How to Join Quilt As You Go Blocks with Sashing
Just recently, we have started creating a series of ‘quilt as you go quilt’ (QAYG) block tutorials. These are super fun to make and personally, it’s one of my favourite ways to make a quilt.
So since we started adding the QAYG blocks, we have been getting numerous questions on how to join them together. So here we are with a tutorial on just how to do that.

Keep in mind, that there are a few different ways to piece them together but in this tutorial, we are going to show you how to join them using sashing. Now that may strike fear in the hearts of many but really it is pretty simple and once you have joined a couple together, you will wonder why you ever thought it was in any way difficult.
Watch the video tutorial below or scroll on down for written instructions
(Can’t see the video? You may have an adblocker installed.)
QAYG Block Used in this Tutorial
If you would like to learn how to make the quilt-as-you-go block used in this tutorial click the following link:
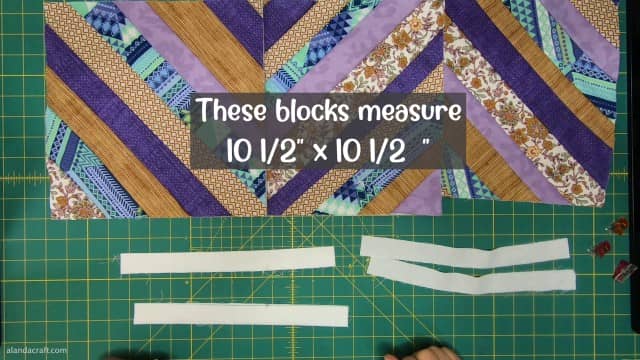
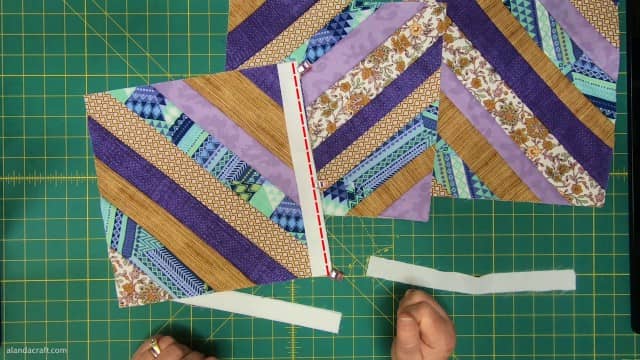
Step 1: Cut your Sashing Strips
The blocks I used in this tutorial measured 10 1/2″ x 10 1/2″ and I have three blocks that I have to join together. So I am going to need the following pieces of sashing:
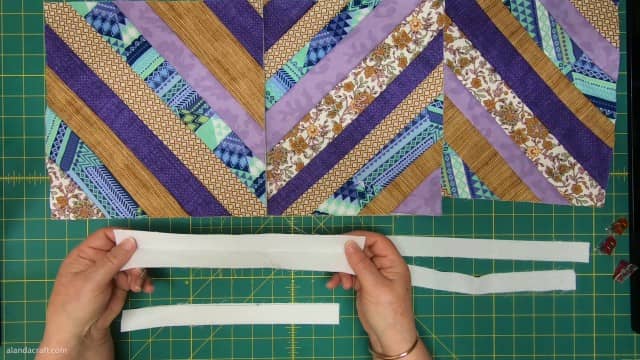
- 2 strips @ 10 1/2″ x 2″ (fold these in half lengthwise and press to form a crease)
- 2 strips @ 10 1/2″ x 1″
Now, you may be wondering why we would only need 2 pieces of sashing for each block when our row is made up of three blocks. That’s because the third block doesn’t need any. It is going to be sewn to the second block which will already have the sashing on it. (At this point, it might be worth watching the video above as it will make more sense.)
In other words, in order to work out your sashing requirements, you only need to determine how many blocks you will have across your quilt and subtract one.
So for example, let’s say I am making a quilt that is 5 blocks across and 6 rows down and each block measures 10 1/2″ x 10 1/2″ (unfinished).
For each row I would need I would need:
- 4 strips @ 10 1/2″ x 2″
- 4 strips @ 10 1/2″ x 1″
And since the quilt has 6 rows in total, I would need to multiply that by 6. So in other words I would need:
- 24 strips @ 10 1/2″ x 2″
- 24 strips @ 10 1/2″ x 1″
But enough with the maths, let’s continue on…
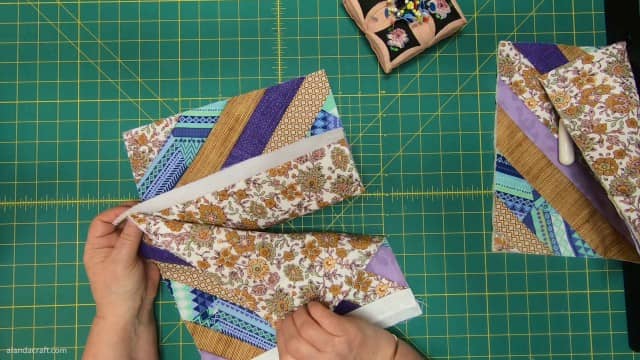
Step 2: Sew the sashing to the blocks
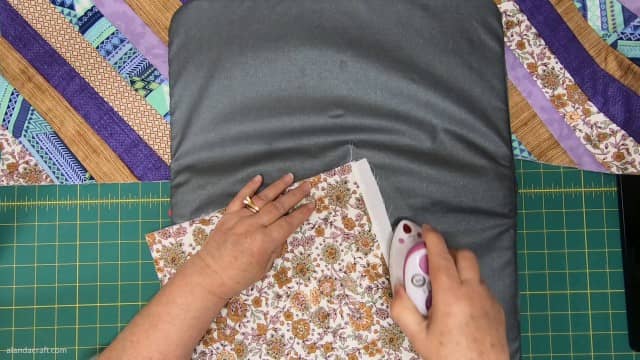
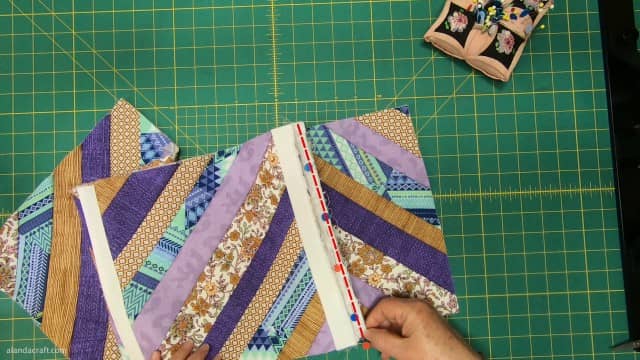
Take one of the 2″ folded sashing pieces and line up the raw edges along the raw edge of the first block. Pin or use clips to hold in place. (Clips will be easier as in the next step, you will need to attach the 1″ strip to the reverse side thus holding the two strips in place.)
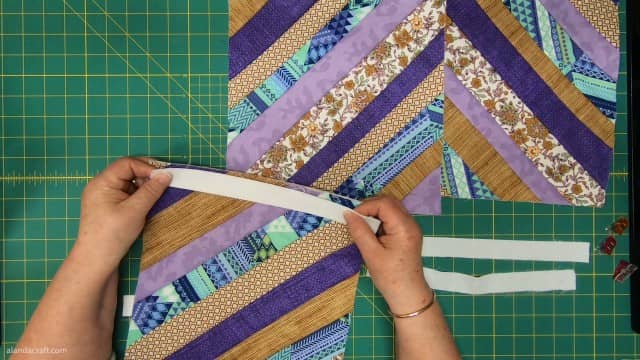
Flip the block over and line up the 1″ strip along the edge of the quilt block.
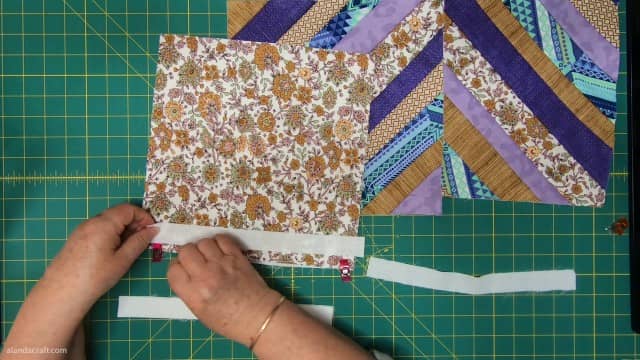
Sew with a 1/4″ seam. This one stitch line will hold the front and the back pieces in place.
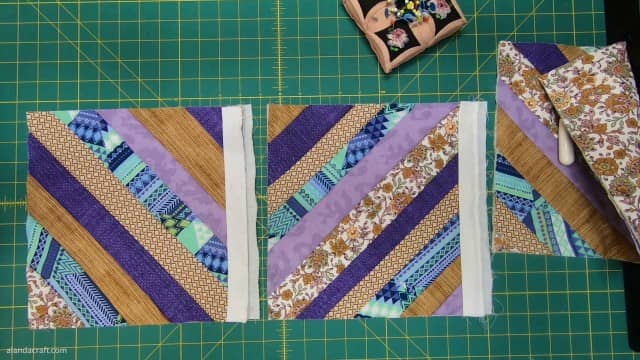
Note that we only attach the sashing to one side of each block.
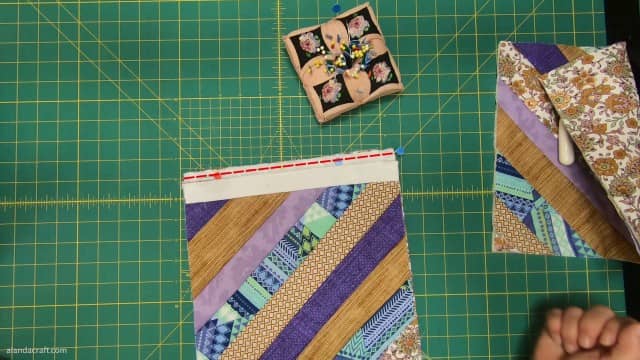
Press the sashing open on the 1″ sashing side.
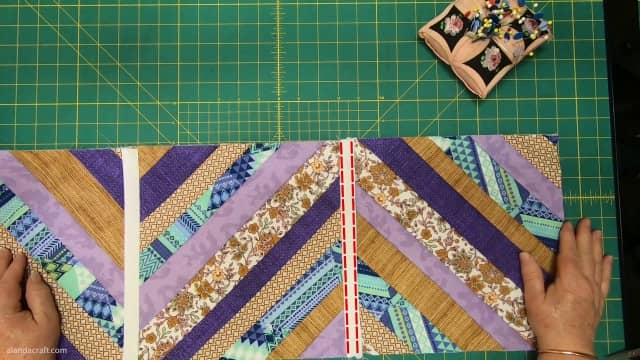
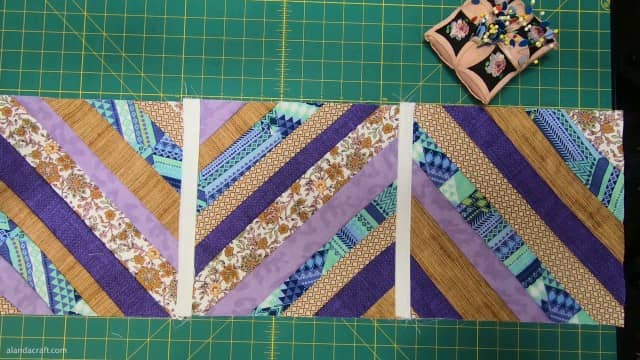
Repeat Steps 2 & 3 for each block except for the last block in each row. In our example, we have three blocks so we only added the sashing to the first and second block and to only one side of each block as you can see in the image below.
Step 4: Join the squares into rows
This step is a little tricky so I suggest you watch the video above to see exactly how this is done.
Line up the raw edges of the back of the second block along the raw edge of the front of the first block.
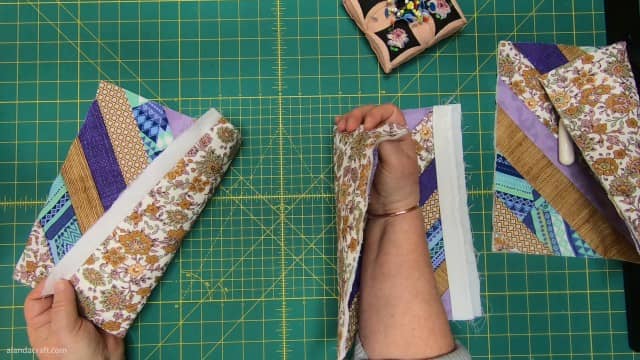
Sew with a 1/4″ seam.
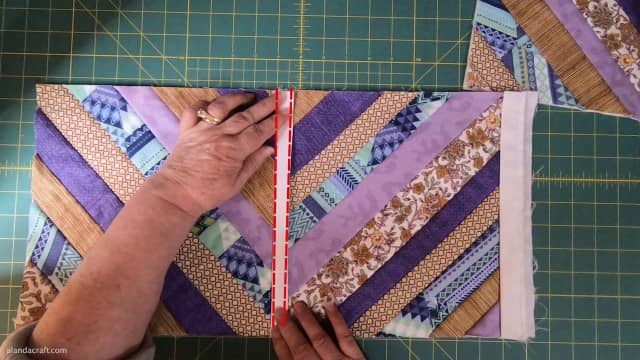
Step 5: Sew down the sashing
With the joined blocks facing upwards, finger press the 2 inch piece of sashing over the seam and pin.
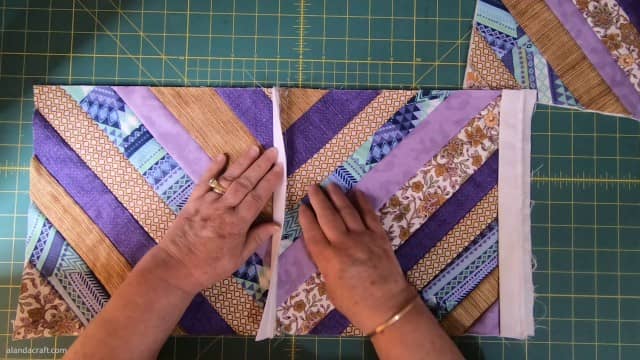
Top-stitch close to the edge on either side of the sashing.
Step 6: Attach your final block
Attach the final block by in the row by lining it along the sashing of the previous block.

Sew with a 1/4″ seam.
Step 7: Sew Down the Sashing
Now we just repeat the same process we did for the prevsious blocks to sew down the sashingto sew down the sashing.

That completes the row. You can see how the back looks on our three joined blocks.
And this is the front.
To join two or more rows together, the exact same process applies. You would measure the length of your row and cut both 2″ and 1″ sashing to that size. Then you would sew on the sashing in exactly the same way as described in this tutorial for the blocks.
If you want to see this in action, check out our Quilt as You Go with Sashing Tutorial here.
Line up the 1″ strip from the 1st block along the edge of the next block.