Easter Egg Tote Bag Tutorial
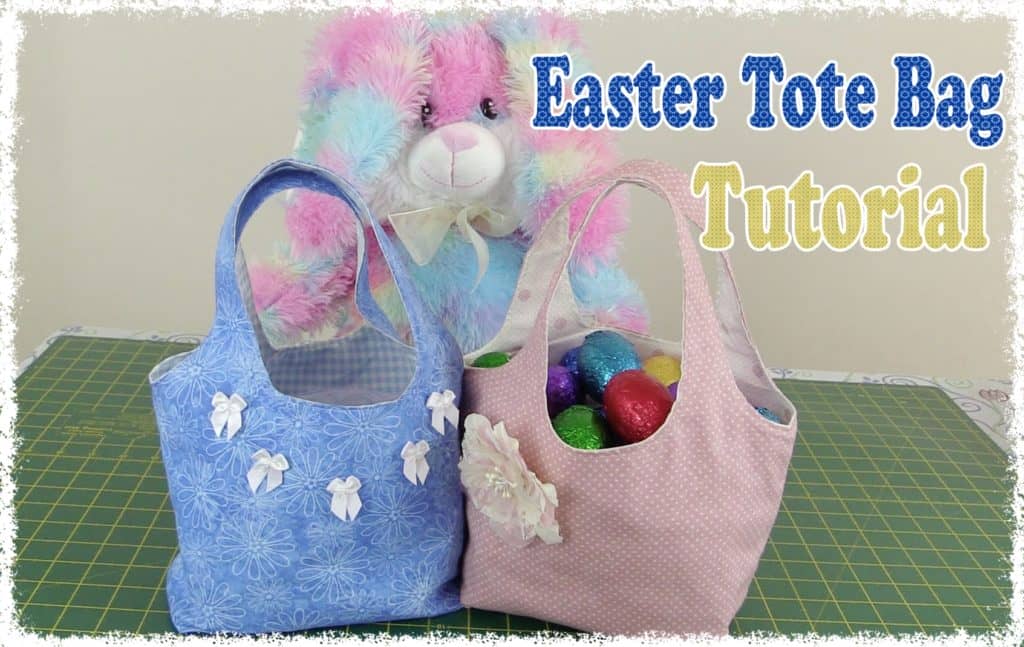 Your little ones are just going to love taking one of these Easter Egg Tote bags with them when they go out on an Easter egg hunt. But they are not only for the little ones, but they will also hold enough Easter eggs for big people too.
This bag is constructed a little differently from our usual bags, in fact, it quite a bit different. But it’s relatively easy to make and it looks just great. We were unable to get Easter fabric from our local stores, which would have made it really relevant to Easter, so we just used some of our on-hand fabric stash.
Watch the Video Below
TOOLS USED IN THIS TUTORIAL
You can check the latest prices at Amazon by clicking on the links below:
- Creative Grids Ruler 8½” x 24½”
- Olfa 24″ x 36″ double-sided healing mat
- Olfa 60mm rotary cutter
- Oliso Iron
- Gutermann Sew-All thread
What You Need
Fabric Required
- Main – (11″ x 15″) x 2
- Lining – (11″ x 15″) x 2
The trick to this bag is the handles. We mucked it up a couple of times when putting the prototypes together, so just make sure you pay attention during that part of the video.
I left a 3-inch opening to allow for ease of stitching the handles together and to make it easier for beginners, but if you can manage with a smaller gap, by all means, do so.
A 2″-2½” gap will mean less fiddling to neaten the handles before topstitching them. It makes no difference to the finish of the bag, it’s just whatever you feel comfortable working with.
Download the pattern here
RIGHT CLICK TO SAVE
Easter-Bag-Pattern-1
Easter-Bag-Pattern-2
Download both files to your computer, print both and tape together as shown in the video.
- Right Click on the links below and ‘Save As.’
- Save the images to your computer, I created a folder where I save my downloadable projects.
- Press Print
On the Print Screen
- Select Scale to Fit
- Select Print Entire Image.