Kids Placemats and Table Runner Tutorial
These days many families don’t take their meals at the dining room table as often as was the case when I was growing up. Sitting around the table for meals was a time for family discussions, sharing and reflecting on what had taken place in each family members day. But even if the kids eat from TV trays, having their own place mat makes the experience that much nicer.

In this tutorial we are going to make a set of placemats and a table runner especially designed with kids in mind.
Finished Size
- Finished size of Placemats – approx 14½” x 9¾”
- Finished size Table Runner- approx 14″ x 27½”
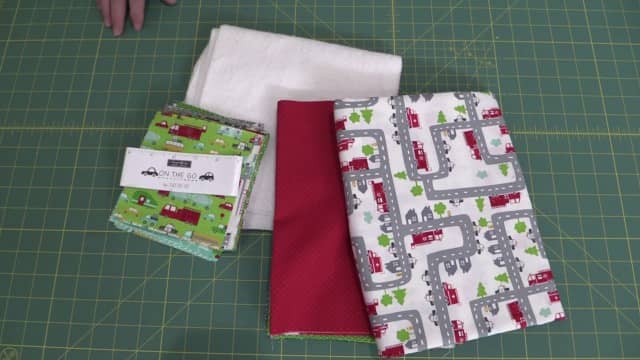
What You Need to Make 4 Place Mats & a Table Runner
- 1 charm pack with 42 squares or you can cut your own 5″ x 5″ squares – (I chose Moda’s “On The Go” pack by Stacy Lest Hsu.)
- Backing fabric (I used fabric from the “On The Go’ range. You can use 100% quilting cotton to compliment your top squares.)
- For 4 placemats – ¾ yard
- Table Runner – ½ yard
- Batting
- Placemats – 17″ x 12″ piece
- Table Runner – 30″ x 17″ piece
- Binding fabric
- Placemats – Cut 2 strips of fabric for each placemat at 2¼” x width of the fabric. If you are using the same fabric for all 4 placemats then you will need exactly ½ yard which will be enough for all 4 placemats (However, be aware that if you buy exactly ½ yard and you find that you need to straighten the piece when you get it home, you won’t have enough fabric, so I would buy the next amount that your store will cut so that you have plenty of fabric for the binding). If you are using a different colour for each placemat then you will need ¼ yard for each placemat.
- Table Runner – ¼” yard – cut 3 strips of fabric at 2¼” x width of the fabric.
Tools We Used in the Project
The links below are affiliate links which means that if you purchase a product via those links, we receive a small commission at no extra cost to you.
Watch the video tutorial below or scroll down for written instructions
(Can’t see the video? You may have an ad blocker installed)
How to Make the Place Mats
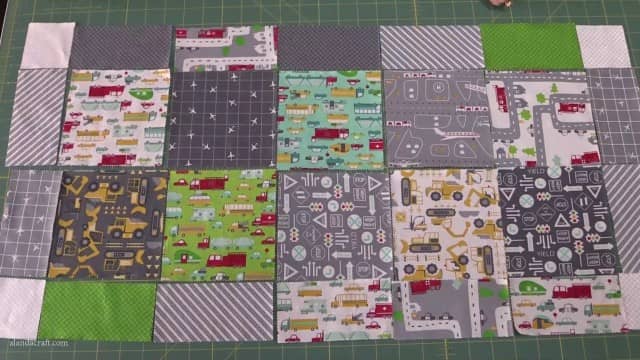
You will need 24 squares to make the placemats so make your selection and lay them out how you would like them to appear, in rows of 2 x 3. I separated the charm pack into different colours so that each placemat would have complimentary colours.
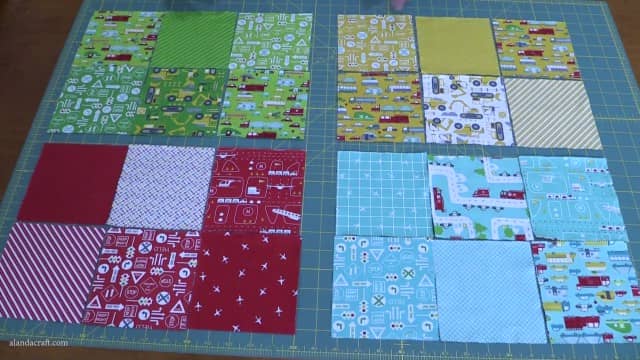
We usually sew squares together in rows. So for each placemat, sew the top 3 squares together and then the bottom 3 squares together.
Watch the video to see how we pressed the seams but basically we pressed the seams for the top row in one direction and the bottom row in the opposite direction. This helps to nest the seams so they line up perfectly.
Now you can sew the two rows together to form the top of your placemat.
Repeat this process for the remaining 3 placemats.
How to Make the Table Runner
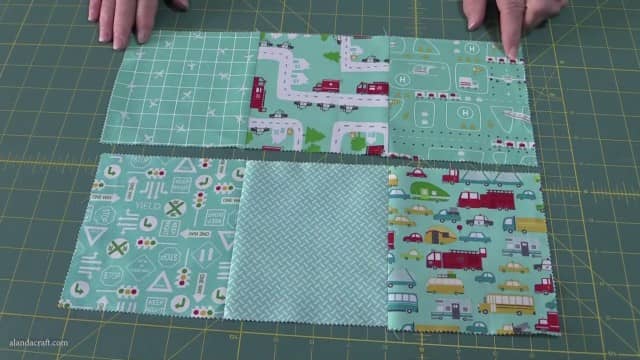
Lay out the remaining squares for your table runner. You will need 18 squares. Ten of those squares make up the centre of the table runner and the remaining 8 squares are used for the border.
You will need to cut 7 of those border squares in half.
You will be left with one square which will be used as the cornerstones. Cut this square into quarters.
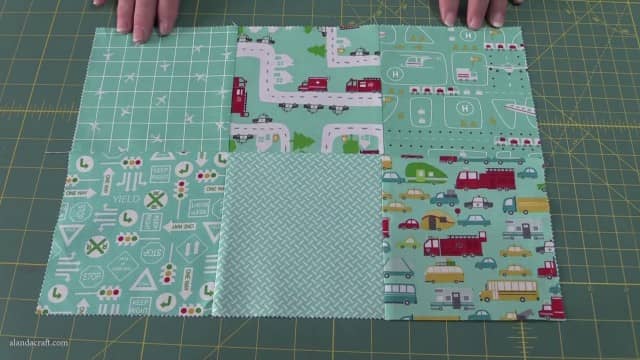
Now it’s time to sew the table runner together. We do this in columns. Press the seams for each column in alternating directions so that they nest nicely. (Watch the video above for more detail).
Once each column is sewn, you can then sew them together to form the top of the table runner.
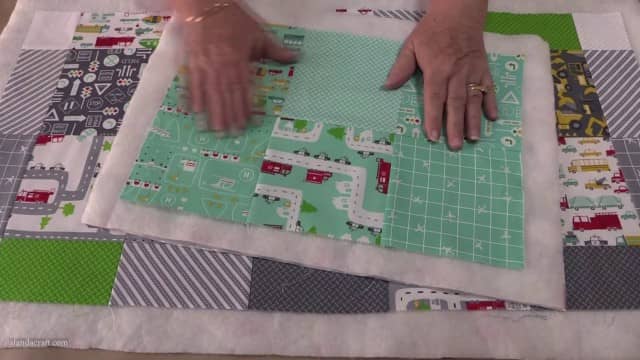
Create the quilt sandwich
Cut your backing and batting pieces for each placemat and the table runner.
For each placemats cut:
- batting 17″ x 12″
- backing 17″ x 12″
For the table runner cut:
- batting 30″ x 17″
- backing 30″ x 17″
Create your quilt sandwich by layering the backing piece, batting and quilt fronts together. Watch the video above if you unsure on how to do this.
We use 505 adhesive spray to hold the layers together but we also add quilting pins to ensure everything stays where it should while we are quilting the layers together.
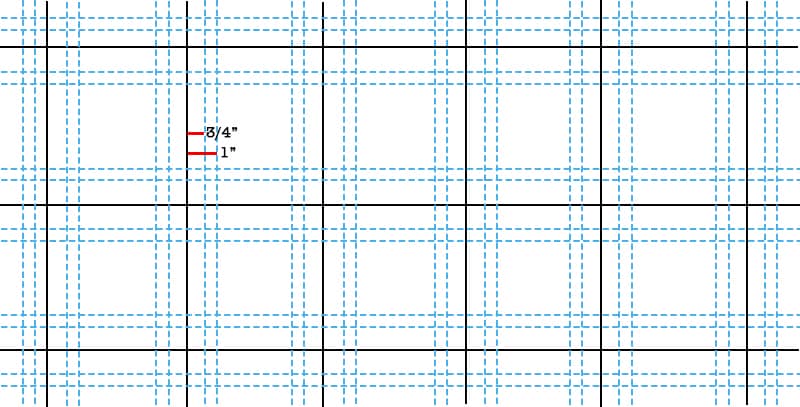
Quilt the layers with your favourite quilting stitch or you can stitch in the ditch, do diagonal lines or sew ¼” from the seam line on either side.
We went with straight lines in the format shown below. Just measure 3/4″ from each seam line for the first line and 1″ from the seam line for the second line. Repeat for the whole quilt.
Trim the piece so it is squared up and add the binding.
How to Bind Your Placemat and Table Runner
If you need help with the binding, here is a link to our video on how to machine bind a placemat or table runner.