Creating a Leather Tote Bag with a Babylon Leather Bag Kit (Our Review)
You will save 10% when you use our coupon code – alanda10.
Just recently, we were approached by Babylon Leather to see if we would be interested in making one of their leather bag kits and of course we said yes. However, we were a little concerned about whether we could actually do it. Neither of us has ever sewn a leather bag before and these looked like beautiful professionally made bags and we didn’t want to mess it up. We also thought that it would take us weeks to put together.
Fortunately, we didn’t need to worry as it ended up being a lot easier and took a lot less time than we thought. Putting it together was oddly therapeutic and extremely satisfying.
And I just love the result.
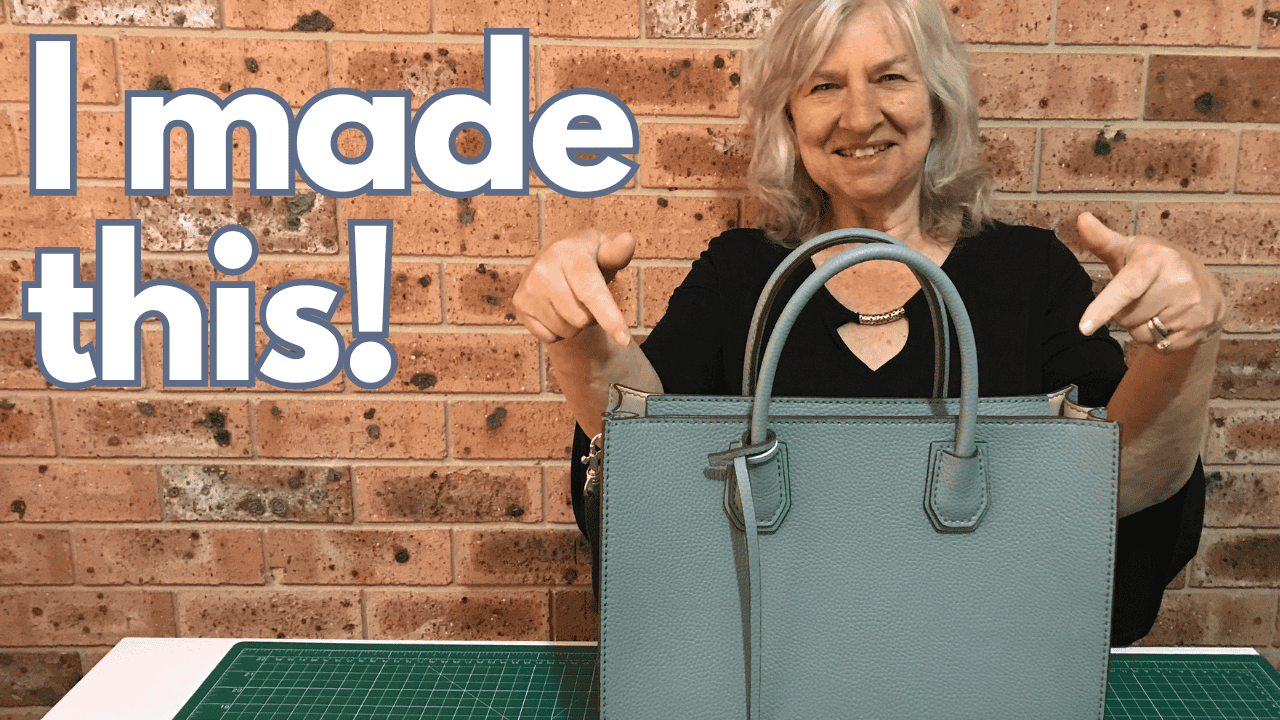
We were given the opportunity to select the bag that we would like to make, and this was a hard decision as Babylon Leather have so many lovely bag kits to choose from. Eventually we chose the Aby Lock tote bag in Blue Haze, mainly because I do like a bigger bag. We also chose the large size but the bag does come in medium size as well. Now the kits not only come in many different styles, they also come in a range of different colors.
Where Can You Buy a Babylon Leather Bag Kit
These are affiliate links which means we receive a small commission for any sales made (at no extra cost to you).
- Link to the Babylon Leather website
- Link to the Aby Lock bag used in this review
The kit arrived and it was well packaged in a box with bubble wrap to protect the contents.
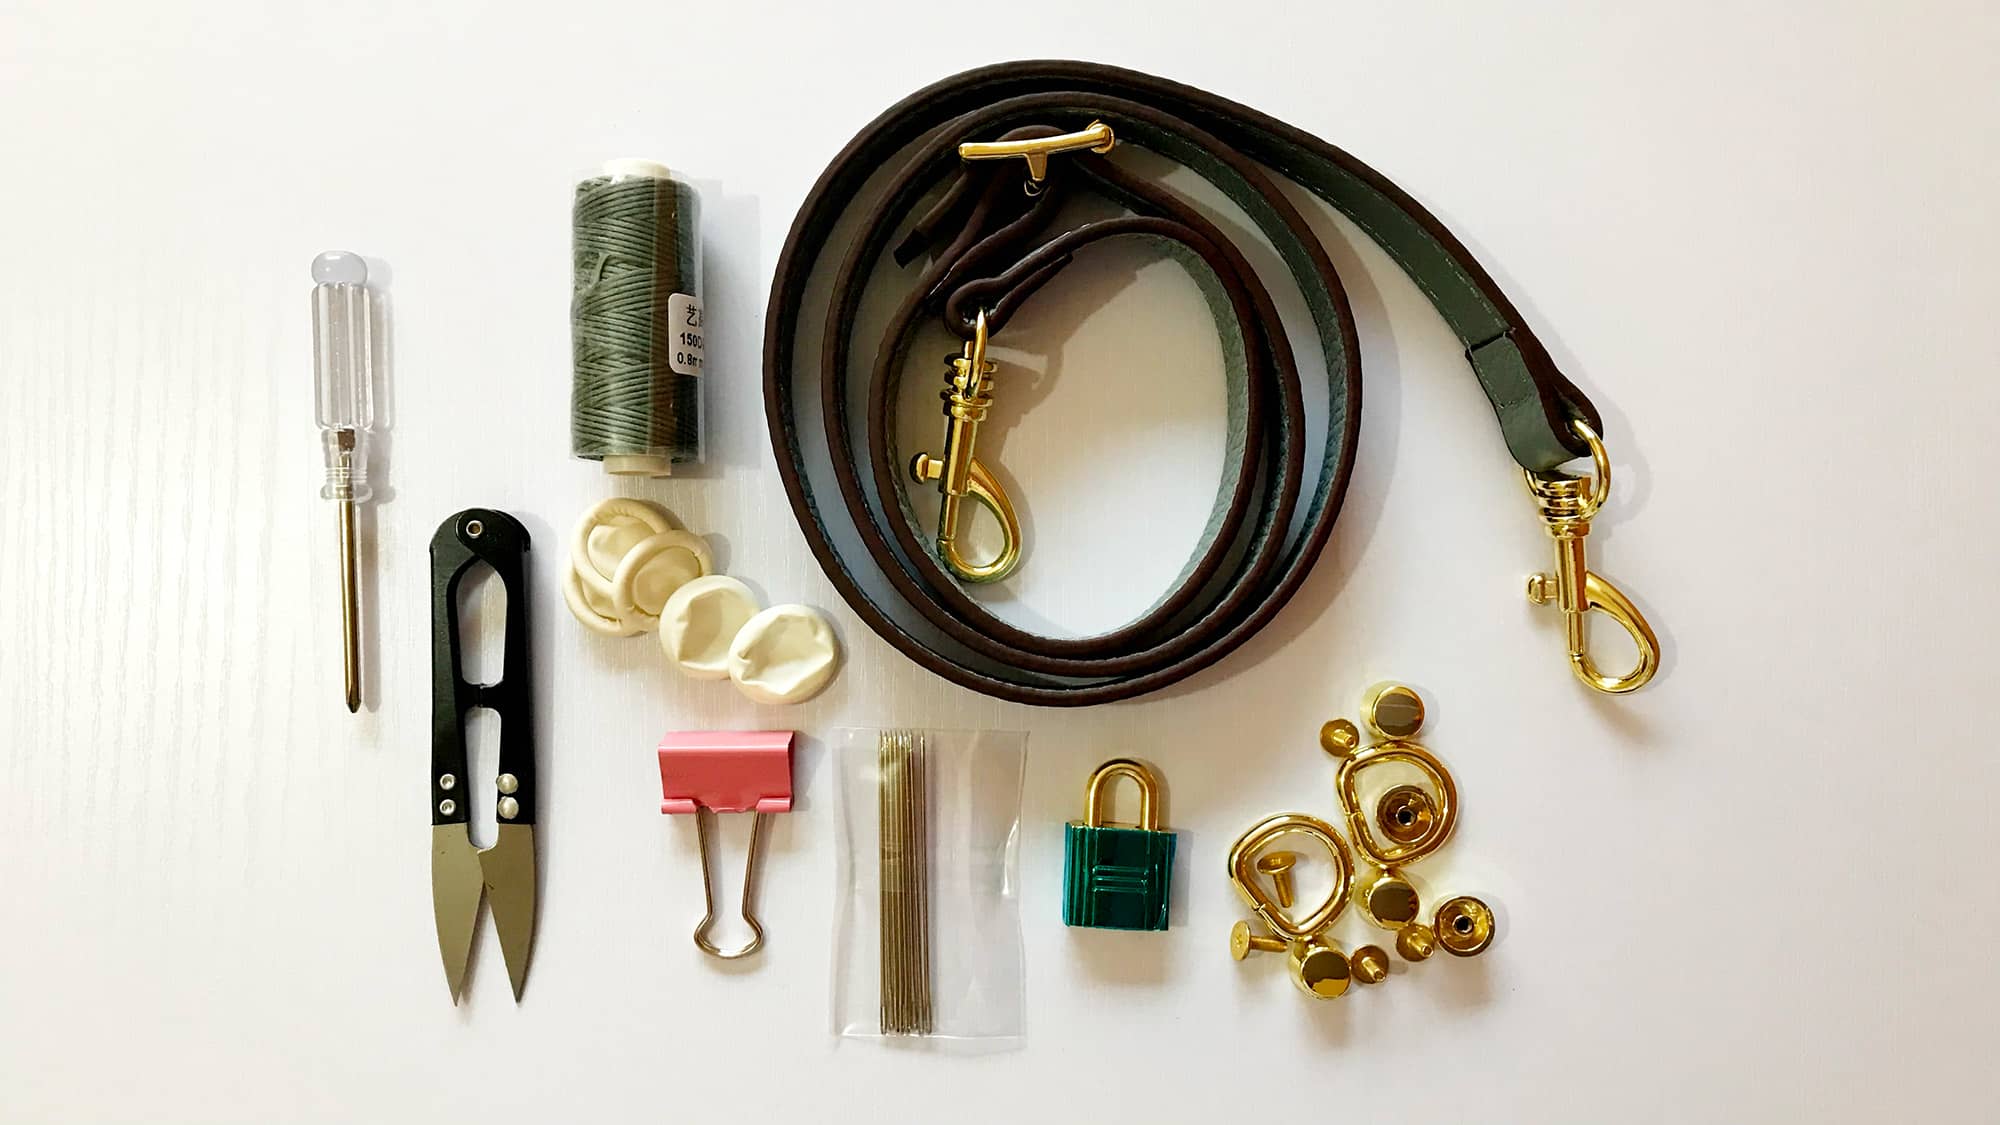
What’s in the Box
On opening the box we found everything that we needed to make up the bag.
- The bag pieces – All the pieces are pre-cut and the pinholes are pre-punched.

- The bag hardware including – a shoulder strap, lock, and the feet
- Wax thread
- Bulldog clip or Binder Clip
- Tools – snips, screwdriver, needles, finger cots ( I won’t tell you the discussion we had around these)
- A pamphlet with a QR code that takes you to the Babylon Leather YouTube channel where you will find all the videos on how to put each of the bags together.
Now one thing that is missing is written instructions on how to put the bag together. So if you are someone who needs written instructions just be aware that there aren’t any.
Having said that, the videos provided by Babylon Leather are excellent. The lass who demonstrated putting together the bag was very thorough and we were able to easily follow what she was doing. At no time did we think, “Oh, it would be nice to have some written instructions right now”, since every step was covered in the videos.

Watch the review video for the Babylon Leather Bag Kit
I think it’s best if you watch their video through to start with and then just replay the video for the piece you are sewing at the time. Not only does she cover each step in great detail but she also shows how to thread the needles and how much thread to use for each section. We did slow the speed down to at certain points in the video and that helped in a couple of tricky situations to better see what was going on.
Pros:
- The leather is of a high quality, and it has that lovely new leather smell that I like. It’s a softer type leather so it feels really nice.
- You don’t need a sewing machine to sew this – it’s all hand sewn. And trust me, I am not a fan of hand stitching anything and yet I really enjoyed this.
- Some of the tricky parts are pre-sewn (the zippered pouch and the top zipper section) so you don’t have to stress about those pieces
- All the sewing holes are pre-punched and they line up beautifully. We never had a problem aligning the holes.
- The company has a load of different styles of bags and wallets to choose from and in all sorts of different sizes and colours.
- And what I love is that free shipping is included worldwide!!
Cons
- No written instructions, however the video instructions are excellent
- No glue included although only a tiny amount is required to glue down thread ends.
Make the Handles
There is a separate video on making the handles so we started there although we were a little concerned about making them. They looked like they might be a little difficult to put together. We didn’t need to be so concerned as they ended up being quite simple to put together once we got past the first few stitches.
I’m really glad that we started with the handles as it meant we were able to get comfortable with the sewing technique before starting on the bag.
Those of you who follow our channel and blog will be aware that I am not one who particularly enjoys hand sewing (however I absolutely admire all those who hand sew quilts etc) but by the time we had finished sewing the handles I was quite comfortable not only hand sewing but hand sewing with two needles. We each took a handle to sew so we both became familiar with the process.
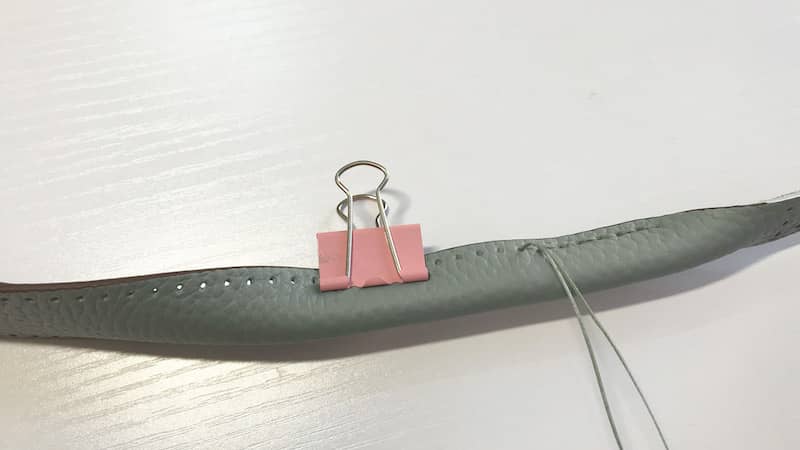
We found that using the binder clip helped to keep the pieces together and helped to ease pressure on my thumb.
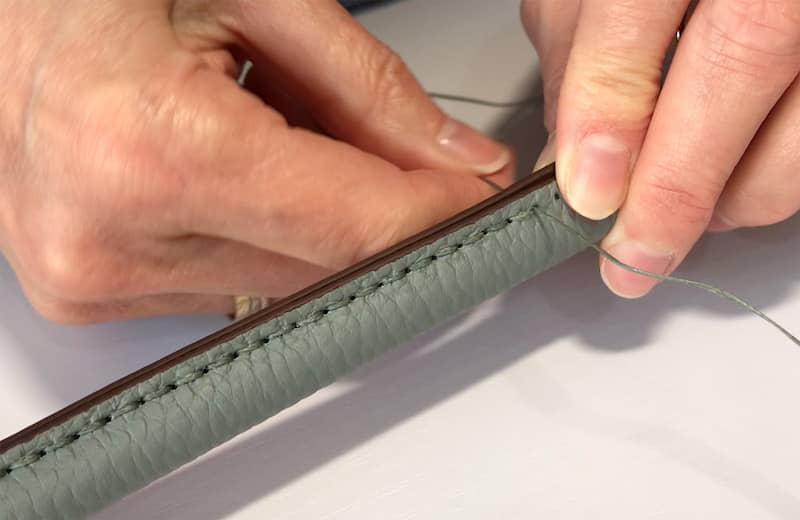
And here you can see the sewn handles in the photo below
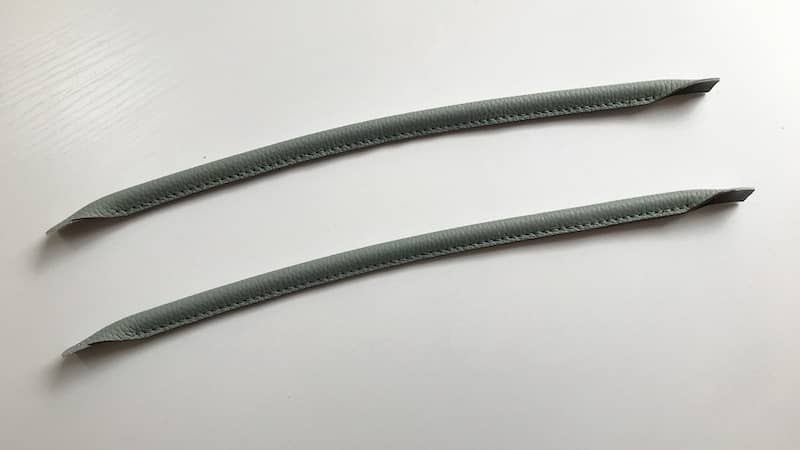
The holes lined up perfectly. How often do you buy a kit to find things aren’t aligned making it a really chore to get things done? Not with this kit, everything fitted together perfectly allowing the needle to easily pass through the holes on each piece you are joining together. There are a couple of places that are a bit tricky to sew together, but the video helped immensely.
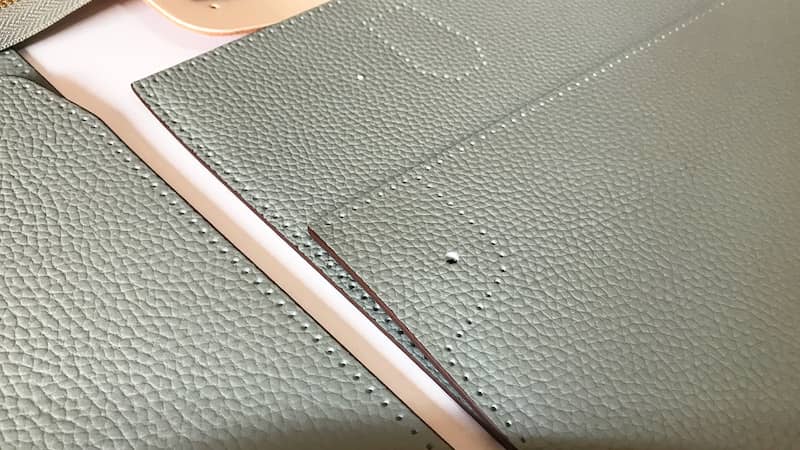
You can see how beautifully the pin holes are made in the image below.
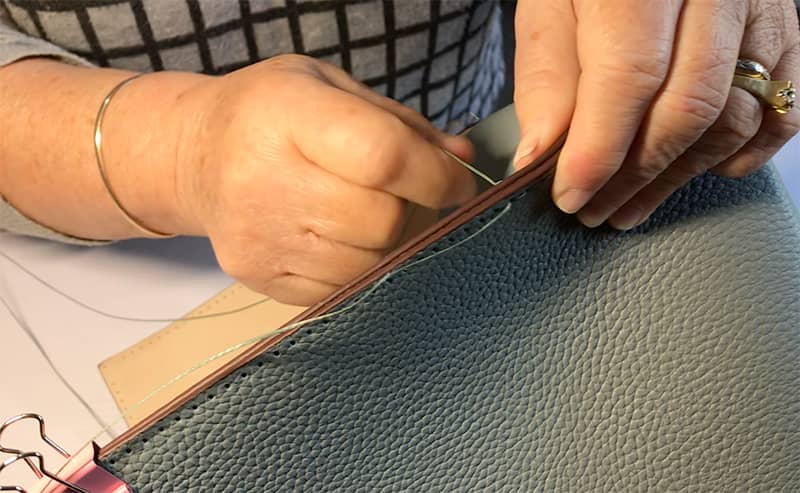
Neither of us have done saddle stitching before so using two needles was interesting. We haven’t knotted the thread on the needle, where you leave a tail and push the needle through the thread, pull the thread until the knot sits under the eye of the needle.
Having the two needles makes it easy if you make a mistake and have to unravel some stitches. Either cut or unravel the knot, pull the thread out until you have taken out the mistake, re-thread the needle and tie the knot as previously mentioned, and set off sewing once more.
The main thing to watch out for is that you don’t split the thread as you push the second needle though the hole where the first needle has just come through. We found that pushing the thread to one side made this a much easier process and it won’t take you long to work out your own style and rhythm.
In all, we probably only split the thread 3 or 4 times during the whole making of the bag.
Attaching the D Rings and Tabs
Once the handles are done, pop them aside and it’s time to start working on the bag.
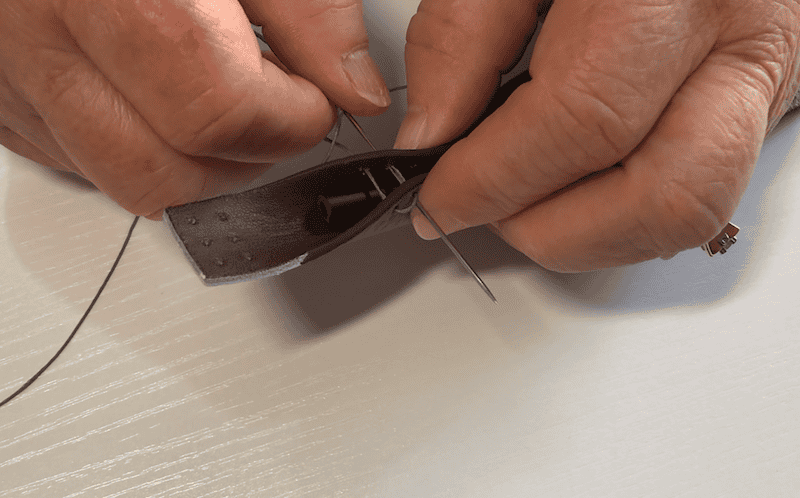
Next we add the D rings to the side panels of the bag. This entails taking a small leather tab and folding it through the D ring. This part can be a bit tricky, but after you have done a few stitches that anchor the tab in place you just need to line up the holes on the tab and the side gusset piece and continue stitching.

The main reason this bit is tricky is because you need to push the needles through three layers of leather. I found that the easiest way to do this at the start was to push the needle through the one layer of the gusset and pull it through, and then push it through the two layers of the tab. Just wiggle the tab around a bit to get the holes lined up and the needle should come through easily. Pull the thread taut and taking the second needle back through the holes with the thread already in them should easier to do.
It got easier to do after the first few stitches were in place.
Once you have finished sewing around the tab, finish with a couple of back stitches, making sure both needles end up on the reverse side of the gusset. Snip the threads and finish with a dob of glue to seal them in place. Repeat the process on the other gusset.
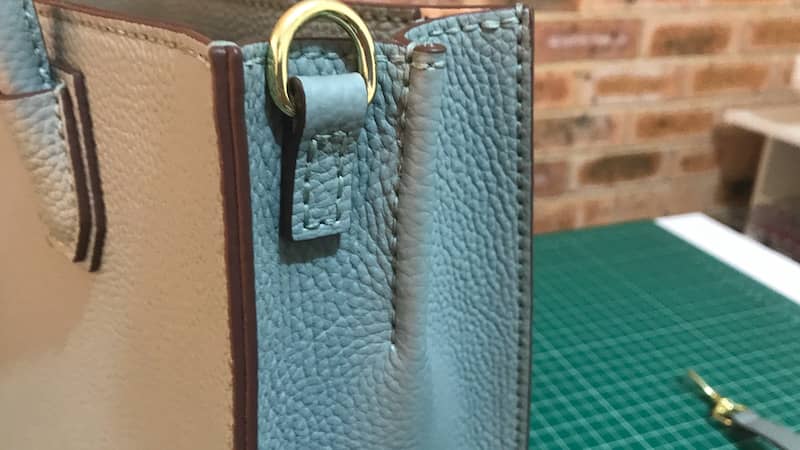
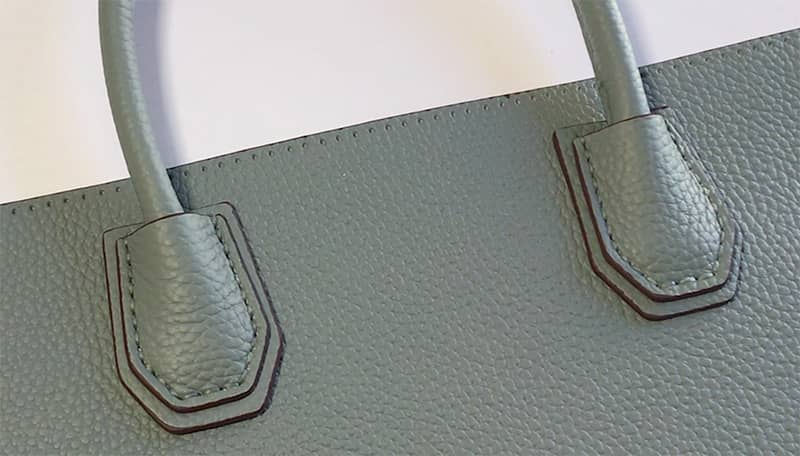
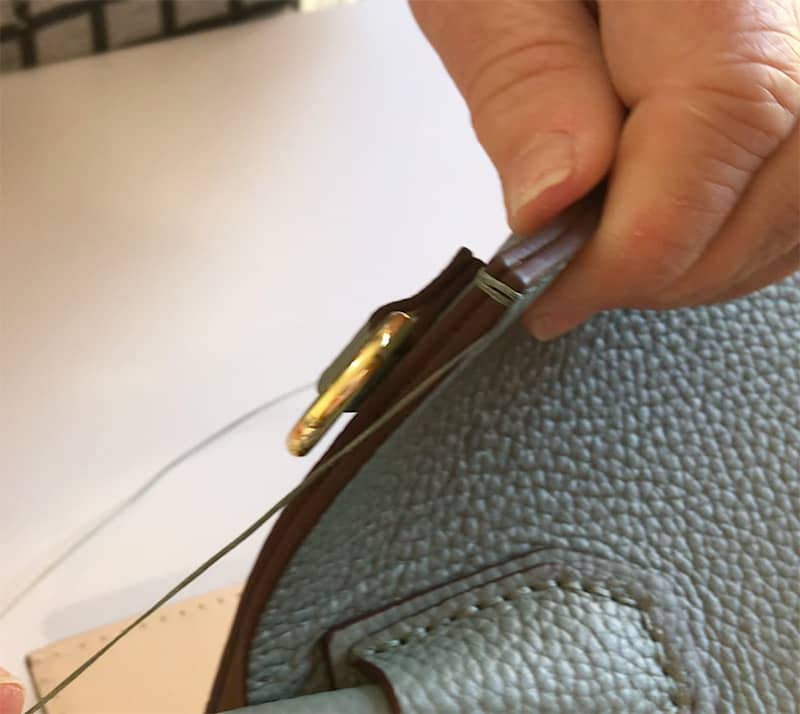
Attach the Handles to the Bag
The next step is to sew the handles to the main pieces of the bag. There are tabs provided that give a lovely professional look to where the handles are attached to the bag. Now this was another tricky part as once again we are stitching through three layers of leather and the handle needs to be pushed aside as tends to block the middle holes. But it’s doable and we just took our time and followed the video.
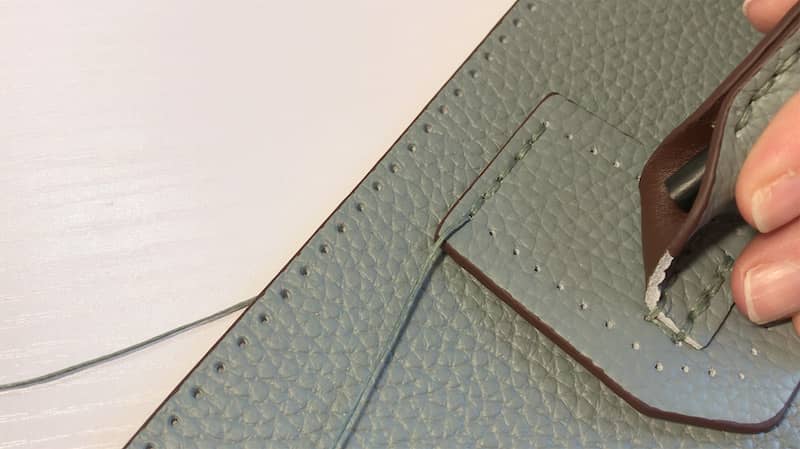
You can see how beautifully they turned out in the image below.
Sewing the Body Pieces Together
Once the handles are firmly attached it’s time to sew the two body pieces together. Now this is a different stitch to the one we used to sew the handles together. For this part we sew in a criss-cross ‘X’ pattern to join the two pieces.
I love the effect but it did take a while to get through.
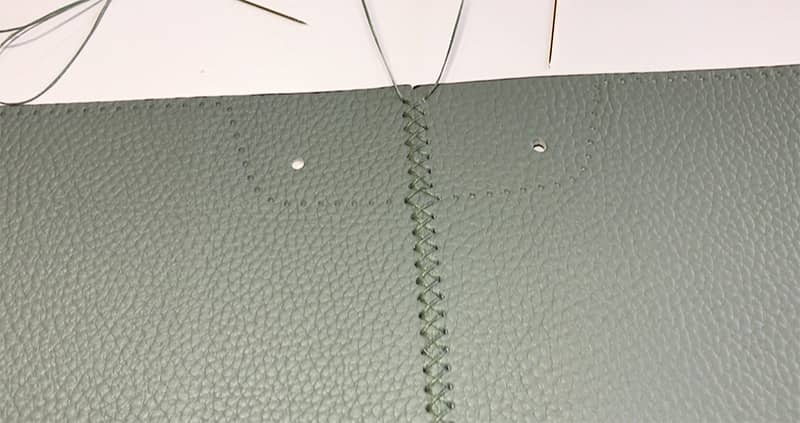
And this is what it looks like on the inside.

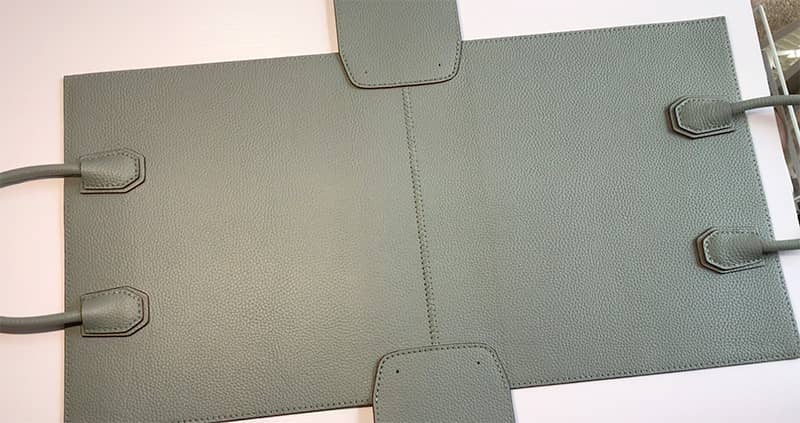
Attaching the Side Gussets/Panels
The side panels get attached next and the first thing you need to do is to secure these panels to the base. The video goes into precise detail on where to start as it’s really important to start the stitching in the right spot.

You also need to take particular care when you reach the X. Once you have attached one side panel it’s time to do the exact same thing to attach the other side panel.
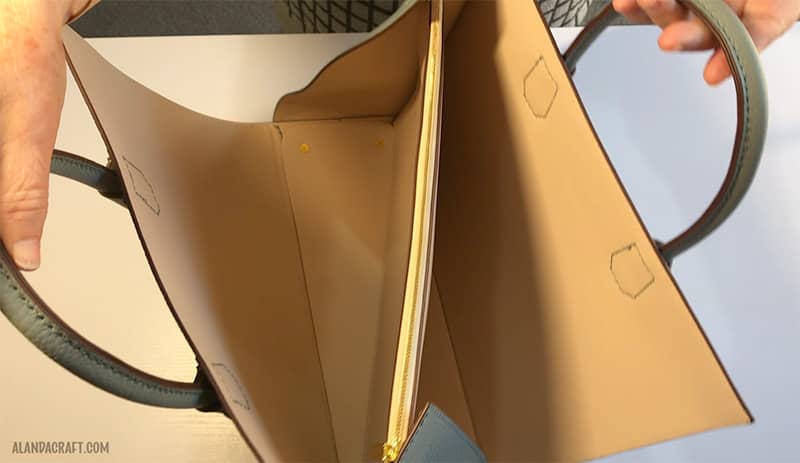
Adding the Inner Base and Studs
It’s time to add the firm base piece. This piece adds strength to the base of the bag and also adds the feet to the bag.
It was pretty easy to do and all the bag hardware is included for the feet.
Lay the leather piece along the bottom of the bag, lining up the large holes. These holes are where the screws and studs will be attached.
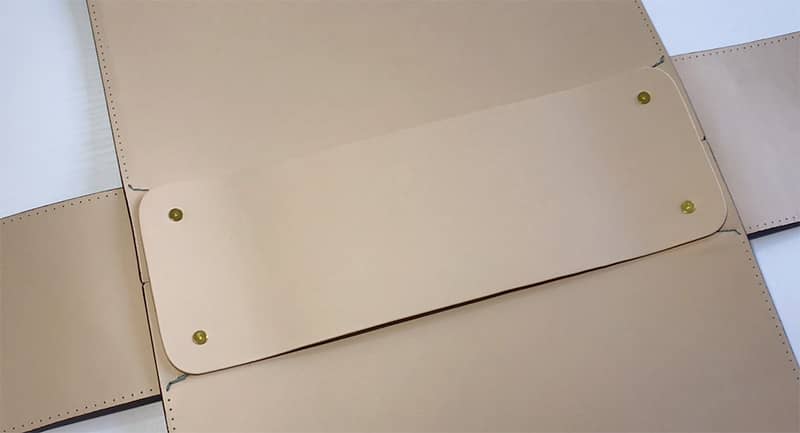
Attach the bottom studs and screws by pushing the screw through the hole, from the inside of the bag, and screw on the stud on the outside of the bag.
Tighten the screw by hand and finish tightening it with the screwdriver that comes with the kit. You do this through all four holes.
You can see how that looks on the outside of the bag.

Sewing on the Side Panels
Next we sew on the side panels.
Just take your time with this step. Once you have the holes lined up, hold the two pieces together with the bulldog clip. This does make it easier when you are sewing as the two pieces are held firmly and not flapping all over the place, which is not only distracting but makes it harder to keep the holes lined up.
Pay attention to where the first 2-3 stitches placed, these can be a little tricky to get going because the gusset is curved. It’s just a matter of taking your time with the first couple of stitches, and by sewing through the pinholes individually on each side instead of trying to go through both the hole on the side panel and the hole on the main piece at the one time, this is a little easier to do. Once you are past those first few stitches the rest flies along.
At the top of the panels you sew an overstitch to hold the top secure.
To start stitching across the top, bring the needle in on a slant so goes through the slit and ends up on the inside of the bag. Then off you go again stitching in the same manner as you sewed up the sides. Once you reach the end of the flap, add some reinforcing stitches, and after making sure that the threads are both on the inside of the bag, cut the threads.
Sew only one side on each panel because now we add the zippered divider.
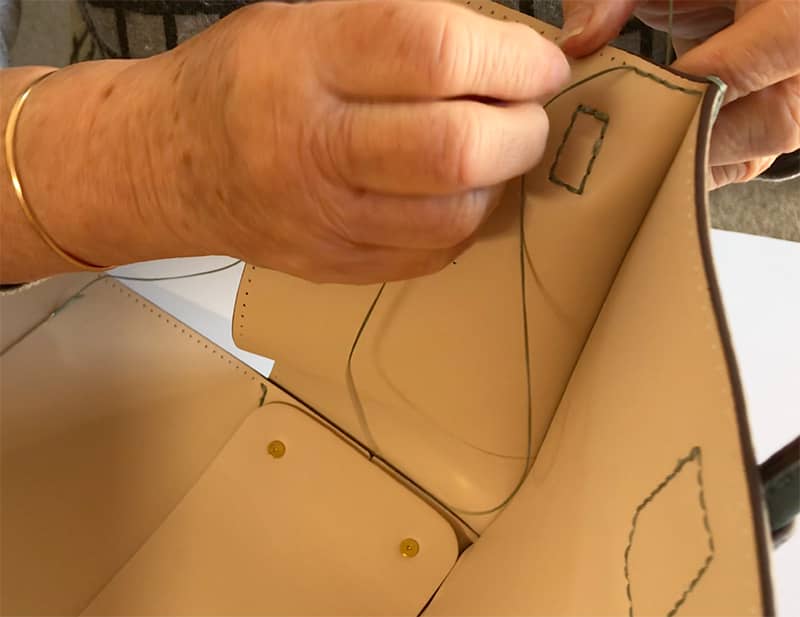
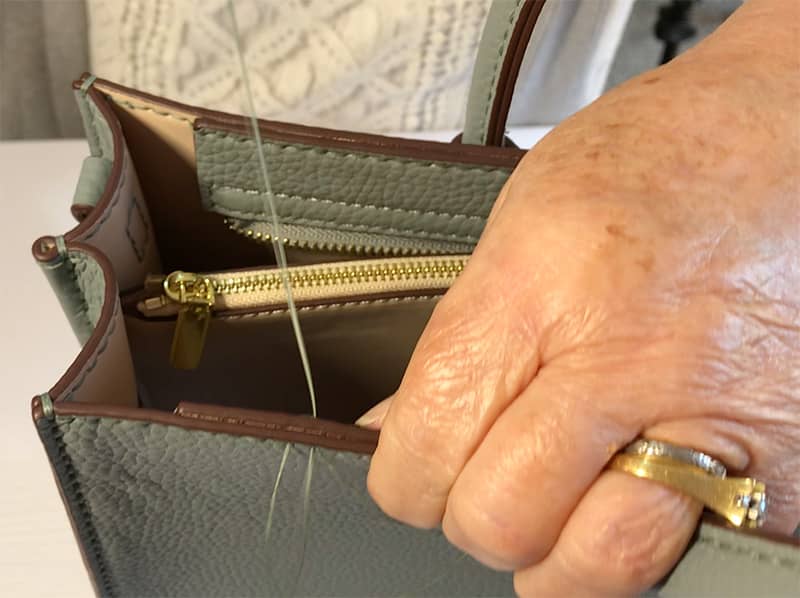
Adding the Zippered Pouch
This bit was a bit tricky. Because we have so many layers I ended up pushing the needle through the side panel pinhole and bringing it right through and then taking it through the zippered pouch and out through the pinhole on the other side, rather than try to push the needle through all holes at once.
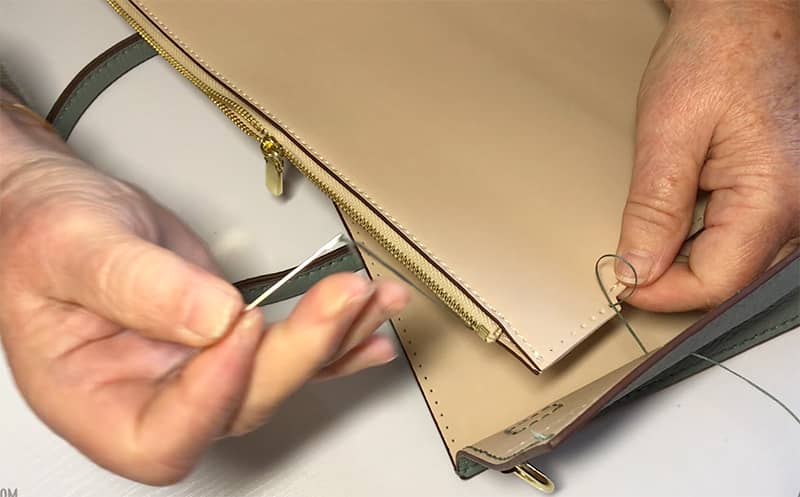
I did struggle with the first side but eventually got it attached.
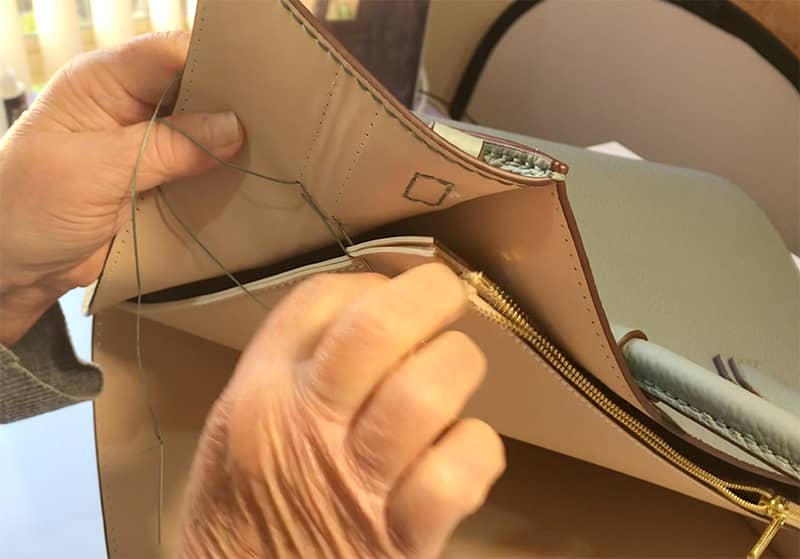
The second side went together much more easily. Not sure if our technique improved or if we just got the hang of it. It kind of gets a bit exciting at this point as you now have two sides sewn up and the zippered divider attached. Big sigh of relief, we’re going okay.
The bag now has a professional looking pleat on the side panels where the divider is attached, and it’s looking just like a store bought bag.
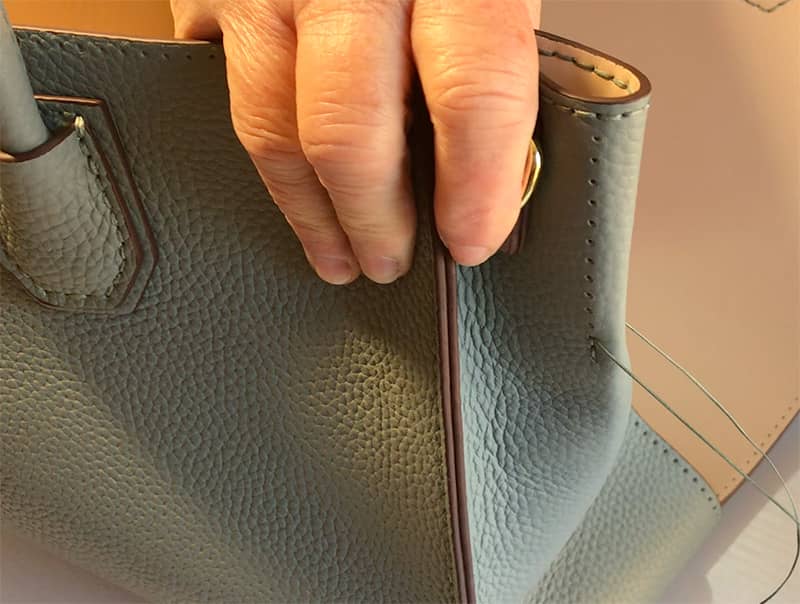
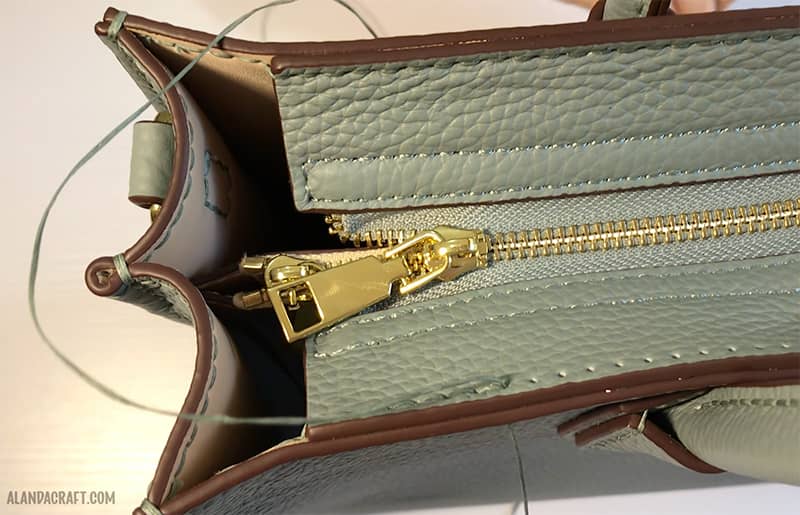
Attach the Remaining Gusset Pieces & the Zip Closure
It’s time to sew up the open sides. I went back to the earlier part of the video for this as I found it to be clearer for me. Especially for those first few stitches. I just wanted to make sure I was starting in the right pinhole.
Now when we get to the top of the first panel we are going to attach the zippered section. It’s easy to do but just listen carefully to the instructions in the video. You sew through 6 holes and start attaching the zippered section to the 7th hole. Keep sewing to the end of the panel, past where the zippered section ends. It ends on the 7th hole from the edge.
Sew up the other gusset and across the other side of the zippered top in the same manner.
Finishing Touch
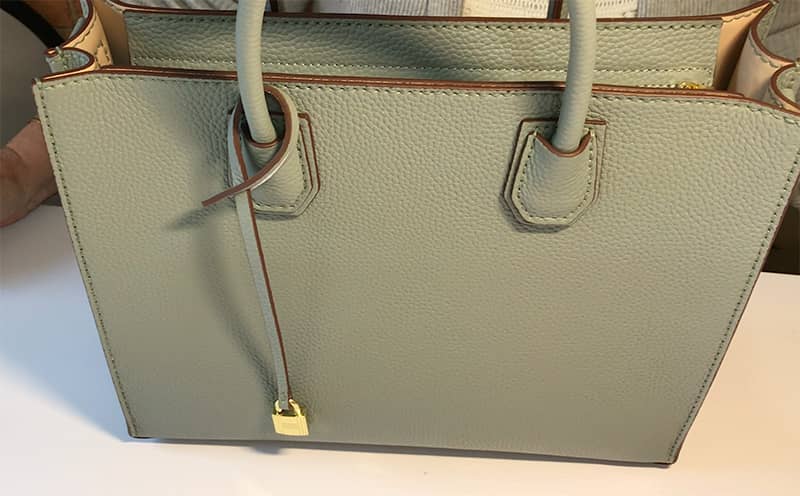
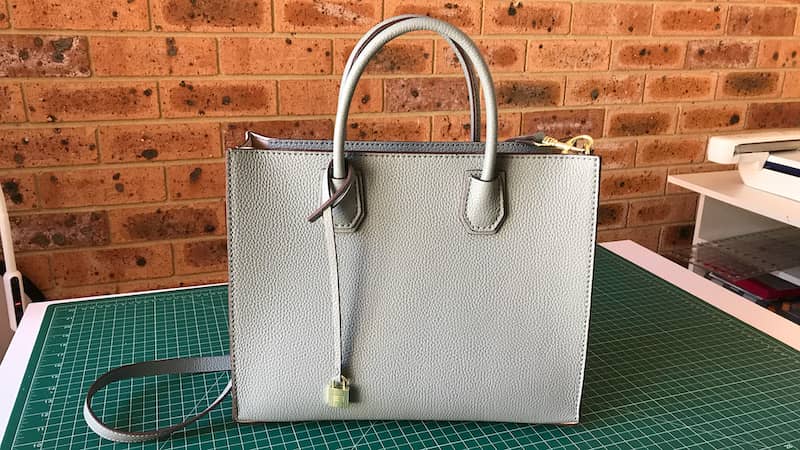
Our beautiful bag is now finished. All we need to do is add the lock decoration.
There is a leather piece to hang the lock from that requires a few stitches on one end. Thread the piece through the lock and stitch in place to hold the lock secure. Then attach the piece to the handle and thread the lock through so that it hangs down the front of the bag. This just adds that touch of elegance.
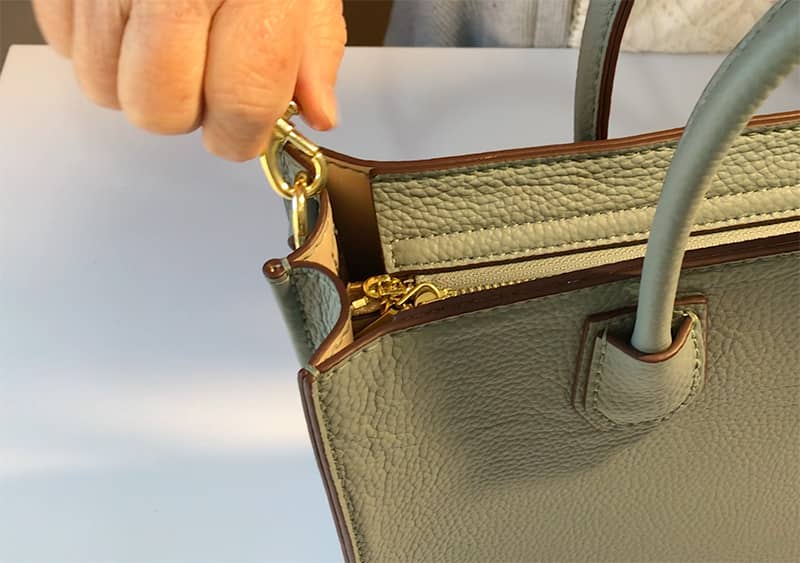
Then we add the shoulder strap and that completes our Aby Leather Bag.
Or for a bit of whimsy you could attach the leather donkey that came with the kit.
Our Thoughts
Well what can I say. In this project we learned to hand sew with two needles and we learned a new method of stitching.
This was a fun project for the two of us. Some tasks were done with only one of us stitching as the other filmed, but for off camera sewing we each took charge of a needle and worked on either side of the bag. So if you want to spend some fun time with a friend then I can recommend this. But it is easy to do on your own when you want to spend some quiet time creating.
We found the process to be quite therapeutic and we spent periods of time not even talking (and that’s saying something as we love to chatter…well at least I do) while we concentrated on what we were doing, not because it need concentration but because it was just somewhat meditative.
We ended up with a professional looking bag that looks every bit as good as my store bought bags.
I would definitely like to make another bag, maybe one of their smaller handbags in the future or a wallet. There range of bag kits is impressive and you are sure to find one that suits you. These bags would also make lovely gifts for family members and friends.
Don’t be put off attempting this if you are a beginner and haven’t ever made a leather bag before. We would never have thought about doing this previously and now we are all in.
A Big Thank You to Babylon Leather
I just want to give a big shout out to Babylon Leather and thank them for giving us the opportunity to share their great product with you. Their kits are well designed, well made and the leather used for the bag and the hardware are of a high quality.
The instructional video is well presented and covers everything in great detail. So you will never be stuck at wondering how and what you need to do next.