Quilt Block: The Magic Quilt Block Tutorial

When the Magic Quilt Block is made from a light and a dark fabric, it gives the illusion of being 3D. I really like the effect and it is so quick and easy to make. You will have a quilt done in no time at all.
Watch the video below or scroll down for the step-by-step written instructions
What Size is the Magic Quilt Block:
- The quilt block we have created measures 14″ unfinished.
What You Need
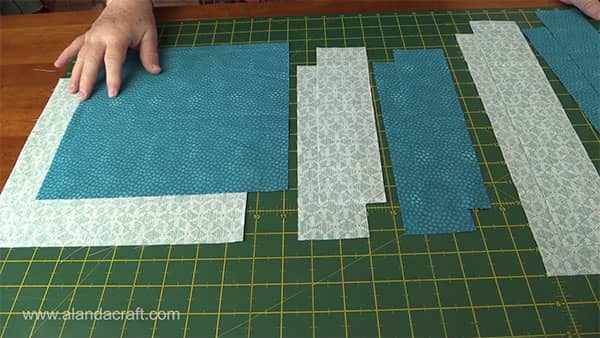
From the dark fabric. cut:
- 1 – 10″ square
- 2 – 10″x 2½” strips
- 2 – 14″x 2½” strips – dark
From the light fabric, cut:
- 1 – 10″ square
- 2 – 10″x 2½” strips
- 2 – 14″x 2½” strips
You can also use a layer cake and jelly roll strips. However, you won’t get quite the same effect as layer cakes are generally patterned and different colours. But it will still look totally awesome.
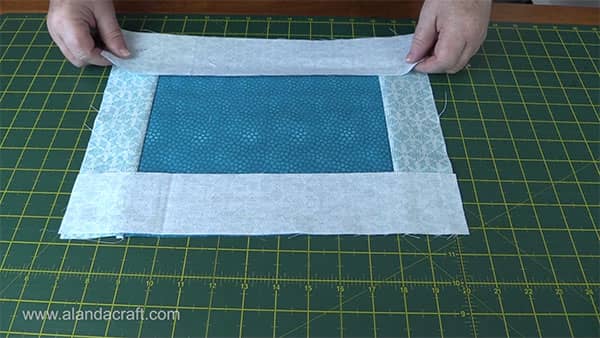
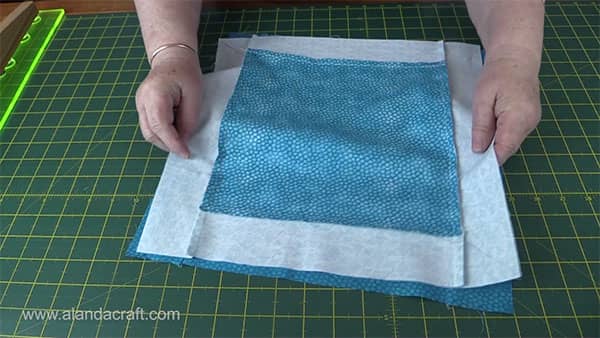
- Take the 10″ square of dark fabric and the 2 10″ strips of light fabric.
- Sew on strip to each side of the dark square with a ¼” seam.
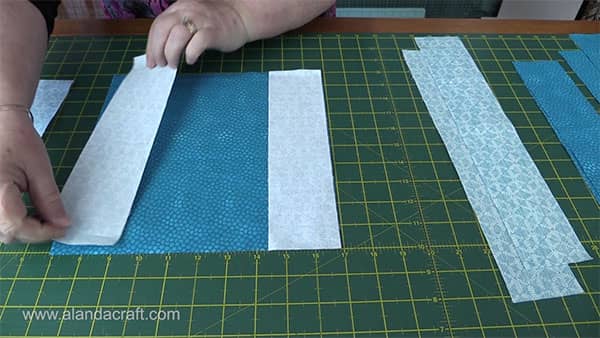
- Press the seams towards the outside edge.
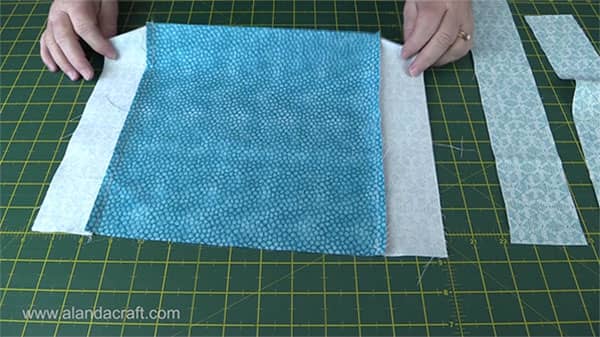
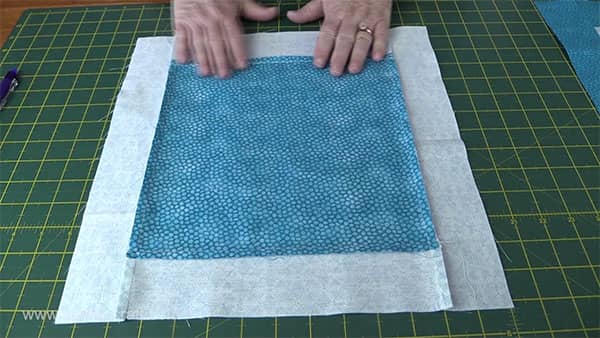
- Take the 14″ light strips and lay them right sides together.
- Sew them to the edges with a ¼” seam .
- Press the seams towards the outside edge.
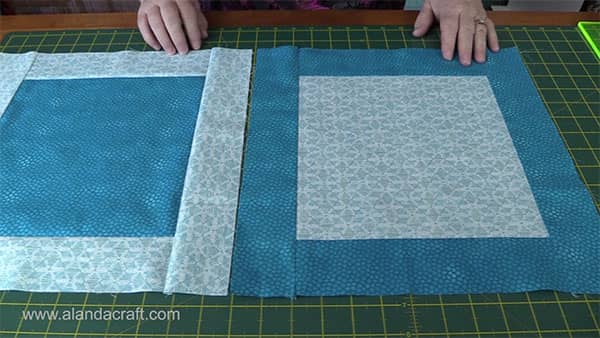
- Take the light square and add the dark strips to the edges in the same manner as you have added the light strips to the dark square.
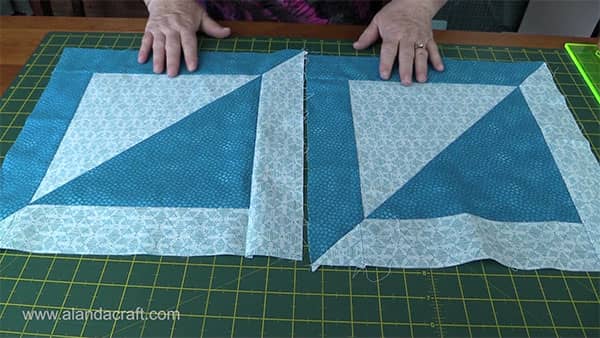
- Take one block and on the wrong side, draw a line from one corner to the other.
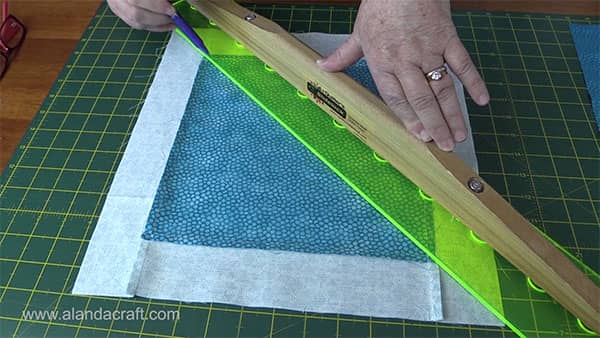
- Place the two blocks one on top of the other, right sides together. Make sure the edges all line up.
- Have the block with the line drawn on it, on the top.
- Sew a seam line ¼” on either side of the line you just drew.
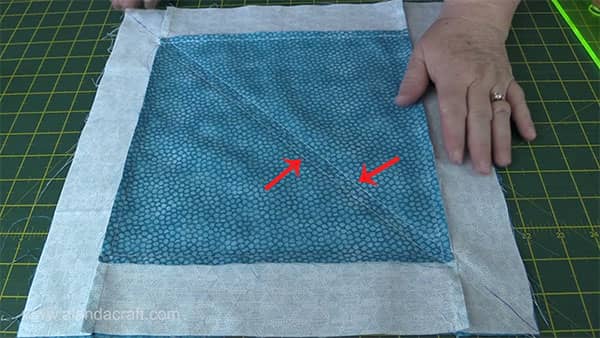
- Lift the top block to check that your points meet nicely.
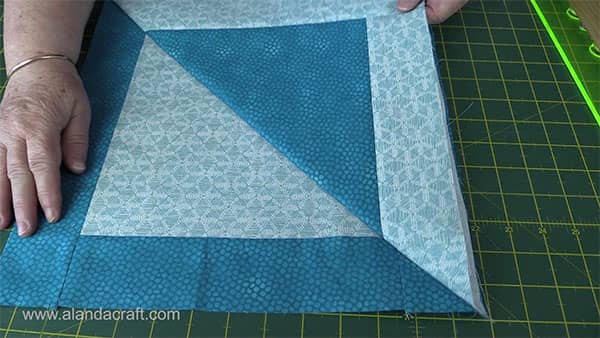
- Cut along the drawn line, in between the two seam lines.
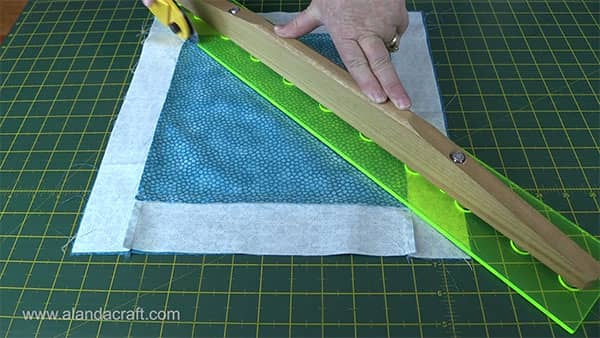
- Press the centre line open.
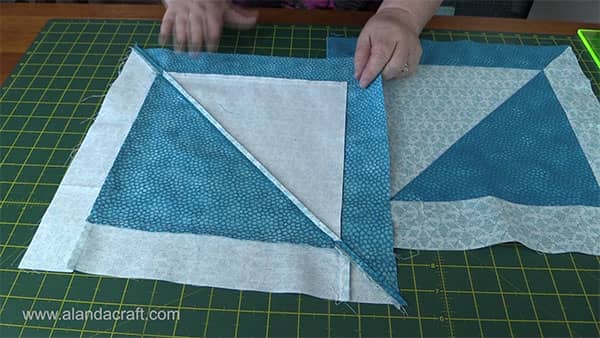
- You now have two blocks already made. How quick and easy it this!