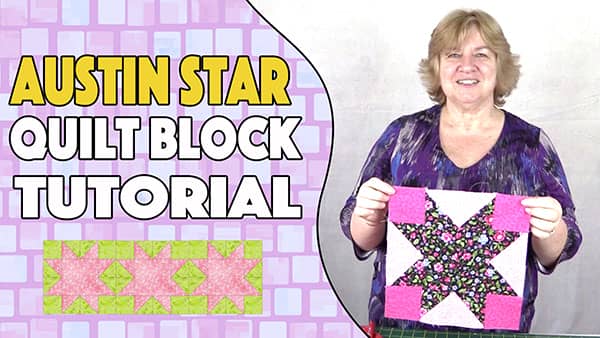
Quilt Block: Austin Star Quilt Block
Making quilt blocks can seem to be a daunting process for a beginner, but really it’s just a matter of taking your time and knowing which bit goes where.
For this block, we used Half Square Triangles (HST’s). If you are unfamiliar with making these, then here is a link to making a half square triangle.
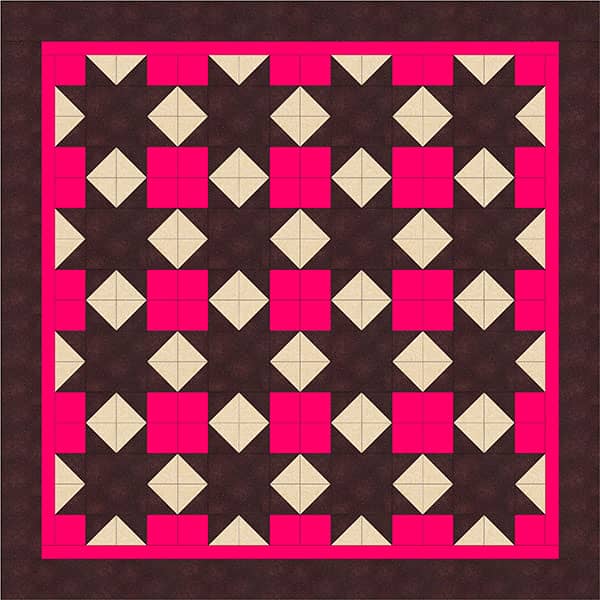
When I finished this block I wasn’t 100% happy with the bright pink corner blocks and feel I should have chosen something a little more subtle. But once you start filming and get halfway through, there’s no going back, well not if you want to get the tutorial finished. Maybe when a few of them are put together it might look better to me.
Watch the video tutorial below or scroll down for the written instructions
The Austin Star quilt block measures:
- 10½” – unfinished
- 10″ – finished
What You Need:
Fabric 1: Star pieces
- 1 pc 6¾”
- 1 pc 5½”Fabric
Fabric 2: Side pieces
- 1 pc 6¾”
Fabric 3: Corner squares
- 4 pcs 3″ square

TOOLS USED IN THIS TUTORIAL
You can check the latest prices at Amazon by clicking on the links below:
- Olfa 24″ x 36″ double sided healing mat
- Quilters slidelock
- Olfa 60mm rotary cutter
- Creative Grids Ruler 8½” x 24½”
- Oliso Iron
- Gutermann Sew All thread
Let’s Put it Together:
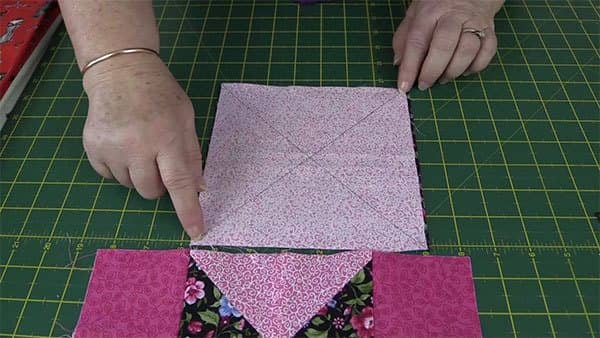
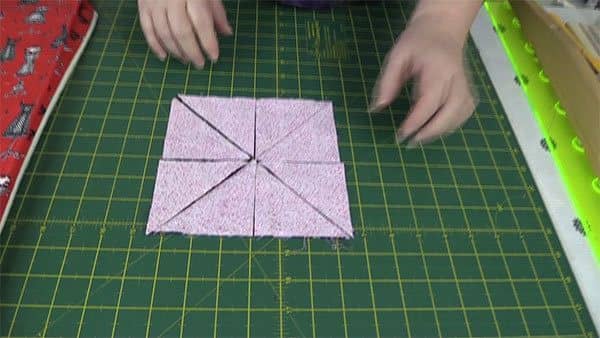
- Take the two 6¾” pieces of fabric and place them one on top of the other, right sides together.
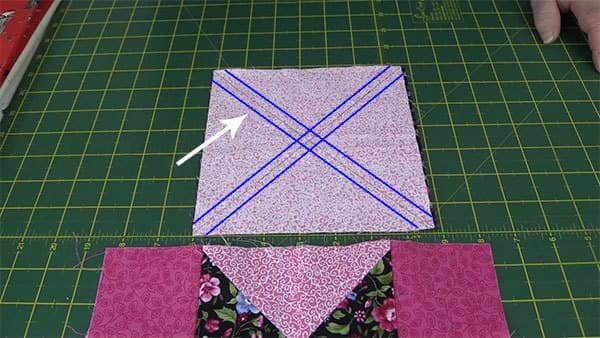
- Draw a line diagonally across the fabric from corner to corner, in both directions as shown in the photo below.
- Sew a ¼” seam on either side of the lines that you have drawn.
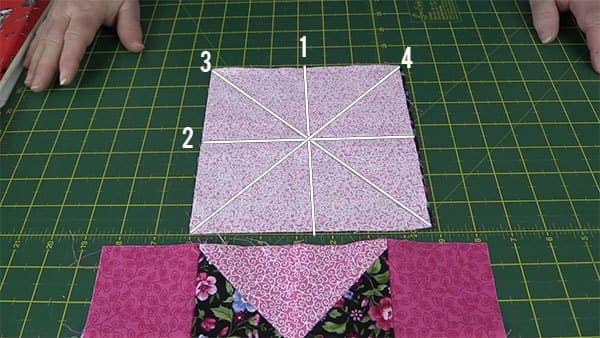
- Slice the fabric in the order shown in the photo below.
- Do Not move the fabric, move the ruler.
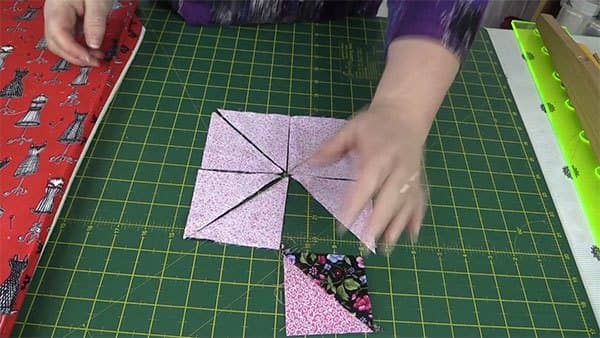
- You now have 8 half square triangles (HST’s)
- Press each of the HST’s with the seam going towards the dark side.
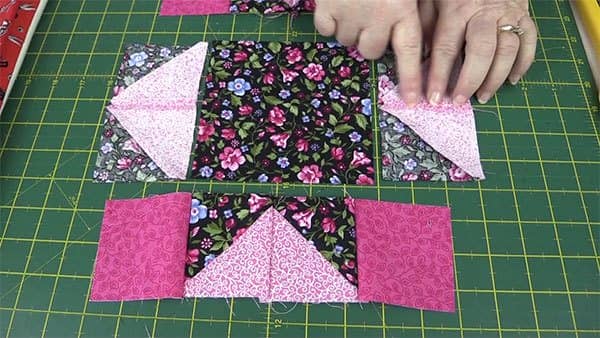
- Lay out the pieces as shown below.
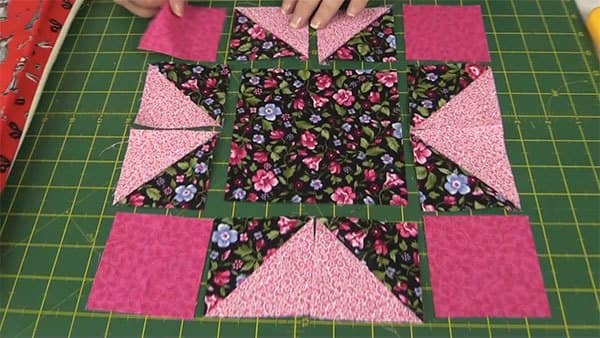
- Sew the first two pieces together with a ¼” seam.
- Sew the next two pieces together with a ¼” seam.
- Then sew the two sets together to form the top row.
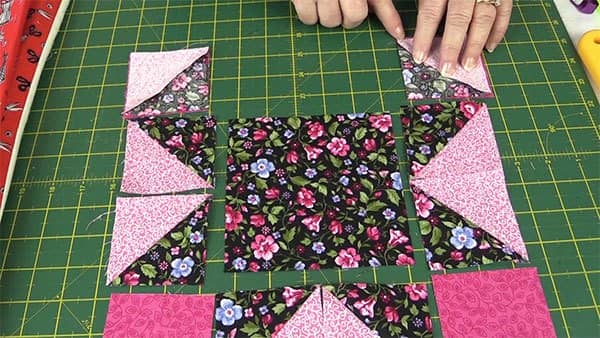
- Repeat the process to form the bottom row.
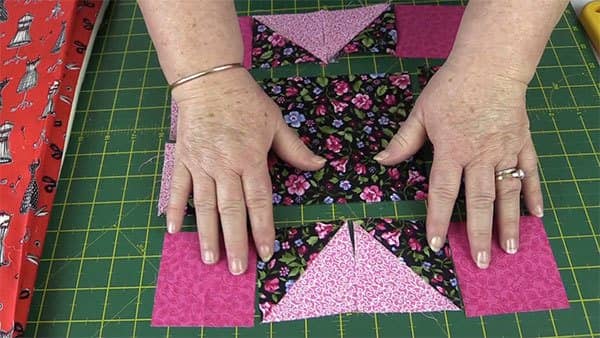
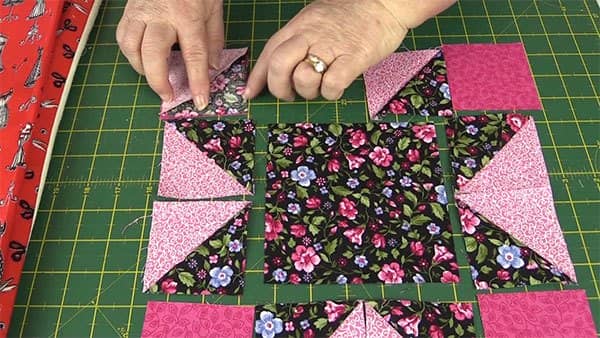
- Take two side pieces and lay them one on top of the other, right sides together.
- Join them with a ¼” seam.
- Repeat the process for the two squares on the other side.
- Press the seams open on the side pieces.
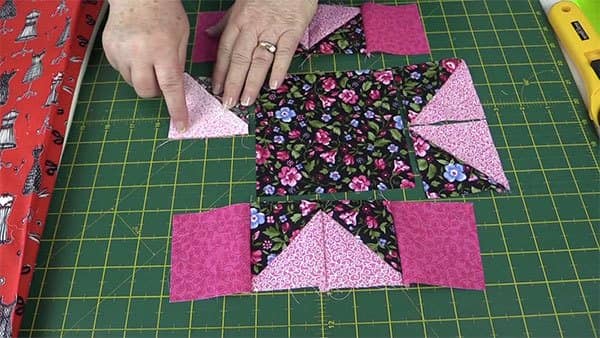
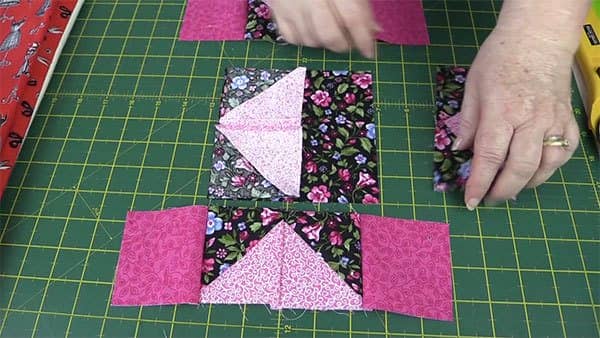
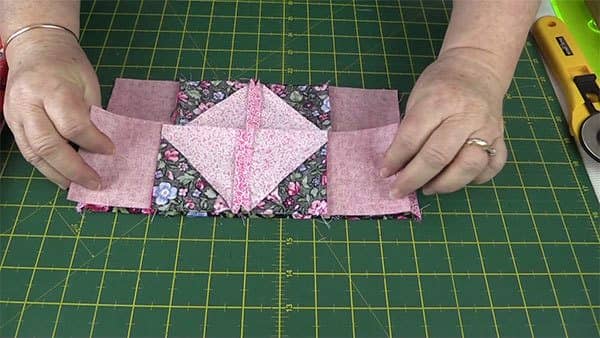
- Lay the side piece over the middle square, right sides together.
- Sew together with a ¼” seam.
- Do the same with the other side piece.
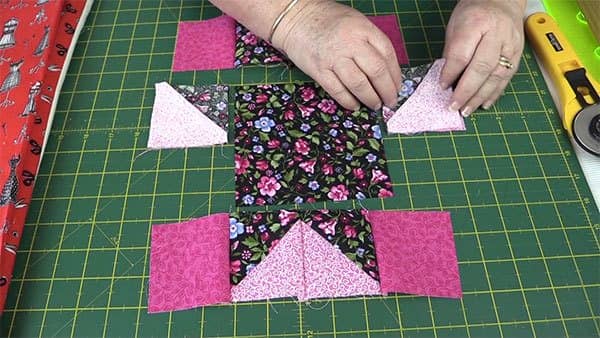
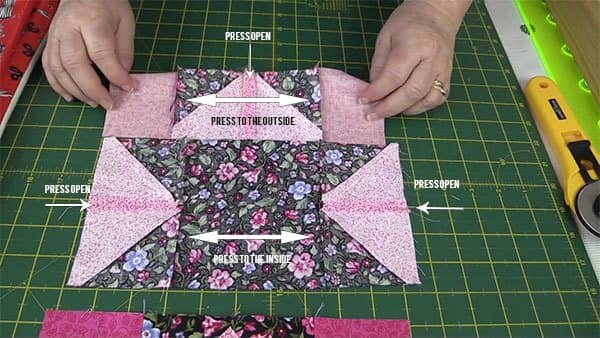
- Now press the seams as shown in the photo below.
- Press the bottom piece the same as the top piece. – Centre seam open, side seams towards the outside edge.
- Press the middle piece with the seams towards the middle square and the seams on the side pieces were already pressed open in an earlier step.
- Lay the top piece on top of the middle section and sew together with a ¼” seam.
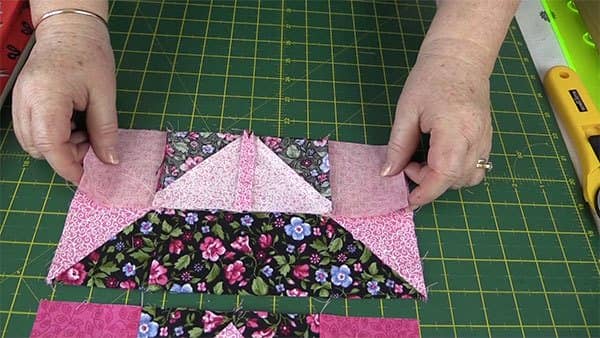
- Lay the bottom piece on top of the middle section and sew together with a ¼” seam.
- And here is the finished block.
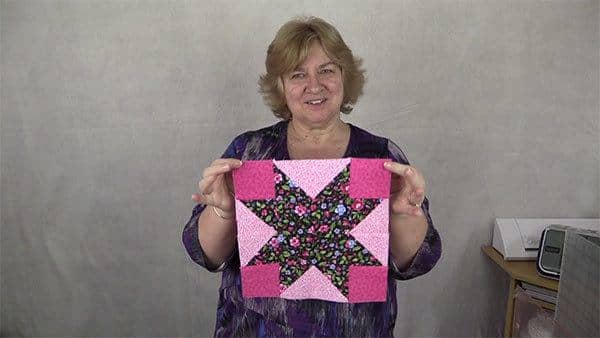
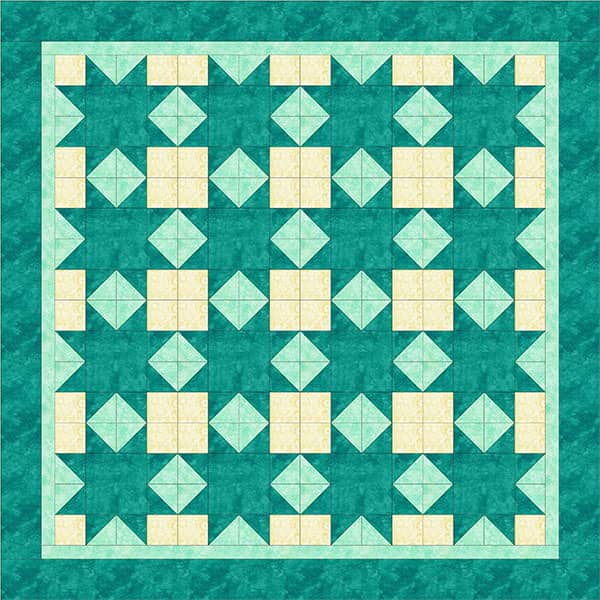
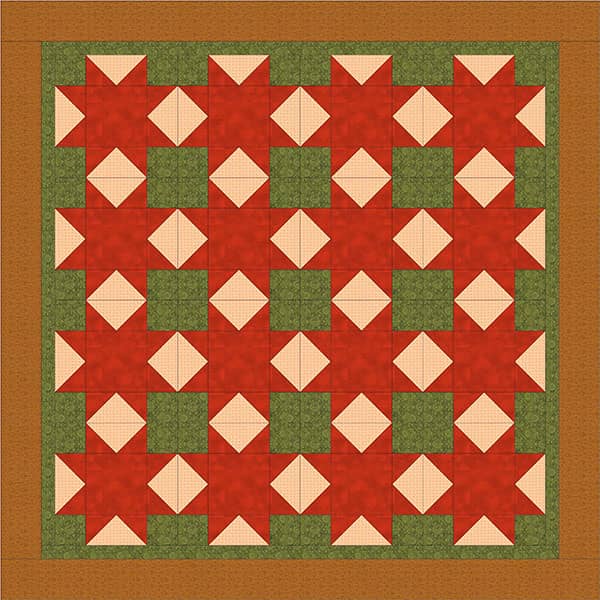
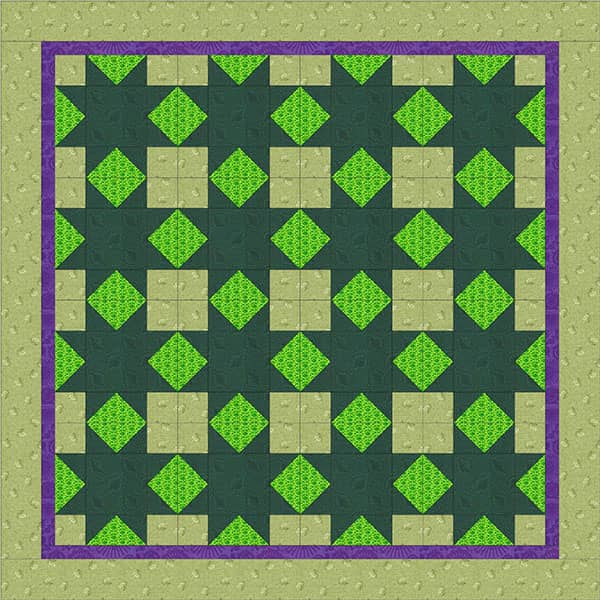
Here are some examples of the Austin Star Quilt Block made into quilts.