Brother Scan N Cut – How to Weld Text on Your Machine
Welding text on your Brother ScanNCut is really handy when you want to add names and messages to your projects.
Watch the video or see the full written instructions below.
Here is how to do it:
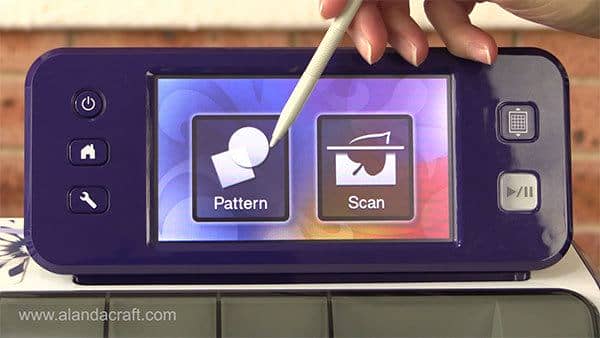
- Turn on your machine and Select ‘Pattern’
- Select Fonts icon ‘Aa’
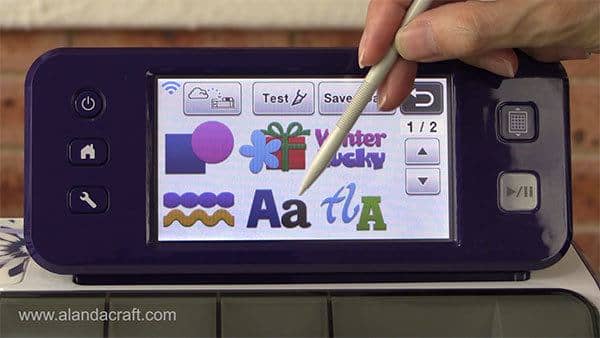
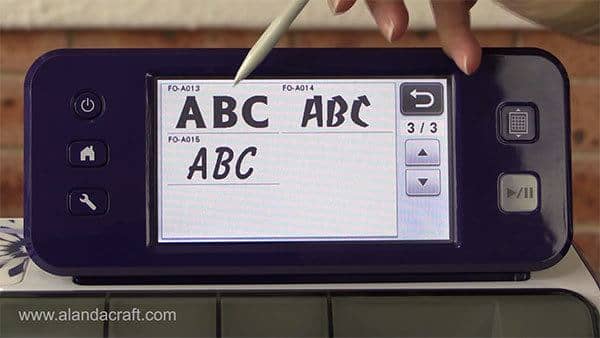
- Select the font you wish to use.
- Some fonts will weld better than others.
To weld text you need to add one letter at a time. If you add a whole word you will not be able to weld the text.
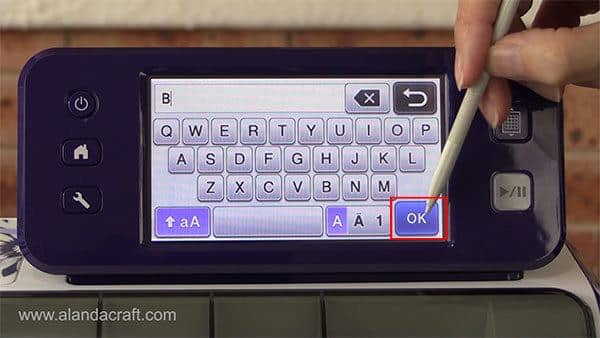
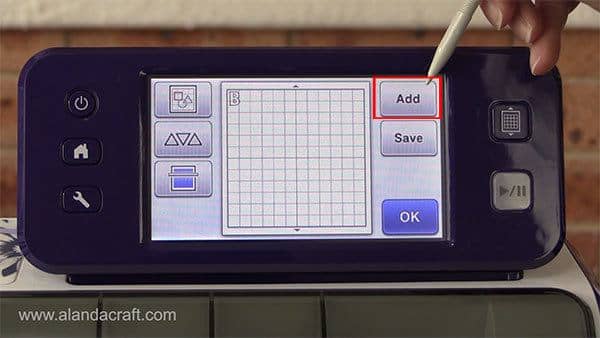
- Type the first letter of your word.
- Press OK.
- Select Set.
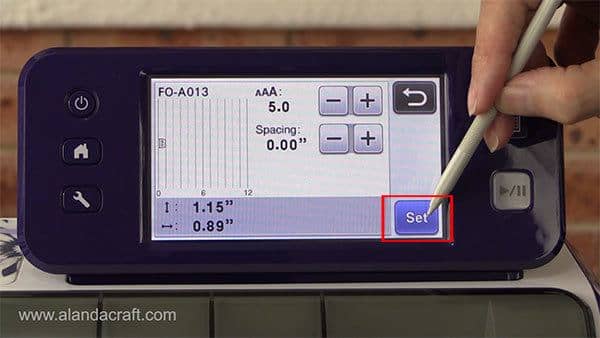
- Your letter now shows on the screen.
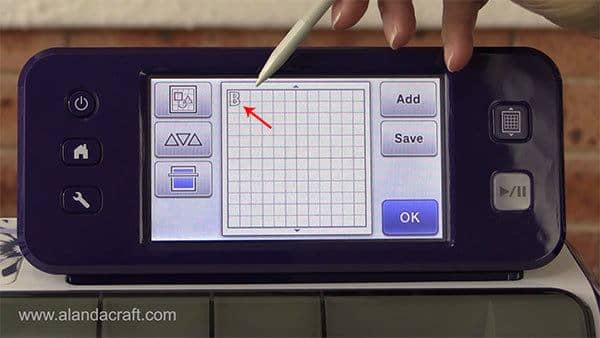
- Select ‘Add’, to add the next letter.
This will take you back to the home screen. Repeat the process outlined above.
- Select the Fonts icon.
- Select the Font you wish to use.
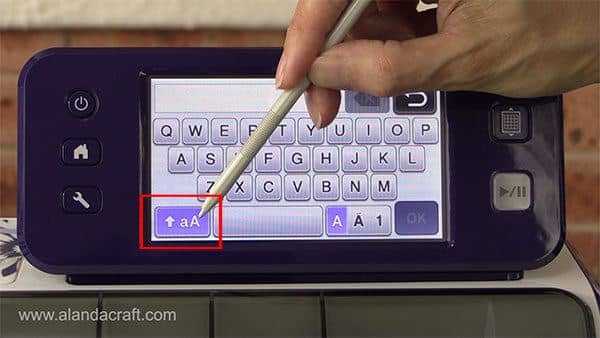
I want the next letter to be lower case.
- Select the icon for Upper/Lower case. aA
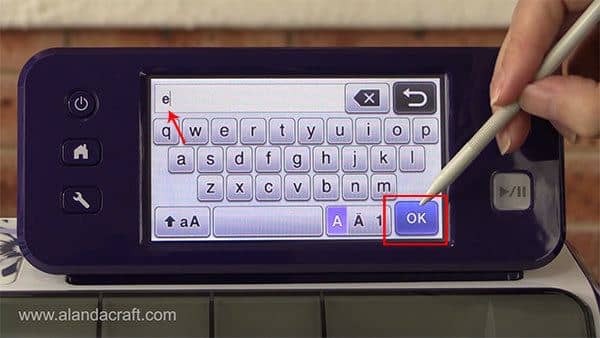
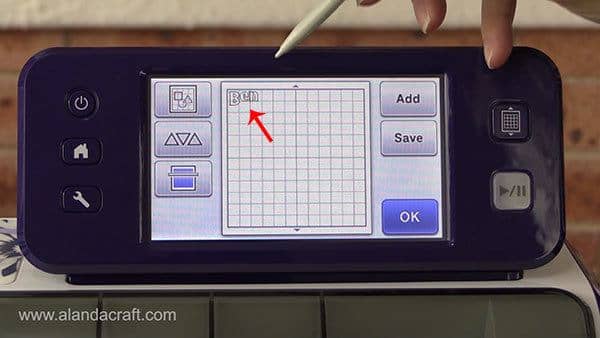
My word is Ben. So now I select the ‘e’.
- Press Ok
- Press Set.
- Select Add.
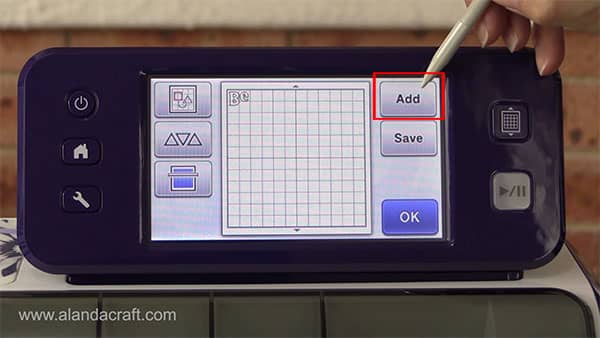
- Repeat the instructions as set out above for adding the ‘e’.
- I now have my full word showing.
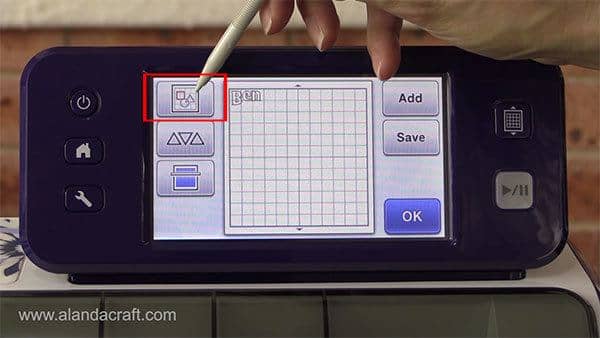
Now we need to make the letters larger to work with.
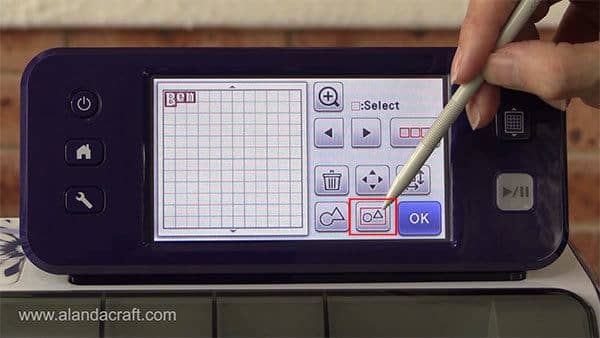
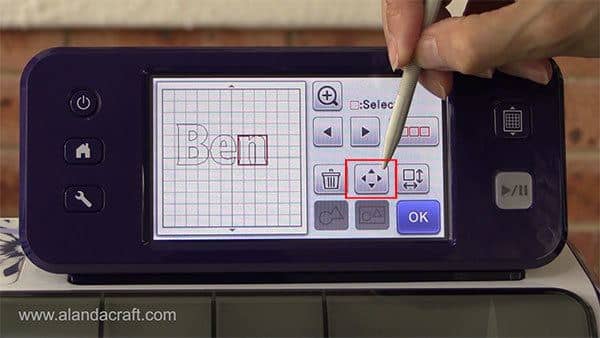
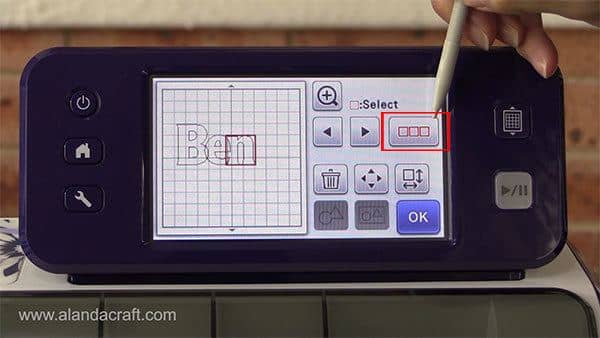
- Select the icon on the top left hand side of the screen.
- Click on the Select icon.
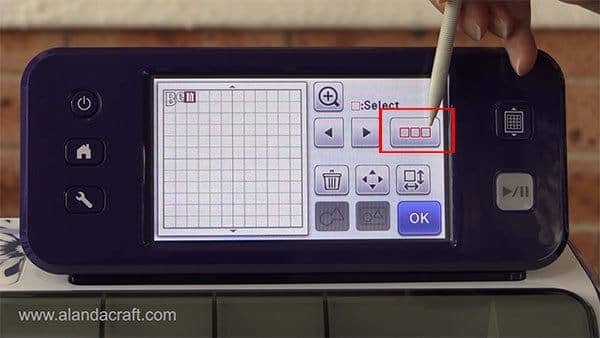
- Click on the Select All icon.
- This will highlight all of the text.
- Press OK.
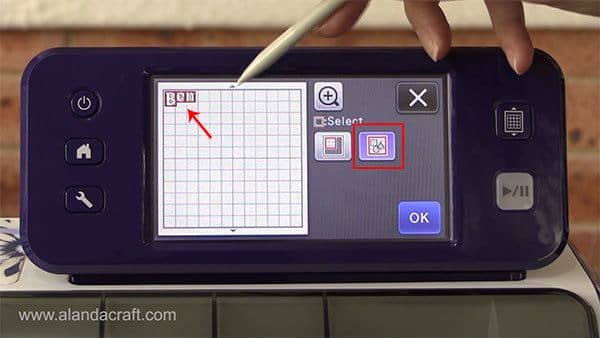
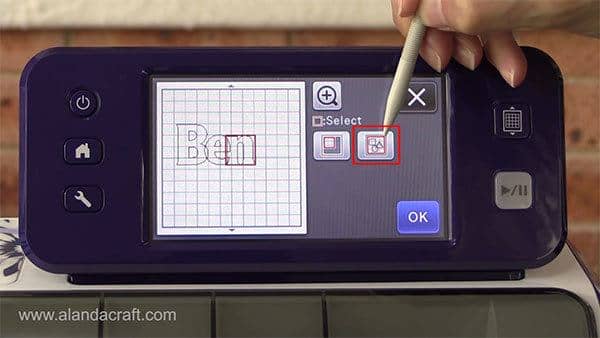
- Select the Group Option.
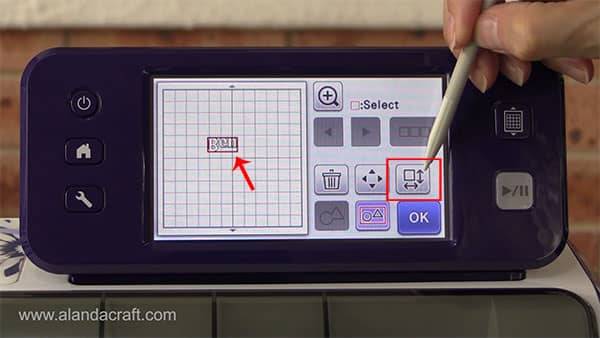
- Once the text is grouped you can move it around the screen.
- Place the word near the middle so you have room to enlarge it.
- Select the Height/Width icon.
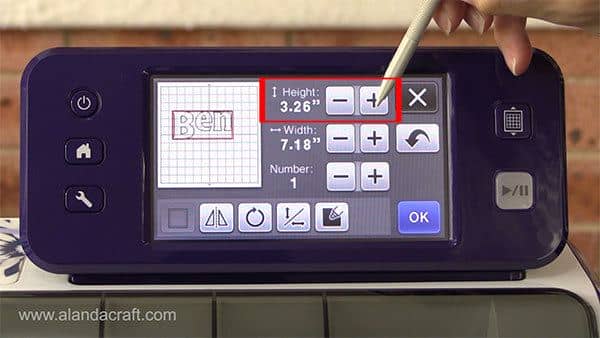
- Change the height and width of the text using the Plus and Minus buttons.
- Press OK.
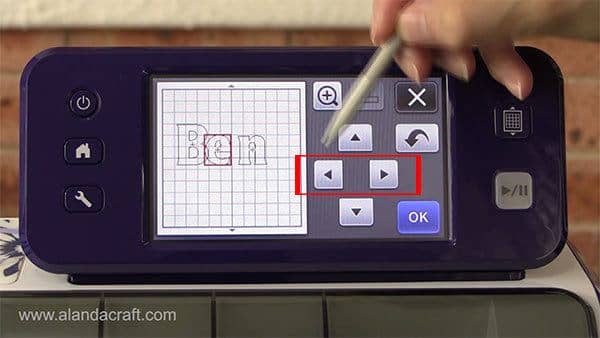
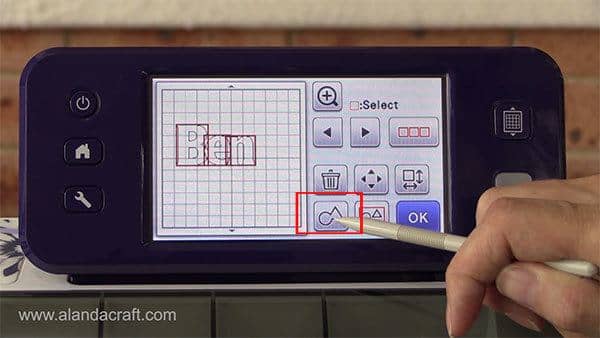
Now we need to ungroup the text.
- Select the Group/Ungroup icon.
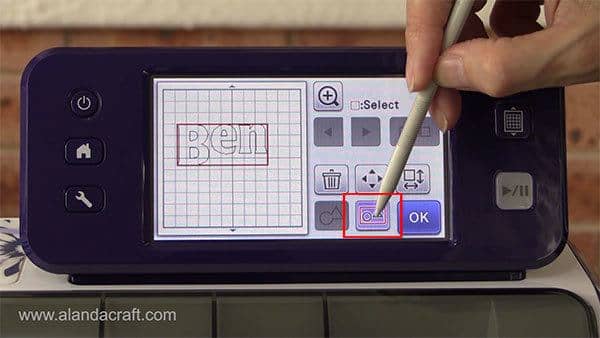
- The letters are now ungrouped but they are still showing as selected.
- Decide if you want the letters aligned at the top as shown in the picture. Or if you want them aligned along the bottom.
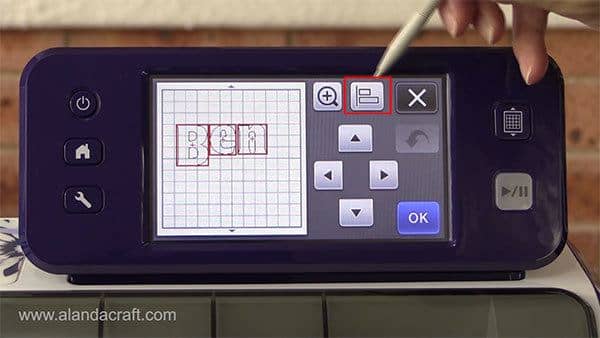
- To change the alignment, Select the Nudge icon.
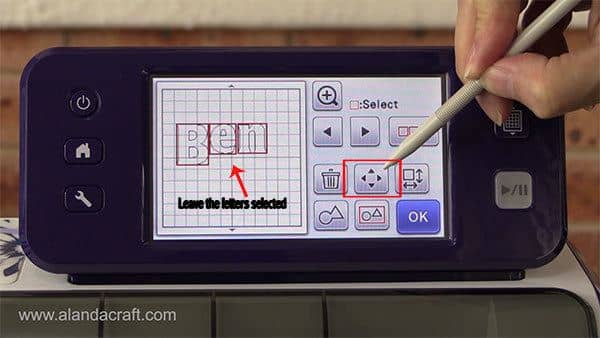
- Select the Alignment Icon.
- Select the ‘Align to Bottom’ icon.
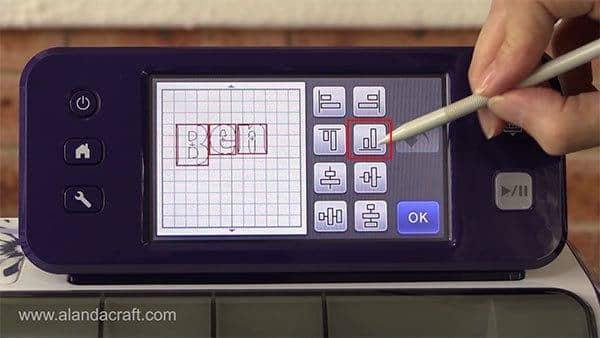
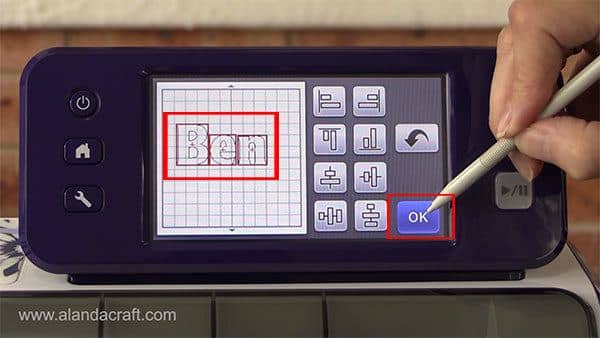
- The text is now nicely aligned to the bottom
- Press OK.
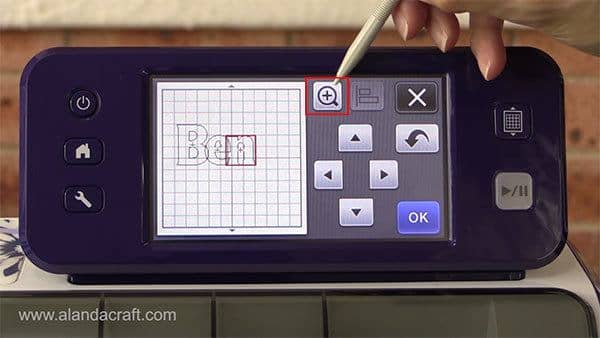
- Press OK a second time and you will come to the screen where we are ready to weld the text.
- Click on the screen to separate the letters.
- Do not move the letters manually as they will go out of alignment.
- Select the Nudge Tool.
- Select the letter you want to move.
- Using the nudge tools, move the letter until it overlaps the previous letter. In my case I am moving the ‘e’ so that it overlaps the ‘B’.
- Then move the next letter in the same way.
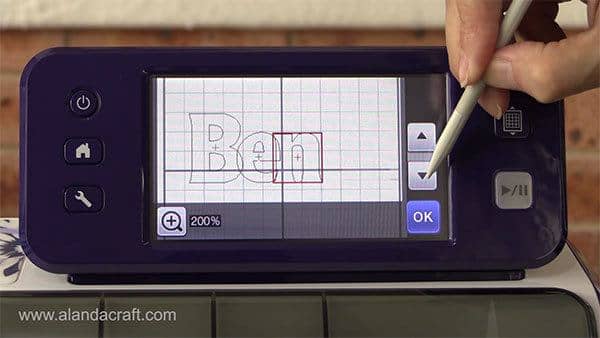
- To check how things are lining up, Click on the Zoom icon.
- When you are happy with how the text looks, Press OK.
Now we need to weld the text.
- Click on the ‘Select’ icon.
- Click on the ‘Select All’ icon.
- Select OK.
- All your text should be highlighted.
- Select the ‘Weld’ option.
- Press OK.
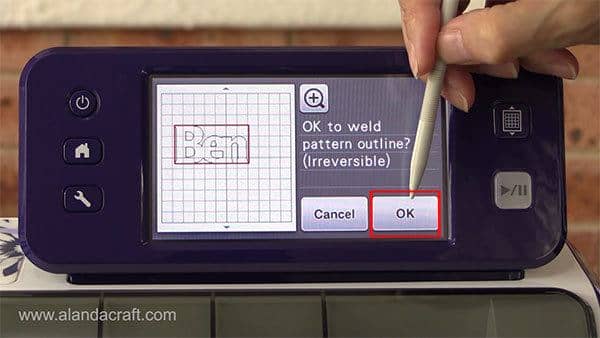
- You will receive a message asking if it is OK to weld the pattern.
- If you want to make further changes Select Cancel.
- If you are happy with how the letters look Select OK.
- Press OK a second time and you are ready to cut out your welded text.