Easy to Make Square in a Square Place Mat
With Christmas fast approaching, we decided to get in early with a quick and easy sewing project for you. We’re using a rather clever technique where you place one square of fabric on top of another piece of fabric to form a quick quilt block. It’s so easy that we thought, why not adapt this technique to make a placemat? So that’s exactly what we’ll be showing you.

Now, I’m not gonna lie, this does result in a little bit of wasted fabric since you are sewing one piece of fabric on top of another piece of fabric. But think of it like this, it’s a great way to use up some of ugly pieces of fabric OR a piece of fabric in your stash that you’ve had on hand for years and can never seem to find the right project for it.
On the plus side it does create a little bit of extra thickness for the placemat so it will provide an added layer of protection for your table top…well, that’s my excuse anyway.
And it’s a great scrap buster project, I have used scraps from my stash for all the the place mats I made using this technique.

So let’s get started.
FINISHED SIZE: 18″ x 12″
What You Need
- 1 piece of fabric measuring 19″x13″
- 1 piece of fabric measuring 13½” x 7½”.
- 1 piece of batting measuring 14″ x 20″
- 1 piece of backing measuring 14″ x 20″
- Binding – 2 strips measuring 2¼” x wof (width of fabric) or you can make a strip from scraps
Tools used in the Tutorial
- Olfa Rotary cutter
- Panasonic Iron
- Creative Grids Basic Ruler
- Creative Grids Big Easy Ruler
- Chalk Wheel
- Clover Hot Press Perfect Ruler
- FriXion
- Juki 2010QP Sewing Machine
- 505 Fabric Adhesive Spray
Watch the video tutorial below or scroll down for written instructions
(Can’t see the video? You may have an ad blocker installed. You can watch the video on our YouTube channel here.
Method
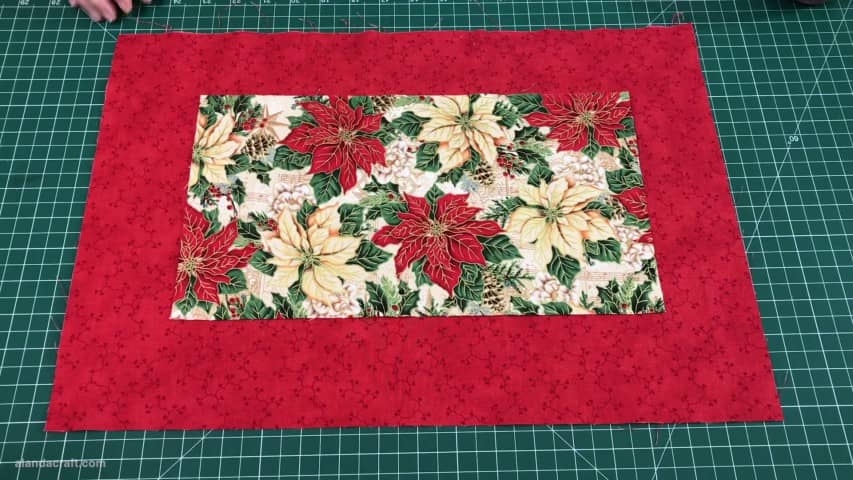
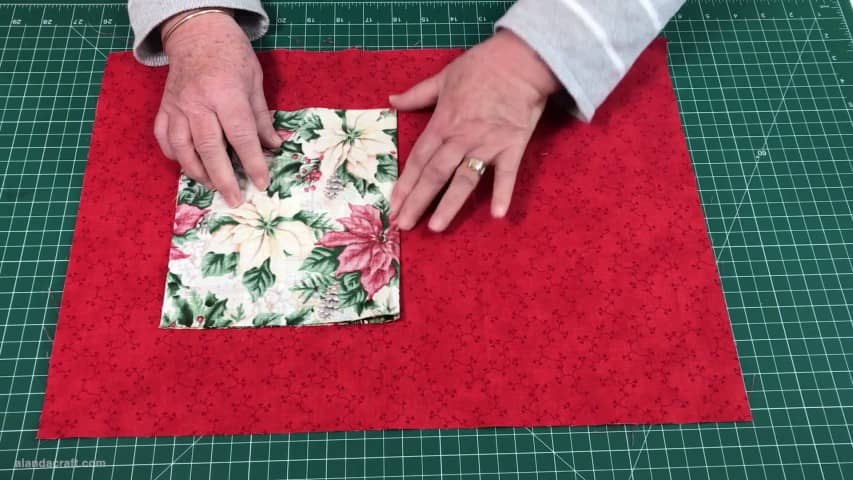
So the first thing we are going to do is place the smaller piece of fabric in the centre of the larger piece. We want these to line up nicely and there are a couple of ways you can do this.
- You can fold each piece in half and then open it up and then fold along the other side – you can just finger press the folds or you can give them a press with an iron which will create a nicer crease. Once you’ve done that you can see how nicely you can line up the two pieces.
2. The other way involves drawing lines which is my preference and normally I would use a FriXion pen to do this but I try to avoid doing that on the front side of fabric so I am going to use a chalk marker to do this.

Once you have lined up the two pieces of fabric, just pin them together to hold them in place. This will help to stop them moving around on you while we do the next step.

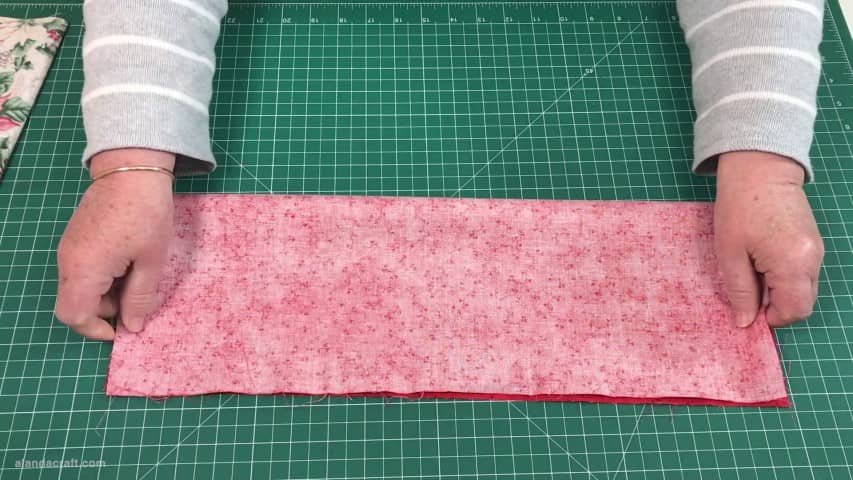
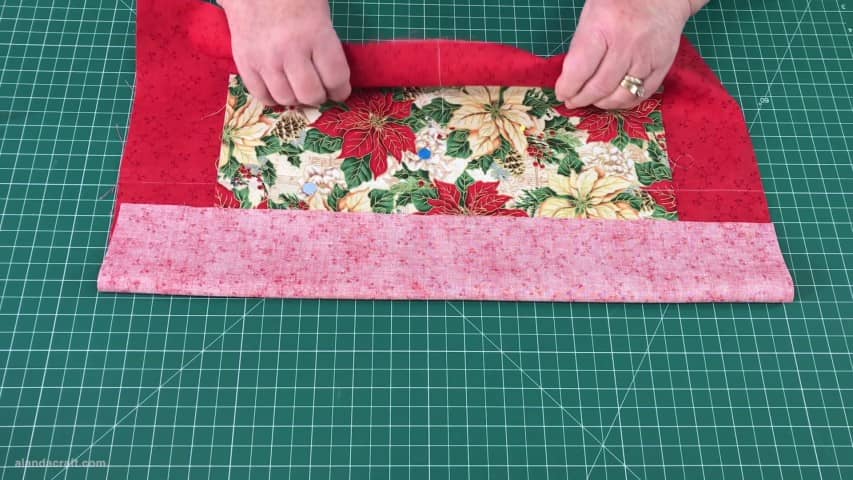
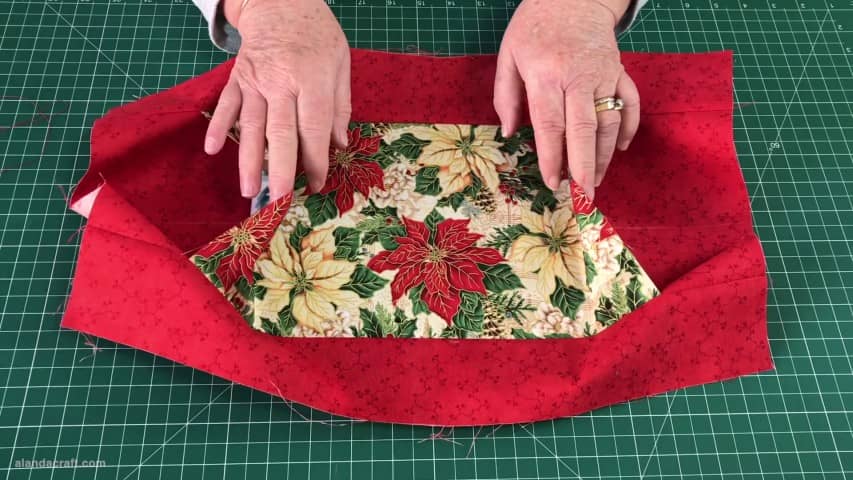
The next thing we are going to do next is fold down each of the long sides of the place mat so that they line up with the inside piece of fabric.
So you have a few options here.
- You can just fold the fabric over and feel for the fabric underneath to make sure you are not overlapping too much and then press.
- You can use a strip of card stock which you place along the edge of the inner piece of fabric and then fold over like so and iron.
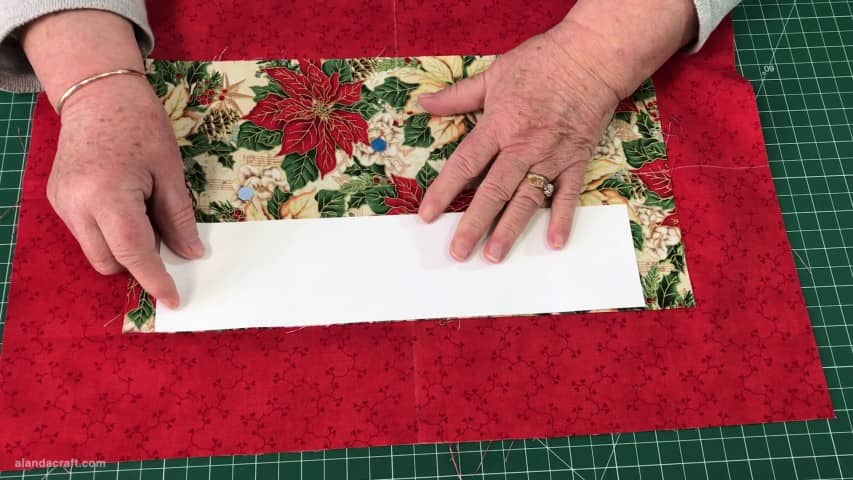
- Or you can use one of these Clover Heat Press strips which I am I going to use.
Once you have pressed the side material in place you need to sew along the folded edge with a quarter inch seam and you do the same with the other side.
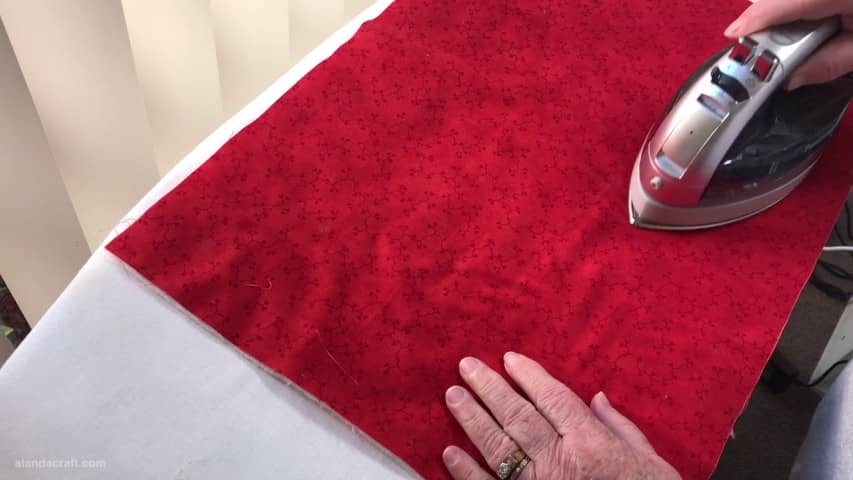
Now that they are sewn, we need to press these sides open, so I’m going to set the seam first and then open it up and press all the way along.
And then I will repeat the process with the other side.
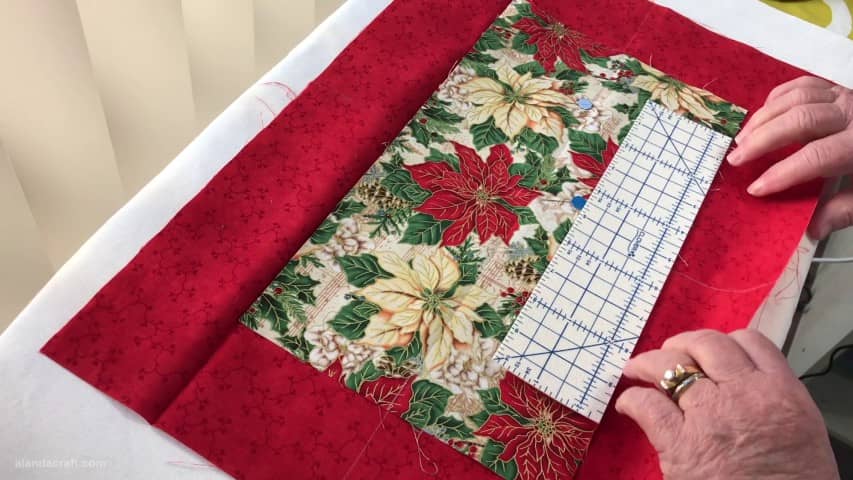
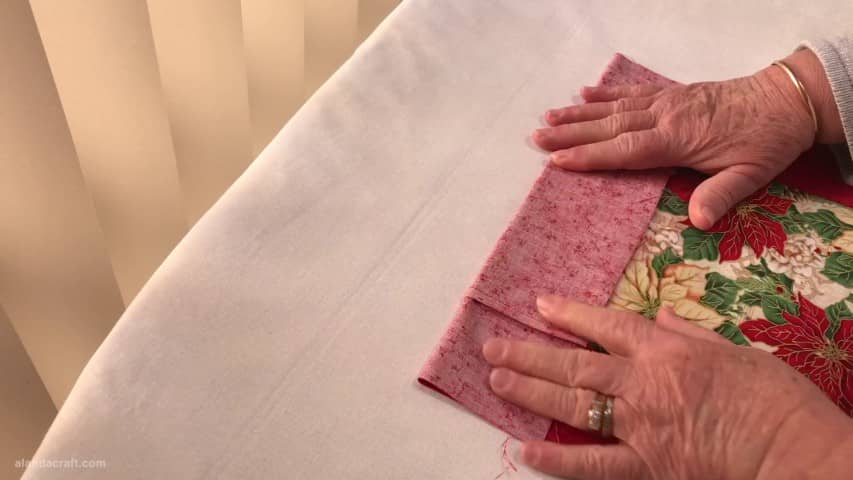
So at this point you can see that we have these two open sides and we need to close them up so what I am going to do is sew the side pieces in the same way I sewed the long edge pieces.
So I will fold them over and then press each side and then sew along each edge with a quarter inch seam.
Once that is done, we just need to press these strips open just as we did with the long edge pieces.
Adding the Backing and the Batting
Now we are ready to add our backing and batting.
And what I am going to do is spray them with my 505 adhesive spray. This is purely optional but I like using it as it helps to keep the layers together.
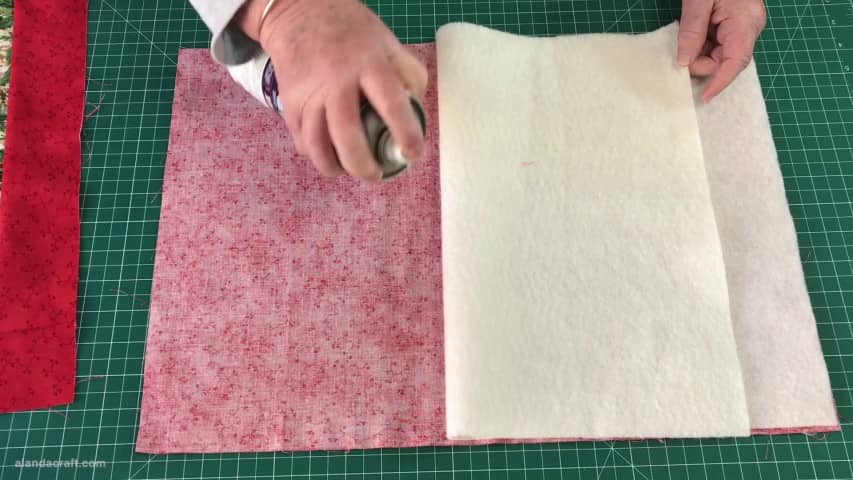
So I just spray on each side and then smooth it all down and I also like to give it a press at this point to remove the bubbles. I don’t press down too hard with the iron as it can warp the batting.
Next we need to place our placemat on the top of the layers, and again I am going to use some adhesive spray to help hold it in place.
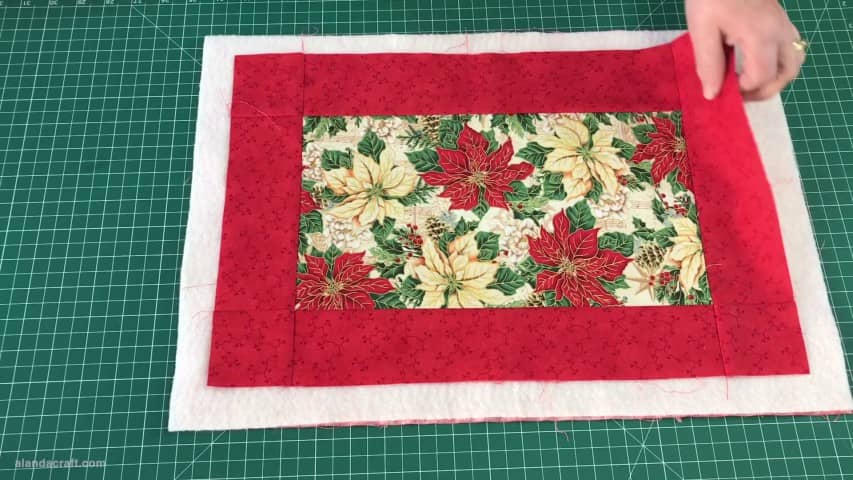
Let’s Get Quilting
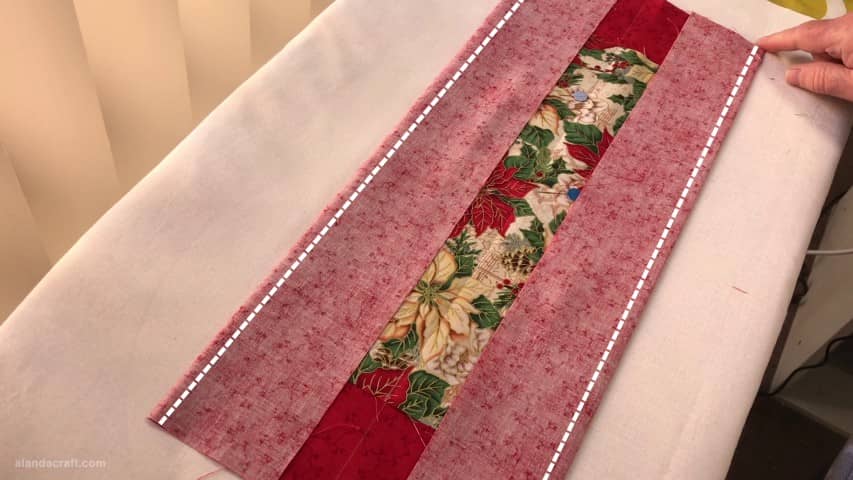
Now everything is nice and bubble free we can quilt it.
I am going to keep it simple and just draw some lines along the center piece. At this point, the center should measure 13” so I am going to draw lines at the 1” mark all the way along.
Now you may be wondering why I am using a Frixion pen for this step when I already mentioned that I try to avoid using it on the front of fabrics. Well, first of all the chalk marker doesn’t show up as well on this fussy fabric and secondly, I am going to be stitching on top of those drawn lines so it will hide the lines if they happen to show up again.
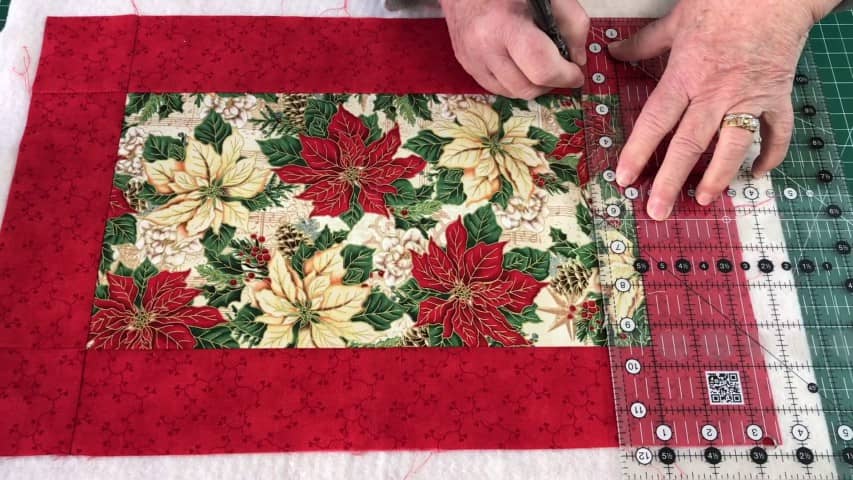
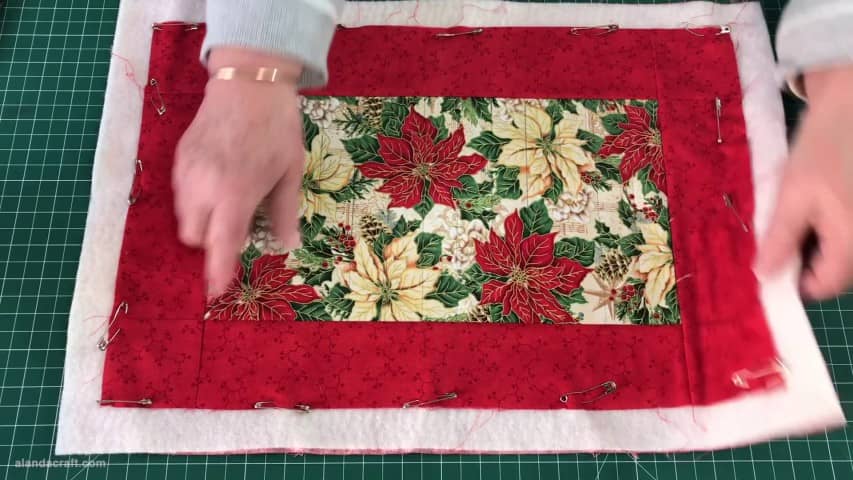
You can see how those lines look there and you will also notice that I have also pinned around the edges. This just stops the fabric from drawing in too much when I start quilting.
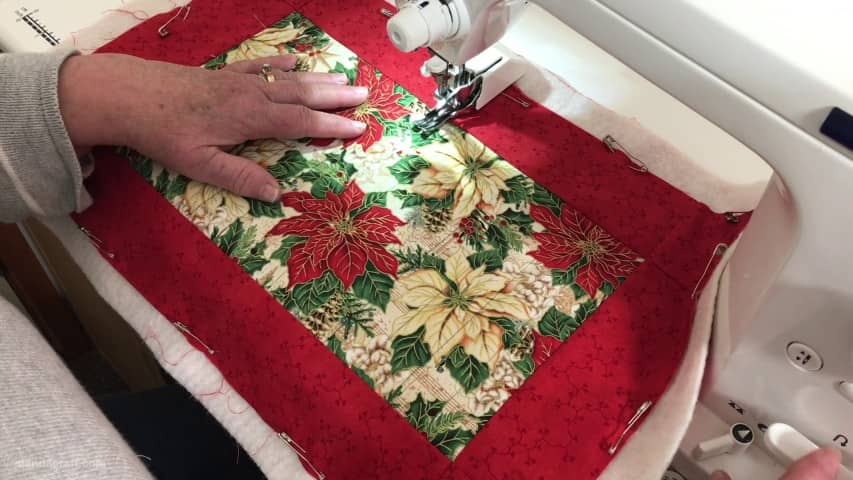
I’ll start sewing down the middle line, beginning with a back-stitch and top-stitching along the drawn line. When I get to the end, I’ll finish with a backstitch.
And I’ll repeat that with all of the drawn lines. Once the centre has been quilted I’ll ditch stitch along the outside seams.
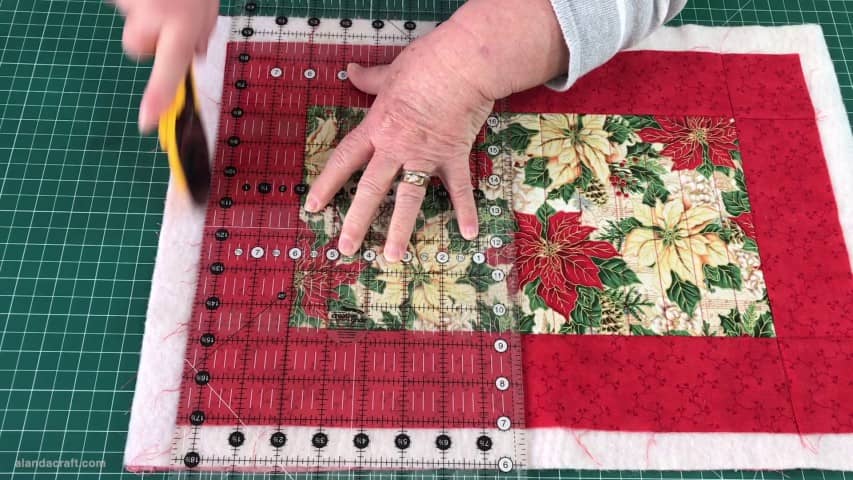
Now that the lines are sewn and I’ve removed the pins, it’s time to give this a trim.
So I am going to line up my ruler along a the seam line and trim back the side and I’ll do the same on the other side. Then I will repeat the process with the long edges.
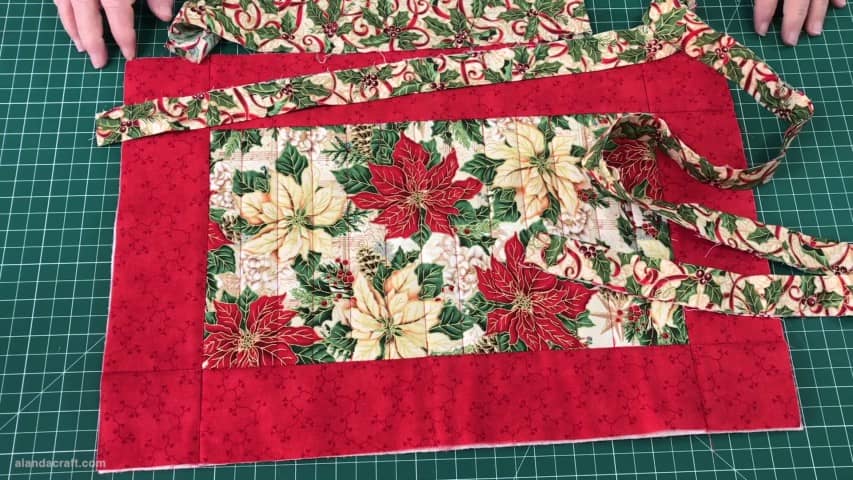
Now we are ready to add the binding and for this placemat you will need two strips of fabric that measure 2 ¼” by the width of fabric but I am actually going to use up some scrap pieces I have on hand and I’ll just make a strip to go around the centre plus about 10”.
If you need to know how to add binding, then check out our tutorial on how to add binding to a placemat.
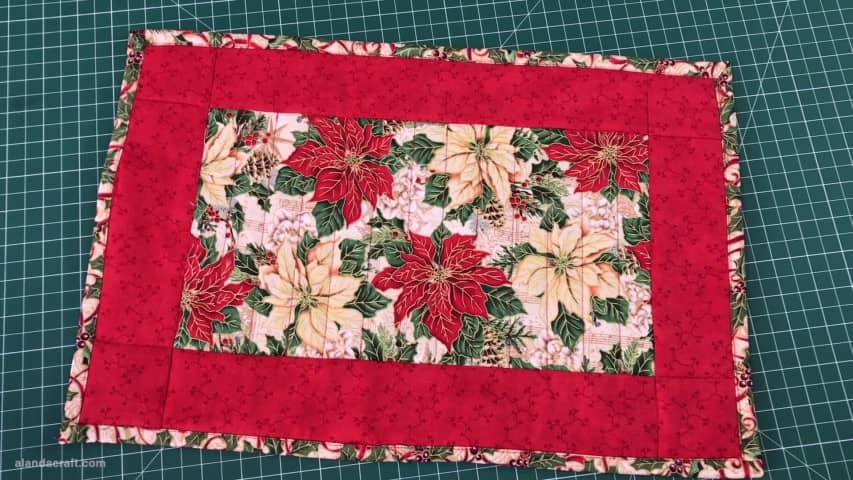
Okay, so our Christmas place mat is complete and just remember that you can use this pattern in other non-Christmas patterns.
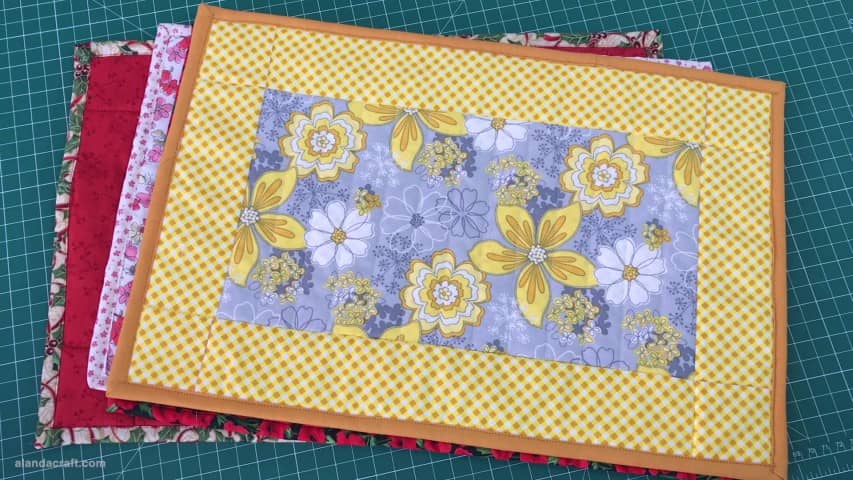
Christmas Place mat
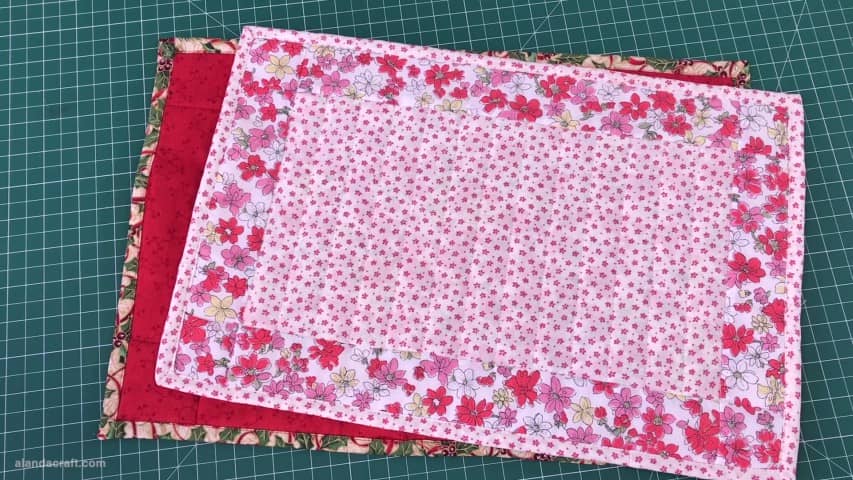
Pink Floral Place Mat
Black and Red Poppy Place Mat
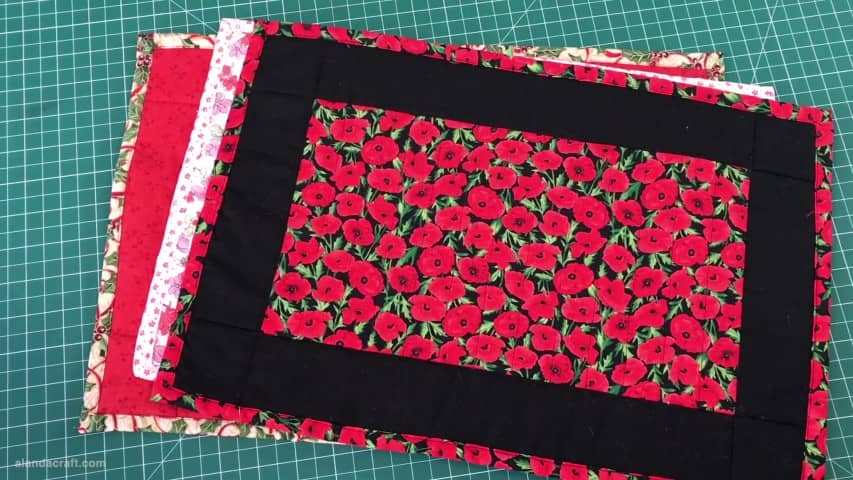
Yellow Floral Place Mat
I think this is my favourite. What do you think?