Split Text Effect Using Canvas Workspace – ScanNCut Tutorial
A reader contacted us recently to ask how to achieve a split text type effect using the ScanNCut. I always like a challenge, so went ahead to see if it would work.
I ended up with two different methods.
Watch the video below for step-by-step instructions or scroll down for the written instructions
(If you can’t see the video, you may have an adblocker on.)
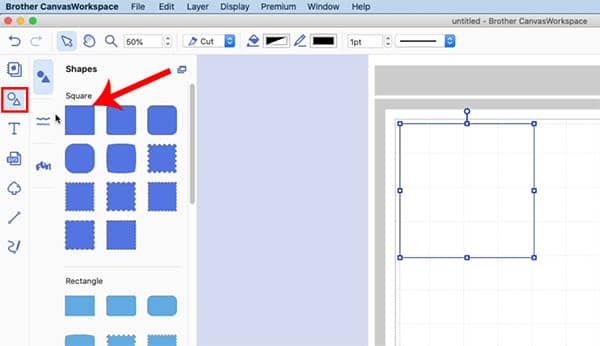
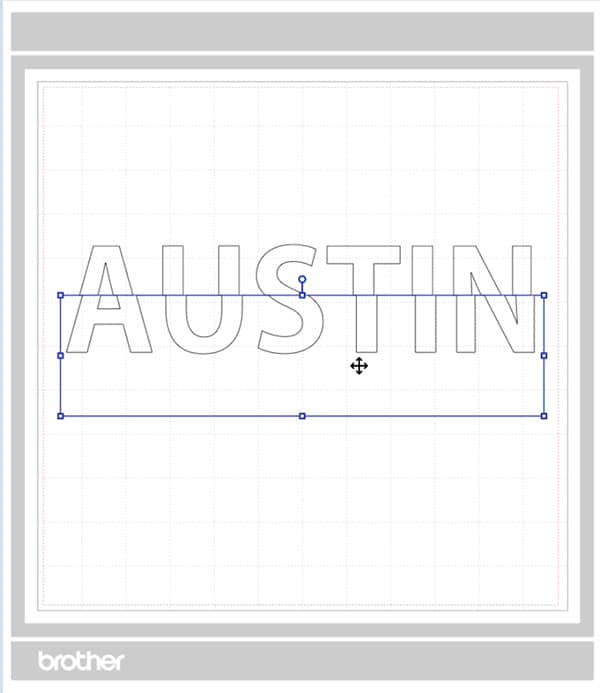
Start by selecting the square shape from the Shapes menu.
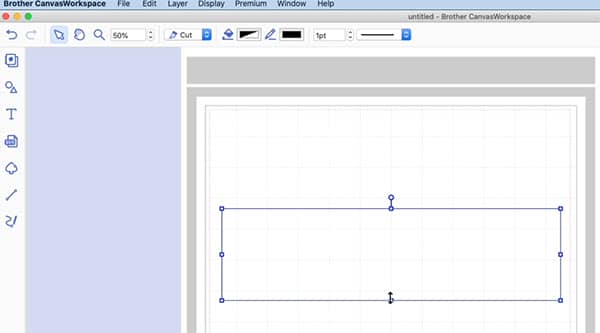
Resize the square to form a rectangle.
Select the TEXT option, click on the canvas and type in the word that you want to create the effect.
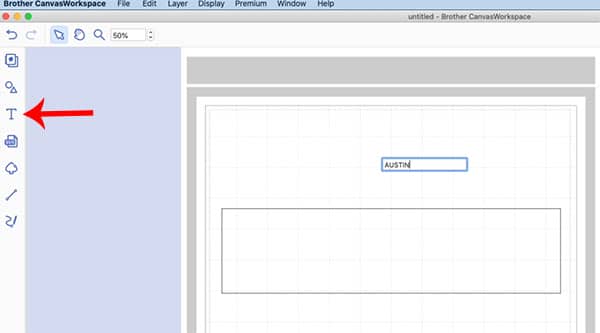
Resize the word by dragging from the bottom corner.
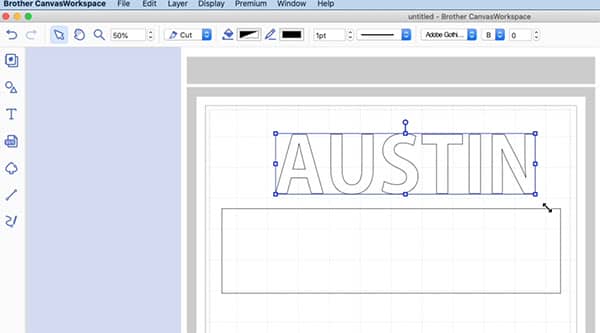
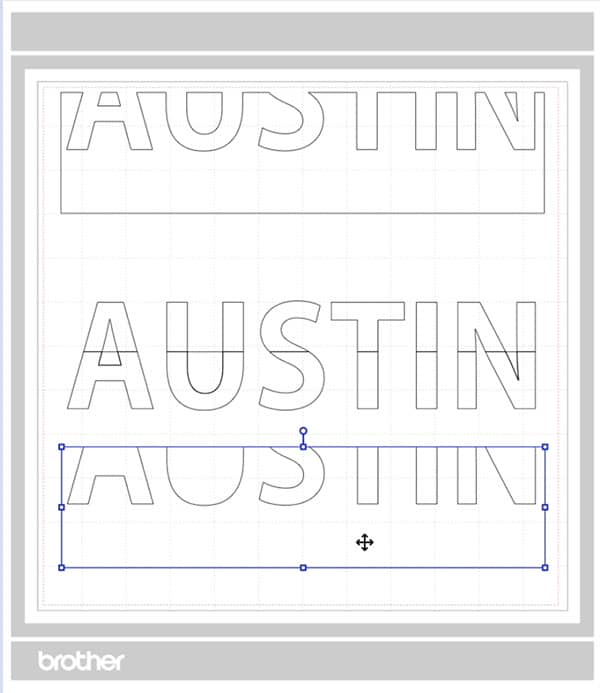
Position the text ovet the rectangle.
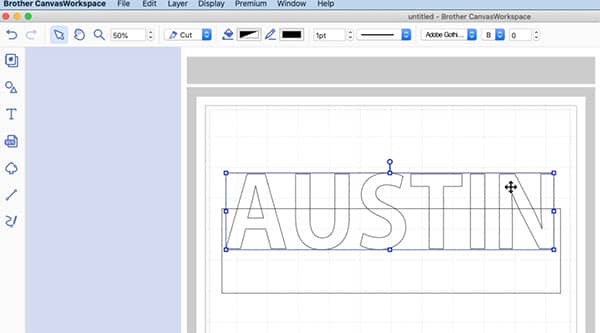
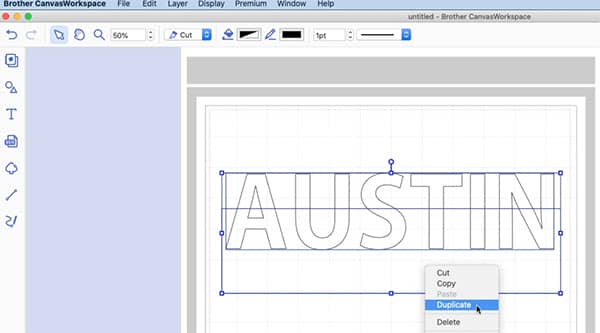
Click and drag with your mouse over the text and the rectangle so that both are selected. Right click and select DUPLICATE.
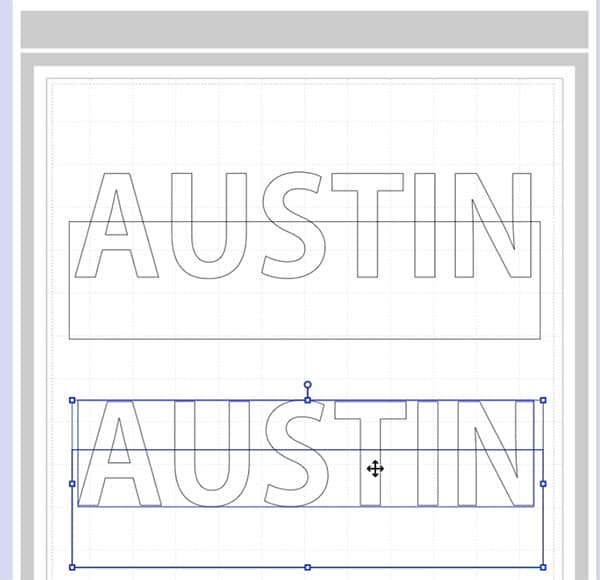
You will now have two versions.
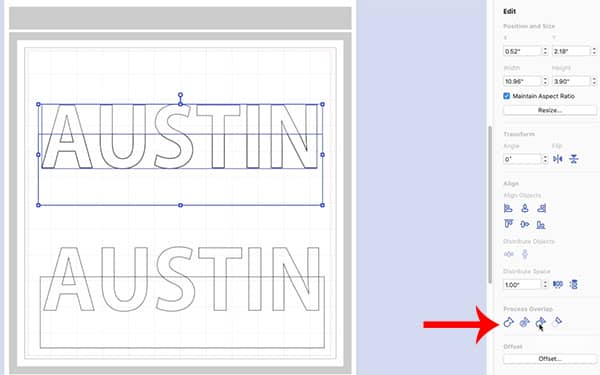
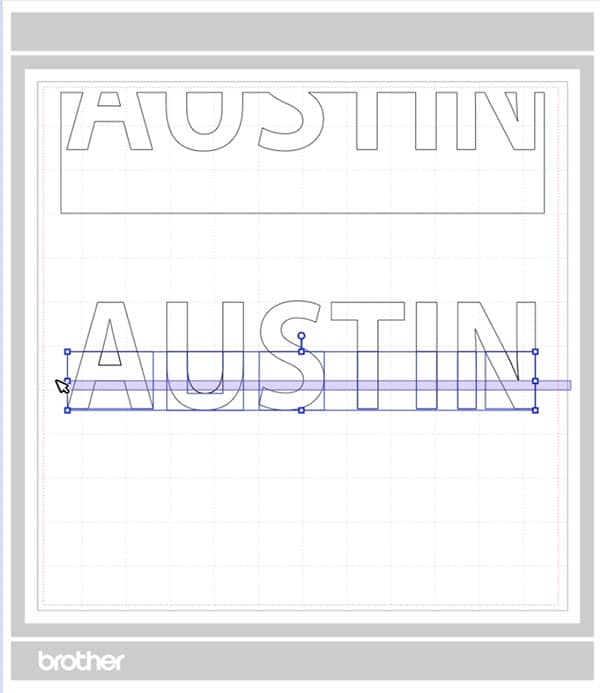
Click and drag to select the top text and rectangle pieces so that both are selected. Click on EDIT from the right-side menu and select REMOVE OVERLAP from the Process Overlap options.
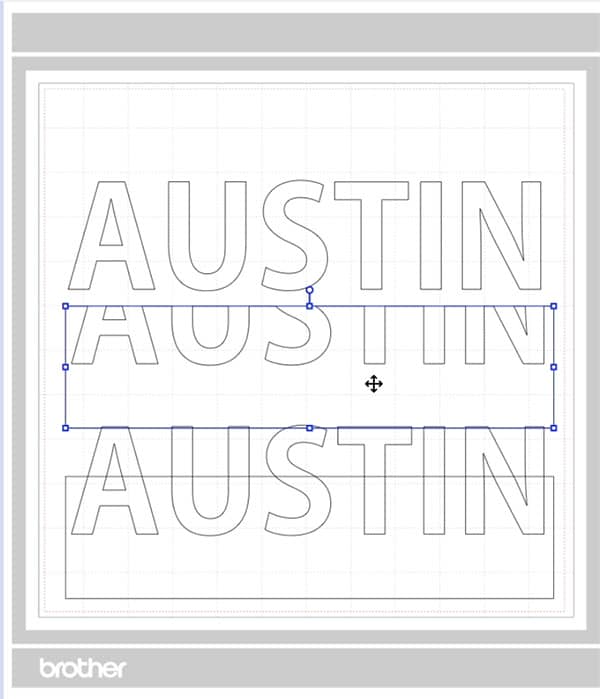
You can now drag the bottom section of the text away. This is the part we need to keep.
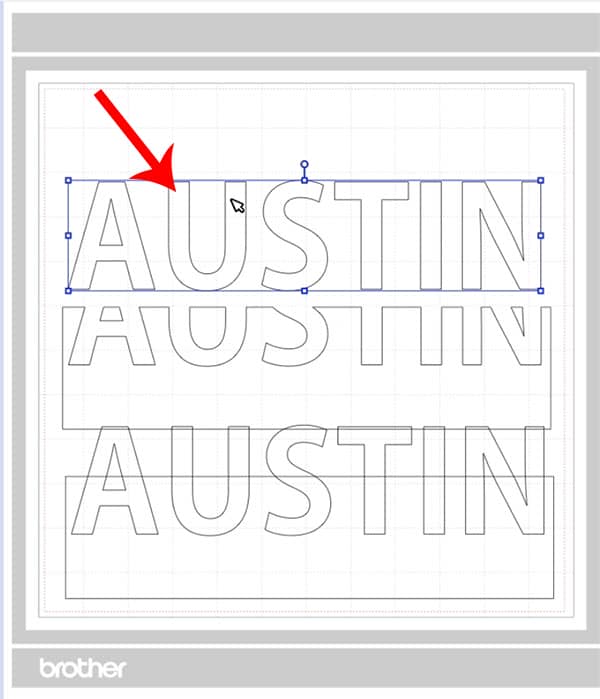
Select the top text and press the DELETE button on your keyboard to remove it from the canvas. We don’t need it.
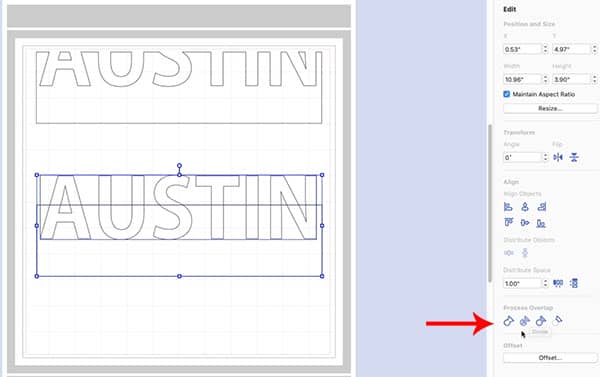
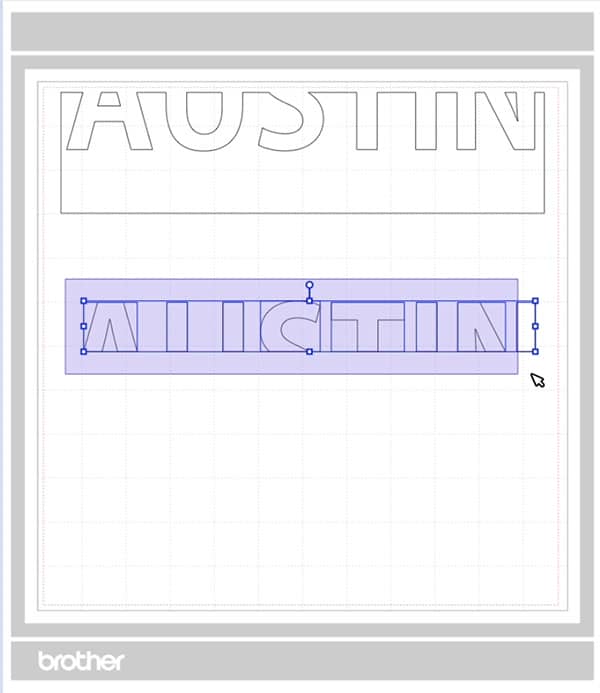
Now select both the bottom text and rectangle and then click the DIVIDE option from the Process Overlap section.
Now you can drag away the bottom part of the text. We don’t need this bit so just delete it.
Click and drag to select the bottom part of the text and then hit the delete key.
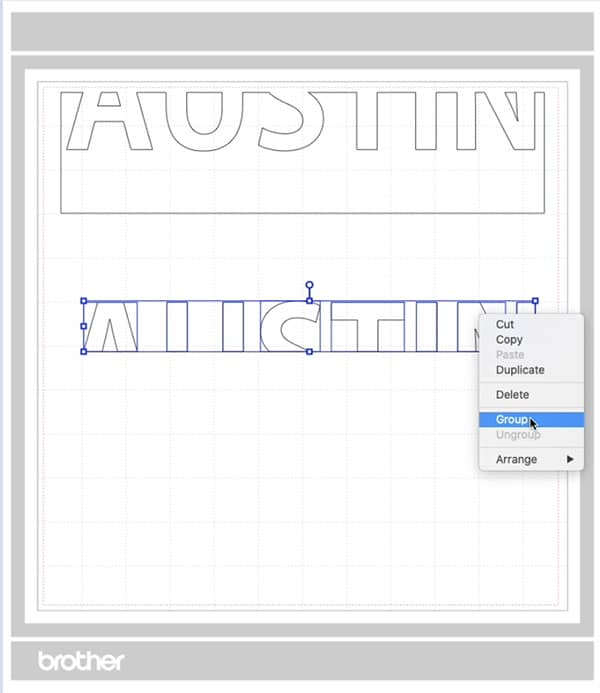
You should now be left with the top text. Select it all by clicking and dragging with your mouse.
Right-click and select the GROUP option.
Move the two bits of remaining text and line them up.
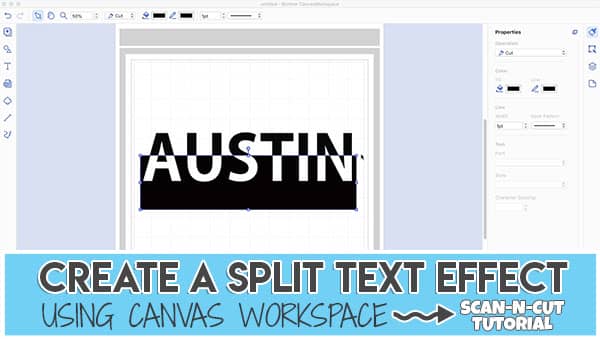
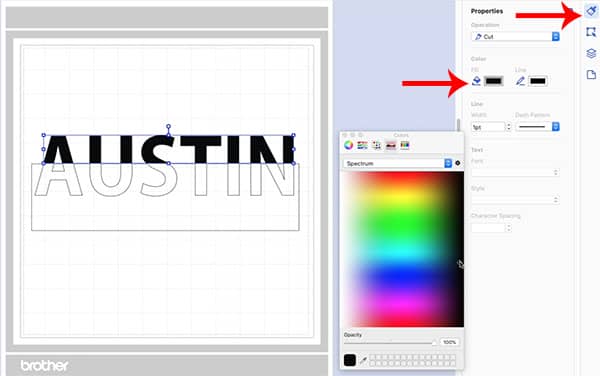
Now we can fill each part with colour to see the final effect.
Select the top part of the text. Select the PROPERTIES option from the right-hand menu and then select the FILL option. Choose the black colour. (We use Mac computers so the fill option may act differently for Windows computers.)
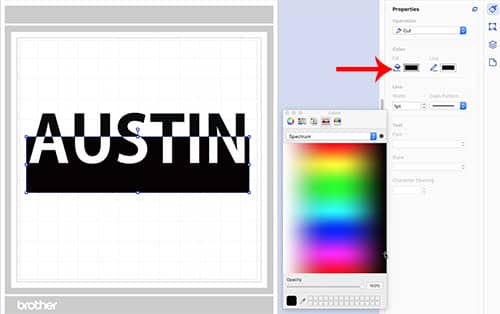
Now select the bottom of the text and repeat the process choosing the black colour.
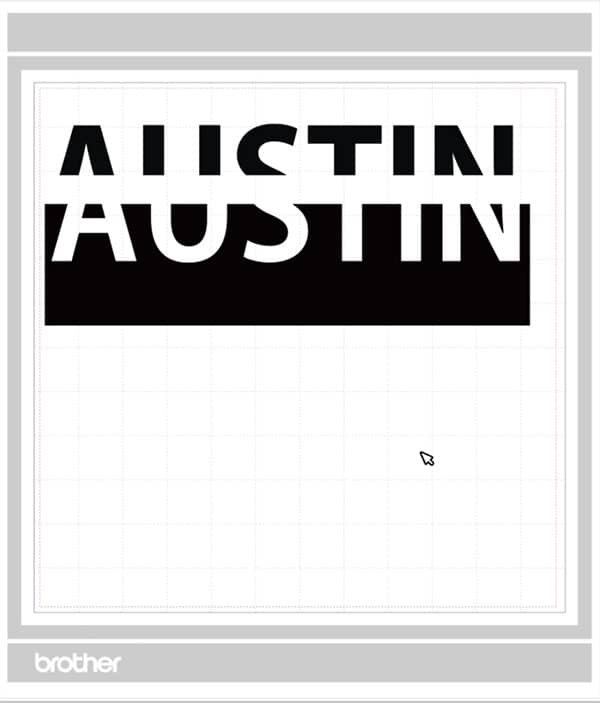
Before cutting separate the pieces out.
To see the second method of achieving this text, watch the video above. If you can’t see the video you may have an adblocker on. Otherwise, you can go to our YouTube channel and watch the video there.