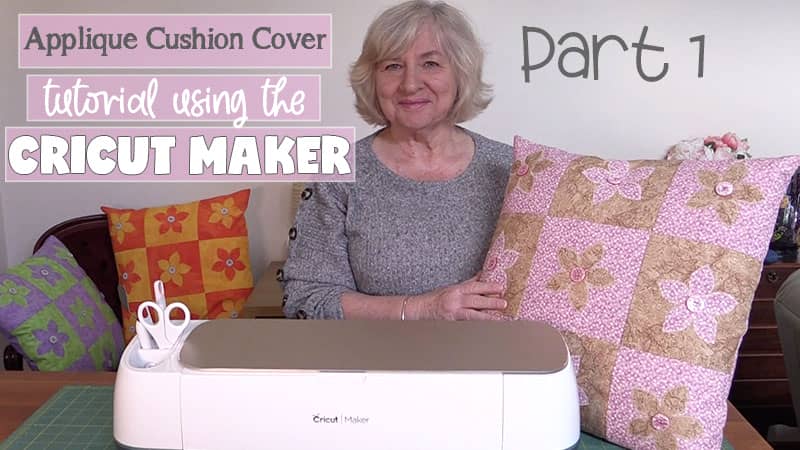
Cricut Maker Applique Cushion Cover Tutorial – Part 1: Cutting the Applique
We have a Cricut Maker...yay!!! It was recently gifted to us by Cricut along with an EasyPress 2 and some other goodies. I have to say, we are loving this machine. We had been wanting to get one for some time now so we are extremely grateful to Cricut for their generosity.
When the machine arrived, we had a quick play cutting a bit of fabric to see how it performed. We really wanted to see the rotary blade in action and that is a real winner for us. It cuts beautifully.
It worked so well on our very first cut that we decided to head straight on into an applique project. So we made some cute, applique cushions and we are going to share that with you in the tutorial below.
Where can you buy the Cricut Maker in Australia
You can purchase the Cricut Maker, here in Australia, from Spotlight, Big W, Harvey Norman and Costco.
Here is the link to purchase a Cricut Maker in the US.
Here’s what you need
PLEASE NOTE: You may get away with less fabric than we have quoted below. We wanted to make sure you had enough fabric for the project.
- Fabric 1 – ½” yard (½” meter)
- Fabric 2 – ½” yard (½” meter)
- Backing Fabric – ½” yard (½” meter)
- Fusible adhesive ( we used Wonder Under)
- 20-inch zip
- Matching thread
- 9 buttons measuring ¾”, or you can cut circles using your Cricut Maker.
- 18″ or 20″ cushion insert.
Cutting Instructions
- Fabric 1 – cut five squares measuring 7″x 7″
- Fabric 1 – cut I piece of fabric measuring 9″ x 12″ (for the 5 flowers)
- Fabric 2 – cut four squares measuring 7″x 7″
- Fabric 2 – cut I piece of fabric measuring 9″ x 12″ (for the 4 flowers)
- Backing – cut 2 pieces of fabric measuring 10″ by 19″
Watch the step-by-step video below or scroll down for written instructions
Method
- Take the 9″ x 12″ piece of fabric (from Fabric 1) and place a piece of fusible adhesive (that is slightly smaller) over the wrong side of the fabric. Ensure you are placing the adhesive with the glue side face down.
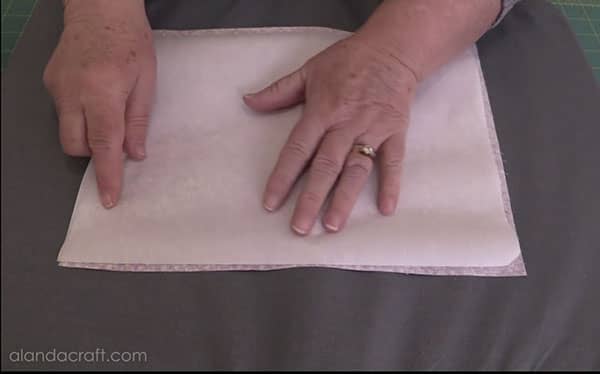
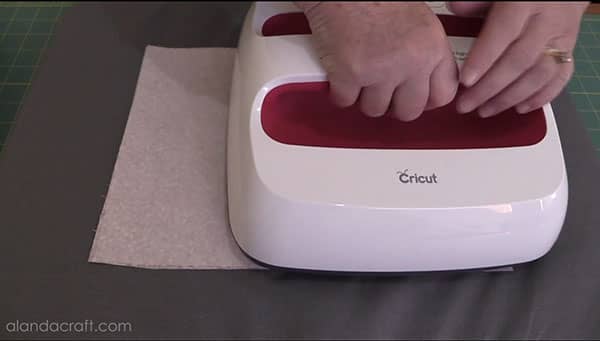
- Apply the fusible adhesive to the back of the 9″ x 12″ piece of fabric using an iron or in our case an EasyPress 2. We used a temperature of 155c (315f).
- Leave it to cool.
- Repeat this process with the other 9″ x 12″ piece of fabric for Fabric 2.
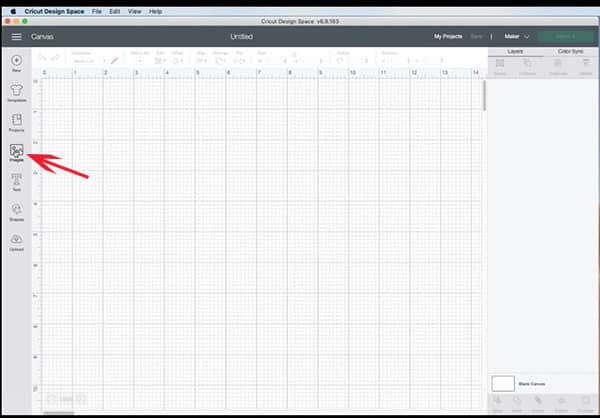
- Open up Cricut Design Space on your computer (or ipad /tablet if you have it connected to the Cricut Maker).
- Select NEW Project

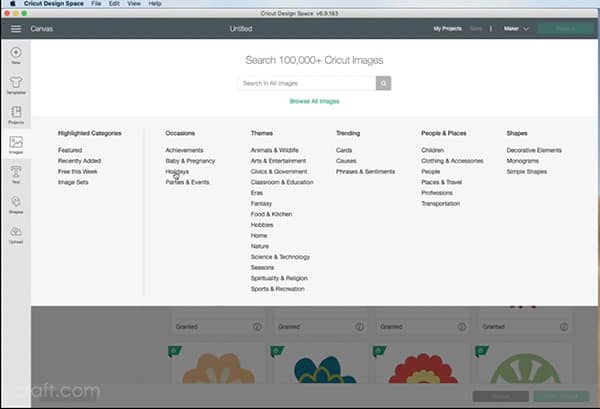
- On the next screen, you will select IMAGES from the left-hand menu bar.
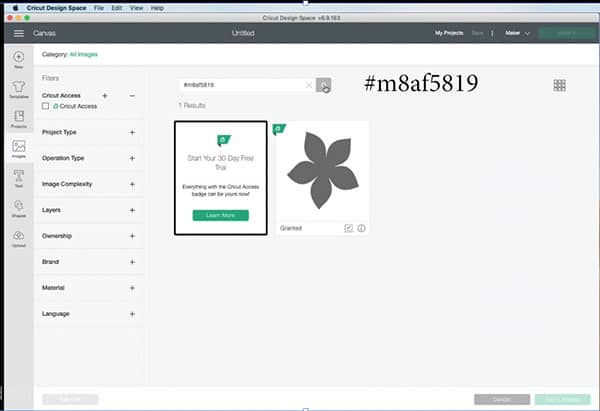
- You may see one of the two screens shown below. Both of them have a search field so just enter the following number (including the hash symbol) to find the flower that we are using for this tutorial – #m8af5819
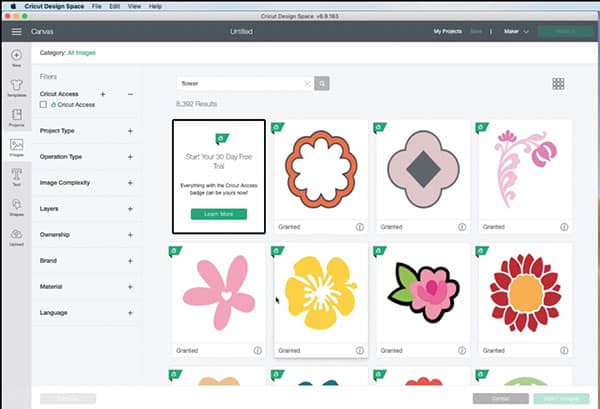
- You should now see the flower come up in the search results.
- Note that you will need to sign up for the free 30-day trial in order to use this file.
- Select the flower and then click INSERT IMAGES.
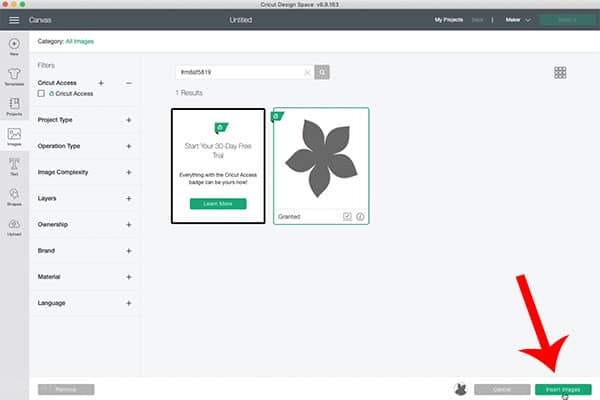
- The flower will appear on the canvas.
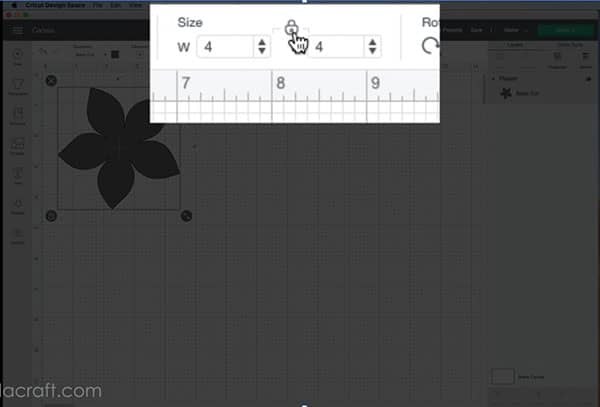
- To resize the image you can click on the arrows to drag the image out or you can key the size of the image in the fields at the top of the screen.
- Change the size to 4″ x 4″.
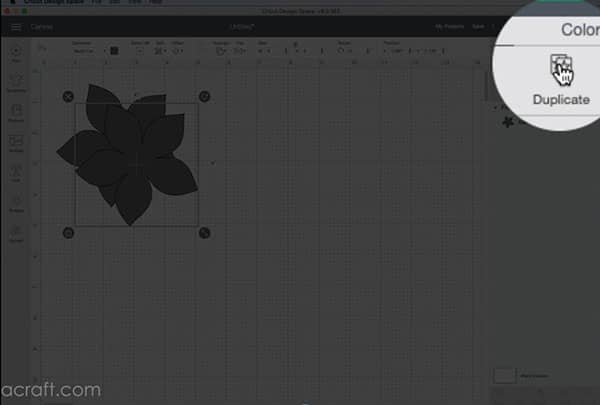
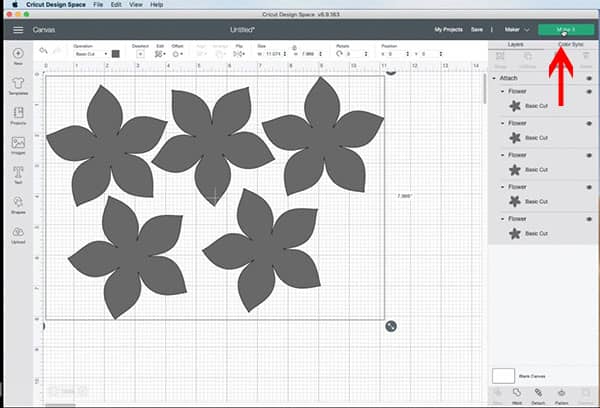
- We will need 5 flowers in one color so we need to duplicate the design. This is really easy. You can right-click on the design and select ‘Duplicate‘ or you can go to the Duplicate icon in the menu bar and press it for how many copies of the design you require.
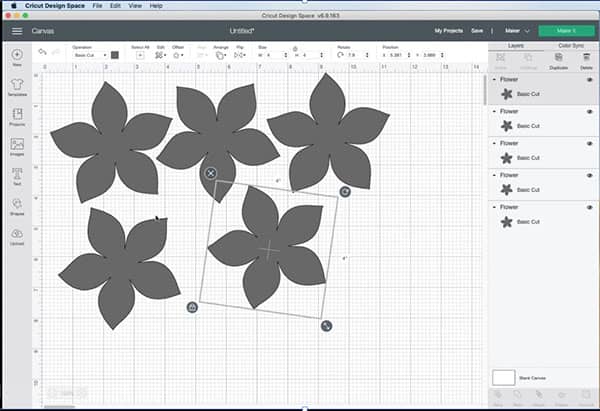
- The cutting area on the Cricut mat is 11.5 inches and we have cut our fabric length at 12″ x 9′ inches. So our images need to fit within those parameters.
- You can turn the images to fit using the rotate arrow in the corner of the design. Keep moving them until they sit within a space of 11.5″ x 9″.
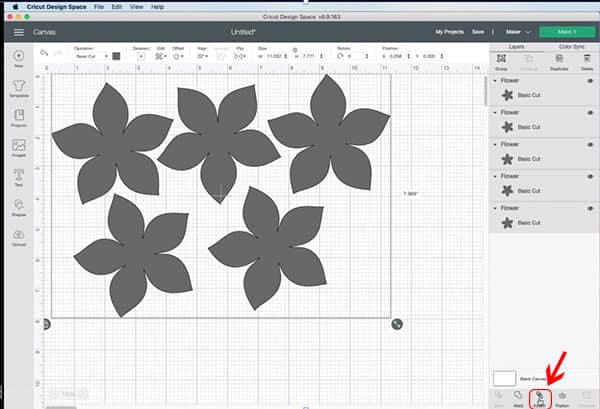
- Once you have the design spaced how you want it, click on the ‘Attach’ button on the lower right menu.
- This will now group the design pieces together so that they move as a group and not as individual flowers.
- Now select the Make it icon on the right-hand side, at the top of the screen.
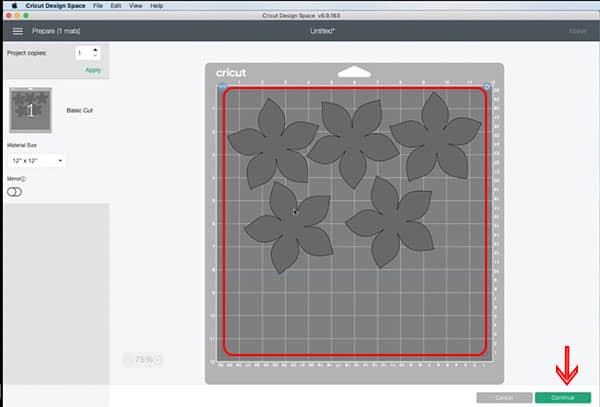
- On this screen, you can check that your design fits within the red border (I have enlarged the border so that you can see it on the screen).
- Our design fits nicely and looks good to go, so we can press the ‘Continue’ button.
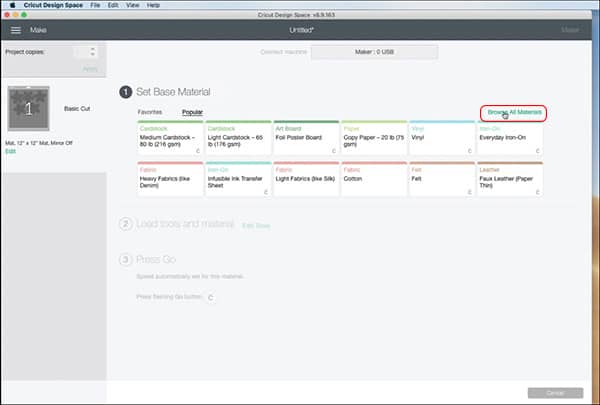
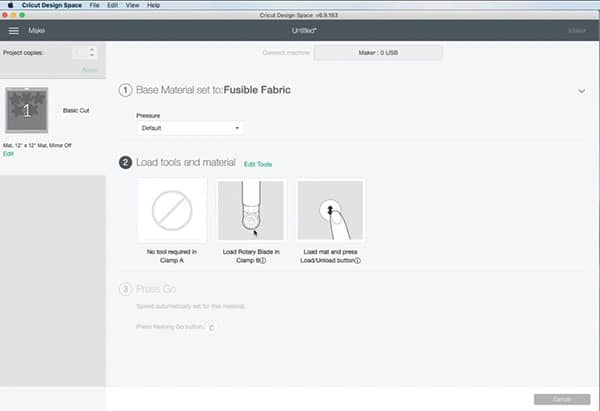
- The machine will now ask you to select the material that you are using. Select the Browse all Materials button.
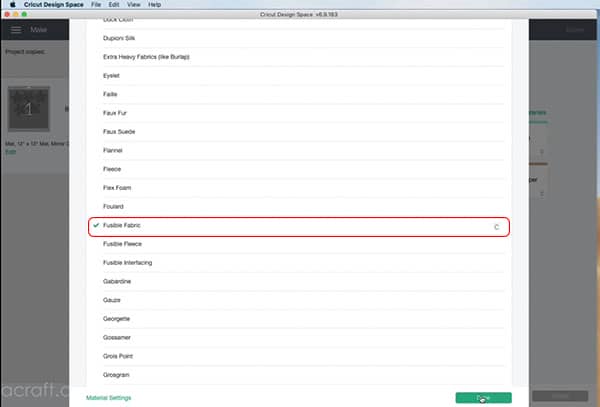
- We are using fabric with fusible adhesive attached so we select Fusible Fabric and select DONE.
- Our clever machine now tells us that to cut Fusible Fabric we will need to insert our rotary cutter into the machine housing.
- Go ahead and change it if you need to. Watch the video above on how we did this.

- Now we are ready to load the mat.
- Remove the fusible backing from the fabric if you haven’t already done so.
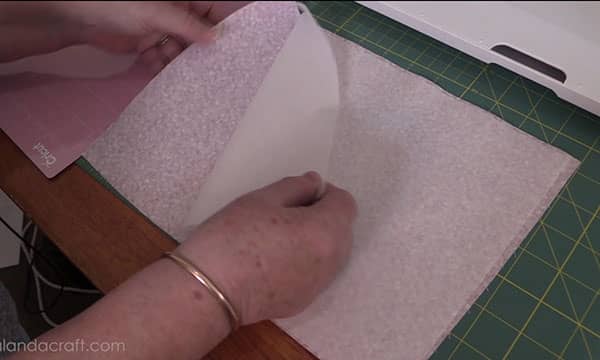
- Remove the dust cover from the fabric mat.
- Place your piece of fabric right side down onto the mat and smooth in place.
- Remember to keep the cover that you peel off the mat and put it in a safe spot. When you have finished cutting, replace the dust cover over the mat to protect it.
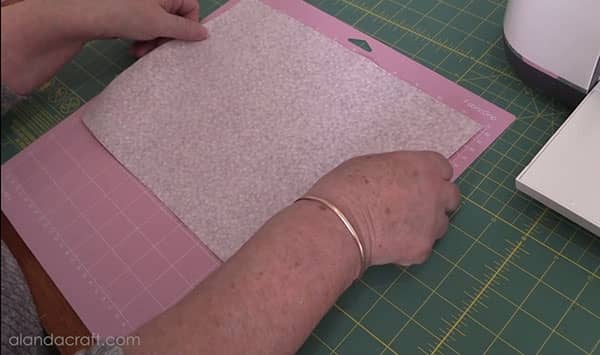
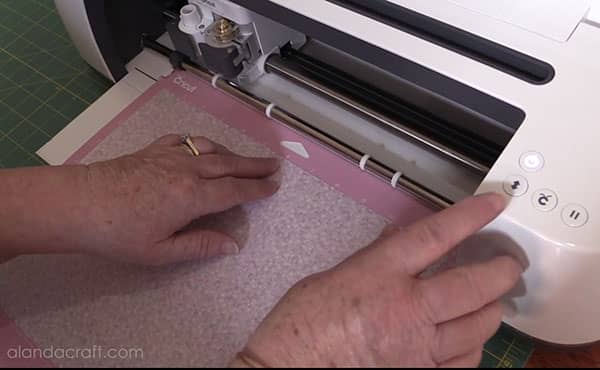
- Place the mat between the lugs and press the load/unload button.
- The mat will load into the machine ready for you to press the cut button. This is the Cricut button next to the load button.
- Once your flowers are cut, gently remove the excess fabric and then remove the flowers using the spatula.
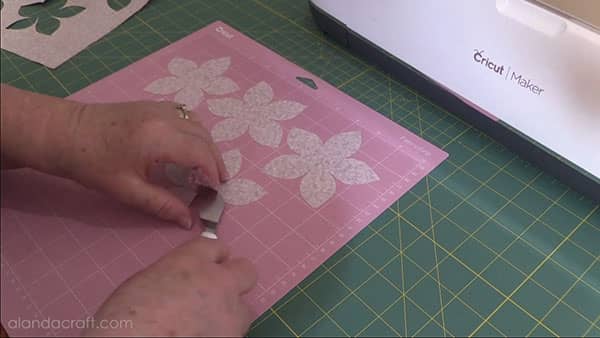
- Just look at the precise, clean cut that the rotary cutter blade has done. I have to say I am very impressed with the Cricut Maker.
- Repeat this process for the other colored fabric. You will need 4 of those.

Now that you have the flowers created, we can continue on finishing the cushion cover.