Easy 4-Patch Quilt Block Method (Tutorial)
I’m always amazed at the patience of so many quilters who make those amazing quilts out of tiny bits of fabric. I don’t think I will ever get to that stage but I sincerely admire those who have that ability to spend hours on their creations.
Personally, I am a fan of quick quilts and I love trying to speed up the process of what I am creating hence why I love this method of creating a 4-patch quilt block. It is quick and easy to put together without having to cut up tiny blocks and piece them all together individually.

It’s also a great way of using up your charm squares or you could cut your own 5″ x 5″ squares. Plus, you could use them in so many different sewing projects – quilts, tote bags, cushion covers, fabric journal covers, pot mitts and more.
So let’s get started and show you how it’s done with our step-by-step tutorial.
Tools Used in this Tutorial
You can watch the video tutorial below or scroll down for the written instructions
(Can’t see the video? You may have an ad blocker installed. You can turn it off or you can watch the video on YouTube.)
You will need 4 charm squares for this project (or you can cut your own 5″ x 5″ squares).
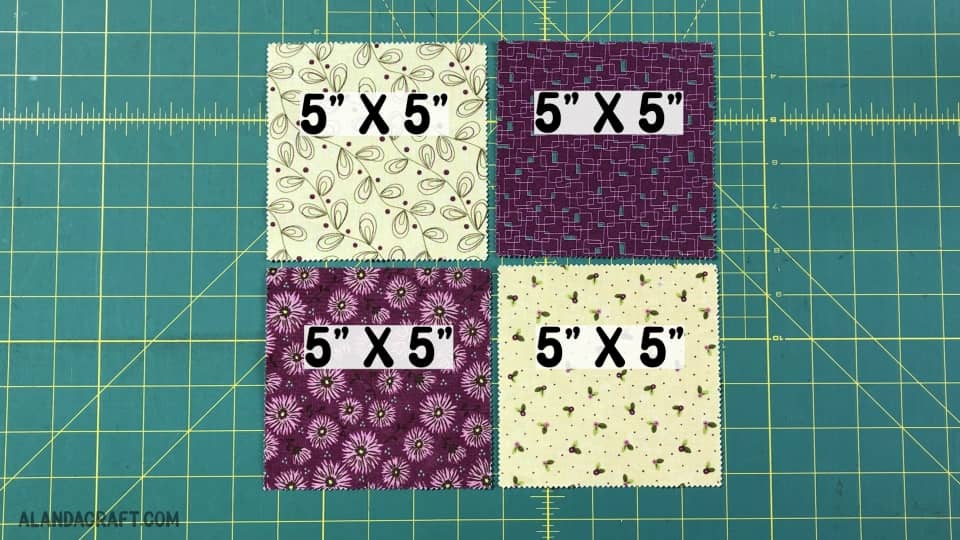
You will also need to arrange them like the image below. So two dark fabrics running diagonally with each other and the same with the light fabrics.

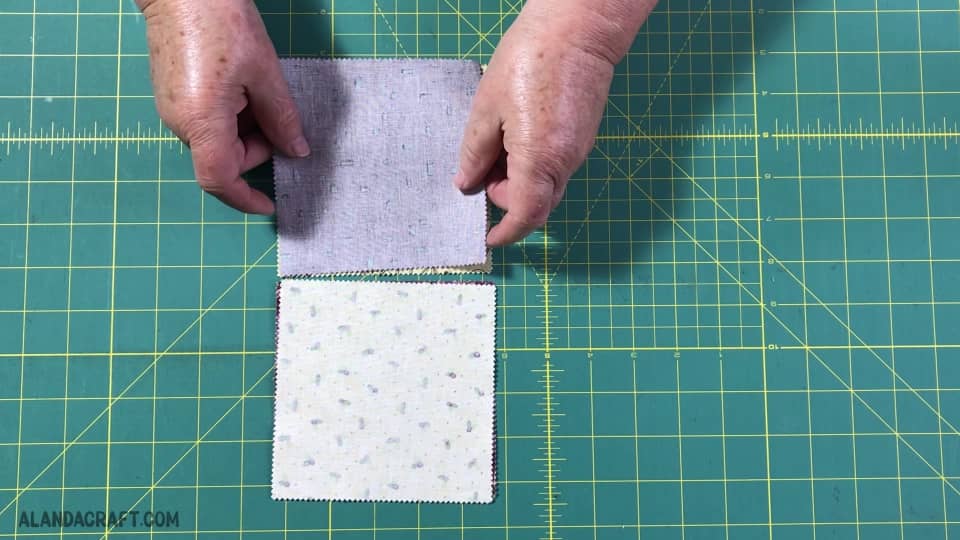
Place the dark fabric over the light fabric (right sides facing each other) and repeat that for the other with the light fabric over the dark fabric.
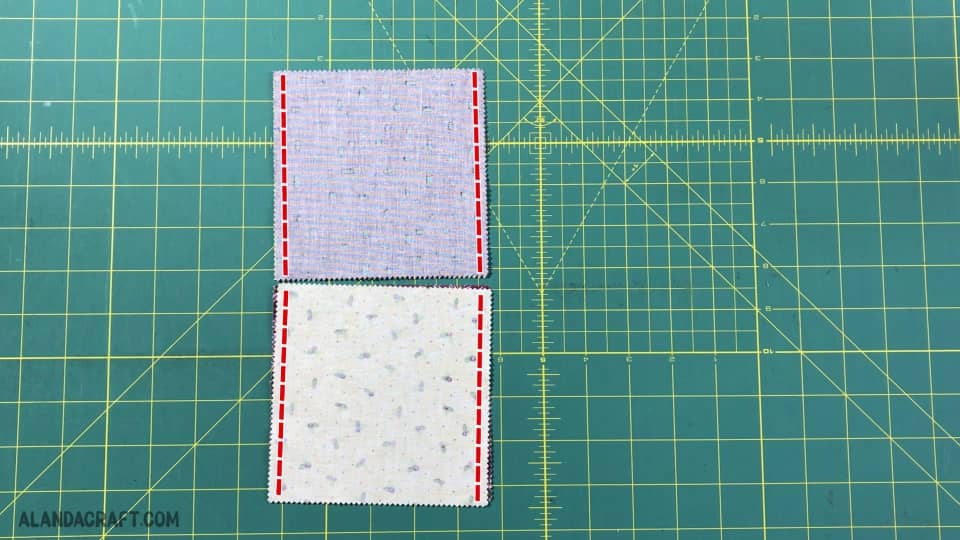
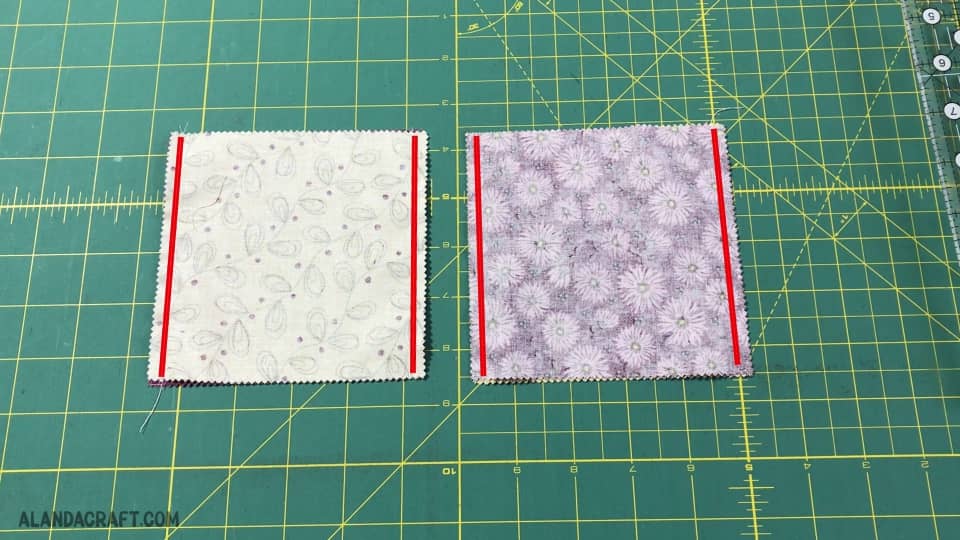
Sew along both edges (for both pieces) with a quarter inch seam.
Lay your pieces on your cutting mat with the seam lines that you just have just sewn running vertically on your mat.
Now take your ruler and line it up on the 2 1/2″ line. (Essentially, you need to cut through at the centre point of your piece so if you have sewn a nice quarter inch on each side, then measuring at 2 1/2″ will be right in the centre. )
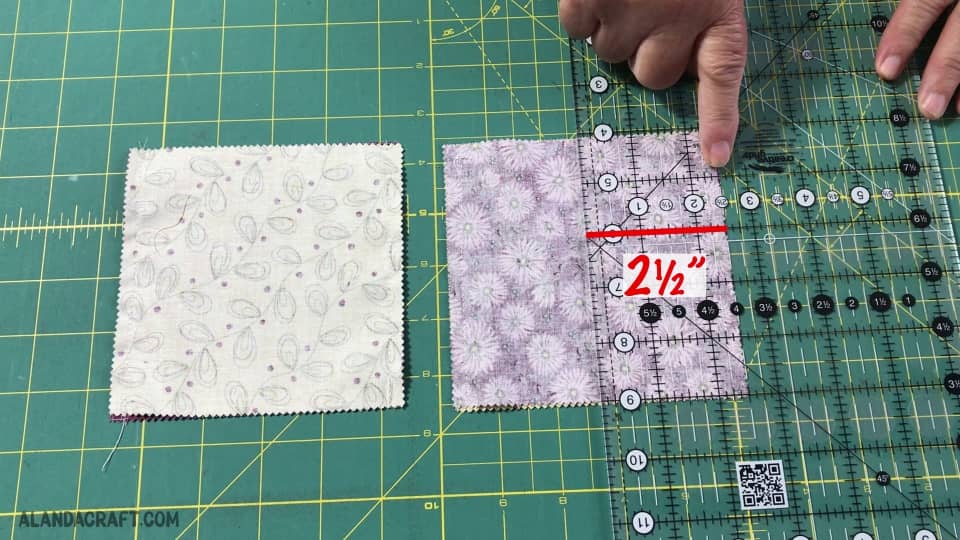
Now you can cut through to create two separate pieces. Repeat that with the other piece.

You should now have 4 strip pieces with alternating colours. Press each of these pieces towards the dark side of the fabric. This will help later when it comes to aligning the seams.
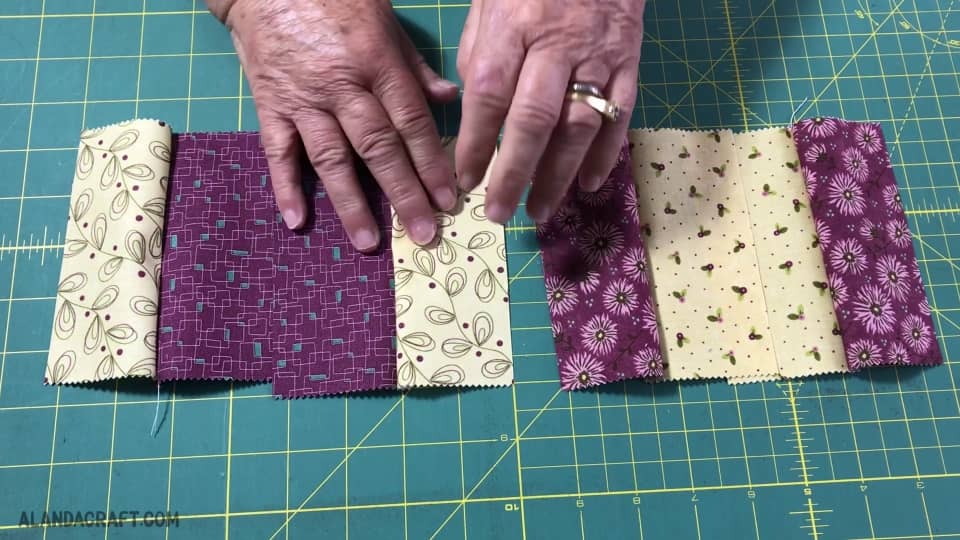
Now that our 4 pieces have been pressed nicely, we need to lay them out on our table as shown in the image below. So we want matching matching set of pieces on the bottom and the other set of matching pieces above them.
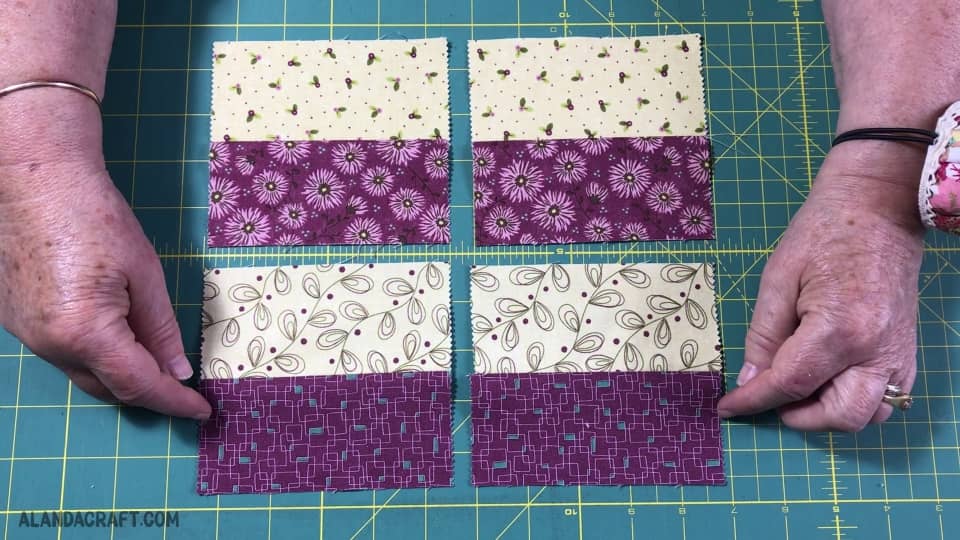
Take one of the top pieces and lay it over the bottom piece with right sides facing each other.
You should have alternating fabrics facing each other – so in my case, I have the cream colour facing down on the purple.
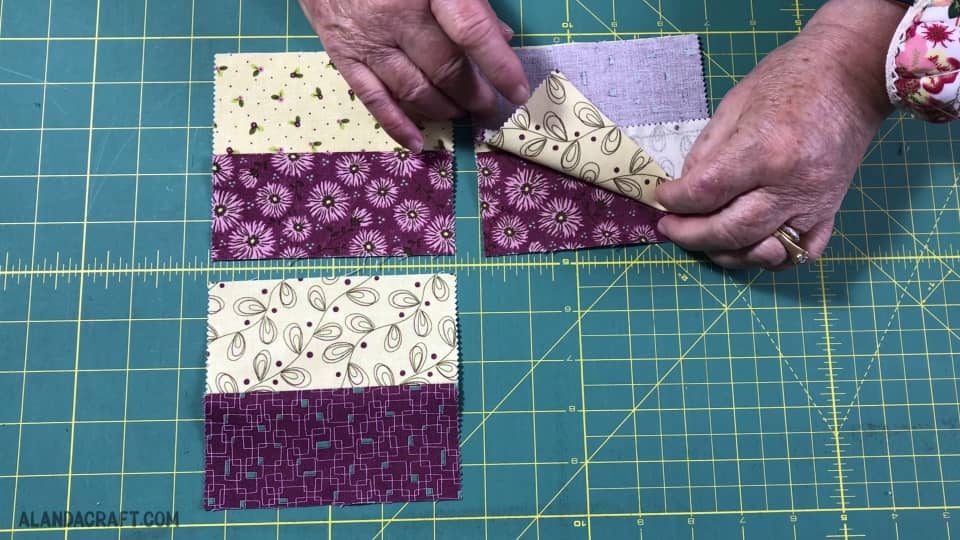
Repeat that with the other squares.

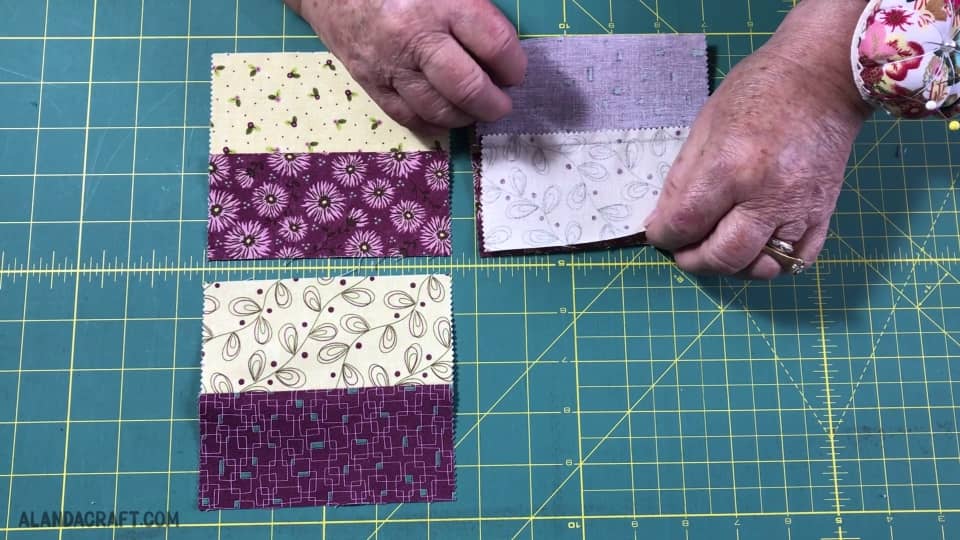
Sew down each edge with a quarter inch seam.

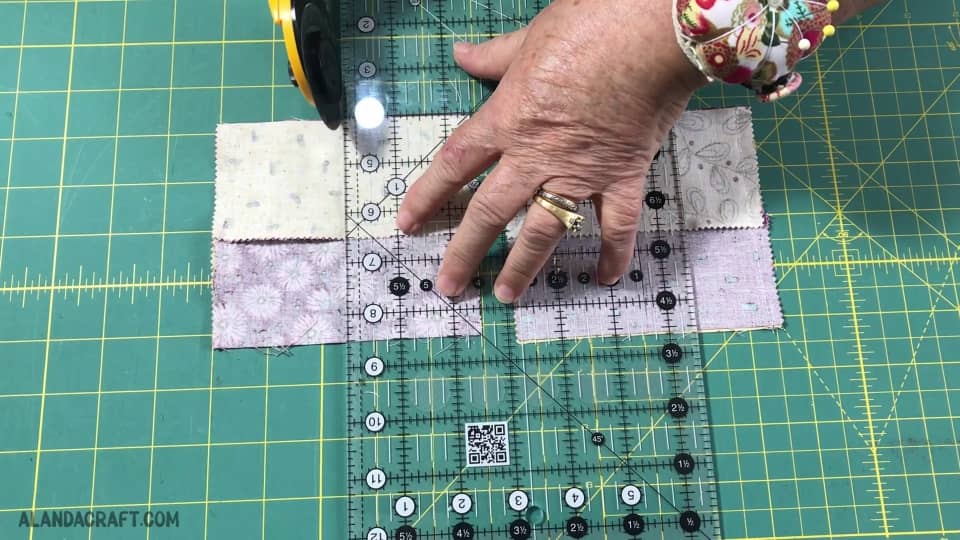
Now lay the pieces down on your table with the centre seam line running horizontally.
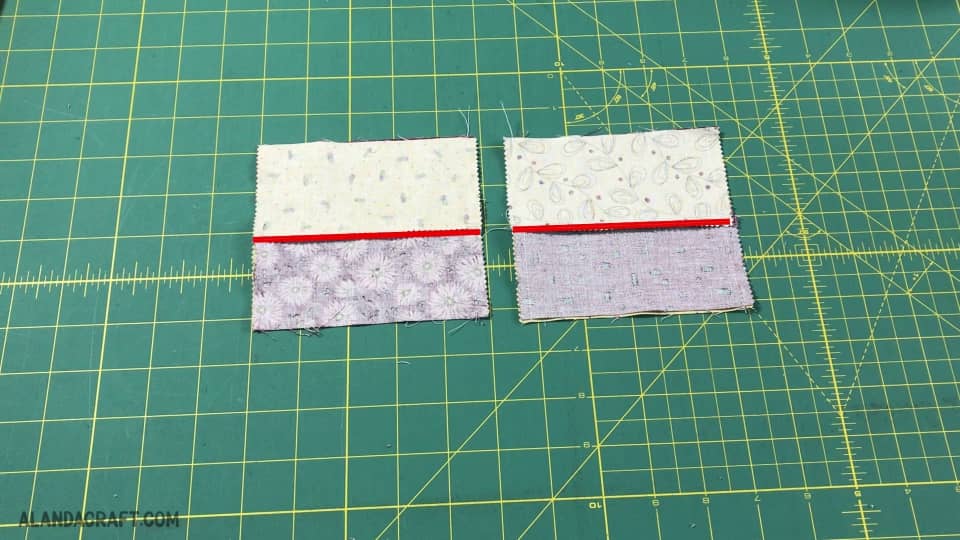
Line your ruler and line it up on your piece at the 2 1/2″ line and cut. This should be the centre of your piece.
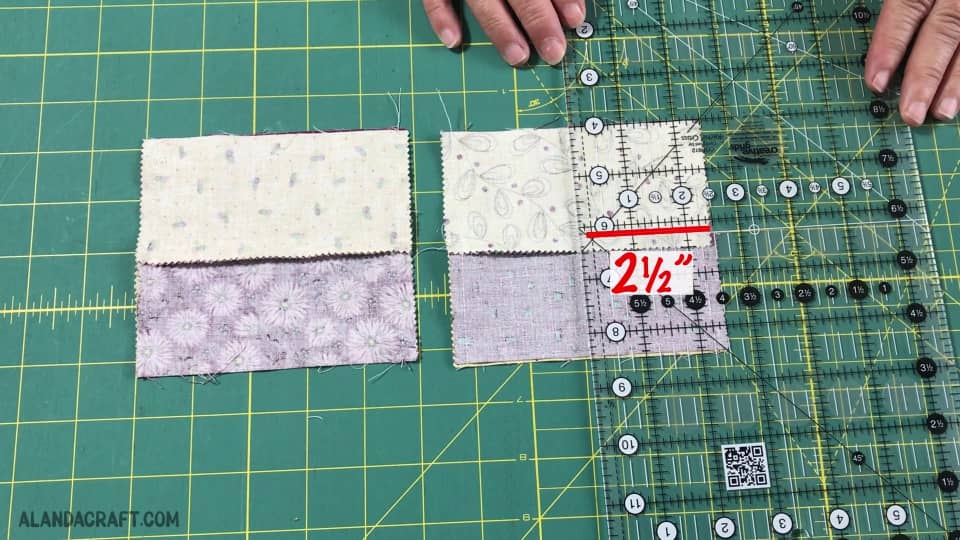
Repeat this on the other piece.
You will now have four 4-patch blocks without having to sew all those little squares together.
