How to Resize Multiple Items on Your ScanNCCut Machine
We received an email recently from a reader who had purchased ScanNCut files on a USB but was having difficulty resizing them when she brought them into her machine. When she opened the files on her machine they contained multiple parts and she wanted to resize them proportionally so that they all resized together.
I can completely understand her frustration at this as it isn’t entirely obvious on the machine what you need to do. Fortunately, it is quick and easy once you know-how, so let’s get started.
Watch the video below or scroll down for written instructions.
- Open up your FCM file in your ScanNCut. (Watch the video if you need to see this step in action.)
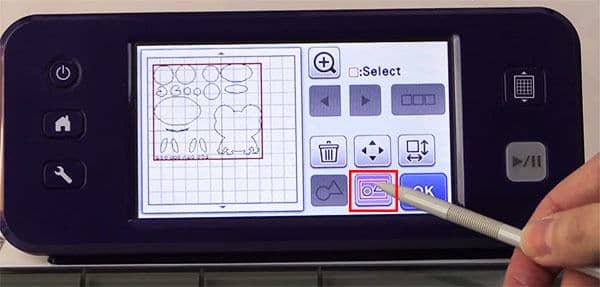
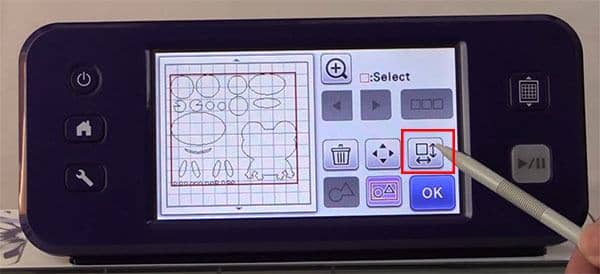
- Select the option as indicated in the image below.
- Click the SELECT option.

- Click the SELECT ALL button.
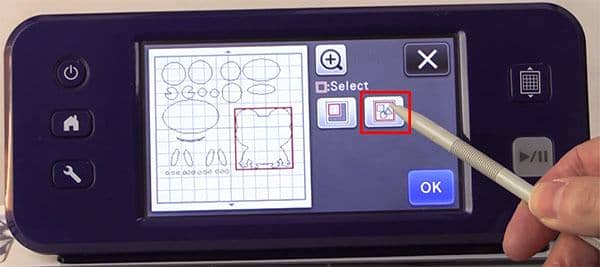
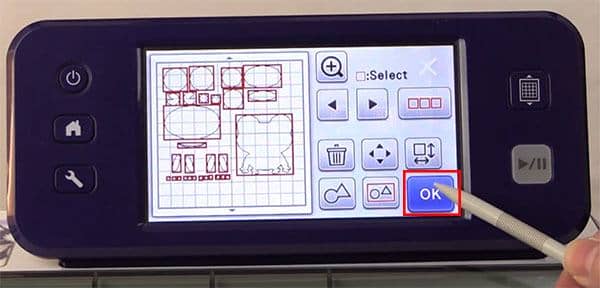
- Click OK.
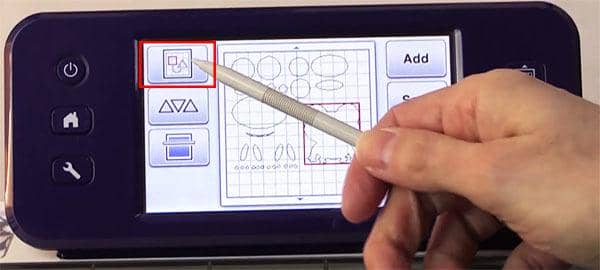
- Click the GROUP option. This will now group everything together to enable you to resize all the patterns proportionally.

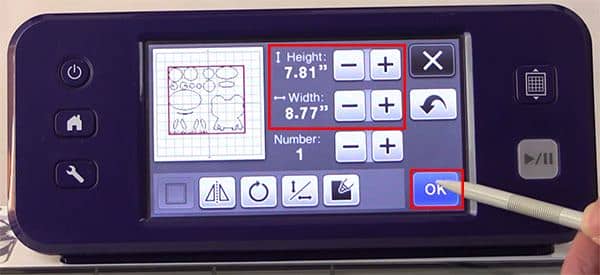
- Click the EDIT option.
- Make changes to the size by pressing the + and – buttons.
- Once you are happy with the size, click the OK button.
- If you need to ungroup the patterns, simply click the GROUP option again.