EASY Halloween Table Topper Tutorial – Step-by-Step
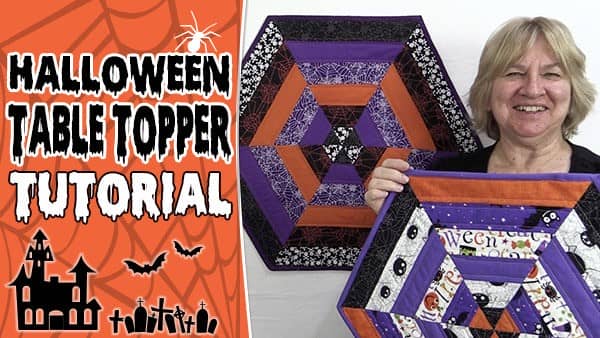
In this tutorial, I am going to show you how to make this awesome Halloween Table topper.
In Australia, we don’t really celebrate Halloween. Even so, I always make sure I have a bowl of treats to give away, but we very seldom get anyone out trick or treating. And because we don’t celebrate Halloween, it makes it a bit of an issue when buying fabric, we just don’t have the selection that our US counterparts have.
But that doesn’t mean we should be lax when it comes to creating Halloween decoration tutorials for all our lovely US followers. So with that in mind, we always add one or two Halloween tutorials to our YouTube channel. This year we have gone with a Halloween Table Topper. It’s quite easy to make and looks amazing, plus we will show you how to bind a hexagonal design. So let’s get started.
We have two sizes that you can make. The large table topper measures approximately 26½” from point to point and the small measures approximately 20½” from point to point.
Watch the video tutorial below or scroll down for the written instructions
Quilting Supplies That You Need
Small Halloween Table Topper
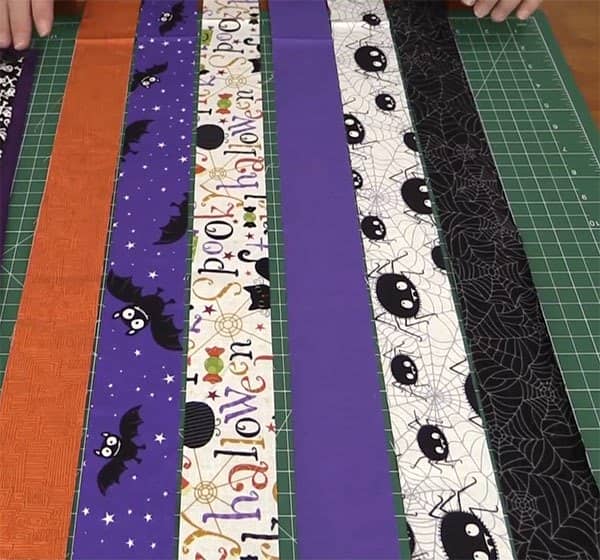
- 6 strips measuring 2″ x width of fabric (for the quilt front)
- 3/4 yard fabric (for the backing)
- 3/4 yard of quilting batting
- 2 strips measuring 2¼” x width of fabric (for the binding)
Large Halloween Table Topper
- 12 strips measuring 2½” x width of fabric (for the quilt front) – Note: You will need two strips for each colour.
- 1 yard fabric (for the backing)
- 1 yard of quilting batting
- 3 strips measuring 2¼” x width of fabric (for the binding)
NOTE: When making the Large Table Topper you need to sew two sets of strips is because each strip is wider ( notice that they are cut at 2½” for the large table topper and only 2″ for the small table topper). So when it comes to cutting the triangles you will need to move your triangle ruler further up the strip to take this into account. This means you will have less fabric in the first strip set to make the 6 triangles. And this is why you need the second set of strips.
Once you have cut the triangles you construct the large table runner in the same manner as the smaller one.
TOOLS USED IN THIS TUTORIAL
You can check the latest prices at Amazon by clicking on the links below:
How to make the Halloween Table Topper
- Start by laying out your strips in the order you would like them to appear. Watch the video below for tips on best layout options.
- Sew the 6 strips together using a quarter inch seam. (If you are creating the large table topper, you will need to do this twice. So you will end up with two lots of strips sewn together. They should be identical so ensure that you sew the 6 strips in the same way for each.)
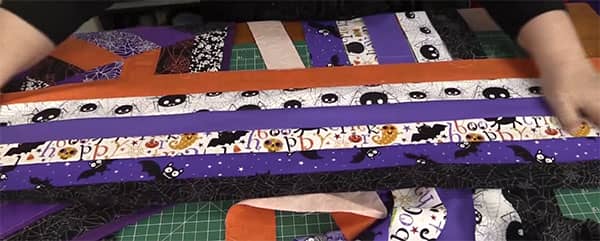
- Iron the seams all in one direction.
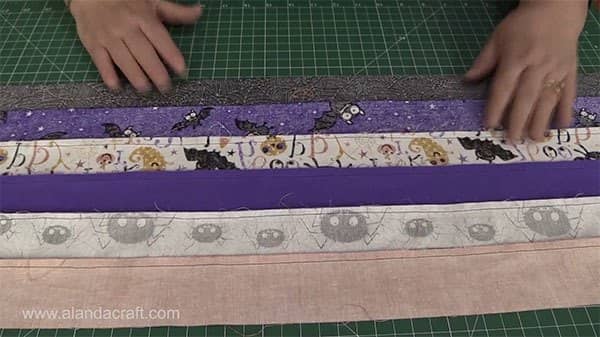
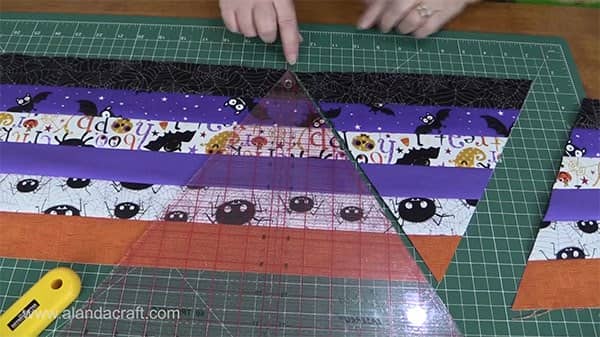
- Cut your strips into triangles using a 60° triangle ruler or your quilting ruler. (Click here for a tutorial on cutting 60° triangles.)
- You should end up with 6 triangles.
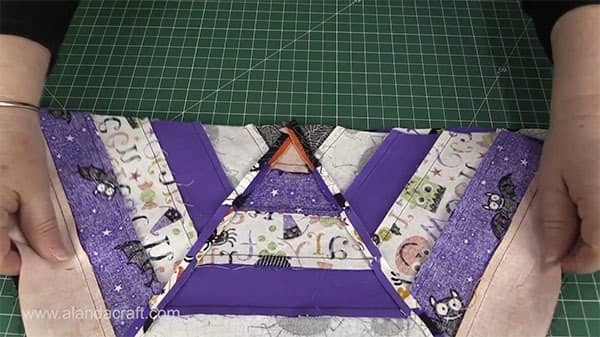
- Lay out the triangles in the pattern you desire.

- Sew together in lots of three using a quarter inch seam.

- Now sew the two pieces together with a quarter inch seam to form your quilt top.
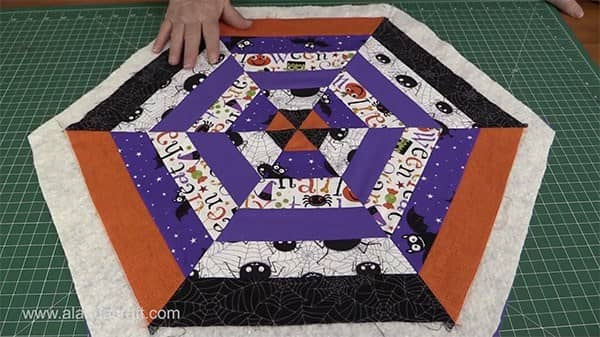
- Use your quilt front to cut a template from the backing fabric and batting. Leave about an inch or two around all sides to allow for quilting.

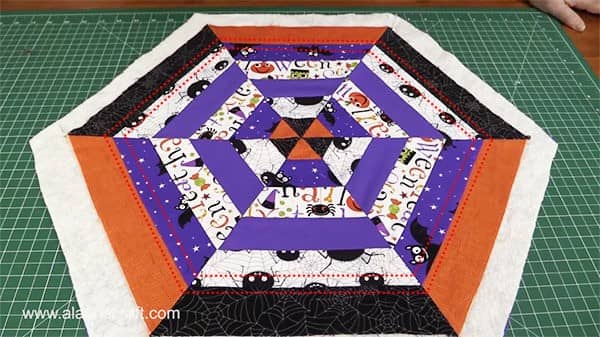
- You can quilt this in any way you like but to start with, we stitched in the ditch along the long seams (as shown by the red lines in the image below).
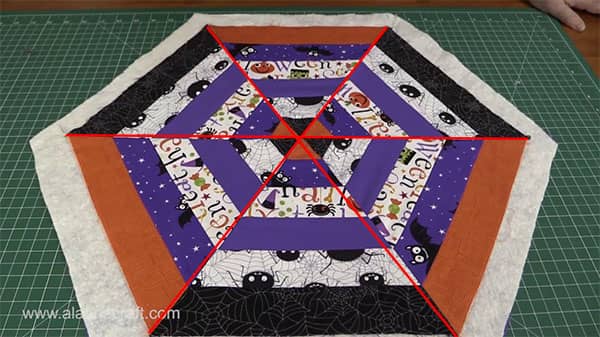
- Then we stitched on either side of the seams running around the quilt. I’ve only illustrated on one of the seams in the image below as shown by the dotted red line, but we stitched around all of the seams.
- Trim your quilt on all sides.
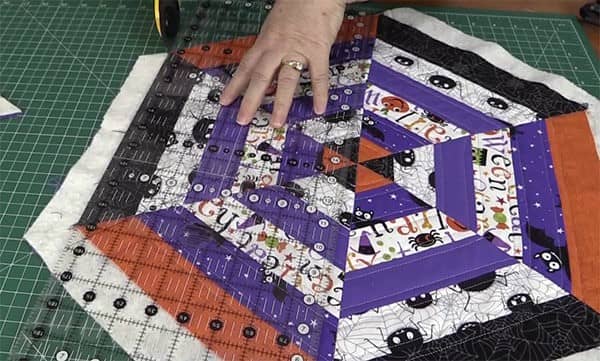
- Now you need to add your binding. Watch the video below for tips on adding a binding to a hexagon-shaped quilt.