Well first up – Why would a quilter need a 3d printer?
To be honest, I thought the exact same thing when we were contacted by Bambu Lab to review the A1 Mini 3D printer, and we initially declined the offer because we weren’t sure that it was something our audience would be interested in.
So what made us change our mind?
Well It was when we found out that you can 3D print all sorts of tools and gadgets for sewing, quilting, knitting, crochet, paper crafts, the home and garden and so much more.
My granddaughter’s husband is an avid World of Warcraft player and he makes all sorts of figures and landscapes for his game with his 3D printer. Paula and I are also avid board game players and we can see that with the A1 mini we will be able to make lots of items for our different board games.
These are just some of the things you can make on a 3D printer and there are literally thousands of 3D files that you can download for free.
Watch the video to see how an A1 Mini 3D Printer can help you create practical items for your quilting and sewing needs.
Can’t see the video? You may have an ad blocker installed. Click Here to watch on YouTube.
Where Can You Buy the Bambu Lab A1 Mini?
Note: There are two versions of the Bambu Lab A1 – the MINI which is featured in this review and are larger version.
- Bambu Lab A1 Mini – Official Website
- Bambu Lab A1 (Larger Version) – Official Website
Never Used a 3D Printer
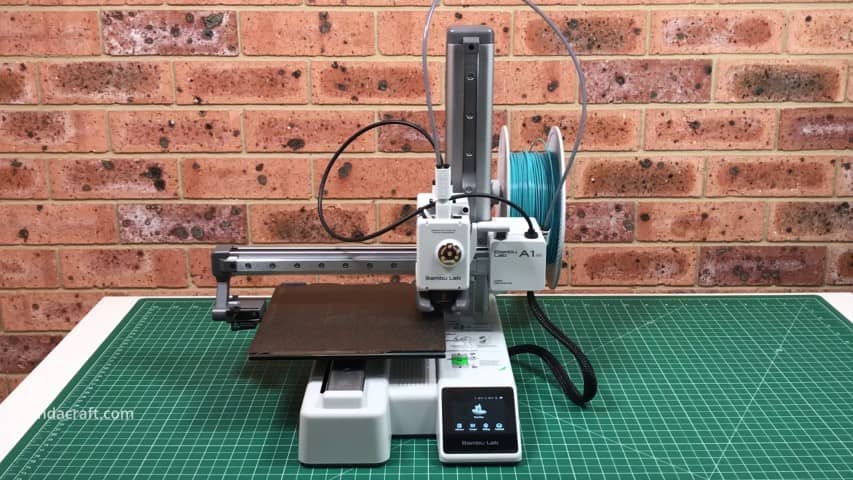
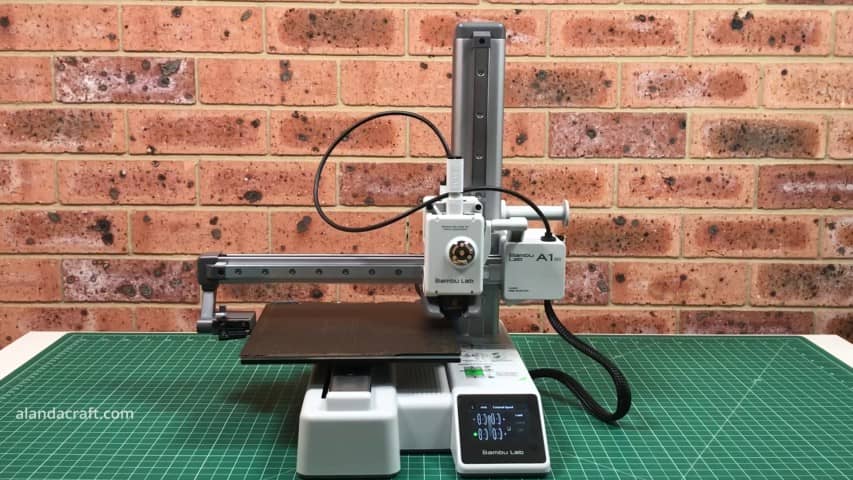
Now bear in mind that we had never used a 3D printer before so we were totally new at this but the Bambu Lab A1 mini has been made with us newbies in mind and it is one of the easiest 3D printers to setup and get started with.
It comes out of the box already assembled so you only need to remove the packaging, some cable ties and a clip on the side (which is only there to keep everything in place during shipping).
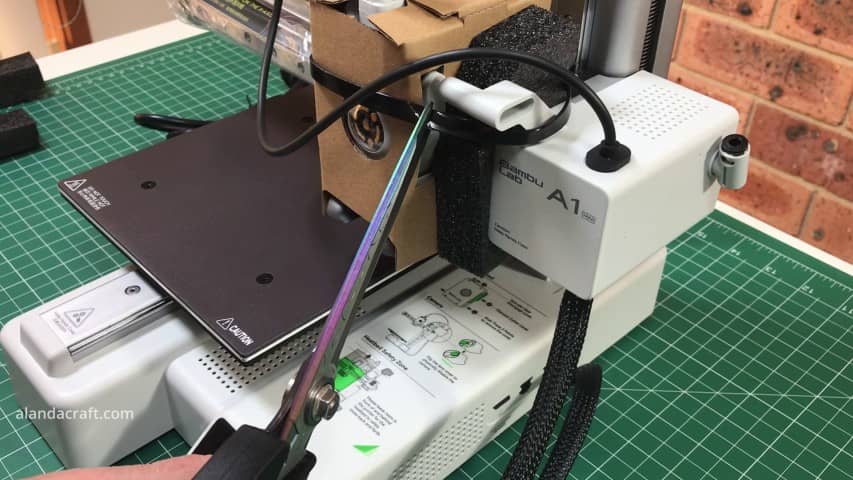
And the manual is really easy to follow to take you through the steps of setting it all up. You just need to tighten a few screws, add the purge wiper and attach the spool holder which holds the spool of filament used for printing
You can get this filament in all sorts of colours and textures but for starting out they recommend going with PLA which is what we mostly used.
Cost of the Bambu Lab A1 Mini 3D printer
Now the machine as you see it here costs only $199 US which is an absolute bargain.
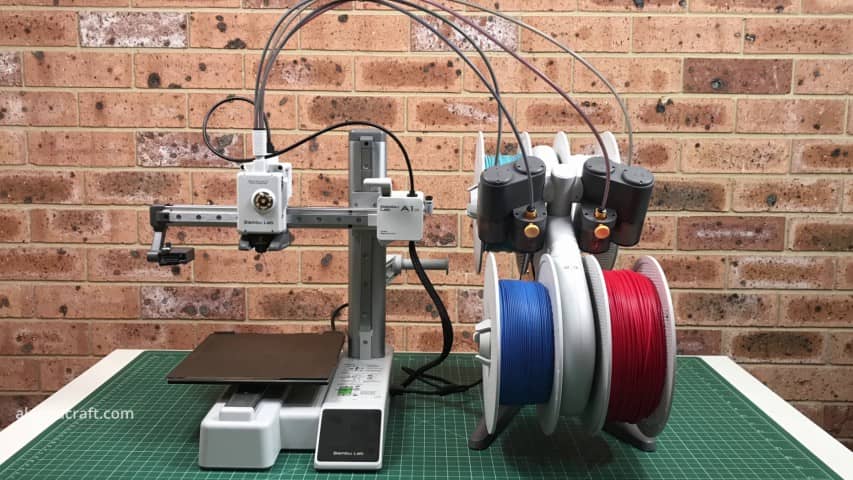
However, there is also a combo version that includes the AMS Lite which holds 4 spools. This allows you to print in multiple colours without changing spools which we will be showing you in a moment.
The combo version at time of filming is only $349 US.
Getting Started
- Once everything is setup, we just need to turn on the machine and follow the on screen steps to setup the WiFi connection and calibrate the machine.
- This is super easy. The onscreen display walks you through step-by-step. Bambu Lab have thought of everything with the beginner in mind.
- So let’s print something and since there are some inbuilt files on the machine itself we thought we should start there.
- And we went with what is apparently the first thing you should print when starting out and it’s called a ‘BENCHY’.
The reason you start with this is because it helps to test the machine to see if it is doing what it needs to do and to make sure everything is working properly.
This was super easy to do, just make the selections on the screen and hit PRINT.
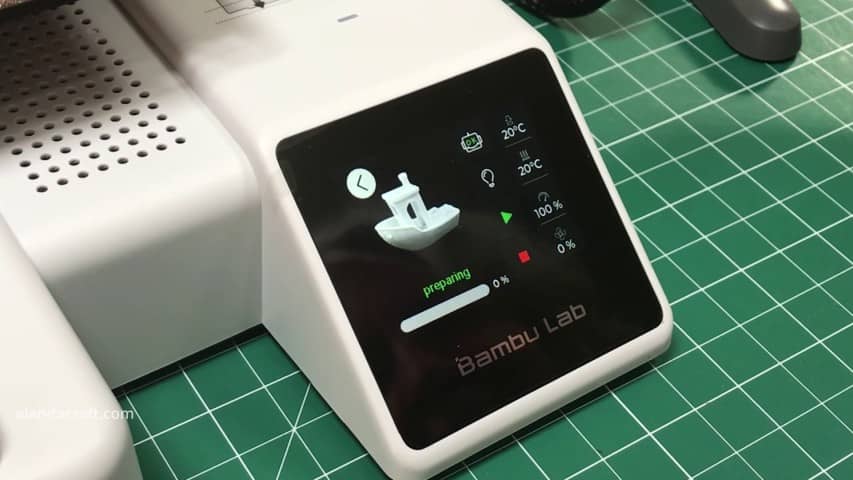
It then runs through a start up process where it heats the bed and makes sure everything is level and working properly and then it begins printing. The machine loads the filament and poops out some excess, so we built a poop catcher to attach to the side of the machine. “Poop” is the common term used for the excess.
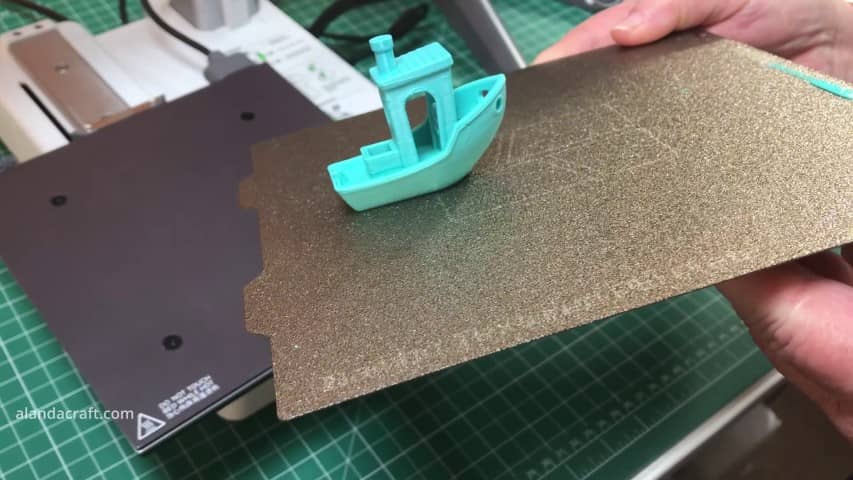
It’s amazing to watch the machine add new layers as it forms the little benchy. And here is our cute little benchy finished. When I showed my daughter she said it would make a great gift for a child along with one of those Little Golden Books about Scuffy the Tug Boat.
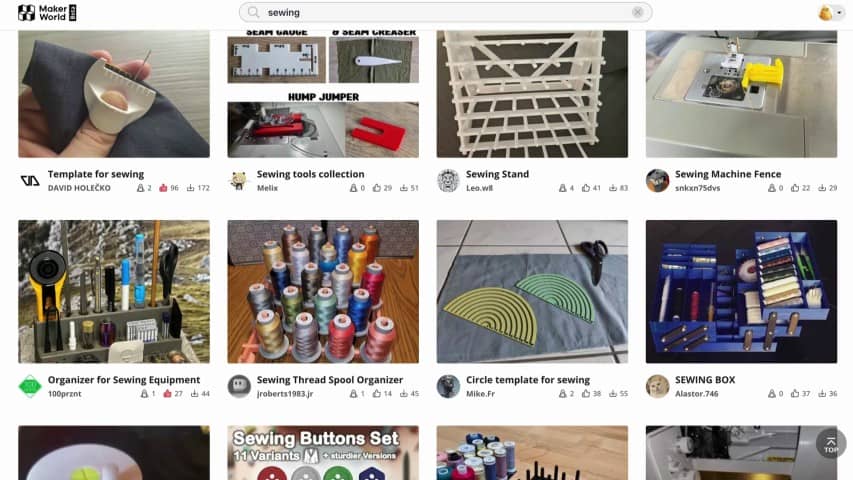
Now that our first test is done, we are going to get into the quilting and sewing files. For this we headed over to Makerworld.com which is the Bambu Lab files resource, and here is where you can download a ton of 3D files for free.
And bear in mind, this is just one of the many many sites (including Etsy) that you can go to, to get 3D files.
It’s just easier to start with MakerWorld because the files are ready to go for Bambu Lab 3D printers and as I have already said, they are available for free.
Things We Made
So I decided to start with something small and these are quilt block markers. I just need to click on OPEN IN BAMBU STUDIO and the file automatically loads into the Bambu Studio software which I have downloaded previously.
Now, the software looks complicated but it is actually pretty simple for a newbie like me. I just had to select my machine which is the A1 mini, the type of nozzle for my machine, and the filament I wanted to use which is the blue PLA Basic.
I also deleted files that I didn’t want to print and I moved things around so that everything was closer together.

Once I had everything ready, I just clicked on the PREVIEW tab and you can see here how it displays all the details of the print including the time taken, the amount of filament used and the cost. So for all of these letters it took around 28 minutes to print and cost approximately only 18 cents which is a bargain.

So now that I am ready to print, I just need to click on the PRINT PLATE button. This gives me a final pop-up just to confirm that everything is okay and then I click SEND.
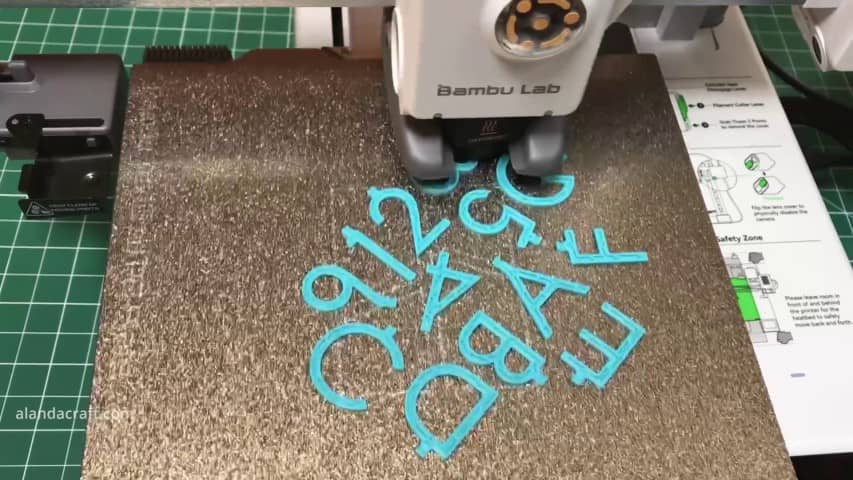
And off it goes, you can see how the machine draws the letters and numbers on the plate.
I am using a textured plate, I like this one as it gives a textured design on the base of the project. There are a number of different types of plates available that give a different look to the base of your design.
Here you can see how it builds the internal walls that create the structure. Its pretty amazing to watch it being created in real time, and you can see this in action the video.
And you can see how great these turned out, and there is a hole at the top where you can pop in a pin to attach them to your piles of fabric so you don’t mix them up.
You can see here where I have used the letters to keep track of my fabric piles when making a Mystery Puzzle quilt block.

More Things We Made
Here is my Ikea Skadis peg board now that it has a bunch of containers, hooks and holders attached. I printed out each of these items with ease.
Firstly, I made some thread holders in two different styles. One has a separate space for the bobbin. Then I added some hooks to hang my Cricut tools from, and a holder for the scissors.
There are also some containers that hold multiple thread spools and a matching bobbin, a cover for my snips, and a little container for holding a few bibs and bobs.

And remember that the best thing of all is that all of the files that we have used were free to download from Makerworld. It’s worth taking a look, believe me. There are just so many projects that you can make, and not only for quilting and sewing.
Sewing Machine Feet
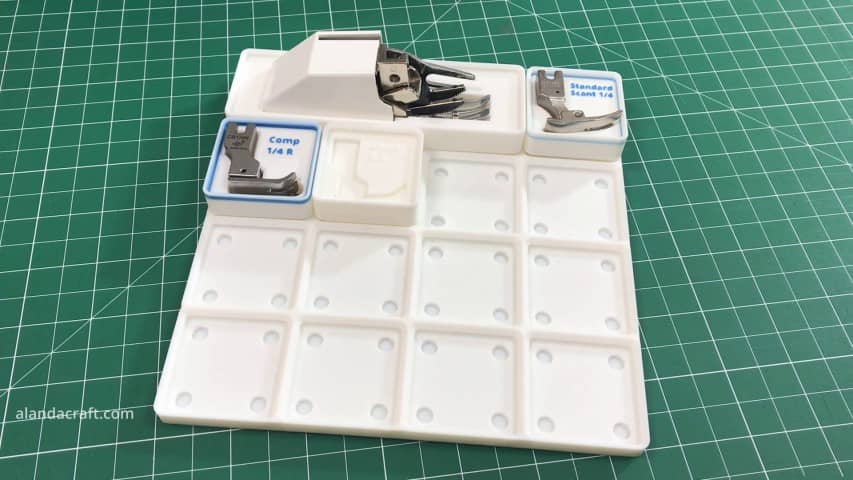
Here is a tray I made for holding my sewing machine feet. This was originally designed for Husqvarna feet but it worked quite well for my extra generic sewing feet from Madam Sew. And the tray fits nicely in the drawer of my sewing desk.
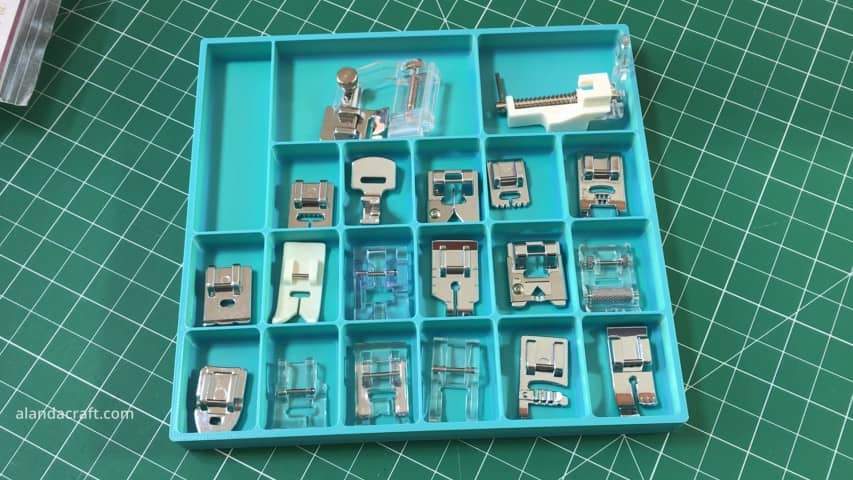
I also printed this tray for my Juki 2010 feet. And you can see that these fit perfectly into the recessed spaces, and each container has the name of the foot printed on it in a contrasting colour. This makes it really easy to see which foot is which a glance and you can choose the colour you would like the name printed in the software.
Knitting Needle Accessories
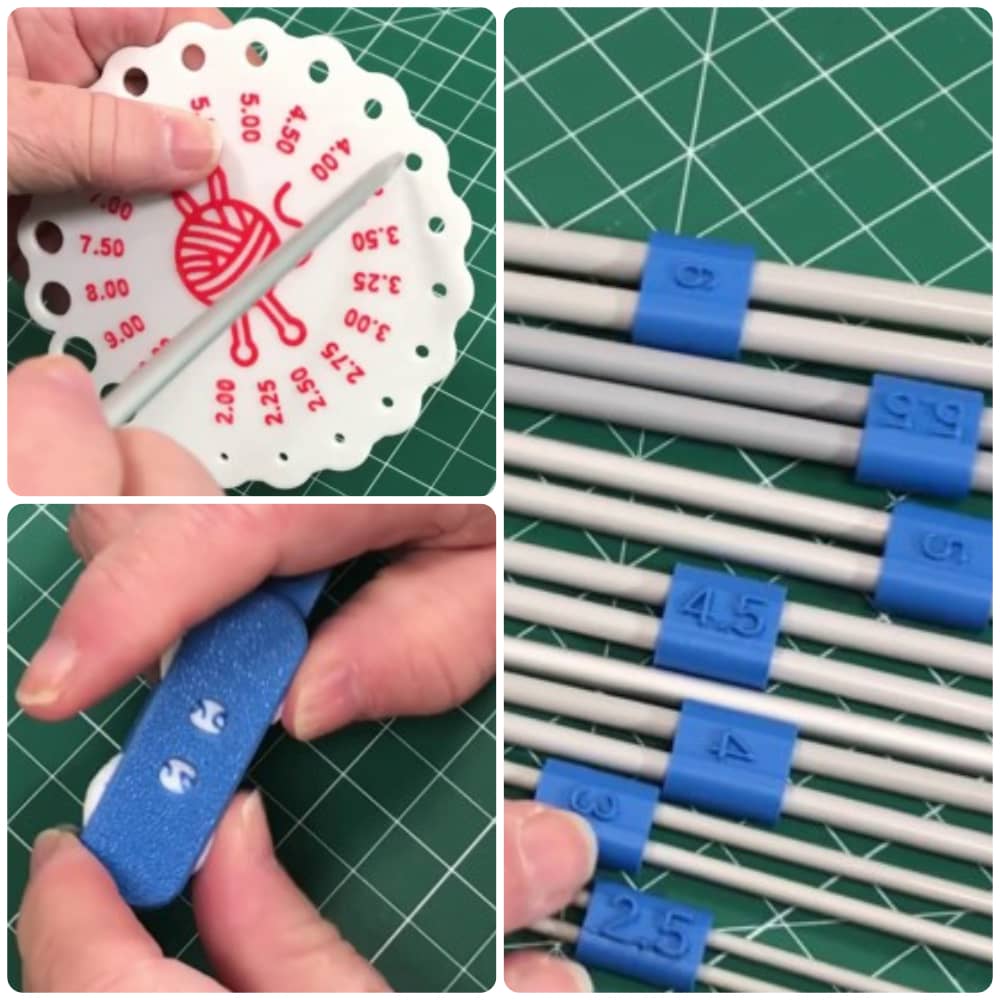
And if you do a lot of knitting and you have loose needles laying around and you’re not sure what size they are you can print out a knitting needle gauge. I have some sets of needles that are really old so putting them through the needle gauge made it easy for me to sort them into their correct sizes.
Then I printed out some knitting needle markers with the size printed on, to hold the needles together.
I also printed out a row counter as I have misplaced mine.
There is so much that you can do with this machine so lets take a look at what else we made. Believe me, we are having an absolute ball with it.
And once we started we found we couldn’t stop. We just kept on creating and here are some more things that we have been making.
Zipper By The Yard Spool
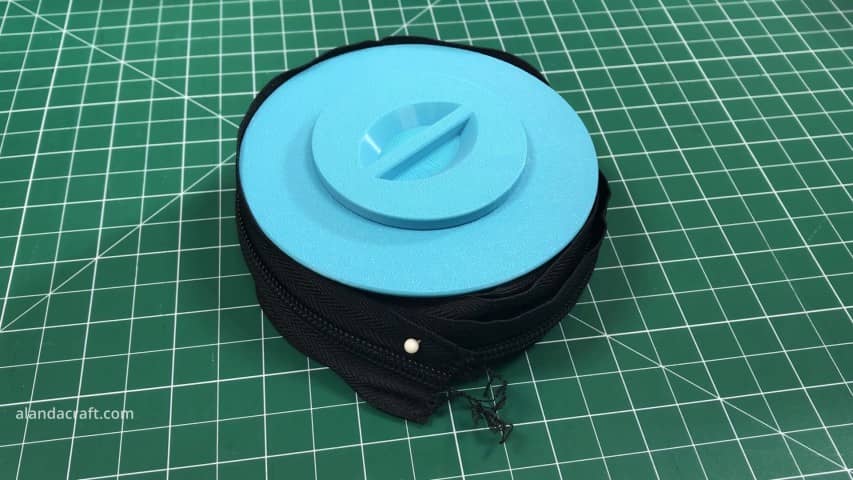
We tend to purchase our zippers by the yard and they often unravel and get messy. So this is an ideal way to keep them tidy. The holder was made in 3 pieces and then screwed together to form the spool. We made the small version but we will be making the larger one for the rest of our zips.
And it has a neat little feature where the cap is on the top of the spool. It unscrews to open a container where you can store the zipper pulls. So everything is neatly in the one place. Love it.
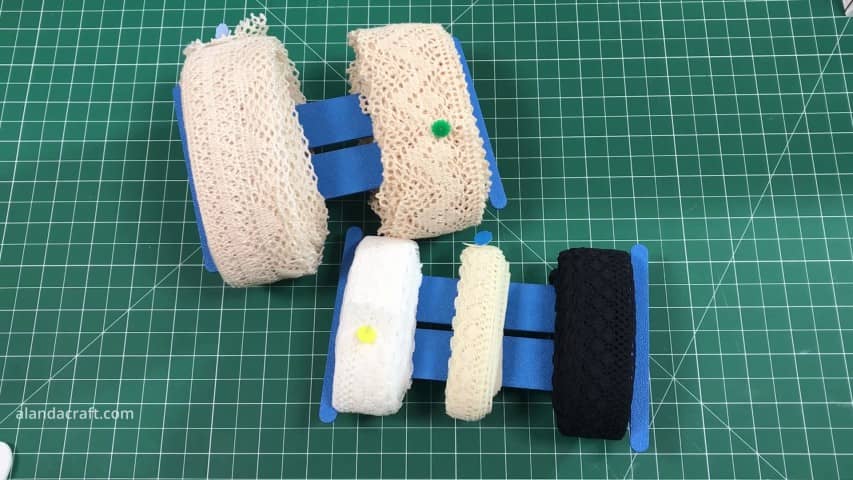
Lace & Ribbon Spools
And speaking of spools, here’s another we made. These are going to be for my ribbon drawer which can get a bit messy. I like the idea of each ribbon being on it’s own spool and I’m thinking about storing the spools on a piece of dowel so that I can just unravel the ribbon I want. However, that will mean finding something to hang the dowel from. So just another project to think about.

Flat Lace Holders
I also printed this flat version which I absolutely love. I have made a few of these of these because they hold a lot of lace but lay flat so they fit nicely in my Ikea Alex drawers. And not only only do they keep everything tidy, I can see at a glance what laces I have on hand. I mainly use lace in my junk journals.
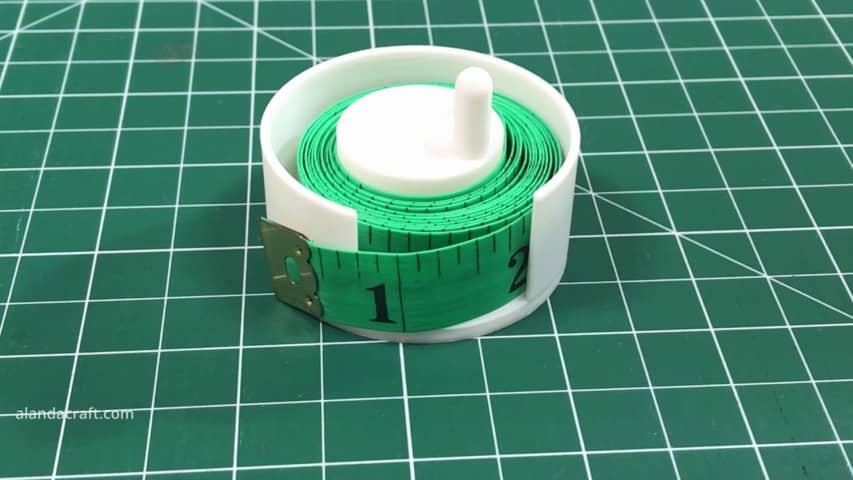
Tape Measure Holder
I thought this tape measure holder was pretty neat. I just love how it keeps my tape nice and tidy in the drawer. There are a number of different types of measuring tape holders in Makerworld, but I chose this one as I like how it winds the tape up.
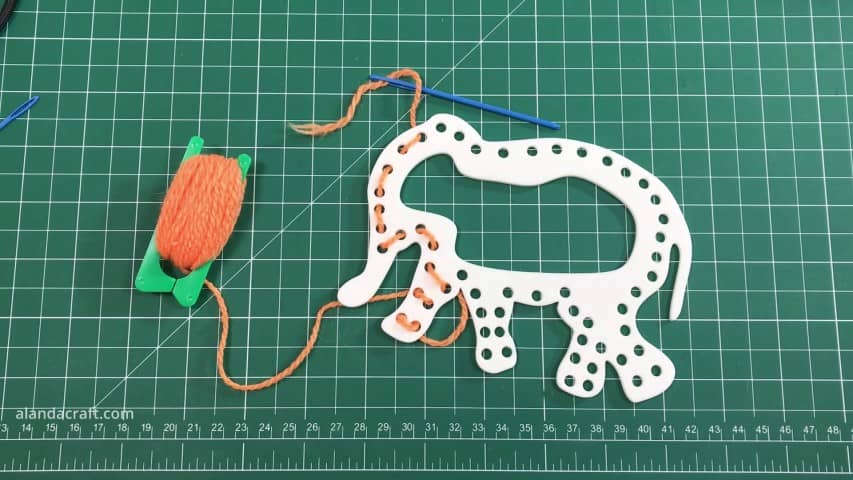
Children’s Learn to Sew Kit
When we saw these, we knew we just had to print them for my great granddaughter and Paula’s great niece. They will both be turning 3 soon and these will make a nice little addition to their presents. I also printed out some blunt needles for them to stitch with. It’s never too early to start kids on a crafty path.
We chose the elephant, mainly because elephants are my favourite animal, but there are a number of different animal files available. We will print some of the other animals out to give the girls some variety to play with.
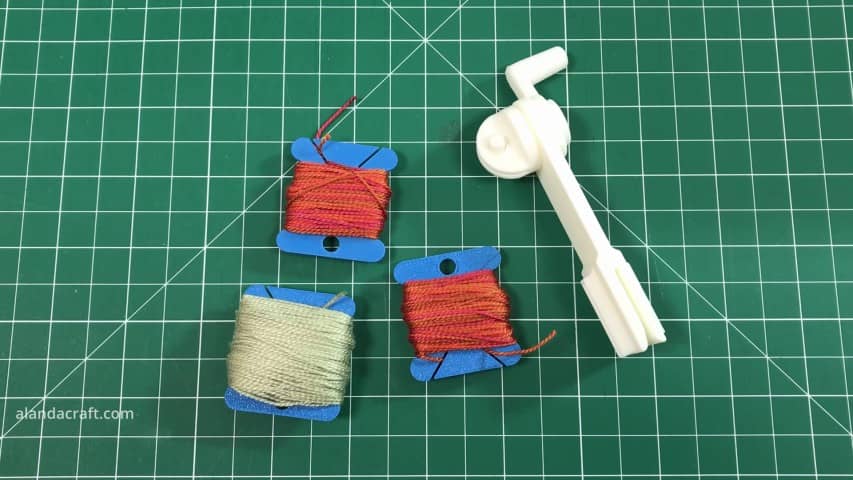
Embroidery Floss Winder
Once upon a time in a distant past, I did a lot of embroidery. It’s a something I haven’t done in a while but I still have a lot of embroidery floss skeins on hand the I use mainly in junk journals these days. Some of these had become a tangled mess in my sewing kit, so when I saw this little gadget, I thought that would be a big help to straighten out the floss.
It works really well, although I have it on the edge of a dodgy box so it doesn’t fit firmly. However, there is a pattern for a box to hold the floss bobbins that I haven’t printed out as yet, and once I do the winder will be more secure as it is designed to fit on the side of the box.
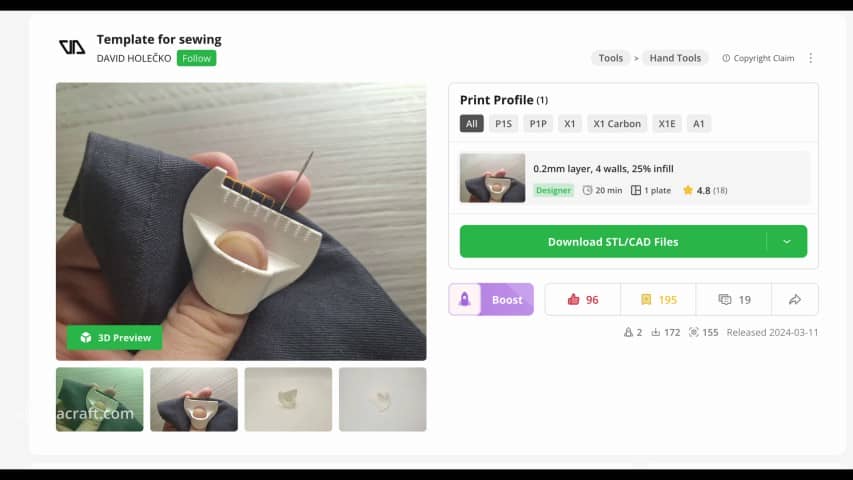
Stitch Spacer
This is a handy guide to help you make sure your hand stitching is evenly spaced. I personally won’t have much use for this as I tend not to hand stitch if I can help it. But I thought it was a handy tool for those of you who do. This would also be a handy gadget when teaching someone to hand stitch and keep their stitches nice and even.
Non-Quilting Items
Now here are some items that aren’t quilting and sewing related that I have printed off.
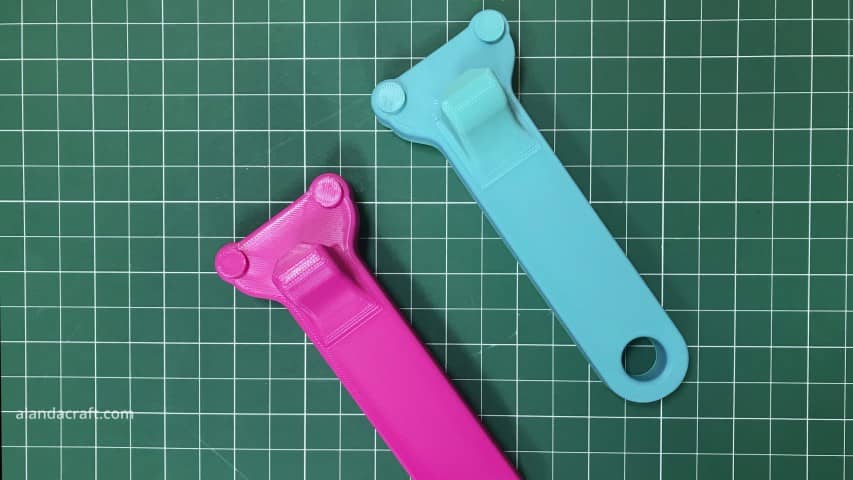
Jar Opener
I often struggle to open jars of pickles etc so I decided that I needed this jar opener and it works a treat. It released the air in the jar making it easy to remove the lid. When I tested it out I could hear the audible pop as the lid released. No more struggling to open a jar of pickles. It worked so well we printed off one for Paula to take home as well.
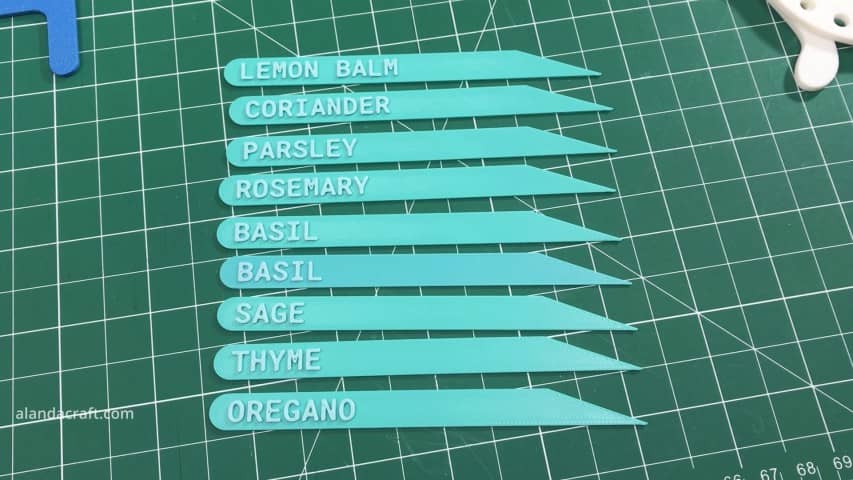
Garden labels
Spring has sprung, so they tell me. Although we are still having frosts. However, it’s time to start planting seeds and seedlings. I generally make my outdoor labels on my xTool F1 laser but I thought these labels would be a nice addition for the seedlings in the greenhouse.
This is also an example of a multicoloured print, which is so easy with this 3D printer. And having the AMS lite I didn’t even have to change the filament myself the machine did it all. The machine automatically changed the colour to print the names of the plants, in white.
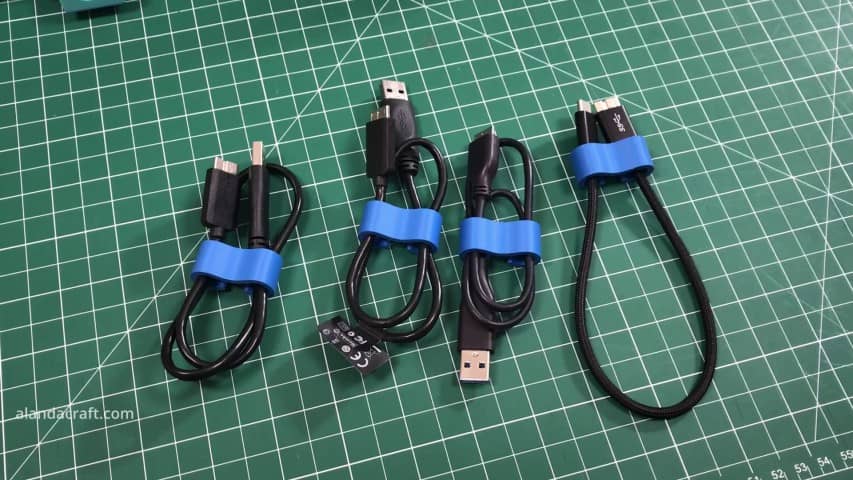
Cable Ties
I have quite a lot of cables that end up getting all tangled up. So when I spotted the cable ties, I thought, “Yep, that’s just what I need.” They were quick to print out and they work a treat. I’m going to need a lot more of these, but already it’s made a difference just having these few cables tidied up.
Honestly, you will be really happy with the number of practical and fun projects that you will be able to print out. There’s a great range of toys available as well, which I will be looking closely at for the great grand kids.
So let’s take a look at the pros and cons of the Bambu Lab A1 Mini.
PROS
- This 3D printer is absolutely awesome – I really can’t say enough good things about it.
- It’s perfect for beginners and I can attest to that since I had never used one of these before so I had no experience whatsoever. Bambu Lab just made the whole process so easy from start to finish.
- The machine is quiet so you won’t be disturbing others. (We actually found the air purifier to be noisier than the 3d printer.)
- Everything about is amazing right down to the cute little tune it plays when starting and finishing a project.
- The A1 mini 3D printer is quite small so it doesn’t take up a lot of room. This is particularly so if you don’t have the AMS Lite. Once you add that you are essentially doubling the amount of space used so keep that in mind.
- Although it looks small and compact, it is really solidly built but it’s not so heavy that you can’t move it around yourself. Whenever we do move around, we always re-calibrate the machine which is really easy to do. Just to make sure it’s all set up properly.
- One thing I really love is that I can leave the Bambu Lab A1 mini to do it’s thing and keep an eye on it via my tablet or phone as it has a built-in camera. We were even able to play a board game and still see what was going on.
Another great thing I found was the amount of spare part files for all sorts of things.
For example, I recently had to replace my fridge after many years because the plastic connector on the door broke and I couldn’t get a replacement. If I had, had the 3d printer back then I could have made one. I did find a pattern in Maker world that would have suited perfectly.
And this also applies to sewing machine parts, machinery and tools.
Cons
- There is a slight odour, which is understandable. It’s not unpleasant but I’m a bit thingy about fumes of any sort, so we purchased an air purifier just to filter the air when we are using the machine especially as it is inside the house in the craft room. The PLA filament is made from fermented plant starch such as corn or sugar cane so that doesn’t sound too bad but still it’s not something I want to be breathing in if I can help it.
- Another thing to mention is the filament waste. This is something common to all 3D printers particularly when you are changing colours but it was less than we were expecting. For example, this is the amount of waste for the sewing feet tray that we printed.
- The only issue is finding a way to use it in another application or safely dispose of it. There are lots of ideas out there which we’ll explore in more details as the waste builds up.
- The built-in camera is a great feature but it is slow to generate the video.


Leave a Reply