
It’s been a while since we have done a bag tutorial but this one is a good one to get back into the swing of things. The Origami bag or azuma bukuro (sometimes called the Origami Market bag) is so quick and easy to make. It’s a slouch type bag, so its soft and drapey without any solid form. This is a great one if you make bags to sell at a market as they are so quick to put together.
Watch the video below or scroll down for the step-by-step written instructions
Origami Fabric Bag – What You Need
To make the larger bag that we made in the video tutorial you will need
- 1pc fabric measuring 19″ x 56″ (for the outside of the bag)
- 1pc fabric measuring 19″ x 56″ (for the bag lining)
- 1pc contrasting fabric measuring 7″ x 4″ (for handle cover)
To make the medium-sized bag (that is hanging in the background of the video) you will need:
- 1 pc of fabric measuring 16½” x 48½” (for the outside of the bag)
- 1 pc of fabric measuring 16½” x 48½” (for the bag lining)
- 1 piece of contrasting fabric – 7″ x 4″ (for handle cover)
Origami Bag Sizes
This is not a structured bag so the sizing is generally looked at as small, medium, large, extra large. So I can’t give you exact measurements for the finished size but here are some basic measurements:
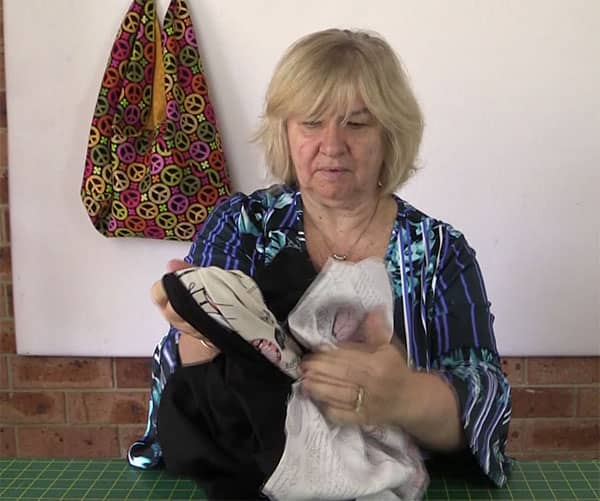
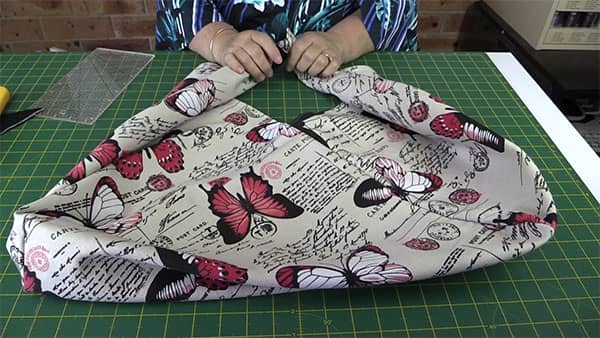
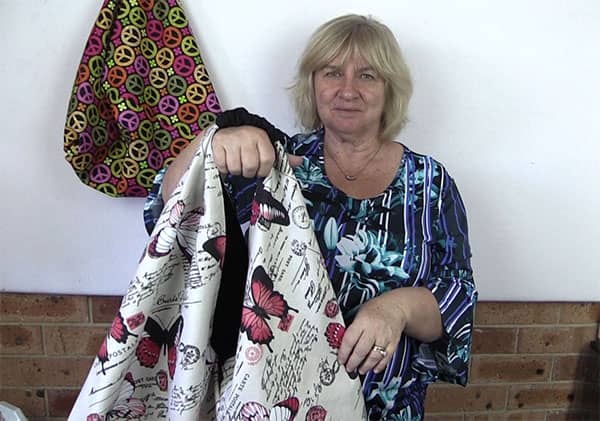
- Medium Bag (the one shown in the image above) – measures approx 22″ tall x 17″ wide when it is hanging on a hook. When I lay it flat and open it out on a table it measures 17″ tall x 21″ wide.
- Large Bag (the one we made in the video) – measures approx 26″ tall x 20″ wide when it is hanging on a hook. When I lay it flat and open out on a table it measures 20″ tall x 24″ wide.
How to Adjust the Bag Size
You can adjust the size of the bag by applying the following formula:
- (width of fabric x 3) = length of fabric
- then add a half-inch to the measurements (for the seam allowances).
For example:
If we decide on a width of fabric of 16″ we multiply it by 3:
(16″ x 3) = 48“
We now take the 16″ and the 48″ and add a half-inch to each number:
- (16 + ½) = 16½
- (48 + ½) = 48½
This now gives us our final measurement for the cutting of the two pieces of fabric. They should both measure:
- 16½ x 48½
TOOLS USED IN THIS TUTORIAL
You can check the latest prices at Amazon by clicking on the links below:
- Quilters Slidelock
- June Taylor Shape Cut Pro ruler
- Creative Grids Ruler 8½” x 24½”
- Olfa 24″ x 36″ double-sided healing mat
- Olfa 60mm rotary cutter
- Oliso Iron
- Gutermann Sew All thread
Let’s Get Started:
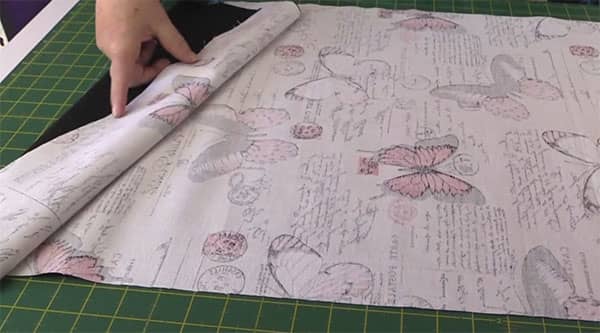
- Take your two pieces of fabric and lay them right sides together.
- Sew around the edge with a ¼” seam.
- Leave a 4″ gap to turn the bag through.
- This is the gap to turn the bag through.
- Turn through and push out the corners with a skewer.
- Press the bag making sure to press in the folded edges of the opening.
- Topstitch around the bag approx an eighth of an inch from the edge. This will give the handle a nice finish plus it will catch in the opening.

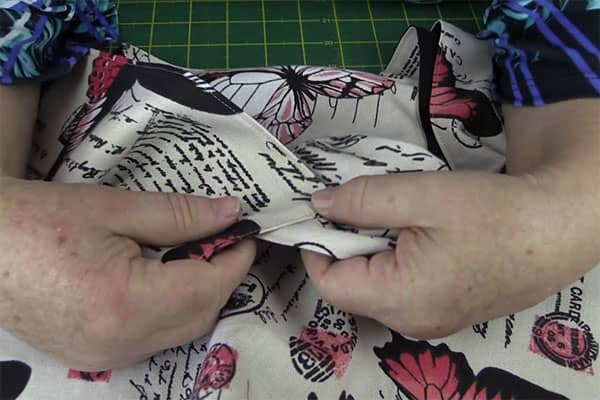
Now comes the tricky bit.
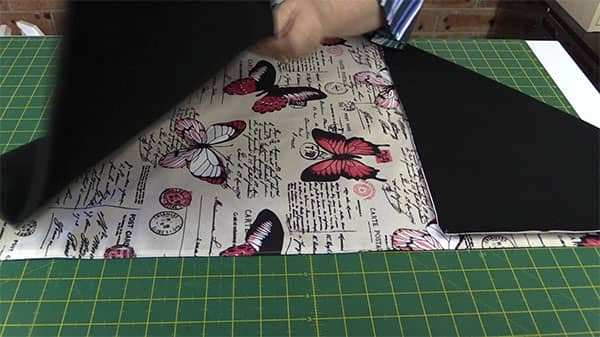
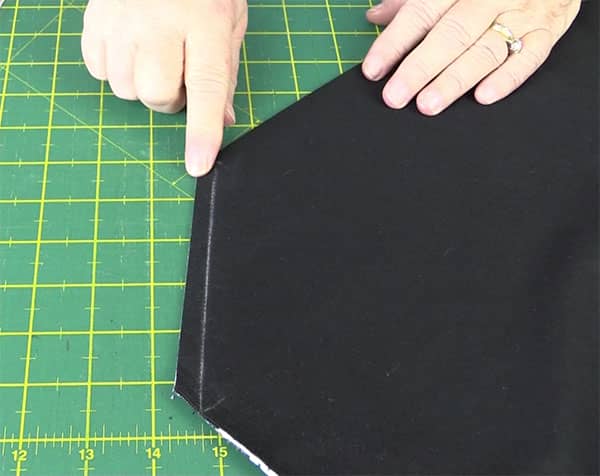
- Bring the bottom edge up to form a triangle. Make sure the top edges are together

- Go to the other end of the fabric and fold up to form a triangle. Matching the edges.
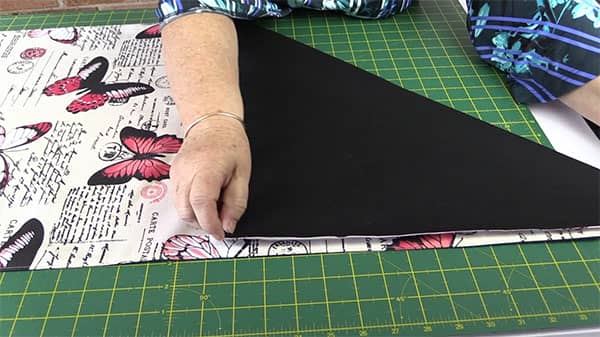
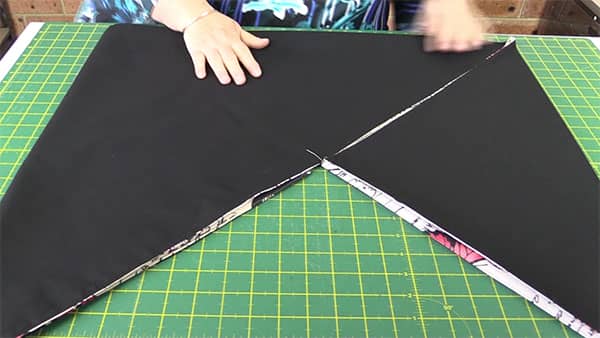
- You now have a triangle at each end of the fabric that is formed in opposing directions.
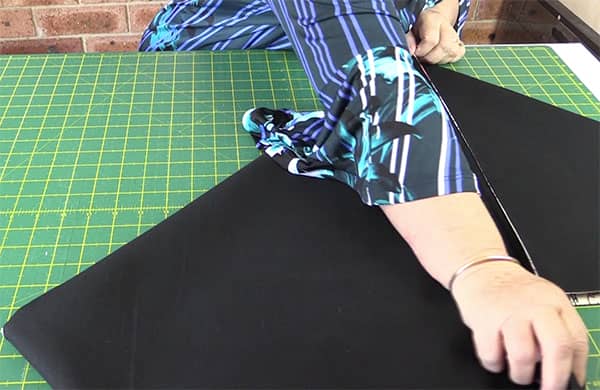
- The piece in the center looks like a square. We are going to imagine there is a diagonal line across the square.
- We are going to fold our fabric along that imaginary line.

- Keep bringing the piece over until the edge of the large triangle matches up with the small triangle.
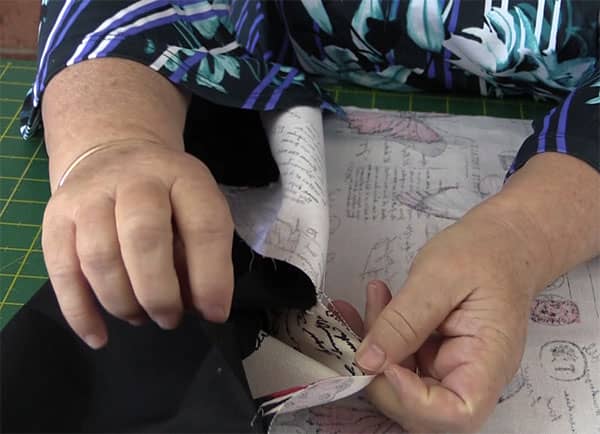
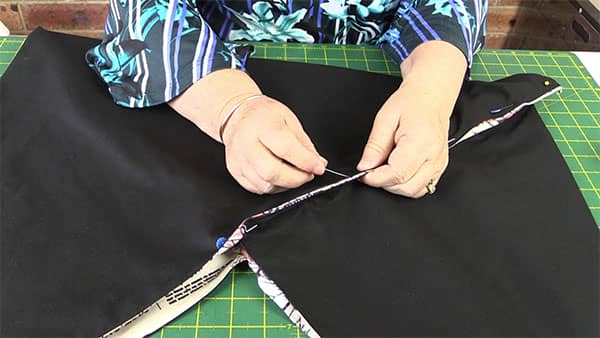
- Now pin the edge of the small triangle to the edge of the large triangle.
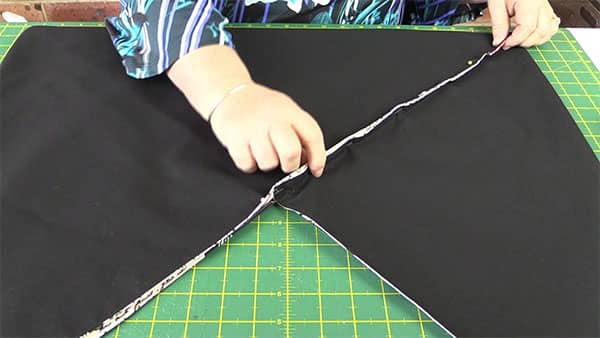
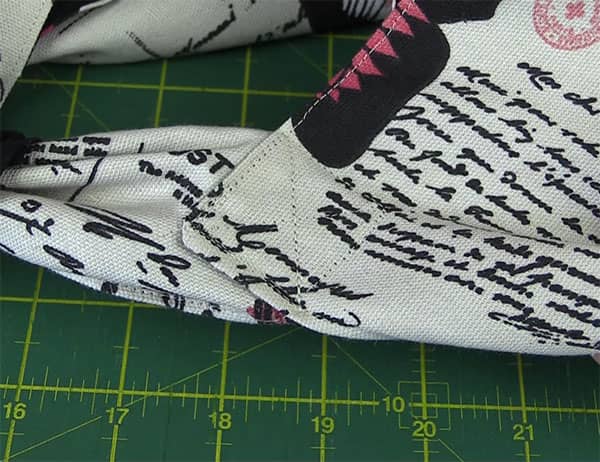
- Once you have pinned one side, turn the bag over and pin the other side.
- Sew each side together with a ¼” seam. Remove pins as you sew so that you don’t blunt or break your needle.

Box the Corners
If you don’t want to box the corners you can skip this step.
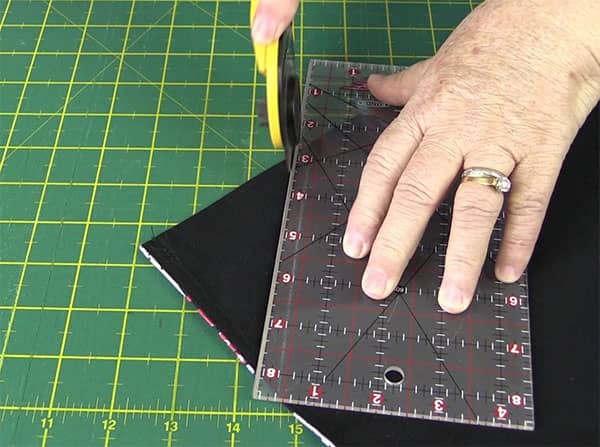
Lay the seam line along a line on your mat. and make sure the bag is laying flat with the ‘imaginary fold line’ also lying along one of the lines on your mat. Flatten the material down so you have a smooth surface.
- For the large bag – measure across 4″ and make a chalk mark. (for the smaller bag measure 3″)
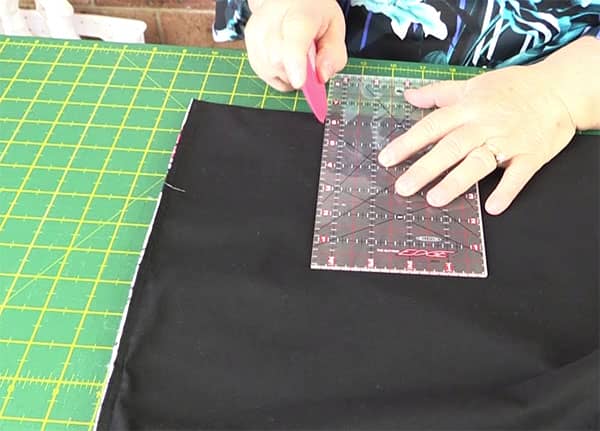
- Measure up the seam line 4″ and make a mark. (3″ for the small bag)
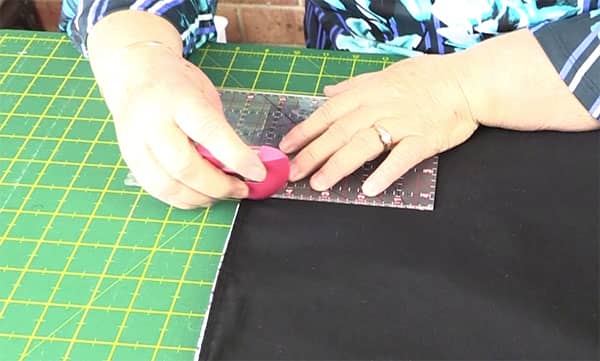
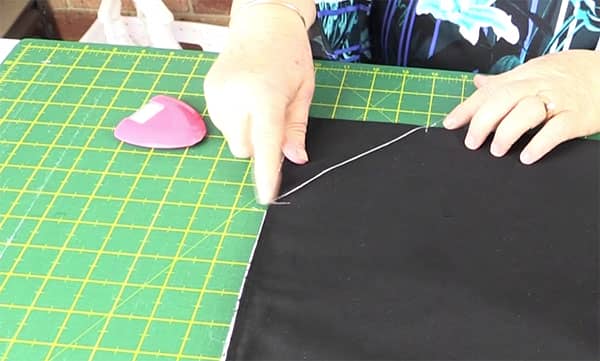
- Draw a line diagonally across the corner.
- This will be the sewing line.
- Back stitch at each end of the seam line.
- Cut across the corner approx ¼” from the seam line.
- You can serge across the corner, zigzag across the corner or just leave it. The choice is yours.
- Turn the bag through to the right side.
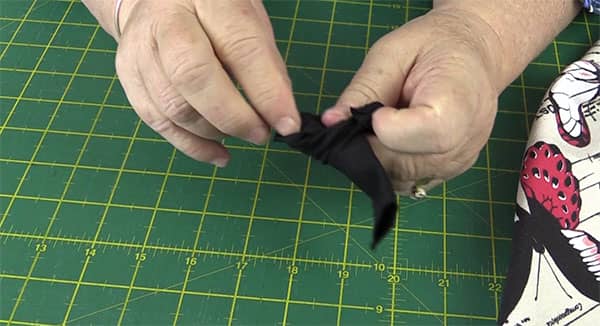
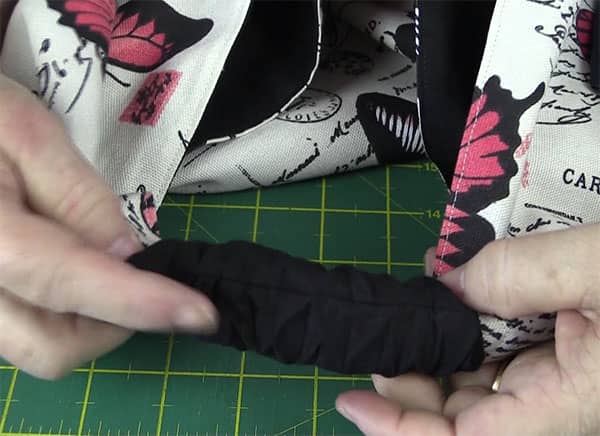
Handle Cover
- Take the piece of material that measures 7′ x 4″.
- Turn under each of the short ends ¼” and press.
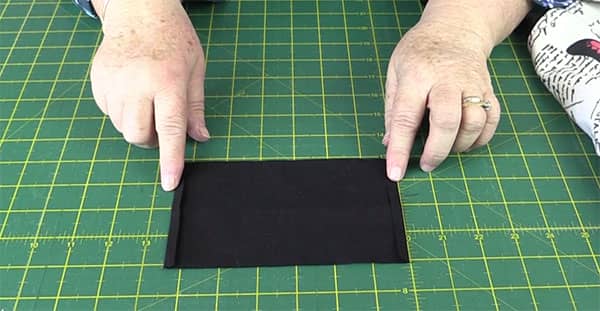
- Put right sides together and sew down the long edge.
- You now have a tube.

- With much huffing and puffing, turn the tube through to the right side.
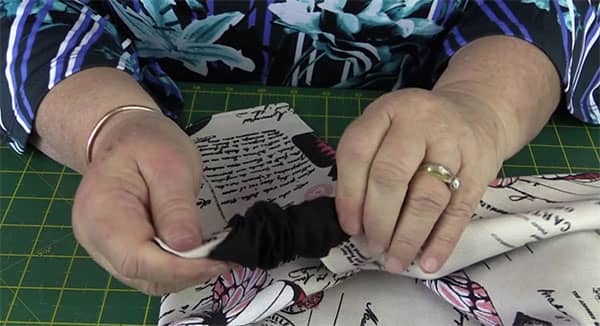
- Gather the tube up and slip it over the end of one handle piece.
- Pull the handle through as far as you can.
- Overlap the handles.
- Sew a square on the handle ends and add cross stitching in the square to hold the handles secure.
- You can even go around twice if you like. The handle join is the part where all the pressure will be when your bag is full of market goodies.
- Pull the handle cover over the joined handles.
- Twist the seam line to the underside of the handles.
- There you go – bag finished. Quick and easy and ideal for markets for gifts.


Marcy says
I have made a couple of these. Anytime I go to the store people ask about them. I actually started carrying little strips of paper with your web site on it, so I didn’t have to keep repeating myself! LOL. I modified it to 20 x 60, but then needed an extra fabric strip from each side to make it more efficient to use. With that, the bag is 10 x 22 holding size and with proper x’ing and back sticking it easily holds a whole shelf of canned goods – (if you are strong enough to carry it – the bag will) Thanks for the inspiration. The larger one folds up to a 8 x 8 size
Alanda says
LOL, I love how you have to take our website with you. That’s awesome!
I’m not sure what you did with those extra fabric strips to make it more efficient. If you would like to share a photo or two and what you did you can do so at our Submit Your Project page.
Here’s the link: /submit-your-project/
NANCY LIZARRAGA says
I love this I will try and Make One hope it turns out as nice as yours ?☺
Alanda says
I’m sure it will Nancy. These are so quick and easy to make – you will love it.
Tracey Nicholson says
I would love to but one of you bags if its possible
Alanda says
Hi Tracey, we don’t actually sell the bags, we just create tutorials showing how easy it is for people to make bags themselves. 🙂
Peaches says
I awake to beauty!
I can’t wait to make it!
Alanda says
Let us know how you go. You can always share your finished result in our Readers Project section here: /submit-your-project/
Jun says
Such a great bag & so easy to make. They make great presents for any occasion & designing your own fabric colours is the best part. ☺️☺️
Jun says
Or even ad colourful Pom Pom edging ?
Alanda says
That’s a great idea Jun. 🙂
Cj says
Ohh where would you add this is.(newbie here)
Jan says
My 9 year old granddaughter is interested in sewing and has been taking lessons. So she is visiting with me for a few days and I thought your bag was perfect to do. Nice long straight lines, corners, angles to fold, making a tube. We cut the size down to 42″ x 14 1/4 ” It turned out great. We will now make her mom one for Mother’s Day since it is a pretty quick project that will last for a long time to enjoy. My granddaughter loved the video for the instructions. She totally understood it….. Thanks so much.
Alanda says
That’s just wonderful Jan. We love hearing about youngsters taking up sewing and quilting. This bag will make a lovely gift for her mum. We would love to see her finished bags on our Readers Project page. Here is a link if you would like to share some photos /submit-your-project/.
Jolyn says
Hello there so nice to see that you made the bag. I have purchased fabric. Since you’ve made it I wanted to ask you directly. In the instructions here for example she says 19″ by 56″ now my question is is once you add the quarter inch on each end for seam what should the actual final measurement be so I’m cutting the fabric correctly or is her 19 x 56 already include the seam?
Alanda says
The seam is already included in the measurement. So the fabric should be cut at 19″ x 56″
Connie Diller says
This is an awesome tutorial. I enjoyed your work, I am definitely going to make a few of these bags. Thank you for being here ?
Helene says
Hi, I am just wondering once you pinned the two sides… do you sew them… the pattern does not mention the pins after that… I am planning on making one soon… just love it…
Alanda says
Yes Helene you pin both sides then sew each of the sides together with a quarter inch seam. Make sure to remove the pins as you sew. Otherwise you may damage or blunt your needle. The video is available at the end of the post, which show the process in more detail. 🙂
Helene says
Thanks… I just completed one and it looks great. Thanks for the pattern.
Alanda says
That’s excellent Helene. How about sharing some photos with. Here is a link if you would like to do that /submit-your-project/
Jo Ann says
making different sizes is a little confusing. I want to make Market bags for little girls. How would I measure?
Alanda says
Take a look at the ‘How to Adjust the Bag Size’ section in the post above and start by working out the width of the fabric. Unfortunately I can’t give you a specific measurement for your width – it will have to be something you test and then decide on. So for our example which was the medium bag we started with a width of 16″. But if you wanted a smaller bag, you might start with a width of 12″. So multiply the 12″ x 3 which gives you 36″. Now take the 12″ amount and the 36″ amount and add a half an inch to each. This will give you a measurement of (12 1/2″ x 36 1/2″). That is what you use to cut your two bits of fabric.
You will just need to test different sizes until you get the right size bag for you.
Diana says
Love the bag,looks so easy. Looking thru my material I have 22×54. I was thinking just use same color inside and out. I played with folding not a perfect square in middle, would that effect size of handle?
I find your the second person from down under I really like your sewing ideas.
Alanda says
To be honest we haven’t tried it any other way so I couldn’t tell you what the final result would be if you adjusted it. It could be worth a try because at the very least it is only two lines of sewing that need to be unpicked if it doesn’t work out.
And yes, you can definitely use the same colour inside and out. This can even be done without a lining although we personally prefer it.
Diana says
Well your right. I tried the medium size and it worked out. Yay! I had extra to make the small tube for handle. I do have extra.
Alanda says
Excellent. 🙂
wendy hartman says
You could use a little piece of ribbon or bias tape to finish that inside boxed corner…I have noticed this is popular in the the US on the insides of unlined jackets. Great project – loved your fabric choices!
Alanda says
Nice tip! I like that Wendy.
Imp says
I really like this but would like to make the straps longer…. any ideas….
Thanks
Alanda says
We are working on this at the moment, but not sure how long it will be before we get a video up.
Diana Speed says
Hi Alanda,
I just watched your video and found it very simple yet functionable. Can these be sold to others or is there a copy right on it? I would love to try and sell these in the near future.
Thanks,
Diana
Alanda says
Yes that’s fine Diana.
Diana Speed says
Can these be sold for profit or is there a copy right on them?
Alanda says
You are most welcome to make them and sell them at markets or online. They should be good sellers. Good luck 🙂
Sandra says
I love the bag!
I saw the tutorial this morning and made it tonight. Usually I buy a pattern, but you made it so easy I didn’t need one.
And thank you for letting us sell it at festivals. That’s very generous of you.
SMyles
Alanda says
That’s great Sandra. You will find that we don’t have patterns for our tutorials, they take way to much time to create. But we do provide full written instructions and photos. 🙂
Madeleine says
Love it! I’m doing a dive into my fabric stash this instant. ^.^
Sue says
PURCHASED THE FABRIC AND i HOPE IT TURNS OUT AS NICE AS YOURS! tHANKS VERY MUCH FOR THE PATTERN
Sue
Alanda says
I’m sure it will Sue. These are so much fun to make.
jax says
thank you so much for a fab tutorial! i gave it a go and made one and i love it! so easy to make and everyone loves it so guess who’s getting a bag for birthdays Hahahaha 🙂
Alanda says
Awesome. They make such quick gifts so as long as you have a bit of fabric in the house, you can whip these up really quickly.
If you’d like to share your results you can do so on our Readers Projects page here – /submit-your-project/
Lindsey Asher says
I’m a beginner at sewing and I made this project today 🙂 I did it from start to finish in 2 hours. It turned out great! Your instructions were clear and really easy to understand. I had a lot of fun making this. Thank you for your guidance!!
Alanda says
That’s excellent Lindsey. And thank you for your lovely comment. Maybe you would like to share some photos of you bag on the website. We love seeing how our readers projects turn out. Here is a link /submit-your-project/.
Mimi says
Hi Alanda,
Love the tutorial! Plan to make one right away. Can I add batting or fusible stabilizer to give it a little body?
Alanda says
Hi Mimi, the whole idea of these origami bags is that they are soft and drapey, so you don’t want to add anything that is too firm. A fusible stabilizer may be too firm, batting may work. or alternatively you can use a firmer fabric like furnishing fabric or canvas. I haven’t made any of these bags with batting so I can’t give you a definitive answer on how it will look. If you do try it, let us know how it goes.
Laura says
I love the tutorial. I would love to see the different size bags with someone holding them in a picture. It would give me an idea of how it looks with a person. Maybe in the future?
Paulne Rowe says
So pleased to see the tutorial, have been looking how to make this for some time, will be buying material tomorrow to make two, one for my son and he other for his partner; they will be off to india in January so nice and light to carry around the markets. ( who knows they might even bring me back some material to make more of your projects).
thank you
Alanda says
Excellent idea Pauline. Just drop them some subtle hints about the fabric. 🙂
Ann-Margaret says
I am super excited to have found this tutorial!!! I’m going to get sewing this weekend.
Linda says
Awesome bag love it made it in an hour. Thank you for sharing
Alanda says
You are most welcome Linda. I love how easy these bags are to make. 🙂
Lara says
Awesome tutorial. Thanks for sharing. Stumbled on your video tonight will definitely be making mine
VICTORIA says
Just discovered this the other day. I’ve almost finished my first bag and intend to make many more! They are simply brilliant! I am using a tapestry/carpet bag fabric with satin lining, and I purchased leather patches for the handle – nice contrast, and will be super strong.
Thank you for sharing your gifts/talent with us.
Blessings
Alanda says
Your bags will be gorgeous in the tapestry fabric with a satin lining. Great idea on the handles as well. We would love for you to share photos of your finished bags on the website Victoria. Here is a link if you are interested /submit-your-project/. I am so happy you like the tutorial. Thank you 🙂 And by the way, this is not our original pattern. We don’t know where it came from – it’s been around for a long time now and has been replicated quite a lot.
Pat Kozlowski says
I wonder if you have a link for the butterfly fabric. It is so beautiful. I love the tutorial. I saw this design in a book and it was in a black and white sketch that was very difficult to understand, but your tutorial answered all of my questions as to how to fold and sew this bag. Thanks so much. I can’t wait to get some fabric to sew these bags, and I will post photos.
Alanda says
We bought the fabric at our local Spotlight store here in Australia. I can’t see it on their website so it doesn’t look like it is available anymore. I remember it was in different colours too.
Cheryl says
If you have a fabric with a pattern that faces in one direction, which way should you cut the fabric. Do you I cut it with the pattern facing the right way on the short side, or long side of the cut?
I am thinking the short side has the pattern right side up, because the fabric width is not long enough for the design to be facing upright on the long side of the cut piece.
Alanda says
I can’t really give an answer to that without actually creating one ourselves and unfortunately we don’t have the time at the moment. Sorry I couldn’t be more helpful.
Dinah Barnes says
Do it with paper! Draw straight lines on the paper and fold it like the outer fabric!
Alanda Craft says
Excellent idea Dinah, now why didn’t I think of that, lol. Thank you for helping out.
Crez Tibayan says
Hi,
Thanks this is such a nice project… Is this reversible?
Crez
Alanda says
No it’s not reversible as there is a seam on the inside.
Patricia Bennett says
Thank you, great bag! Hoping to make 4 in order to give to friends when we go on a shop hop together!
Julie Carney says
Just wondering what the butterfly fabric is???
Alanda Craft says
This is it here: https://www.spotlightstores.com/curtains-blinds/curtains/curtain-fabrics/uncoated-curtain-fabrics/postale-fabric/BP80255605
Janice Hamilton says
Just made my first bag, looks great & I can’t wait to use it. Sent a pic to my friend in Tasmania she was impressed & is now getting some friends to make them too. I’m making more for at a charity stall conducted by a local hospital. Thanks for an easy to follow tutorial & pictures. ??????
Alanda Craft says
That’s great Janice. These bags are so quick to make. We are looking at creating variations at the moment, like longer handles for example.
P.S. If you want to share your results with the rest of our readers, you can do so on our ‘Submit a Project’ page.
Janice Hamilton says
I always go to the fabric reduction bin at Spotlight where curtain fabrics are a good price. My bag cost me about $4 for both main & lining fabrics.
Alanda Craft says
We use Spotlight quite a lot. I love the 40% vouchers.
Janice Hamilton says
I have recently made a smaller bag suitable for a 10yr old. Measurements were 12 1/2” x 36 1/2”. It looks very cute. I also do a stitch in the centre of the handle cover to hold it in place. Where do I find the “submit a Project” page so I can show you & other crafty people what I have made.
Alanda Craft says
Here’s the link Janice – /submit-your-project/
Looking forward to seeing it.
Janice says
I have submitted three photos, hope they have come through ok
Alanda Craft says
Yes we got them Janice. The post will be going up after Christmas for others to see.
Judith says
Thank you so much for your ingenious designs, and your easy-to-follow instructions.
And thank you especially for sharing your lovely creativity with the world.
Alanda Craft says
Thanks Judith but just to let you know that we weren’t the original creators of this. We don’t know who was as it has been around a long time and there are a lot of different tutorials on it. Would love to give credit to the original designer of this. I think since it has a Japanese name maybe someone from there but just my guess really.
Pat L. says
Great PIN and great video. I’ve tried to follow others and always get lost along the way. I have the same fabric in the video and I now know what I’m going to make with it! Thank you so much for sharing!
Alanda Craft says
Glad we were able to help Pat.
Claudia says
I was just wondering about the mathematics for different sizes. 19×3 would make it 57, not 56. So do I need to take off an inch when I do a smaller size instead of adding half inch on both? I am a little confused.
Alanda Craft says
The original width of fabric we decided on was 18 1/2″. So when we multiply that by 3 we get 55 1/2″. Now we need to add on that extra half inch so that takes us up to 56″
So just follow the section on How to Adjust the Bag Size and it will work out okay.
Lin Cramer says
just made this bag along with your video! love it and your directions and video illustration are so easy to follow
Thank you
Alanda Craft says
Great to hear Lin. If you’d like to share your creation with our readers you can submit your project here: /submit-your-project/
JANICE WEIR says
I have made two of the origami bags ,they are great . Thank you ‘a lot of presents coming up.
Great for market stalls.
My granddaughters will be making one each very soon.
kind regards Janice
Australia
Alanda Craft says
That’s great Janice. These are so easy to make. I love them.
Tamsyn says
Loved the post and instruction video.
I’m having a very sleepless night here in the UK. This gave me something simple and useful to do with my time.
If I could post a pic I would.
Thanks so much!
Alanda Craft says
Sorry to hear you are having sleepless nights, Tamsyn, but it’s great that you are putting that time to good use. We would love to see a picture of your bag. Here is the link where you can submit a photo /submit-your-project/.
Sara Scholl says
Love your tutorial. Made 2 bags. Beautiful! Had to laugh at myself though, I looked at the second picture above and it looked like you had a crow by the neck and it was trying to bite you. (Optical illusion. ?
Alanda Craft says
lol, I took a look and that’s just what it looks like, you know I will never be able to unsee that now. Glad to hear you liked the tutorial. We would love to see photos of your bags on the website Sara. Here is the link if you are interested /submit-your-project/
Delvene says
I am learning to sew and have just made your bag in medium and large size. I am so proud of myself! Your instructions and video were perfect, so thankyou for them. Now my two girls want to make one each which I am excited about helping them learn. I will hthen see what other projects you have for our next challenge. Thankyou again. Oh, the longer straps would be a good addition if you ever can do one of those like someone mentioned in their comments. Thankyou again.
Alanda Craft says
Thank you for your lovely comment Delvene. I am so happy that you found the instructions easy to follow. I would love it if you would share some photos of your bags on the website. It’s always an inspiration to see what our readers have done with our tutorials. Here is a link if you would like to share photos /submit-your-project/. An Origami bag with longer straps is on the to do list.
Colleen says
I LOVE this bag!! Thank you for such a great pattern and easy to follow instructions.
I really like that it can be any size.
Shameka says
Hi, I made this but the parts that were to connect as the handle weren’t even. They showed a lot of the lining. What could we have done wrong? The corners were pointy or even.
Alanda Craft says
I’m sorry Shameka, but without standing over your shoulder I can’t really tell what might have happened. I haven’t experienced this when making these bags.
Tiffany says
I am pretty new to seeing so it took me a bit to get my courage up to make this bag. Super easy, great instructions and video.
Alanda Craft says
That’s great to hear Tiffany. We would love to see your bag, perhaps you would like to share some photos of your bag on our Readers Project page /submit-your-project/.
Brandy says
The best tutorial I have found yet! Simple and easy to understand instructions, and pictures and video to boot! I cant wait to try my first bag!! Thank you!!
Alanda Craft says
Thank you Brandy. Maybe you will share some photos on the Readers Projects page when you have made your bag. We love seeing our readers creations. Here is a link if you are interested /submit-your-project/
Genevieve Darrett says
Thank you for a great idea. My granddaughter lives
were you have to have some sort of bag for all her shopping unless you want to spend .7cents for each bag .when I visited her she handed all of us a tote. we asked ,”What are we to do with these ?” she said “you need to put your items in ” I said Wow ! she said ,Why pay for bags we just tote these around all day ..
so when this video popped up on my Pintrist site .I said this is for her .And I have made 3 in 2 days for her ..Was amazing and fun to make ..Thank you 💘
Alanda Craft says
We have to pay for bags here in Australia as well, but most people buy those roll-up bags to reuse again and again.
Rogee says
So good, the tutorial, and the instructions. I think I will enjoy making this bag.
Alanda Craft says
Excellent 😊. Maybe you will share some photos of your origami bag when it’s finished. Here is the link in case you are interested /submit-your-project/ We love to see how these bags turn out. We have had so many ladies make them and each and every one looks so different, it all depends on the fabric used.
Meg McKinney says
Thank you for the Origami Bag video and instrucioins. Excellent. I’ve wanted to make one of these for quite awhile.
Alanda Craft says
I think you will enjoy it Meg. They are really fun to make.
Jenny says
Thank you so much for sharing this project ladies. I’m really new to sewing and loved making this bag for my daughter. Your instructions and video were easy to follow and I was really pleased with the completed bag. Now my other daughter would like me to make her an origami bag. Thanks again!
Alanda Craft says
The second one should go much faster than the first now that you have one under your belt.
Connie Hockey says
I have probably made a couple dozen of your bags. I love them everyone who sees them loves them. I gave them to friends who said they were going to use them for beach bags, a purse, and grocery shopping. The sister who used it for a purse said she needed a pocket. So now I add a pocket on the Criss cross. On the front and it’s fantastic. It will hold someone’s cell phone.
Alanda Craft says
Wow, that’s awesome Connie 😊. Adding a pocket is a great idea. I would love to see some photos of your bags. Here is a link if you would like to share /submit-your-project/
Audrey Bevan says
Thank you so much for your tutorial. I have made three really fabulous origami bags for my friend’s teenaged girls……and they are absolutely thrilled! I think the main reason is “No-one else will have a bag like this” 😂😂. I have just subscribed, so I hope to complete more projects as my skills improve. Thank you.
Alanda Craft says
How awesome Audrey 😊. The girls are so right, their bags will be unique to them. I would love to see some photos of your bags if you would like to share some with us. Here is the link /submit-your-project/.