The Square-in-a-Square block is a fun way of creating a quilt block that involves just cutting two pieces of fabric – or better yet just using a layer cake square and a charm square. It’s a really quick way to create a quilt and we will be creating a tutorial for it in the near future.
NOTE: This block isn’t to be confused with the other Square-in-a-Square block which can also be referred to as a diamond in a square. You can view that tutorial here.
And here is a link to our tutorial on how to make a table runner using this method.
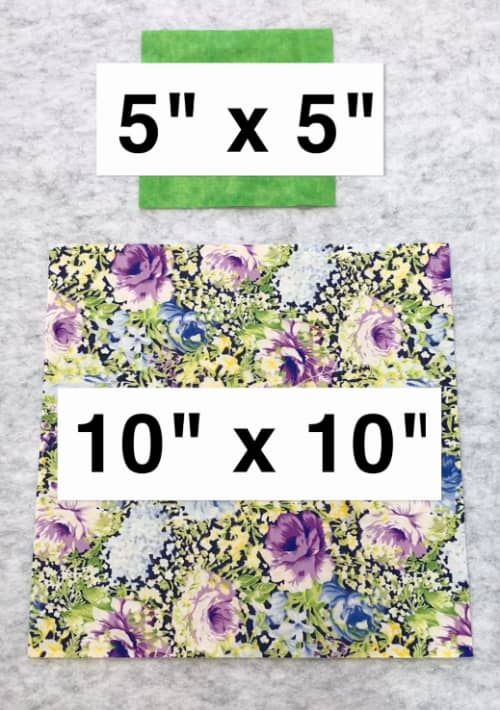
What You Need
- 1 square fabric – 5″ x 5″ (or use a charm square)
- 1 square fabric – 10″ x 10″ (or use a layer cake square)
Tools Used in This Tutorial
Watch the 1 Minute Video Tutorial Below or Scroll Down for Written Instructions
Method
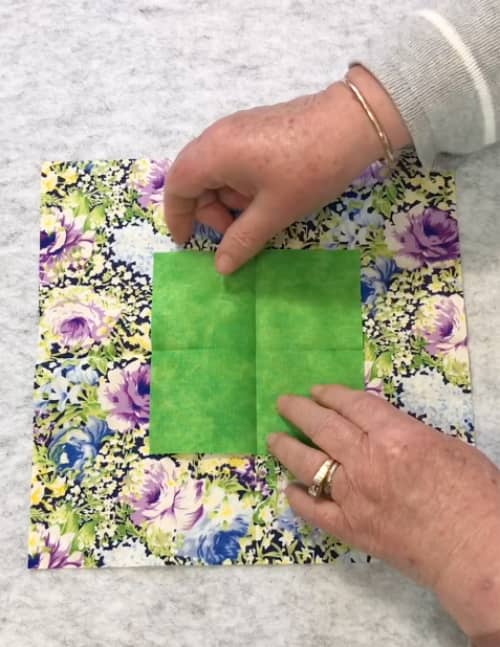
Step 1
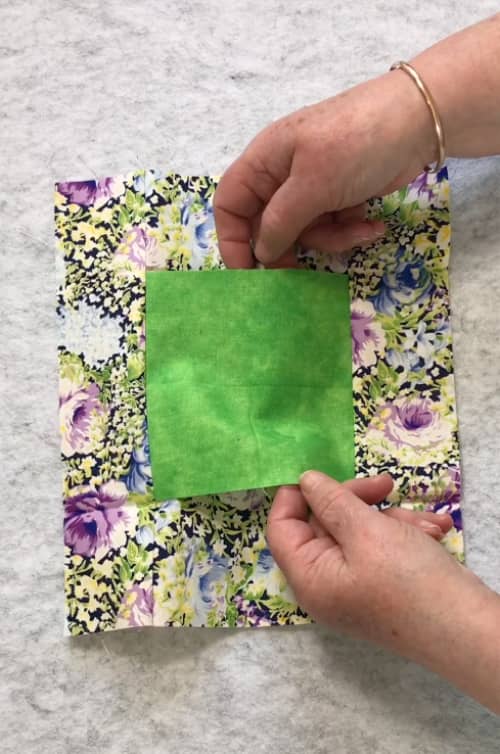
Start by placing the 5″ square over the top of the 10″ square – you will need to ensure that it is centered perfectly and there are a couple of ways to achieve this:
- fold the fabric on both pieces to form a cross hair in the middle
- draw lines with a fabric chalk marker to form a cross hair in the middle
Either of these methods will allow you to center the two pieces of the fabric.
It’s a good idea to pin the two pieces together at this point.
Step 2
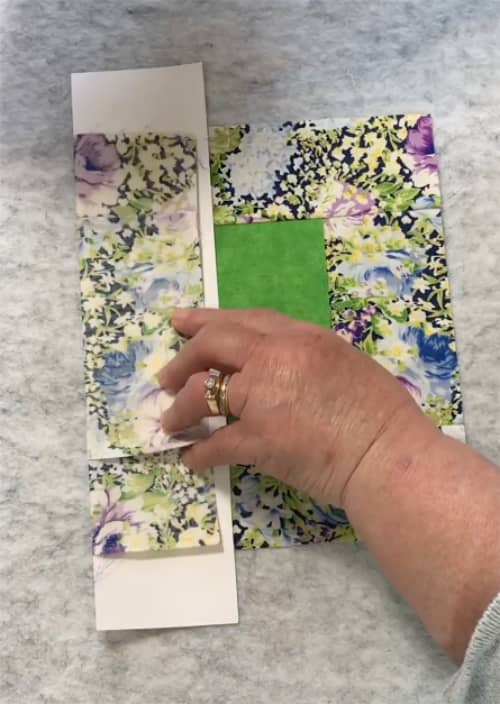
Fold the top and bottom sides towards the center. You have a few different options for doing this:
- Manually fold over each side and line it up so that the fabric folds perfectly over the middle piece. You can feel the fabric underneath to help you do this.
- Cut a piece of card stock (which is what I did for this tutorial) and line it up with the middle piece and then fold the fabric over.
- Use a Clover Heatpress Ruler (instead of using card stock – it will last longer).
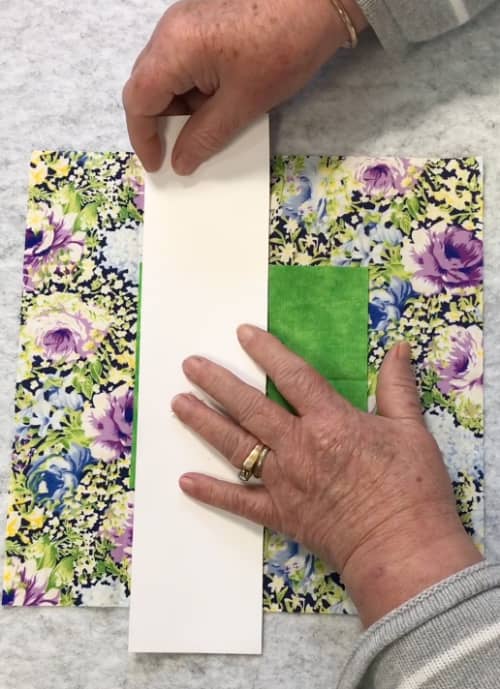
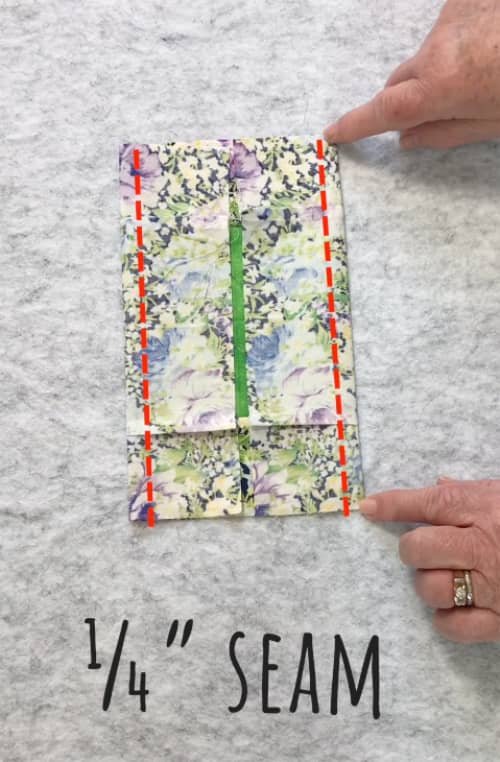
Once you have folded both sides over, sew along both edges with a quarter inch seam.
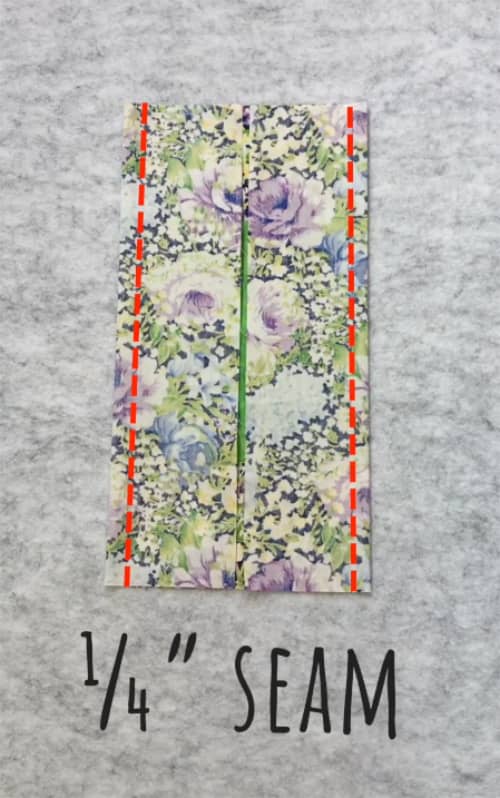
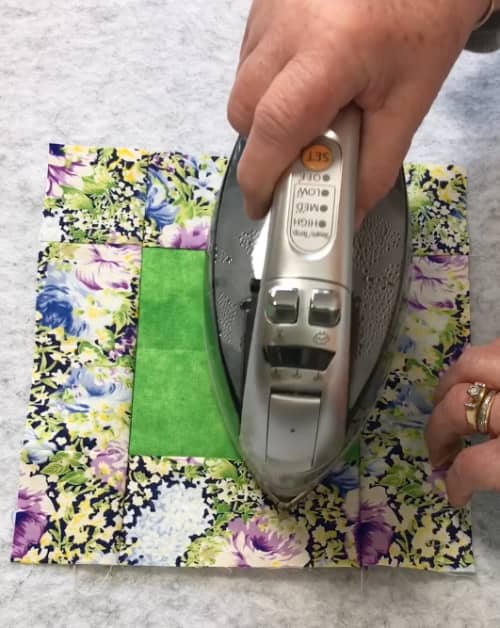
Once sewn, press each of the strips open.
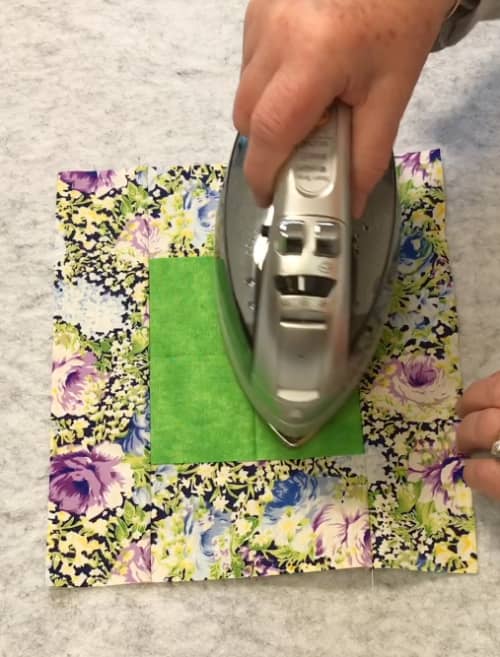
At this point, you will see that you have open pieces on both sides.
Step 3
Repeat the same process with the side ends.
Press the sides open.
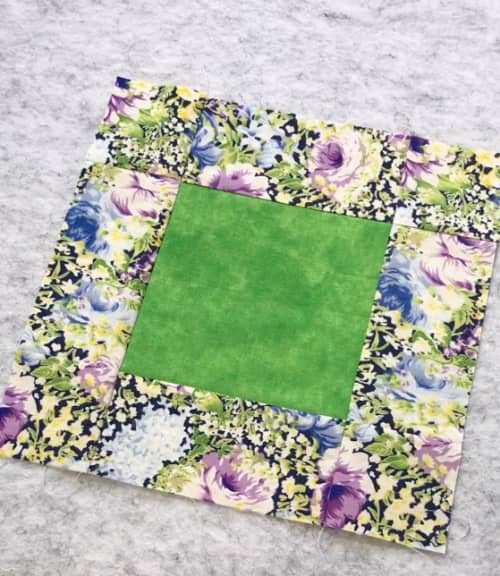
The Final Result
You should now have a completed square-in-a-square quilt block.


Leave a Reply