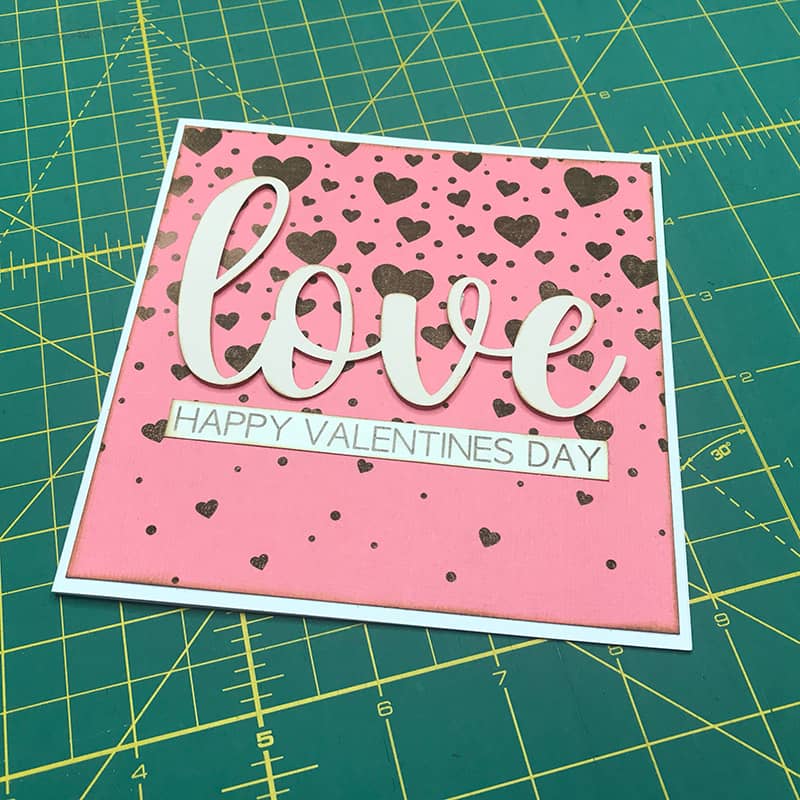
One of our newest hobbies is laser cutting and engraving and since Valentine’s Day is coming up, we decided to create a Valentine’s Day card from start to finish using our Aufero Laser 2, laser engraving and cutting machine. And here is what we did.
What You Need
- Laser Machine – We used a 10w Aufero Laser 2 to create our card.
- 65lb cardstock – pink for background, pale pink for wording, white for sentiment
- 5½”x5½” cardstock for card base
SVG Files Used – Creative Fabrica
Watch the 60 second video below or scroll down for written instructions
Method
We used Lightburn software for this project.
Engrave the hearts background onto cardstock.
- Select FILE in Lightburn and import the Hearts background SVG file from your computer.
- Set the size for your image – we set this at 5½”x5½”.
- Settings for engraving – Speed 5000/Power 75 (mm/min) If you have a different machine you may need to do a test to check the settings for your machine.
- Frame the image to ensure it will fit onto the cardstock.
- Press Start.
Cut out the word ‘Love’
- Select “A” in the left sidebar. This is the text option.
- Type ‘Love’ and select the ‘Thick’ font. We found this font on Creative Fabrica. It is a nice flowing font that joins together well.
- Set the size for your word – we set this at 4½” in width.
- Select the Line option.
- Settings for Cutting – Speed 600/Power 40 (mm/min).
Engrave and Cut the Sentiment
- Select Cardstock colour of your choice.
- Select “A” in the sidebar for the text option.
- Type your sentiment – We wrote ‘Happy Valentine’s Day’. ( Well we should have but we forgot the apostrophe).
- Select the Fill option.
- Settings for Engraving – Speed 3000/ Power 75 (mm/min)
- Settings to cut out the sentiment – Speed 600/Power 40 (mm/min)
Assemble the Card
- Take a piece of 100lb cardstock measuring 5½”x11″.
- Fold it in half and crease the edge with your bone folder. You now have a card that measures 5½”x5½”.
- Cut your Hearts background cardstock to 5¼”x5¼”.
- Edge with Vintage Photo or your favorite Distress Ink.
- Glue the background to the base card, keeping the edges as even as possible.
- Position the word ‘Love’ to where you like it and attach it to the background. I used 1mm thick foam tape to raise the word off the card.
- Glue on the sentiment. You can place this where you like.
- Add further embellishments as you like.


Leave a Reply