The Hourglass quilt block is made from quarter square triangles.
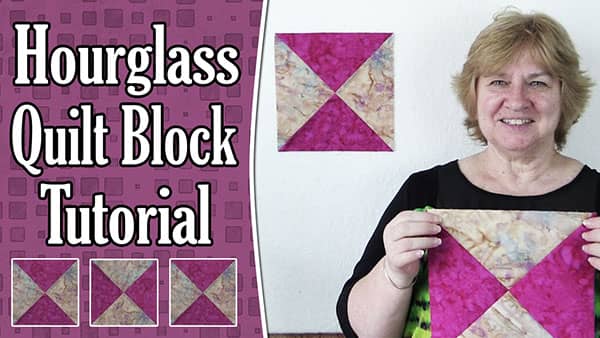
You can use these quilt blocks as filler blocks in your quilt or you can use them as a feature block.
Watch the video tutorial below or scroll down for the written instructions
What you need:
- 2 squares of fabric measuring the same size- one light, one dark for best effect.
- See the table at the bottom of the post for fabric sizes.
TOOLS USED IN THIS TUTORIAL
You can check the latest prices at Amazon by clicking on the links below:
- Creative Grids Ruler 8½” x 24½”
- Olfa 24″ x 36″ double-sided healing mat
- Olfa 60mm rotary cutter
- Olfa Non-slip Ruler 6 1/2″ x 61/2″
- Oliso Iron
- Gutermann Sew-All thread
- Quilters slidelock
Method:
You start by making two half square triangles with two squares of fabric. If you aren’t sure how to make a half square triangle here is a link to our ‘How to Make an HST’ tutorial or watch the video above.
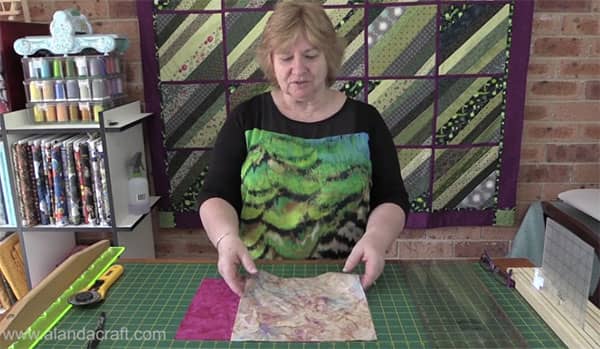
- Lay one piece of fabric on top of the other.
- Draw a line diagonally from point to point.
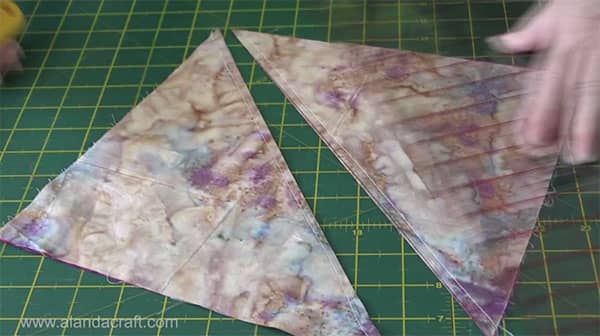
- Sew a ¼” from either side of the line and then cut on the line.
- You now have two half square triangles.
- Press the seam to the dark side of the fabric.
- Lay one half square triangle on top of the other making sure that you have one light on top of one dark.
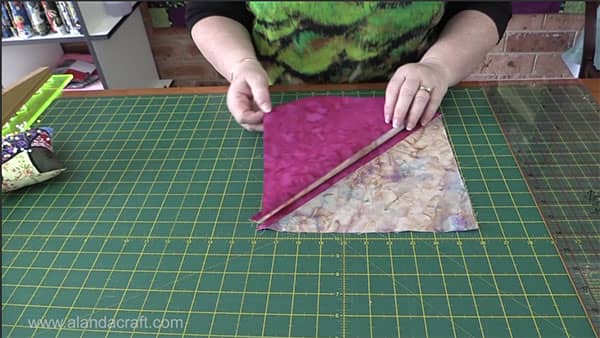
- Draw a line from point to point, diagonally across the square.

- Sew ¼” either side of the drawn line.
- Cut down the line.
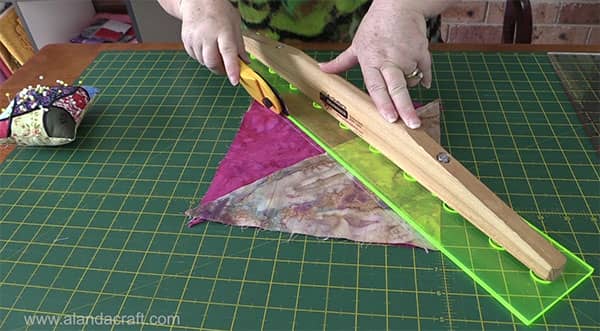
- Open up the square and you will have two hourglass quilt blocks.
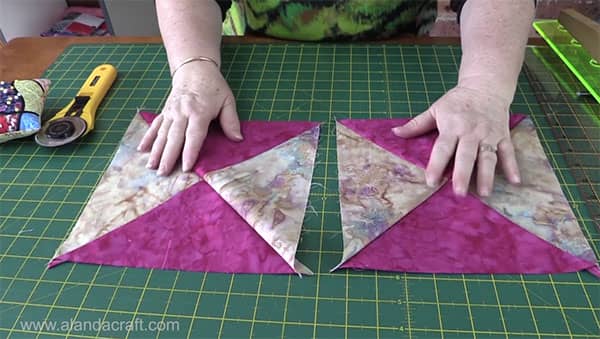
- If you cut your fabric as per our chart you will only have to trim away the excess dog ears.
We tend to cut our material on the large size and trim to the unfinished size after the block is sewn together.
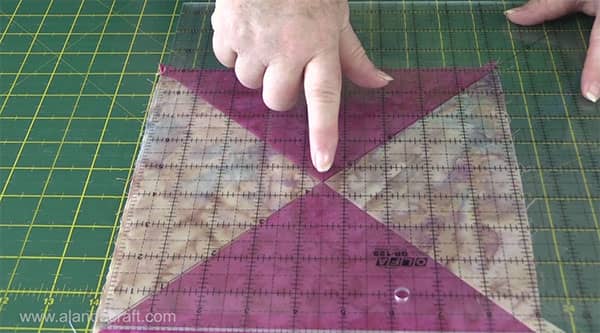
- If you cut your material oversized then you will need to divide the size of the square by two. i.e. 9″ ÷ 2 = 4 ½”.
- Lay the 45° line on your ruler along the diagonal seam line.
- Place the 4 ½” mark at the center of the block where all the points meet.
- Trim two sides of the square.
- Turn the block around and do the same thing also making sure that the edges of the square that have been cut, line up with 9″ lines on the ruler.
- Trim the two sides of the square.
You will now have a perfectly square block.
Here is a chart to help you calculate the size of the square you need to make your hourglass quilt blocks.
| Fabric Size | Unfinished Block Size | Finished Block Size |
|---|---|---|
| 2" | 1 1/4" | 3/4" |
| 2 1/4" | 1 1/2" | 1" |
| 2 1/2" | 1 3/4" | 1 1/4" |
| 2 3/4" | 2" | 1 1/2" |
| 3" | 2 1/4" | 1 3/4" |
| 3 1/4" | 2 1/2" | 2" |
| 3.5" | 2 3/4" | 2 1/4" |
| 3 3/4" | 3" | 2 1/2" |
| 4" | 3 1/4" | 2 3/4" |
| 4 1/4" | 3 1/2" | 3" |
| 4 1/2" | 3 3/4" | 3 1/4" |
| 4 3/4" | 4" | 3 1/2" |
| 5" | 4 1/4" | 3 3/4" |
| 5 1/4" | 4 1/2" | 4" |
| 5 1/2" | 4 3/4" | 4 1/4" |
| 5 3/4" | 5" | 4 1/2" |
| 6" | 5 1/4" | 4 3/4" |
| 6 1/4" | 5 1/2" | 5" |
| 6 1/2" | 5 3/5" | 5 1/4" |
| 6 3/4" | 6" | 5 1/2" |
| 7" | 6 1/4" | 5 3/4" |
| 7 1/4" | 6 1/2" | 6" |
| 7 1/2" | 6 3/4" | 6 1/4" |
| 7 3/4" | 7" | 6 1/2" |
| 8" | 7 1/4" | 6 3/4" |
| 8 1/4" | 7 1/2" | 7" |
| 8 1/2" | 7 3/4" | 7 1/4" |
| 8 3/4" | 8" | 7 1/2" |
| 9" | 8 1/4" | 7 3/4" |
| 9 1/4" | 8 1/2" | 8" |
| 9 1/2" | 8 3/4" | 8.1/4" |
| 9 3/4" | 9" | 8 1/2 |
| 10" | 9 1/4" | 8 3/4 |


Darla Cueto says
Thank you for this tutorial! I’m new to quilting and made 16 small hour glass blocks the traditional way…sewing the small triangles, then attaching to make the hourglass block. But after sewing, my blocks were all off measurement even with careful measuring on my part. I knew I was doing something wrong but couldn’t figure out what it could be. I came across your tutorial, and on my first try using your technique, the hourglass blocks are perfect! Thank you for sharing your knowledge and helping to make my quilting newbieness less frustrating.
Alanda says
That’s brilliant Darla. I am really happy we were able to help you out. It’s so frustrating when you spend so much time making a block to have it turn out wonky. Happy quilting 🙂
Syble cope says
I have used your method and one finished square is correct t size and one is smaller. What am I doing wrong?
Alanda says
The only things I can think of that might cause this are:
1. Your original squares of fabric aren’t perfectly square.
2. Your quarter inch seams aren’t accurate. If one side was more than quarter inch it could make it smaller than the other.