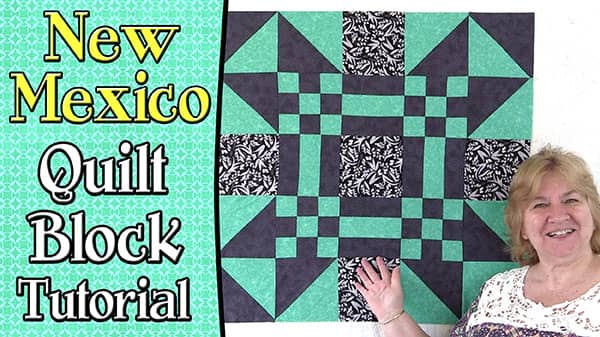
I just love this block, it really is one of my favourites. Apart from the fact that I think it looks great, it’s so big that you only need 4 with some sashing and borders to make a queen-sized quilt. Or you can use one block to make a baby quilt.
It looks complicated but it really isn’t, especially with the method, we have used to make up some of the smaller blocks.
Watch the video tutorial below or scroll down for the written instructions
What You Need:
I have run this through our EQ7 software to work out the fabric requirements.
Material:
- 5/8 yard of color 1 – dark
- 5/8 yard of color 2 – light
- ¼ yard of color 3 – the squares.
Having said that, I tend to overbuy simply because I know I can use up the leftover material in my strip quilt blocks. So if it were me I would buy 1 yard of each of the first two colors and ¼ yard of the third, just to be on the safe side, but that’s just me.
TOOLS USED IN THIS TUTORIAL
You can check the latest prices at Amazon by clicking on the links below:
- Olfa 24″ x 36″ double sided healing mat
- Creative Grids Ruler 8½” x 24½”
- Quilters slidelock
- Olfa 60mm rotary cutter
- Oliso Iron
- Gutermann Sew All thread
Method:
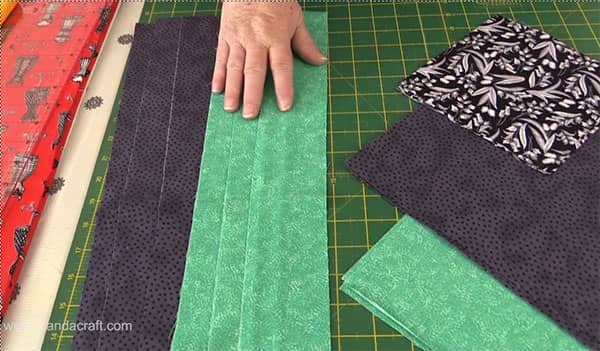
Cut the following:
- 6 x 10″ squares – 3 light, 3 dark – these will make the HST
- 5 x 6½ squares – contrasting fabric
- 3 x 2½ strips of light – color cut WOF
- 3 x 2½ of dark color – cut WOF
Construct HST:
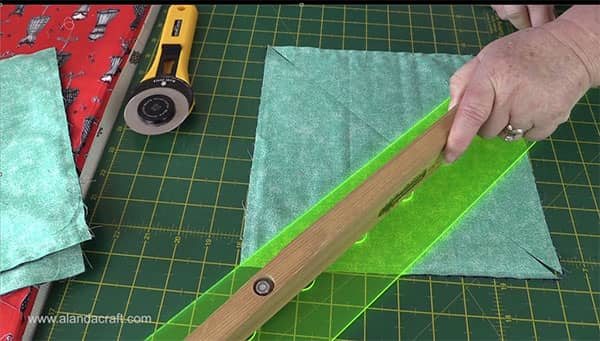
- Place 1 dark 10″ square on top of 1 light 10″ square. Right sides facing.
- Sew a ¼” seam all around the edge of the square.
- Do this for all 6 pieces of fabric. You will now have 3 x 10″ squares.
- Cut from point to point on the diagonal so you will have 4 HST from one square. Turn your ruler and cut from point to point on the diagonal on the other side of the square.
- Do the same for all 3 squares and you will have 12 HST.
- Trim the half square triangle blocks to measure 6½” square.
If you are not sure on how to make a half square triangle check out our video tutorial
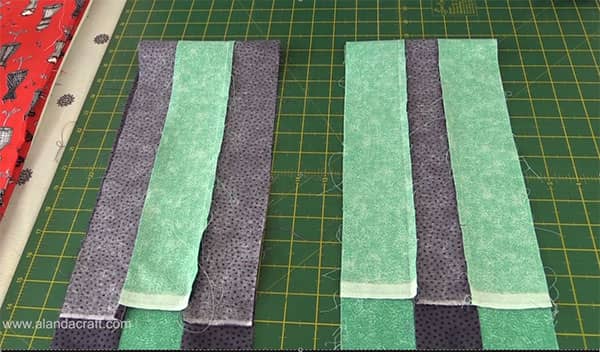
Rail Fence Block:
- Sew 3 x 2½” strips together 1 dark, 1 light, 1 dark
- Sew 3 x 2½” strips together 1 light, 1 dark, 1 light
To stop the strips from bowing, join two strips together sewing down the strips in one direction and when you are ready to join on the 3rd strip, join the strips by sewing in the opposite direction to what you have just sewn.
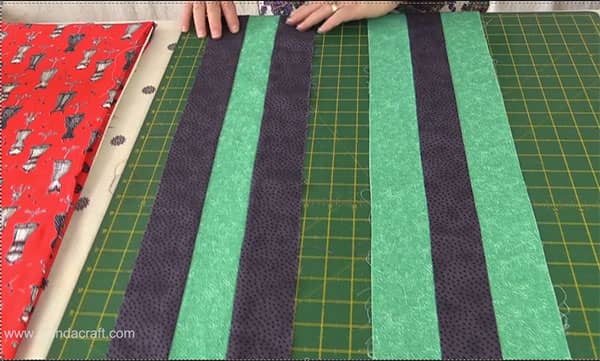
- Press the seams towards the outside edge on the dark, light, dark strip.
- Press the seams towards the center on the light, dark, light, strip.
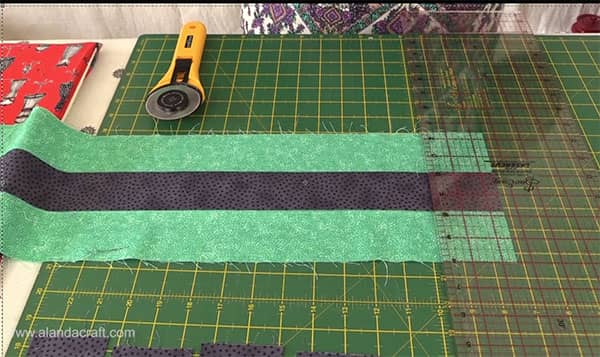
From the Dark, Light, Dark strip
- cut 4 x 6½” rail fence strips.
- Also, cut 4 x 2½” strips – these will form part of the 9 point square.
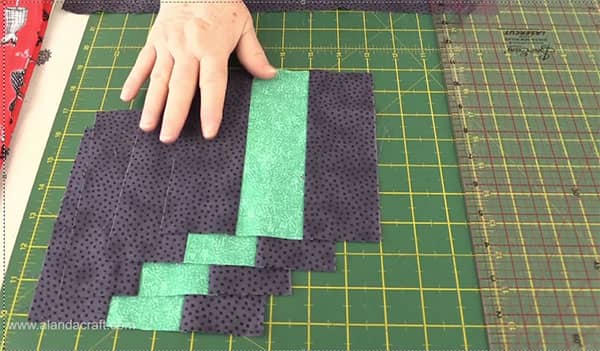
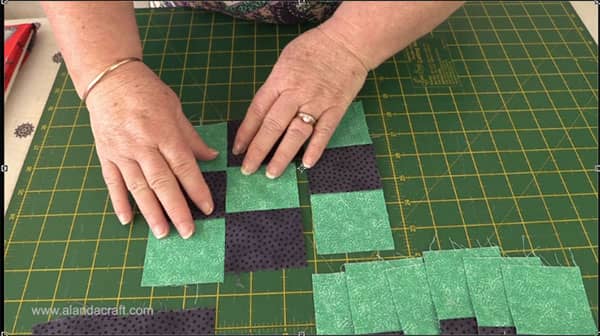
9 Patch Square (Checkerboard)
You have already cut your 4 x 2½” strips from the dark, light, dark strip in the previous step.
Now take your light, dark, light strip
- cut 8 x 2½” strips
Now that you have everything cut, assemble the 9 point square: You can see this in more detail in the video below.
Once all your Rail Fence blocks, Half Square Triangles and 9 Patch Square pieces are assembled it’s time to lay out the pieces to form the New Mexico block.


Mary Lou says
I made this as a table topper for a friend and it turned out beautifully. Now working on a quilt for my daughter in law. Love this pattern and the instructions are well done. Thumbs up. Love Alana craft.
Alanda says
We would so love to see your table topper, Mary Lou. And the quilt when you finish it. Here is a link so that you can share some photos on our readers projects page – /submit-your-project/
Its great to see how our tutorials turn out for our readers, as everyone uses different fabrics which give the projects a whole new look. 🙂
Sara says
Made this in a short few hours for my sis-in-law who will give it as a baby gift! I wish I knew how to post a picture. I was unsure of how it woyld come out since I didn’t like the block.
It came out super cute.
Alanda says
Thank you Sara for sharing your project with us. I just love it. The lady who is going to receive this gorgeous quilt as a baby gift is going to be delighted. I have added your photo to our readers project page. 🙂
MiMo Day says
Most beautiful block I have ever seen. Simply sublime. Thank you Alanda for making quilting seem so ease. You are wonderful teacher.. Stay blessed.
MiMo
Alanda Craft says
Thank you so much MiMo for your lovely comment. This is one of my favourite quilt blocks. I love that you can make a baby blanket with just one of these blocks.
Cyndy Ponczek says
What a nice easy quilt! I would love to save this so I can make it later, Is there a way to save this tutorial? I couldn’t find one.
Alanda Craft says
At the bottom of each post you will see a PDF icon. Just click on that and you will be able to save it to your computer.