Today, we’ve got something pretty cool to talk about – the LaserPecker 2. It’s a portable handheld laser engraver that is so lightweight that you can use it to engrave on items that are attached to a wall, the sides of boxes that you have stored, plus a host of other items and materials that you can successfully engrave on. So if you are a looking for a small, portable laser machine then the LaserPecker 2 could just be what you are looking for.
Now before we get into the nitty gritty, I just need to take a moment to say that LaserPecker were kind enough to provide us with their machine to review. However, those of you who follow our YouTube channel and our website know that our reviews are honest and up front. If we don’t feel a product performs as it should, we let you know.
So let’s see how this little gadget holds up in the real world. Grab a snack and let’s get into it.
WHERE CAN YOU BUY THE LASERPECKER 2?
***Use COUPON CODE – alanda50 to receive $50 off a LaserPecker 2 (only valid at the official LaserPecker website).***
Watch the video below to see the LaserPecker 2 in action
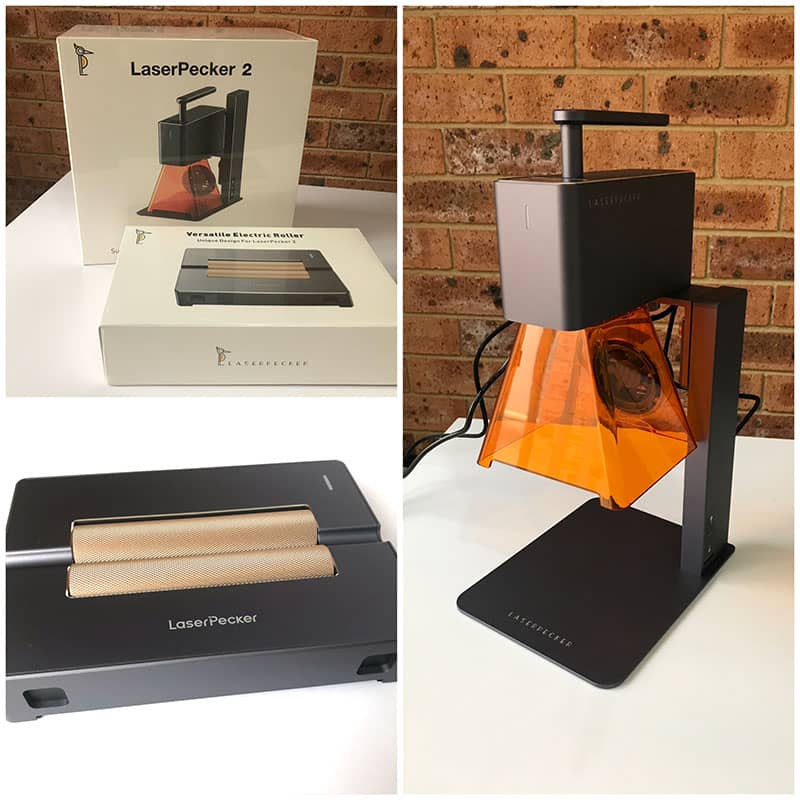
What’s in the Box
Now we have already uploaded a detailed unboxing and setup video so I’m not going to go into that here. But, inside the box, you’ll find all the essentials – the engraver itself, a user manual that is easy to read and instructions that are easy to follow; safety glasses, cables and a ruler.

As for materials, the only things included with our machine was a small piece of plywood and a dog tag. Not a lot to play with but fortunately we have enough materials to give this machine a good run.
We also received a Roller which allows you to engrave round or larger materials but that is an optional accessory.
Let’s take a look at some of the Features of the LaserPecker 2 (gotta love that name)
It’s super fast – We found that most of our projects took very little time to engrave. The machine has dual lens galvanometer technology that allows the machine to engrave at 600mm/s and the frame/graphic preview speed is up to 3750mm/s.
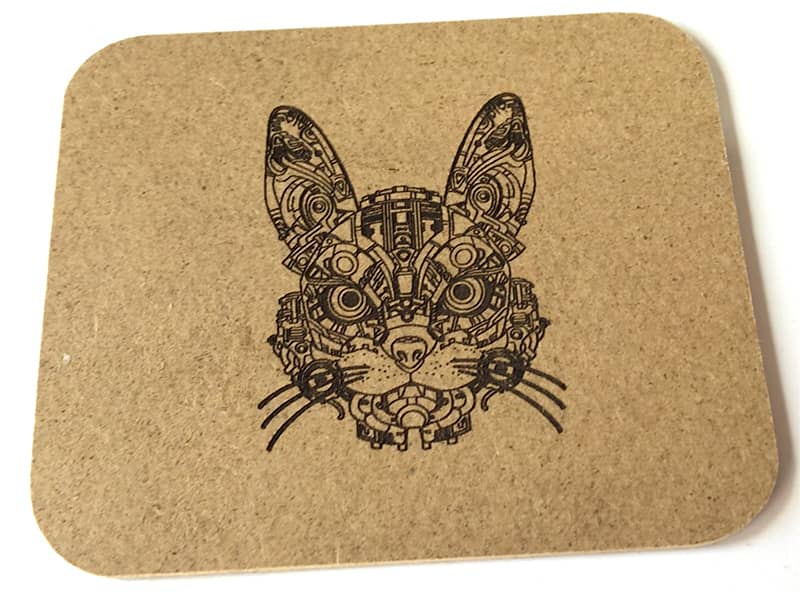
It can engrave teeny tiny detail – We were impressed with the small details that the machine can engrave.The compressed spot is 0.05*0.05mm. This small spot and the machines double lens focus allows you to create a fine level of detail. Just take a look at the cat we engraved, it’s a real work of art.

The LaserPecker 2 can engrave and cut a number of materials. Check out the table below.
| Material | Laser Engraving | Laser Cutting <5mm |
|---|---|---|
| Acrylic | Yes | Yes |
| Anodized Aluminum | Yes | No |
| Bamboo | Yes | Yes |
| Bones | Yes | No |
| Ceramic | Yes | No |
| Cloth | Yes | Yes |
| Corrugated Paper | Yes | Yes |
| Felt | Yes | Yes |
| Food | Yes | No |
| Fruit | Yes | No |
| Leather | Yes | Yes |
| MDF Board | Yes | Yes |
| Plastic | Yes | No |
| Paper | Yes | Yes |
| Slate | Yes | No |
| Stainless Steel | Yes | No |
| Stone | Yes | No |
| Tiles | Yes | No |
| Wood | Yes | Yes |
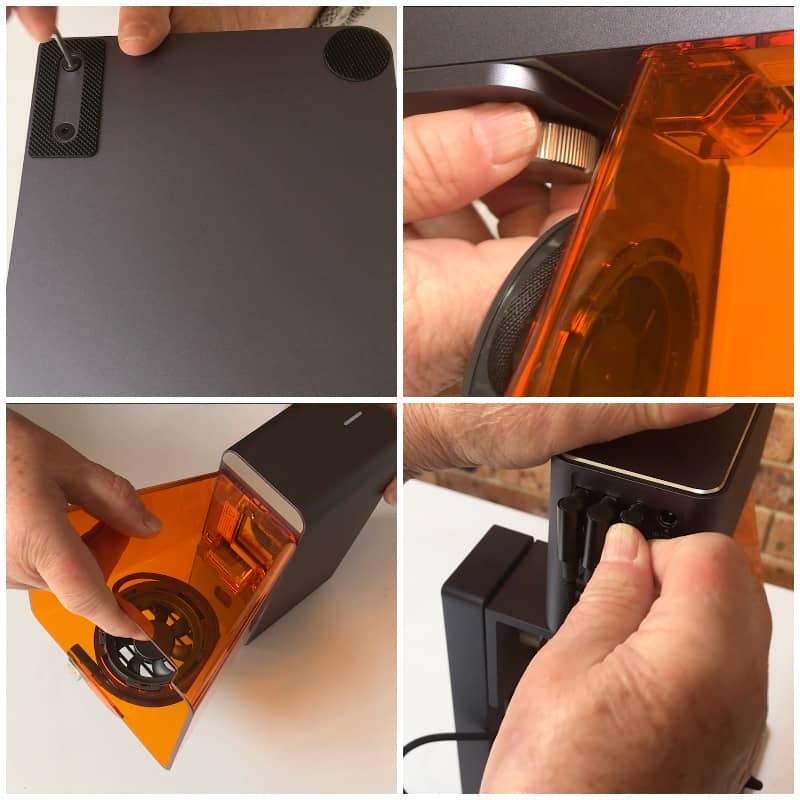
Set Up
One thing I love about the LaserPecker2 is that there is no complicated set up. Setting it up was a breeze. It took less than 5 minutes and it was up and running. Just a couple of screws for the stand and then attach the shield to the unit and plug in some cables. Just what the home hobbyist needs.
We do have a separate video on the setup.
Portability
One thing I absolutely love is the portability. You can literally engrave anywhere and on an angle. Plus, the rechargeable power bank (which is an optional accessory) means you’re not tied to a power outlet. We didn’t get one with our pack, unfortunately, but I think it will be a must if you want to be able to easily move around to engrave things.
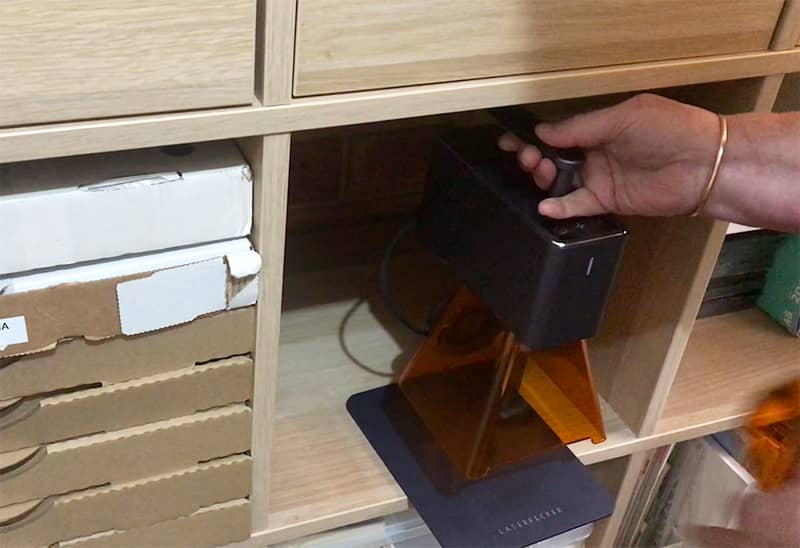
Storage
It’s not a massive machine that needs a dedicated space, like larger laser machines. We cleared a space in our Ikea Kallax storage cabinet to store the machine when it’s not in use. It fits perfectly and as it’s in the craft room, it’s so easy to grab and begin engraving really quickly.
Safety
I can never stress enough that you should use safety glasses when using a laser machine.
Your LaserPecker 2 comes with a set of cool looking safety glasses, and although the machine has a protective blue light filter cover, you should always wear your safety glasses to protect your eyes.
We have run the machine with the cover open but this is only for filming purposes, you should have the cover closed in most instances.
The machine has another great safety feature in that it will automatically stop if there is any vibration, tilting or overheating.
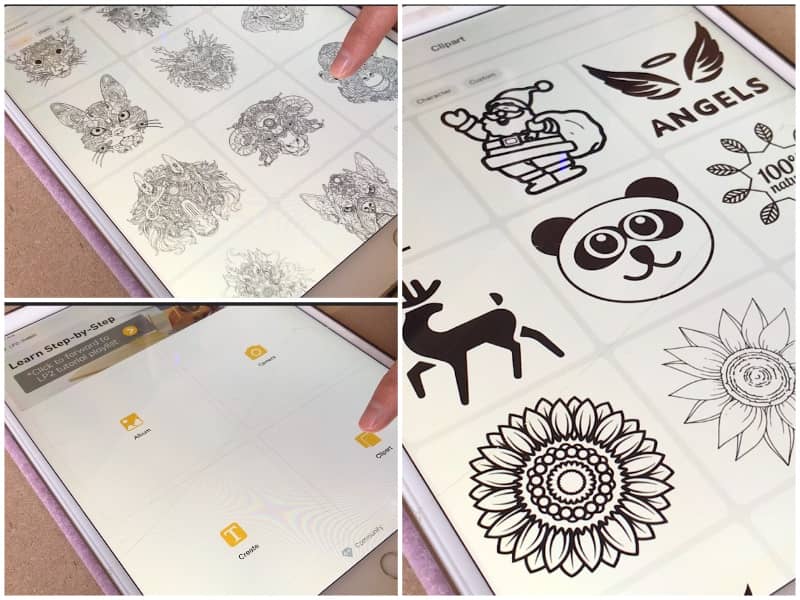
Software
The LaserPecker2 has it’s own software which is available for both Android and iOS. Unfortunately, it’s the LaserPecker 2 is not compatible with Lightburn. However, I do believe that the LaserPecker 4 is.
We found the software to be a little limited in it’s capabilities compared to Lightburn but it does the job and it’s easy to use. We did have the machine hooked up to the Mac using the Desktop version of the software but we ended up using the app on an iPad for most of the work.
The app is straightforward, and it comes with a bunch of preloaded designs, which is great for beginners.
Our User Experience
What’s the actual experience like? Well, we’ve been playing around with various materials – wood, metal, card stock, fabric – you name it, and we had a ball.
The high-speed preview helps you to precisely position your design on your project, and although the LaserPecker app provides you with default settings for various materials, you can also adjust the engraving and cutting speed and power to suit your requirements.
Let’s look at the Projects We Engraved
1 – MDF Coaster
We have a few of these coasters in our stash that we purchased from Bunnings here in Australia.
The Cat image was selected from the Clipart section in the LaserPecker Software. I absolutely love this design and was delighted with the result. I am making a junk journal for one of my granddaughtes, Demelza, who is a cat and a dog lover, and this coaster will tuck nicely into one of the pockets.
Settings – Be sure to run your own test before engraving your project
- Material – Wood Setting
- Power – 100%
- Depth – 10%
- Resolution – 1K
- Pass – 1
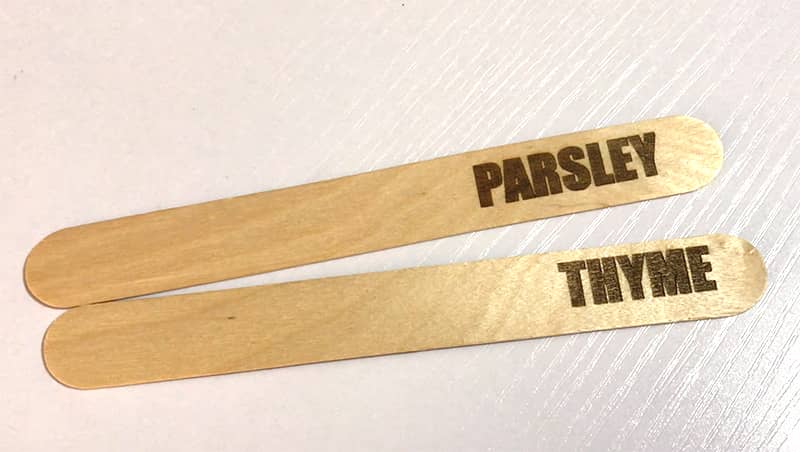
2 – Popsicle Sticks
I am getting my labels ready for my vegetable and herb garden and engraving on popsicle sticks works really well. The labels are easy to read and they stick up out of the ground so they can be seen at a glance. We typed the words using IMPACT font.
Settings – Be sure to run your own test before engraving your project
- Material – Bamboo Strip Setting
- Power 100%
- Depth 10%
- Resolution 1K
- Pass – 1
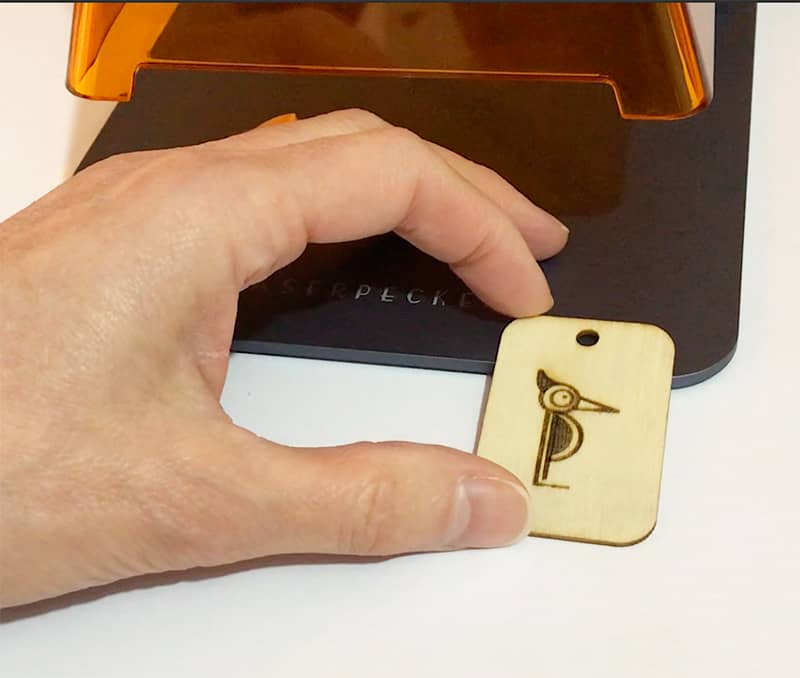
3 – Wood Tags
We engraved the Laser Pecker Logo on these tags. The logo is available in the clip art section of the LaserPecker Software.
Settings – Be sure to run your own test before engraving your project
1st attempt
- Material – Bamboo Strip Setting
- Power – 100%
- Depth – 8%
- Resolution – 1K
- Pass – 1
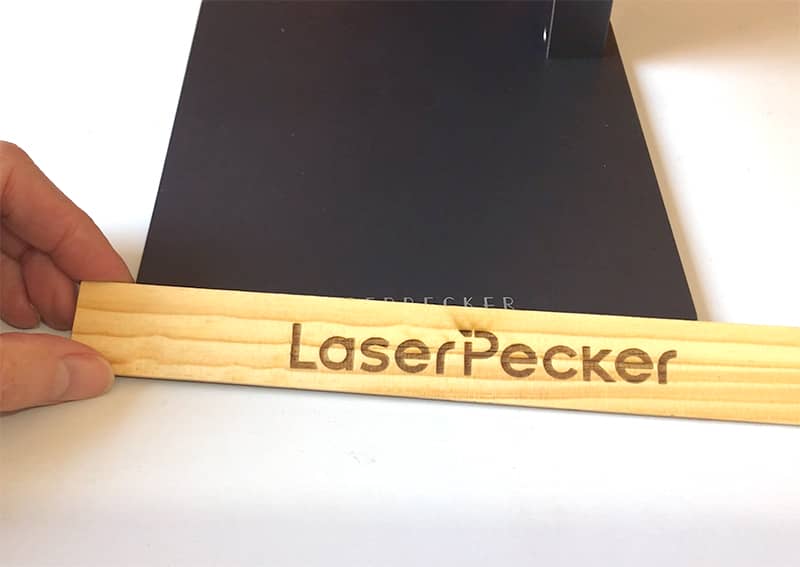
4 – LaserPecker Ruler
For this project we engraved the LaserPecker logo (words) on to the ruler that was included with the LaserPecker2. The ruler is used for measuring the distance when focusing and we didn’t want to mix it up with other rulers around the place.
This came out pretty good but I think next time we will reduce the settings slightly as it had a bit of burning just up the letter ‘P’.
Settings – Be sure to run your own test before engraving your project
- Material – Wood Setting
- Power 100%
- Depth – 10%
- Resolution – 1K
- Pass – 1
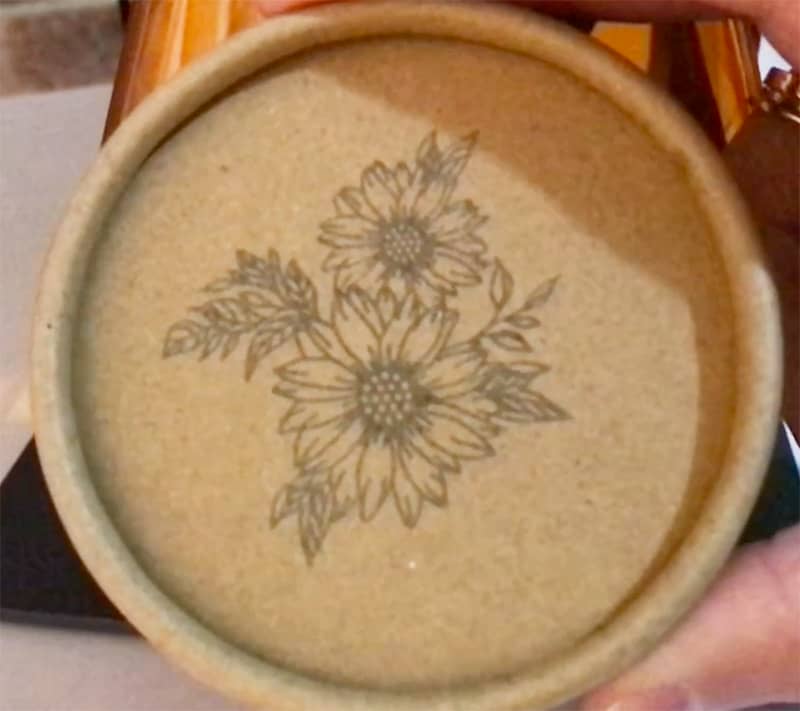
5 – Cardboard Round Container
The design we used on this hard cardboard container is a ‘Sunflower‘ from Creative Fabrica. We have used this design on a number of occasions for both engraving and cutting and it really is a lovely design.
The LaserPecker2 did a really nice job on the cardboard container.
Settings – Be sure to run your own test before engraving your project
- Material – Recycled Paper Setting
- Power – 100%
- Depth – 3%
- Resolution – 1K
- Pass -1
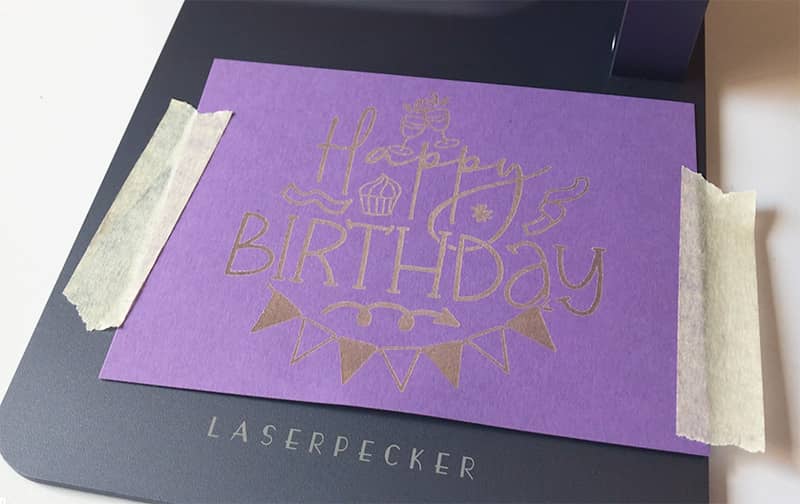
6 – Cardstock
This Happy Birthday design is from a ‘Happy Birthday pack‘ from Creative Fabrica. We like making greeting cards from scratch so always looking for different ways to design cards.
Settings – Be sure to run your own test before engraving your project
- Material – Recycled Paper Setting
- Power -100%
- Depth – 3%
- Resolution – 1K
- Pass – 1
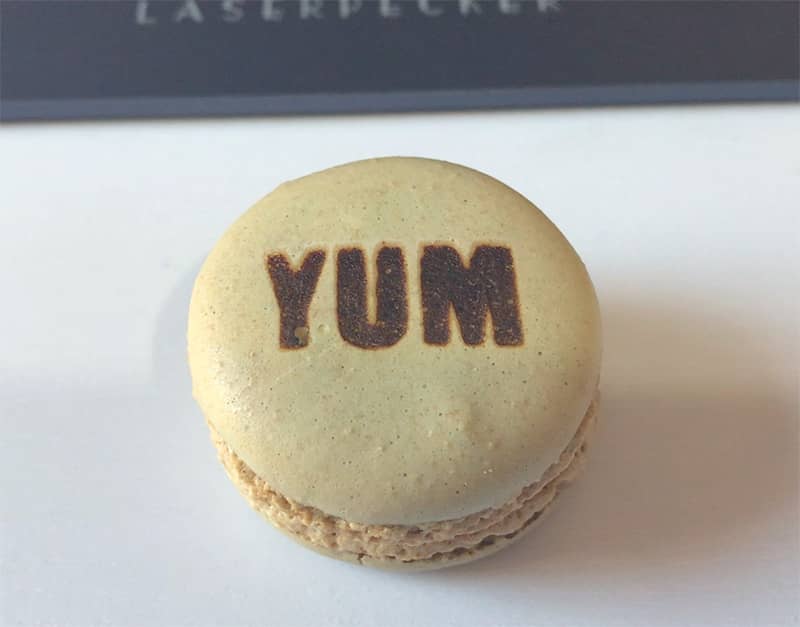
7 – Macarons
We bought a packet of delicious Macarons. These are a French sweet meringue based biscuit that we first tried when we were in Paris a few years ago. They are absolutely delicious. We decided to engrave the word YUM on them, because that’s what they are.
Settings – Be sure to run your own test before engraving your project. It doesn’t matter if you make a mess of a few because you can just eat them.
1st attempt – The settings were not intense enough. Oh dear we had to eat this one…and we don’t even have a photo for you either since it got eaten so quickly.
- Material – Recycled Paper Setting
- Power 100%
- Depth – 3%
- Resolution – 1K
- Pass – 1
2nd attempt – The settings were too intense. What a shame, we just had to eat this one as well.
- Material – Fruit Peel Setting
- Power – 100%
- Depth – 5%
- Resolution -1K
- Pass – 1
3rd attempt – These settings gave us the best result. We kept the same settings as for attempt #2 but changed the depth to 4%.
- Word – Dog graphic from the LaserPecker clipart.
- Material – Fruit Peel Setting
- Power 100%
- Depth – 4%
- Resolution – 1K
- Pass – 1

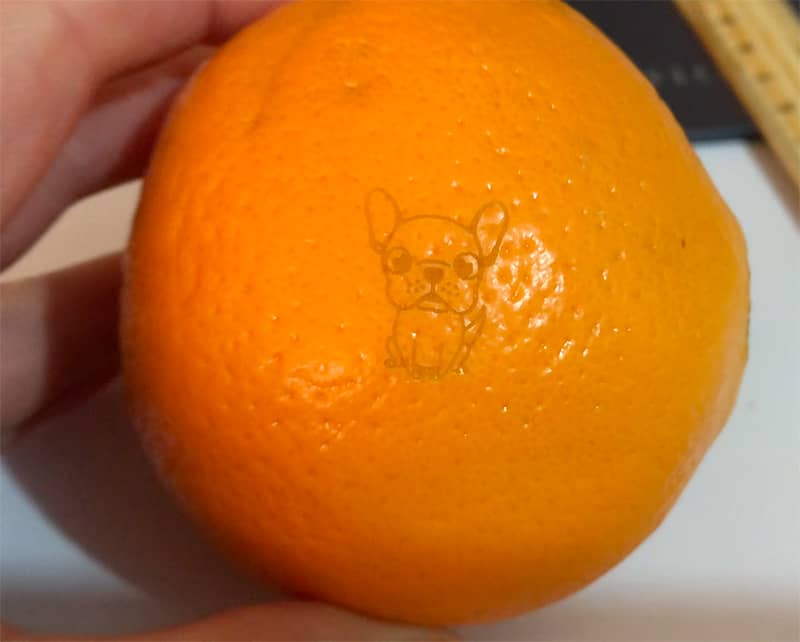
8 – An Orange
It was time to try out engraving on fruit, and we chose an orange. For this engraving we used the same dog picture as we had used on the Macaron.
I love how this one turned out. If you have kids, just think how much fun this would be for them to open up their lunch bag to find their fruit with all sorts of different engravings.
Settings – Be sure to run your own test before engraving your project.
- Material – Fruit Peel Setting
- Power – 100%
- Depth – 8%
- Resolution – 1K
- Pass – 1
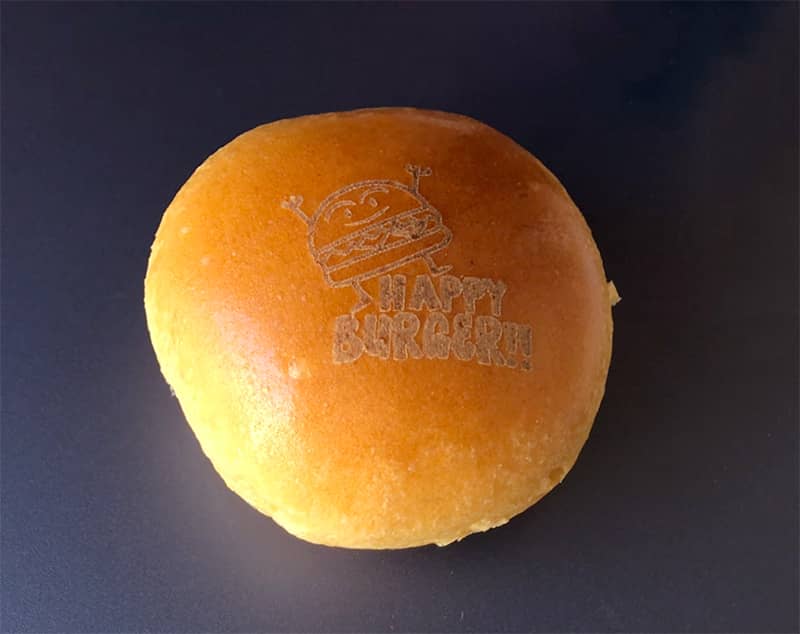
9 – Burger Slider Buns
These are cute little brioche buns. They are also very tasty. We engraved the Happy Burger design on the bun, it’s from the Creative Fabrica Kawaii Hamburger Bundle.
These are great if you are having a BBQ. You could set up the engraver next to the BBQ and quickly engrave each persons name in the buns.
Settings – Be sure to run your own test before engraving your project.
1st attempt
- Material – Fruit Peel Setting
- Power 100%
- Depth – 8%
- Resolution – 1K
- Pass -1
2nd attempt – This was the best result
- Material – Fruit Peel Setting
- Power – 100%
- Depth – 10%
- Resolution -1K
- Pass – 1
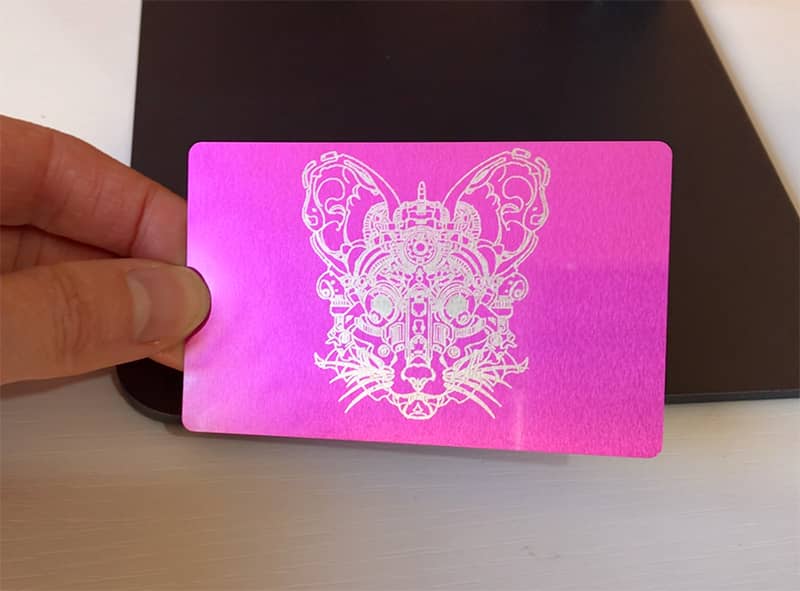
10 – Aluminum Business Card
For this project we engraved the Mouse design from the clipart files in the LaserPecker software.
Settings – Be sure to run your own test before engraving your project.
- Material – Stainless Steel Setting
- Power – 100%
- Depth – 100%
- Resolution – 1K
- Pass – 1
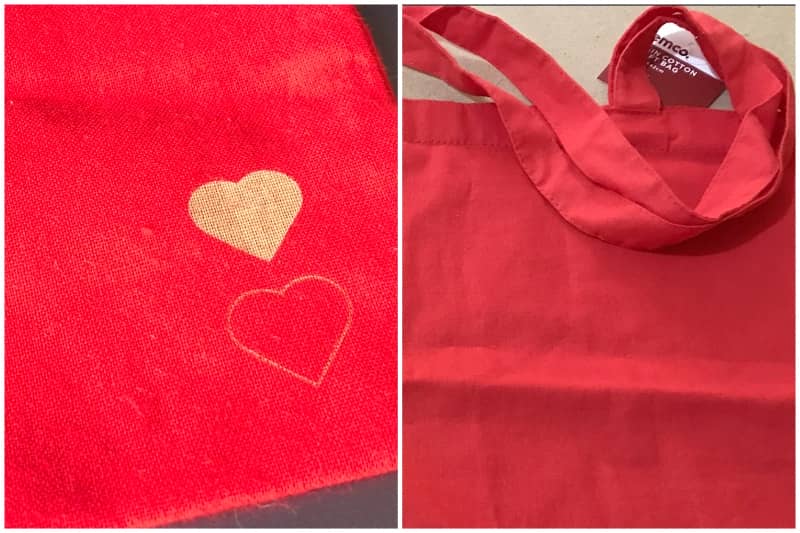
11 – Cotton Tote/Library Bag
For the first attempt we cut through the bag as we had the machine set to line instead of fill. It’s important to make sure to check all your settings before you start.
The heart design is one of the shapes in the LaserPecker software.
Settings – Be sure to run your own test before engraving your project.
1st attempt – not so good as we had accidentally selected line instead of fill.
- Material – Cloth Setting
- Power – 100%
- Depth – 100%
- Resolution – 1K
- Pass – 1
2nd attempt – best
We used the same settings as the 1st attempt but used the Fill option instead of the Line option.
- Material – Cloth Setting
- Power – 100%
- Depth – 1%
- Resolution – 1K
- Pass – 1
12 – Slate Coaster
We have a few slate coasters in our stash so we like to do one of these when we are testing out a new laser. For this one we used the American Eagle and the US Flag from Creative Fabric.
Settings – Be sure to run your own test before engraving your project.
- Material – Stone Setting
- Power – 100%
- Depth – 100%
- Resolution 1K
- Pass – 1

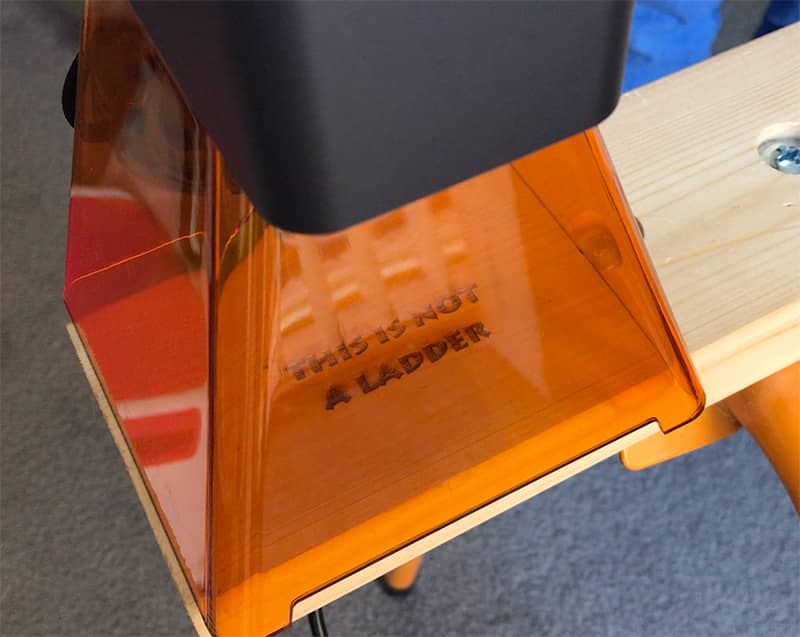
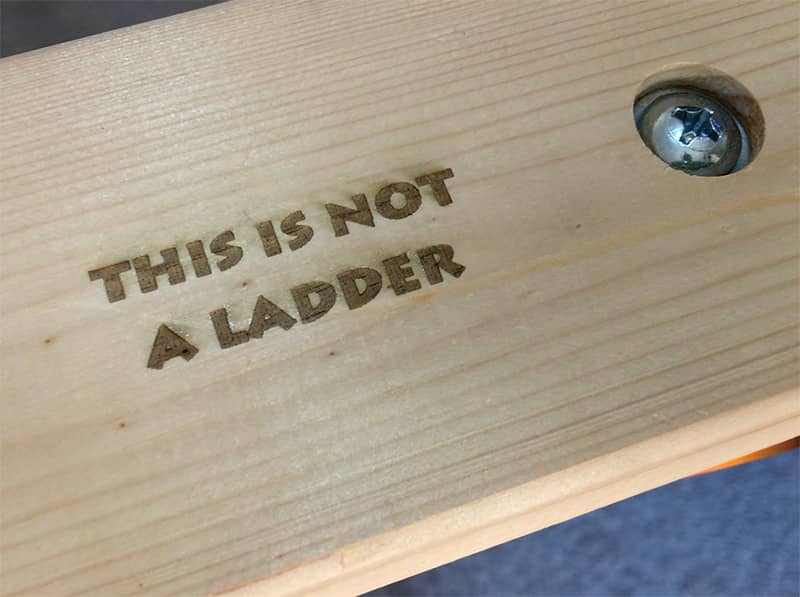
13 – Saw Stool
How many times do you find someone using your saw stool as a step ladder, even though the instructions say not to. Well maybe not that often but I decided to engrave on the saw stool “This is not a ladder”. Hopefully it will have the desired result.
Settings – Be sure to run your own test before engraving your project.
- Material – Wood Setting
- Power – 100%
- Depth – 10%
- Resolution -1K
- Pass – 1
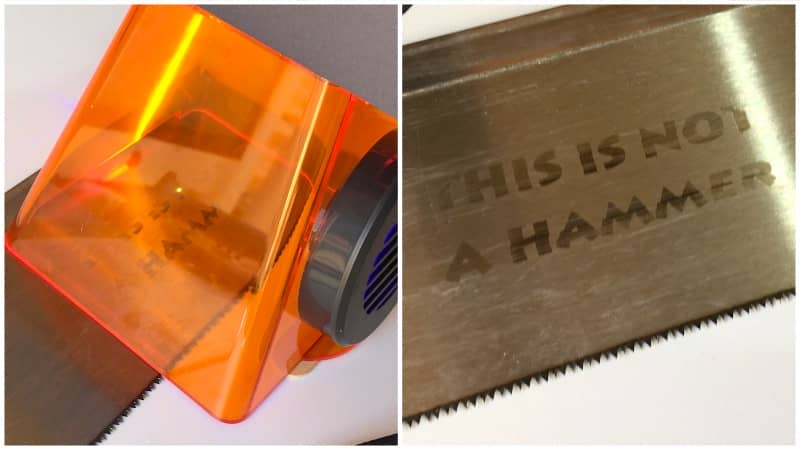
14 – Saw
This wasn’t as prominent as I would have liked but the saw is old and scratched. Plus, because I was holding the engraver and it took a while to engrave, at some point it moved and it created misaligned text.
In keeping with the saw stool messaging I decided to write ‘This is not a hammer’ on the saw.
- Material – Stainless Steel
- Power 100%
- Depth – 10%
- Resolution -1K
- Pass – 1
Cutting
The LaserPecker 2 does a nice job of cutting and it can cut through material up to 5mm.
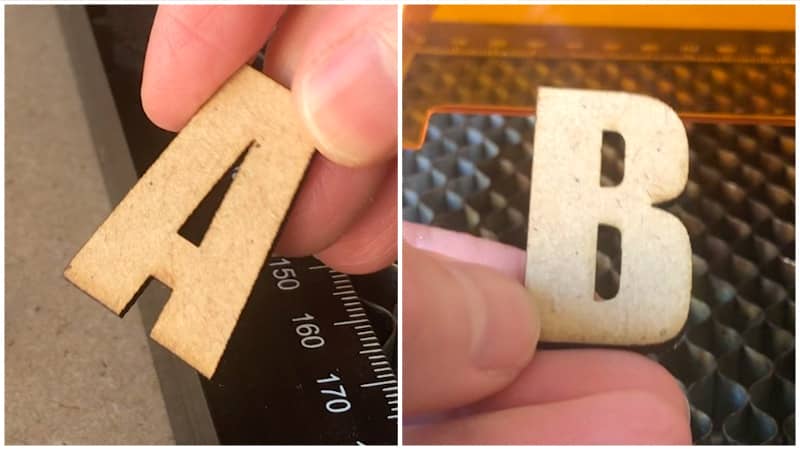
1 – MDF Board
We tested it out on a piece of MDF 3mm
1st attempt
- Material – Wood Setting
- Power – 100%
- Depth – 35%
- Pass – 3
2nd attempt
We wanted to cut out the design with just one pass. These settings DID NOT cut completely through.
- Material – Wood Setting
- Power – 100%
- Depth – 85%
- Pass -1
3rd attempt
So we upped the Depth and this time it worked beautifully.
- Material – Wood Setting
- Power – 100%
- Depth – 100%
- Pass – 1
2 – Cardstock
A good test of a laser machine for us, is how well it can cut out card stock. We actually had a lot more attempts at this than shown below. It just didn’t seem to want to cut cleanly particularly along the left and right sides for the image.
1st attempt
Our first attempt was using our fine flower design. This didn’t work very well as the settings were too intense and we burnt the card and it became brittle and broke up. We decided this design way to fine and we needed to do a few more practice runs to get it cut cleanly.
- Material – Recycled Paper Setting
- Power – 100%
- Depth – 10%
- Pass – 1 pass
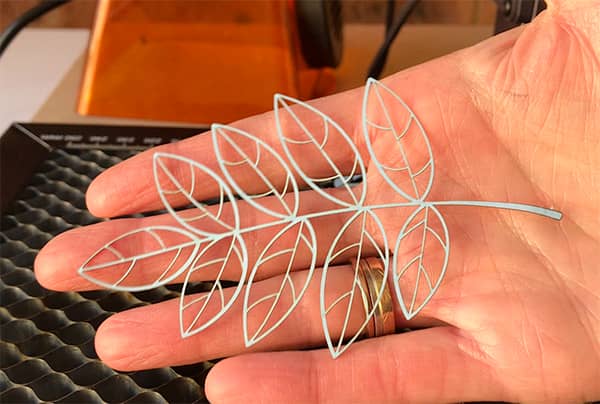
Final attempt
For the last test we chose a skeleton leaf design in the Autumn Leaves Bundle from Creative Fabrica. This design is not quite as fine as the flower design but it’s still quite fiddly. This LaserPecker 2 cut it out beautifully. This will work well in a junk journal I am making.
- Material – Recycled Paper
- Power 100%
- Depth – 20%
- 1 pass
Our Final Thougts
[PROS]
- First of all, I absolutely love the portability. It’s not a massive machine that needs a dedicated space. You can engrave just about anywhere and I think that’s where this machine really excels.
- The rechargeable power bank (which is an optional accessory) means you’re not tied to a power outlet.
- We didn’t get one unfortunately but I think it would be a must if you want to be able to easily move around to engrave things.
- The engraving quality is great. The details are nice and sharp and quite impressive for this little machine.
- It works really well with the app. We didn’t have any connection issues and the software is really easy to use.
- And the framing tool is pretty awesome. It makes it real easy to line things up and centre correctly.
[CONS]
- First of all, the app doesn’t tell you how long it is going to take to engrave or cut. This could be an issue if you are holding the LaserPecker when engraving and you find that it is going to take 10 minutes. After a while, you learn what is going to take a long time, like engraving on slate or metal for example, but even so an estimate of the time would be appreciated.
- It’s not compatible with Lightburn – the Laserpecker 4 is but this one unfortunately is not but the software is decent enough. It does the job.
- The working area is obviously small but you can purchase an optional roller which allows you to engrave on larger areas but you are still limited on the width so it would only ever be on long projects like signs for instance. However, the roller also doubles as a rotary tool for engraving round objects.
So how do we feel about the LaserPecker2, is it a worthwhile addition to your craft room?
If you are into making creative projects, wanting to personalize objects in and around your home or just love experimenting then I would have to say this machine is definitely one to consider. It’s not just a cute tool, it’s a gateway to creating unique designs for friends and family – there are endless possibilities.
We are having a lot of fun with it. The fact that it is so lightweight and easy to use makes it an ideal addition to the craft room.
WHERE CAN YOU BUY THE LASERPECKER 2?


Andy says
Do you have a demo to cut 2-3mm woood along with the settings?
Alanda Craft says
We only cut 3mm MDF and these are the setting we used Material – Wood Setting Power – 100% Depth – 100% Pass – 1
Maybe try a test cut on some scrap wood with those settings and see how it goes. You may need more passes to cut it through.