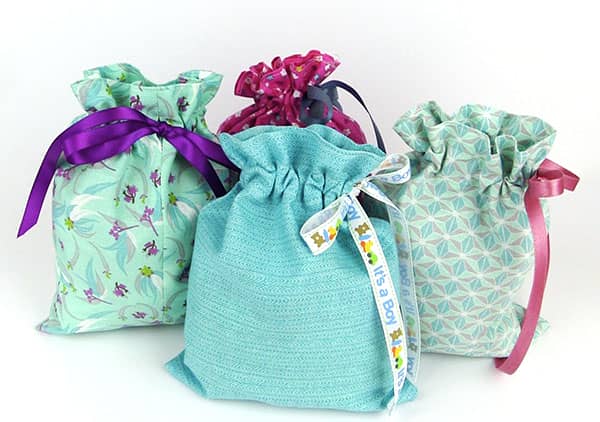
This fabric gift bag is just so easy to make and they look lovely. You can personalise them so that they suit the person you are giving them to. We’ve made them in Christmas fabrics as well as some more generic fabrics so they really can suit any special occassion.
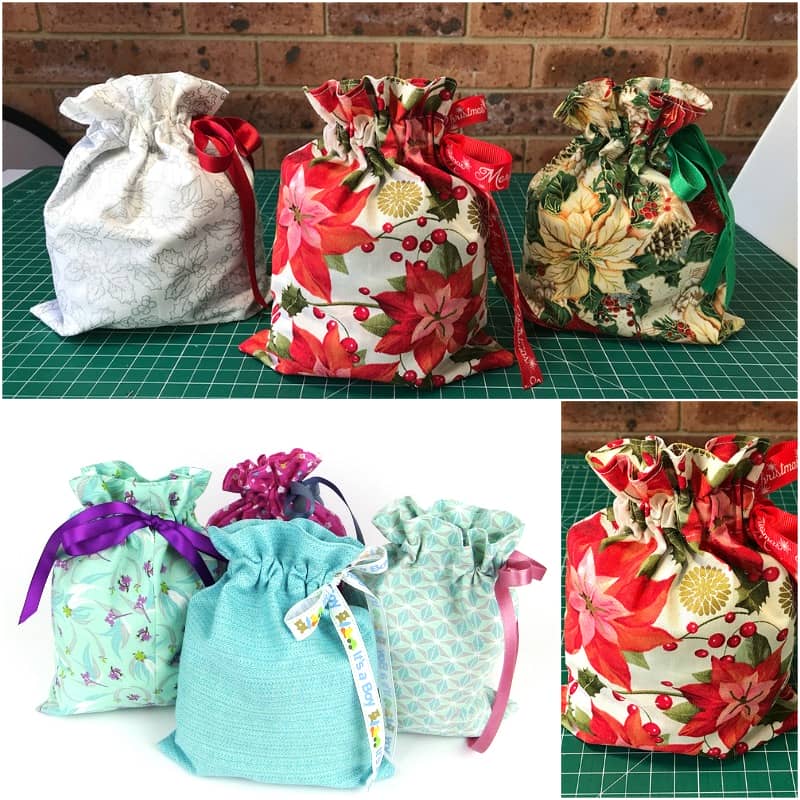
How to Make a Fabric Gift Bag
What you Need:
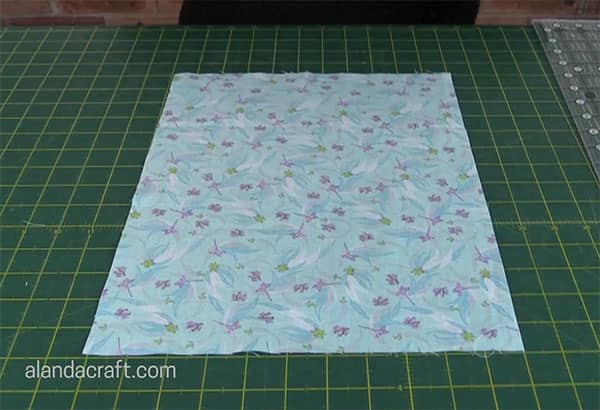
- 1 pc fabric 14″ x 11″
- ribbon – approx 28″ for this size bag.
TOOLS USED IN THIS VIDEO
You can check the latest prices at Amazon by clicking on the links below:
- Creative Grids Ruler 8½” x 24½”
- Olfa 24″ x 36″ double-sided healing mat
- Quilters Slidelock
- Olfa 60mm rotary cutter
- Oliso Iron
- FriXion Pens
Finished Size: 6 ¾” x 8 ¾”. (Note that the available height is 7″ as we have to take into account the ribbon section.)
We have two videos that you can watch to make these so take your pick.
VIDEO 1: Christmas Gift Bag
Video 2: Any Special Occasion
Method:
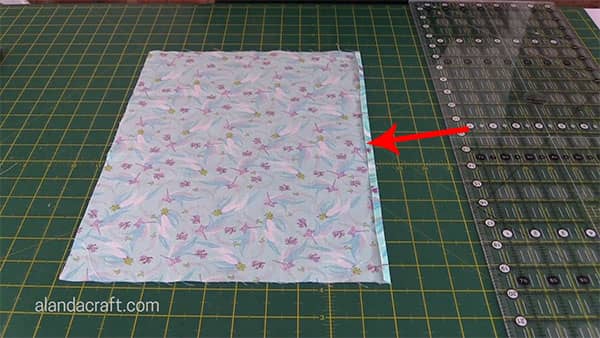
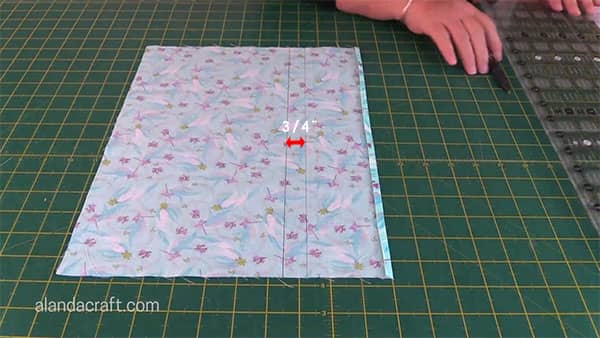
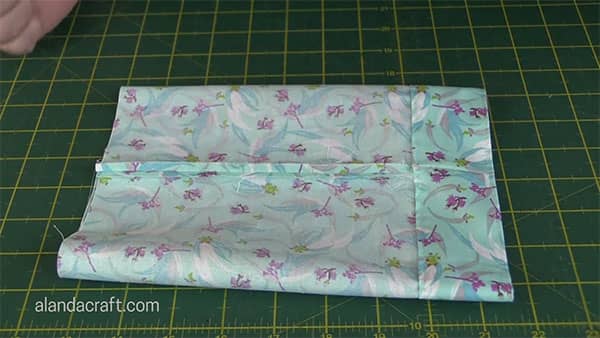
- Draw a line ½” from the edge along one of the long edges.
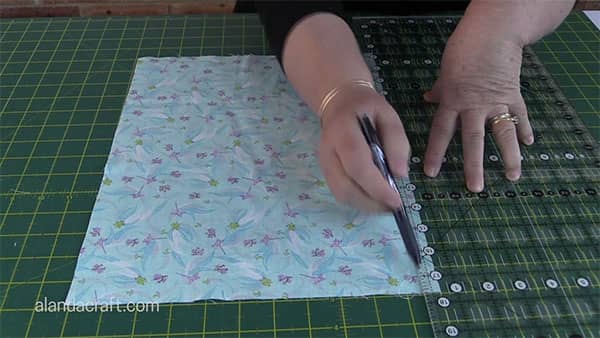
- Fold over to create a ¼” fold.
- Press
- Draw a line 3½” from the top folded edge.
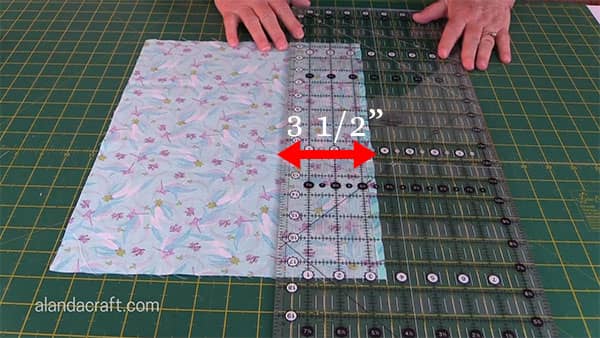
- Draw a line ¾” above the 3½” line.
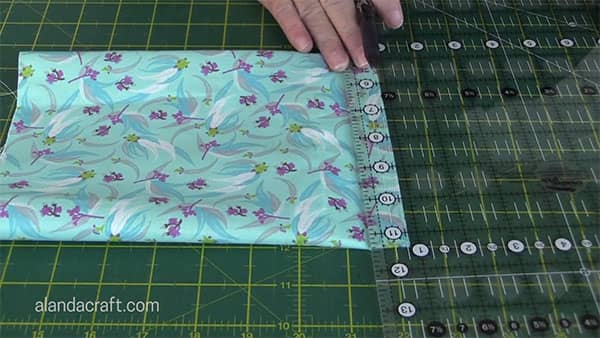
- Sew from the bottom edge to the first line you have drawn.
- Backstitch at each end
- Leave the ¾” gap and starting with a backstitch, sew to the top of the bag with a ¼” seam.
- Fold over the top piece until the hole is covered. 1¾” should be enough, but do check to make sure that the piece you are folding over covered the gap and the line you drew earlier. Check the video for more detail here.
- Sew around the folded over piece with an 1/8th inch seam .
- Sew an 1/8th of inch sew around the top edge as well.
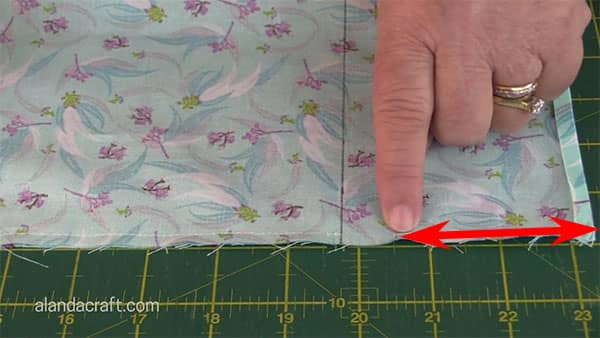
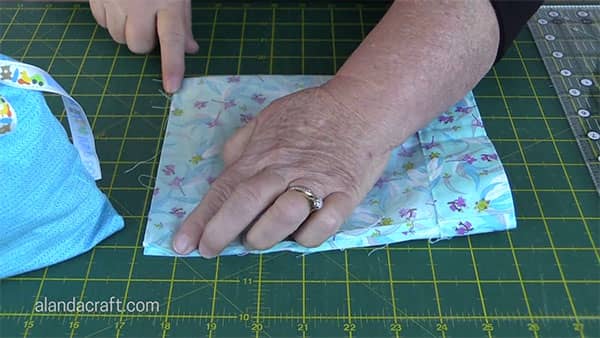
- Turn the bag through and place your ruler just above the gap. The gap on my bag started at 7/8ths of an inch from the top edge.
- Draw a line right around the bag at the measurement for your bag. This will help to keep the ribbon in place.
- Sew around the bag on that line.
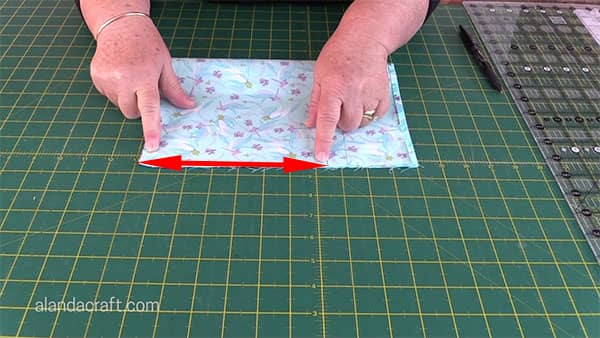
- Turn the bag through and sew up the bottom edge with ¼” seam.
- If you want the ribbon bow to be on the side, simply lay the bag flat with the seam on the side before sewing the bottom seam.
- If you want the ribbon bow to be in the centre the lay the bag flat with the centre seam in the middle of the bag.
- Sew across the bottom with a ¼” seam.
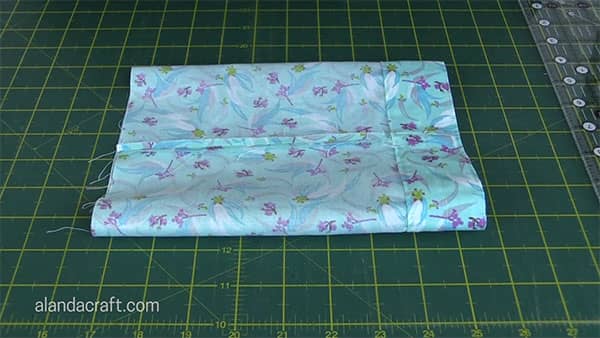
- This will leave a seam line, which looks okay. But you could maybe add some lace if this is a problem for you.
- Turn the bag through
- Thread the ribbon through the gap, gather up the bag and tie a bow.
- All finished.
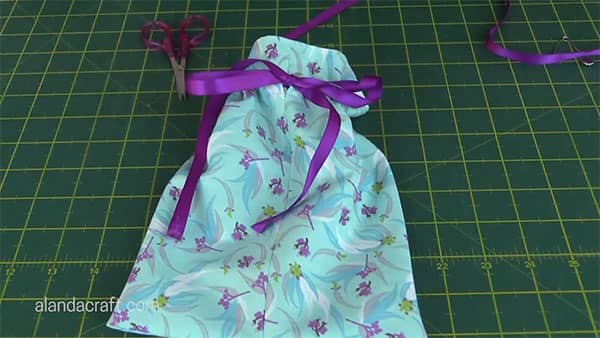
How easy was that. And just look at how cute these little gift bags are.


Emma says
I’m like everything!
Thank you so much
Alanda says
That’s great Emma. I’m really happy that you like everything. 🙂
Noelle I Prairie says
Love all your videos, Thank you so much for sharing . Can you tell me the size of the ruler , Love it! BTW, Im making these as my Christmas gift bags!! You do an AWESOME job !
Alanda says
Thanks for your lovely comments Noelle.
The ruler is a Creative Grids ruler. Just love these as they don’t slip when you use them. It measures 8″ x 24″. I’ve added links to the products used in the tutorial to the top of this post.
Janet Fagan says
Hi Alanda, I love the way you give step by step instructions, I’m a beginner but can easily follow your videos, thank you so much, any easy sewing crafts will be greatly received
Alanda says
So glad we could help Janet. If you want more tutorials, you can check out all of them on our channel here: https://www.youtube.com/user/alandacraft
Jayaslings says
I used your tutorial and had great success on my first try and I’m a beginner. Thank you for the great instructions. so pleased with my bag.
Alanda says
Excellent. Maybe you would like to share some photos of your gift bag with us on our Readers Project page. Here is the link /category/readers-projects/ We love seeing our readers projects. 🙂
Stephany says
I followed your link but can’t see how to share the photos. can you give me an email I can send them to? thank you
Alanda says
Hi Stephany, On the ‘Submit your Project’ page there is a browse button just under where you add you details and some information about your project. Click on the Browse button and locate your photos on your computer and select the ones you want to upload. Give that a try and if you still have a problem let me know.
Grace says
Hi Alanda,
thank you for all the information you show us, I would like to print
out the instructions for my 12 year old granddaugher. She loves to sew and
knit. Unfortunately I live over 5 hours away, but I think this is easy enough
for her to understand and make on her own. Thank you.
Grace
Alanda says
Hi Grace,
We don’t have the ability to provide a downloadable PDF. But I’m sure she will have no trouble following the written instructions and photos. Just send her the following link so that she can access the page /2018/06/22/quick-easy-drawstring-gift-bag/. You can always print the page from your browser as well. Cheers Wanda
Christie says
Hi Alanda, how would I adjust the pattern to make the bag bigger? I made the bag above for my first sewing project last night and it worked great! Just need them a little bigger.
Alanda Craft says
Hi Christie, as long as the fabric is cut in a rectangle it should work. We found the 3 inch difference between the two measurements worked for us. Ours is 11″x14″, so just cut the fabric to the size you want just making sure you cut the fabric as a rectangle (don’t forget to allow for seams). Here is a link so that you can see what Stephanie did to make her bag bigger /2019/04/17/readers-project-stephanys-drawstring-gift-bag-2/. I hope that helps.
Rhonda says
What a great tutorial! Easy to follow and leads to a polished finished project. Whipped up three as a gift for a friend who is going zero waste. I know I’ll be making many more! Thank you 🙂
Alanda Craft says
That’s awesome to hear Rhonda. Maybe you would like to share some photos of your gift bags on the website. We would love to see them. here is the link in case you are interested /submit-your-project/ 🙂
Eleanor says
I just recently discovered you and I absolutely love your teaching style as it is extremely clear and methodical
You don’t gloss over anything without explaining it I am very appreciative for all that you share
Thank you!
Alanda Craft says
Thank you for your lovely comment, Eleanor. It’s always so heartening to receive such nice feedback. 🙂
Telma says
Hi Ladies, I have missed hearing your lovely voices. I truly enough your videos. I have watched just about all your videos for a few years and hadn’t seen anything new in a while, it was so refreshing to hear and see your new video. Thank you so much for sharing your talents with us. You are so talented in many areas, including your ability to teach. You make it easy to follow your instructions and produce crafts that will wow anyone. Thank you for turning us into an “oh, I can do that” crafter.
Alanda Craft says
What a lovely comment! It’s always nice to hear that we are appreciated. We are feeling like we are ready to get back into the tutorials now, so you will definitely be seeing more videos from us.
Dee says
Thank you for all the information. Be Blessed
Alice says
Am I right in calculating that the space in the finished bag would allow an item of approximately 8 inches tall to fit under the closure? I looked but didn’t see if you said anywhere what the measurements of the finished bag is so I tried to do the math myself (a dangerous thing). I am considering making several bags in various sizes out of Christmas material to help my husband and I buy less wrapping paper every year (creating waste) and also shorten the time we spend wrapping gifts on Christmas Eve. ;-). I’m also thinking that cloth bags will make wrapping items that have odd shapes much easier to wrap. Thanks for the video and the great step by step directions.
Alanda Craft says
The bags measure 6 3/4″ wide x 8 3/4″ tall. However, the available height is 7″ as we have to take into account the ribbon section.
Tammy says
What a wonderful idea!! Thank you for sharing.
What was the length of the ribbon you used?
I can’t wait to make some for the Holidays😊
Alanda Craft says
Good question. I just went to measure and we had a variety of different lengths but if you cut around 30″, it should give you plenty to play with.
Lucinda Jorgensen says
wow this looks so easy can’t wait to put some together. I need to make some for some homemade projects and just don’t want to have to pay and arm and a leg for good looking bags. These will be fun. Thank you
Alanda Craft says
You are going to love how easy these bags are to make Lucinda. And you can personalize them for the recipient. I used sugar skull fabric for one that I made for my grandaughter and she just loves it 🙂
Heidi says
Great tutorial. I was looking for a quick gift bag to make. I’m wondering if I made one larger would it be suitable to gift a lap size quilt. Do you think I’d have any issues?
Alanda Craft says
You shouldn’t have any problems making it larger, Heidi. Here is a link from Stephany, one of our readers. /2019/04/17/readers-project-stephanys-drawstring-gift-bag-2/ She made her bag much larger so that it would fit a bigger gift. Just decide on the size you want, the technique is the same as making a smaller bag.
Heidi says
Thank you! I’ll check it out and give it a try!
Bekkie says
I can’t wait to make these for my birthday party favor bags. I read in am earlier comment to cut 30″ of ribbon, but how wide is the ribbon you used. Or better yet what is the width of the casing sewen? Thanks in advance.
Alanda Craft says
Hi Bekkie, I have used 1/2″ ribbon and the casing measures 3/4″.
LL says
If I wanted to make a “lined” bag
I was thinking of cutting a piece the size that would be left over after you have turned over your “cuff” and attach it to the bottom section. Then your raw edges are all enclosed. Adding seam allowances of course.
What do you think?
I hope that made sense.
In other words…instead of doubling up on your whole piece of 11×14 piece of material. Less bulk in the top section where your ribbon and ruffle are.
Just a double bottom.