Adding sashing to your quilt blocks is ideal for when you want to separate the blocks, rather than sew them together. It also adds a bit of oomph and interest to your quilt blocks. You can make sashing as wide or as narrow as you want. For this tutorial I have cut my sashing at 2″. This will give me a finished sashing size of 1½”.
This is a generic tutorial to show you how to add sashing to any sized quilt block.
Watch the video tutorial below or scroll down for written instructions
(Can’t see the video? You may have an ad blocker installed.)
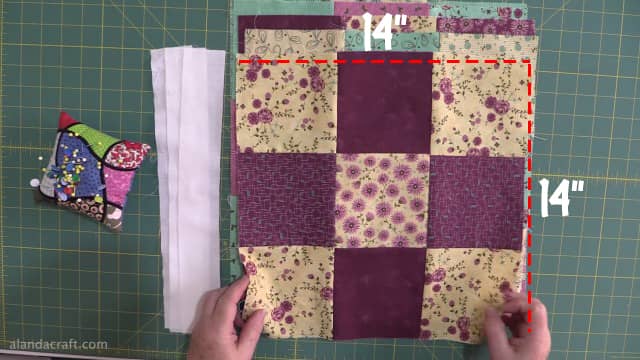
Firstly, measure your blocks. Mine measure 14″ square.
I have six quilt blocks so I need to cut 3 pieces of sashing measuring 14″ x 2″. If you have more quilt blocks you will need to cut more sashing strips.
The sashing strips are only going to be added to 3 of the blocks, so put the other 3 blocks aside for now.
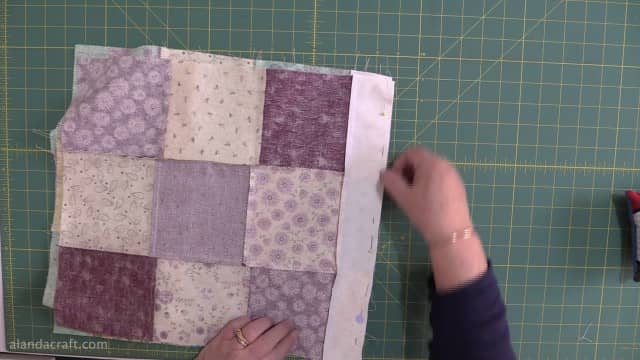
Lay one piece of sashing along the edge of one block.
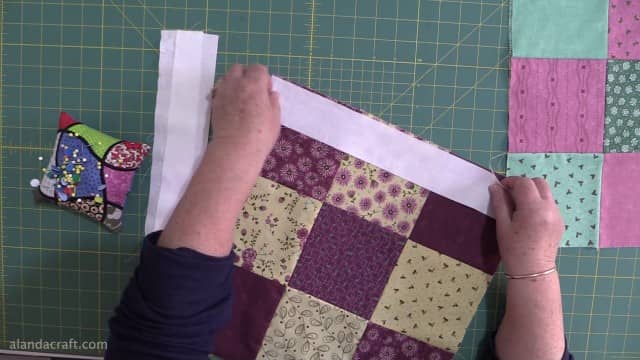
Pin the sashing to the edge. I generally make sure the edges match up nicely, and then I pin at each end of the block and again in the middle.
Now, sew the sashing to the block with a ¼” seam.

Repeat this process with all 3 blocks.
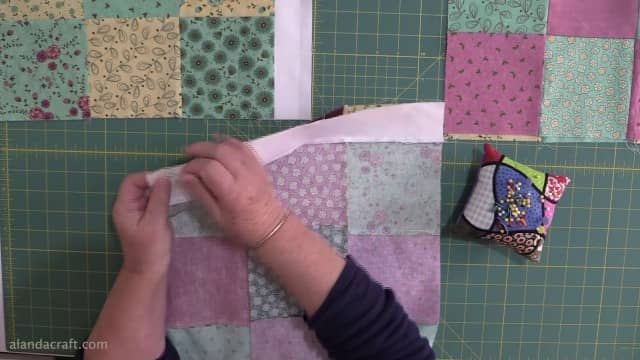
Now take one of the blocks that doesn’t have sashing attached and pin it to one of the blocks that does have sashing. You will be pinning it to the sashing of that block. It’s kind of difficult to explain it with photos so it’s best to watch the video so it makes more sense.
Sew the block to the sashing with a ¼” seam.
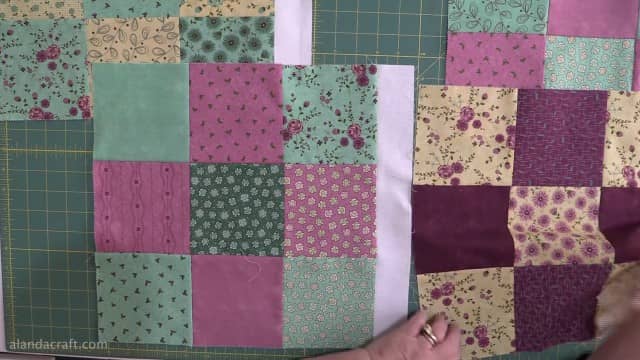
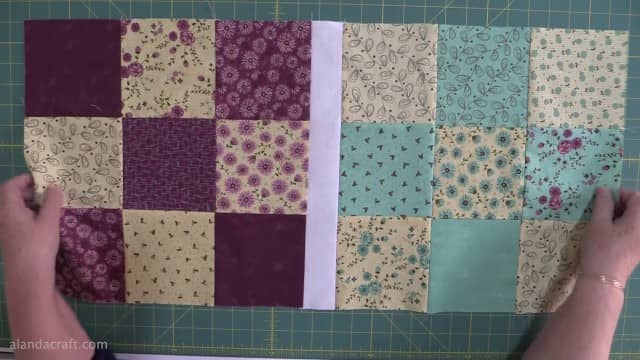
You now have two blocks sewn together with the sashing between them.
Repeat the process with the remaining blocks. So you now have 3 sets of blocks joined together with sashing.
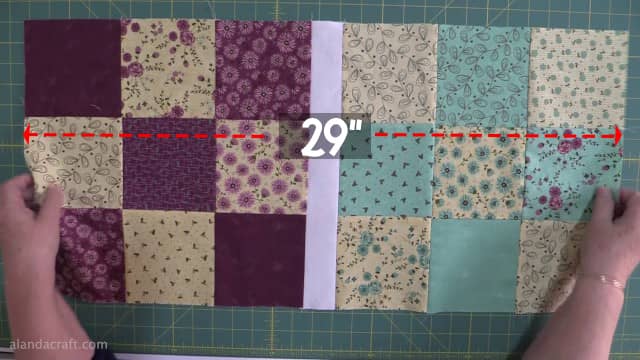
Next we need to measure the width across the 2 blocks and the sashing. Mine measures 29″.
So I will cut 2 sashing strips measuring 29″.
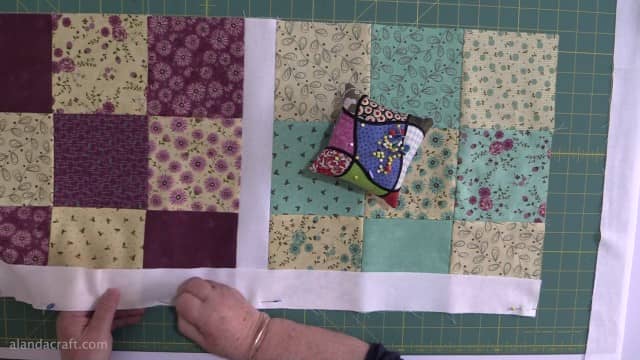
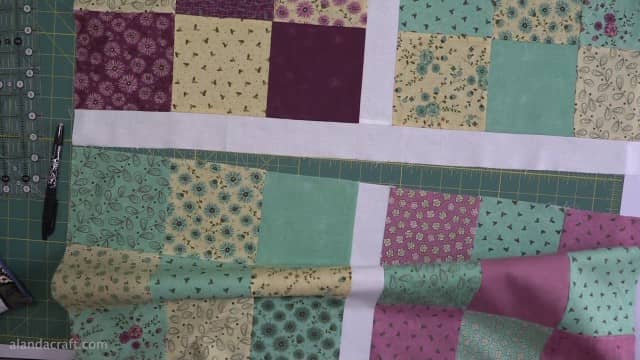
Attach the sashing to the lower edge of the first set of blocks with a ¼” seam.
Do the same with the next set of blocks.
Line up the centre sashing of each set of blocks, pin and sew together with a ¼” seam. An easy way to make sure your sashing pieces line up, is to lay your ruler along the edges of the squares and make a small mark with a frixion pen on the sashing. This makes it easy to line up your rows and make sure that the sashing strips will flow nicely and not look wonky.
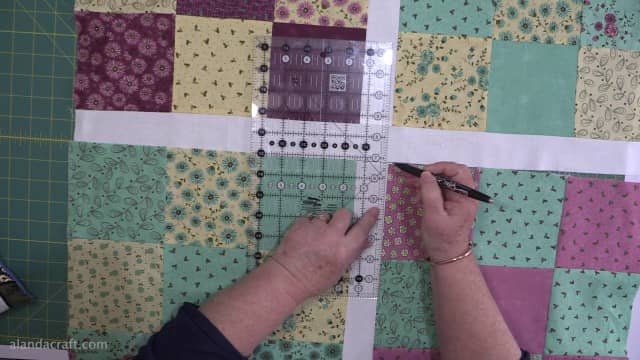
Pin where the mark and the seam line matches and pin the sashing along the rest of the row.
Sew together with a ¼” seam.
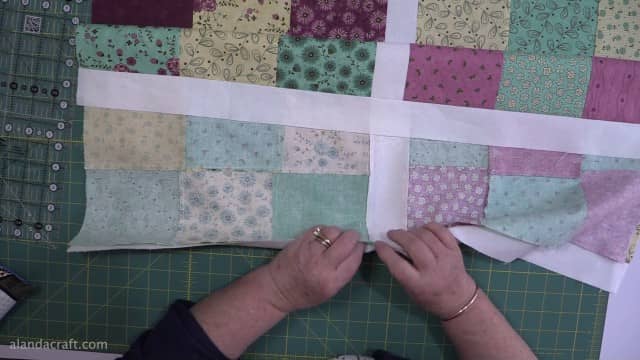
So you can see in the image below that we have the first two rows sewn together and the centre sashing lines up nicely.
Now add the last set of blocks and sashing to the row above in the same manner.
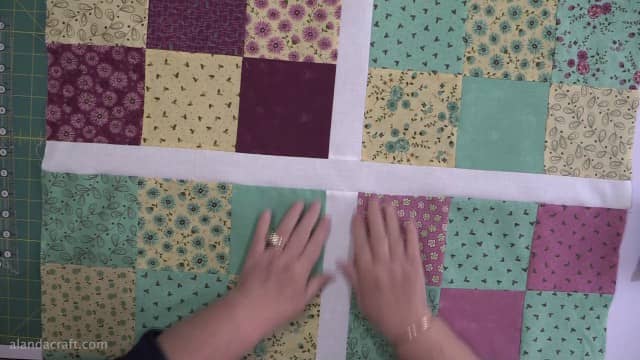
You have now added sashing to your quilt blocks.


Theresa says
Great tutorial!
Alanda Craft says
Thank you Theresa 😊
Glenda G Steele says
Thank you so much, I needed to know that for sure !
Alanda Craft says
😊
Glenda G Steele says
Thank you so much.
Alanda Craft says
You are most welcome Glenda 😊
Carol Schmidt says
Even though I have done this many times, your tutorial was very good. I needed the information about putting a tick next to the sashing, so you are sure they are even. Thanks! Great tip!
Carol S.
Alanda Craft says
Thank you Carol 😊. I’m glad you found that little tip helpful.
Judy Yockey says
Thank you so much! Very helpful!! Judy
Alanda Craft says
I’m glad you found the tutorial helpful Judy.