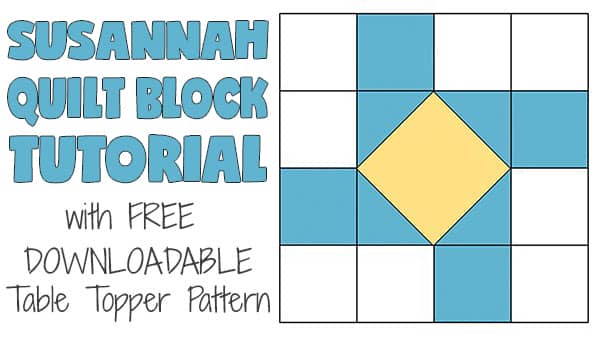
The Susannah Quilt Block is a nice easy block to not only make but also cut since it only relies on squares. Even the inner piece which might look complicated to a beginner is really simple to put together.
We have two video versions of this lovely block in different sizes.
This is the first version
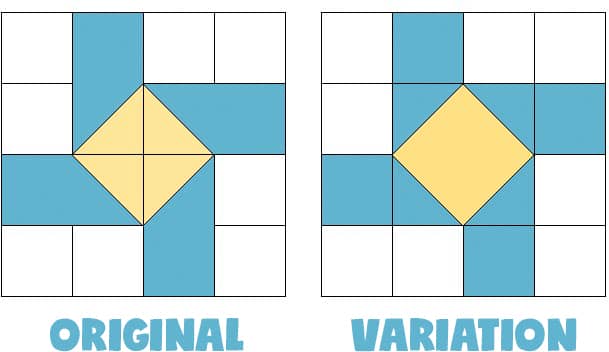
The quilt block we are making is a variation on the original Susannah quilt block. The original requires you to cut fabric on an angle whereas this variation is so much easier as you only have to cut squares. It is also easier to piece together.
In other words, you get the same result but without all the hassle.
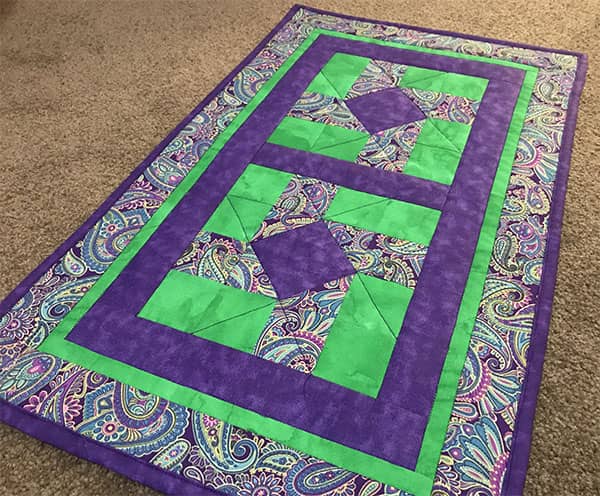
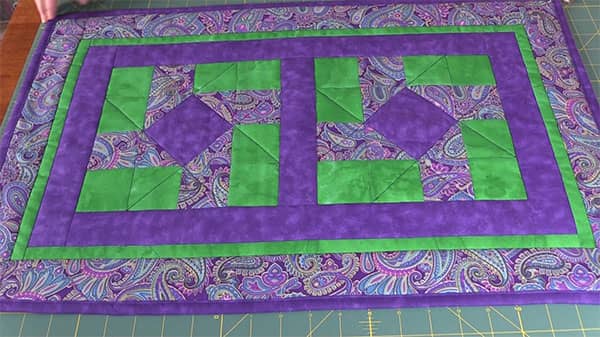
We had a lot of fun making these and we ended up putting a couple of these blocks together to make a table runner (more on that below if you would like to make it) although it might be classified as a table topper since it doesn’t run very long. To be honest, I’m not sure what the cut off point is when determining whether something is a table runner or a table topper. If you know the answer to this one, let us know in the comments.
But enough talk, let’s get started and show you how to make this block.
This is the second version
Cutting Instructions
These instructions are for an 8″ x 8″ finished block (8½” x 8½” unfinished block). For alternative sizes, scroll to the end of this post.
- Fabric 1: Cut 1 piece at 4½” x 4½”
- Fabric 2: Cut 8 pieces at 2½” x 2½”
- Fabric 3: Cut 8 pieces at 2½” x 2½”
Piecing Instructions
Start by adding two of the squares to each corner of the large center square and sew as per the image below.
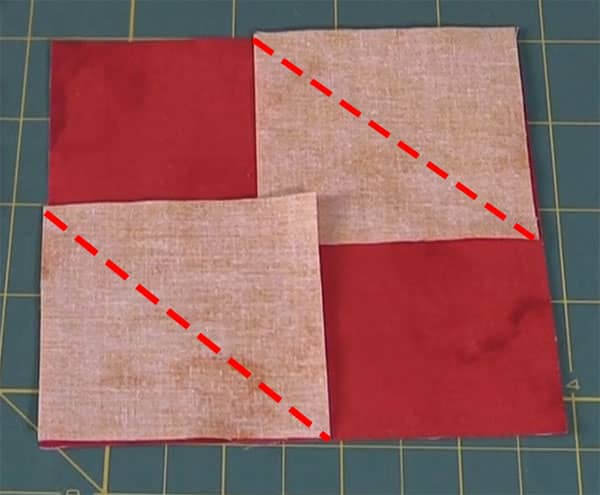
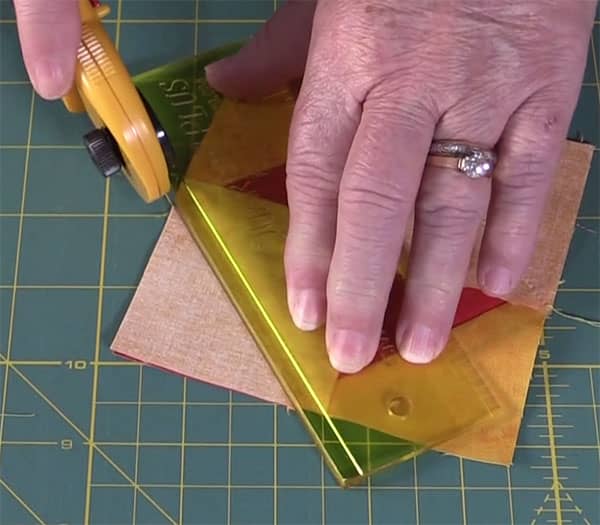
Trim the excess fabric from each side leaving a quarter inch seam.

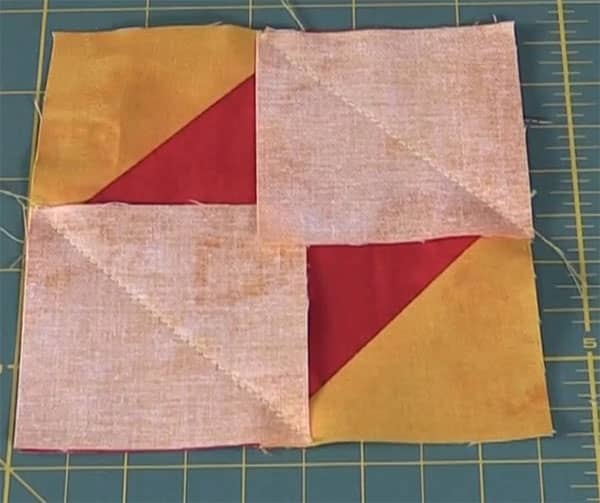
This is how it should look at this point.
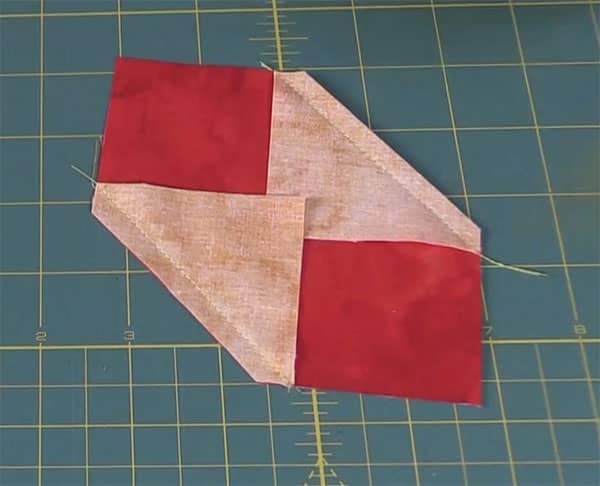
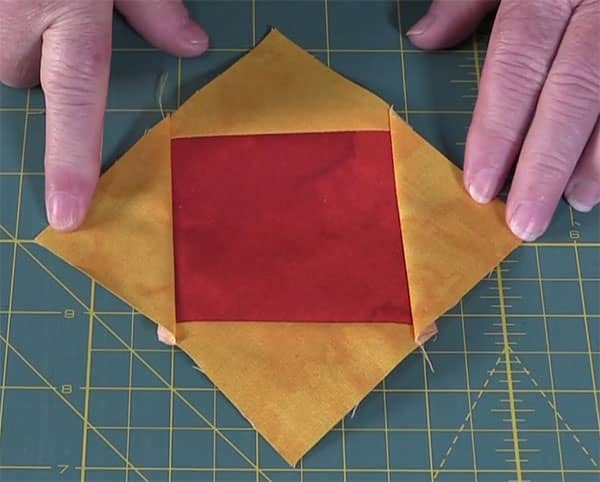
Fold back the fabric and press.
Add another two pieces to the other corners of the main square.
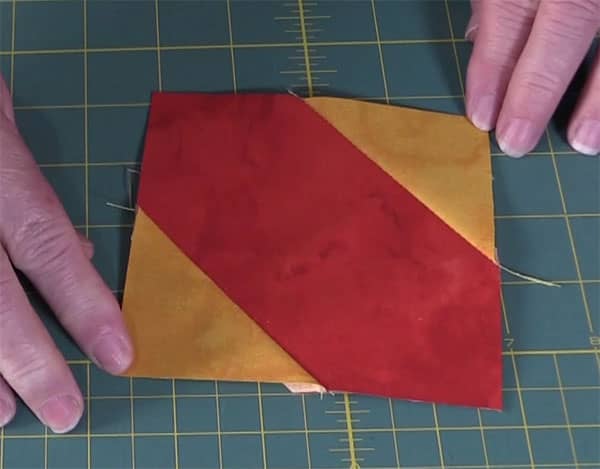
Sew along the diagonal as shown in the image below.
It should look like this when sewn.
Trim off the excess fabric on each side leaving a quarter inch seam.
Open out the sides and press.
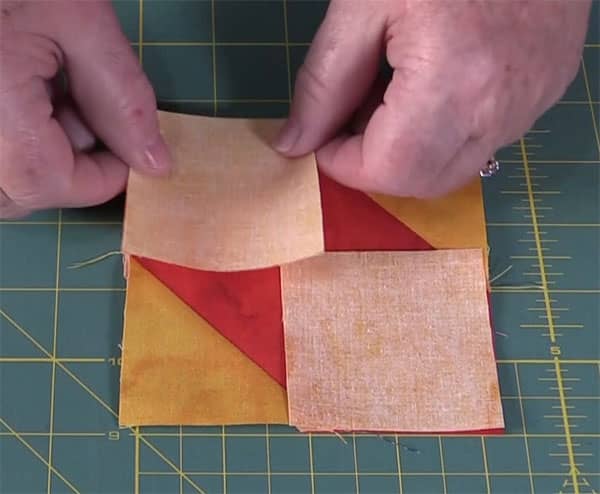
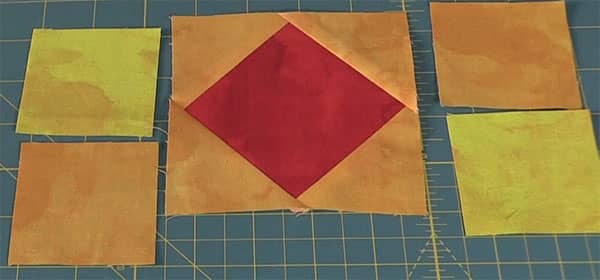
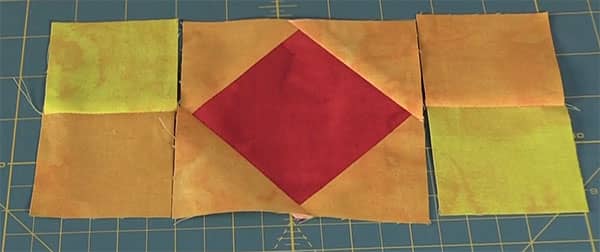
Now we are ready to sew the squares to the side of the center piece. Arrange these squares as per the image below and sew together.
They should look like this when sewn.
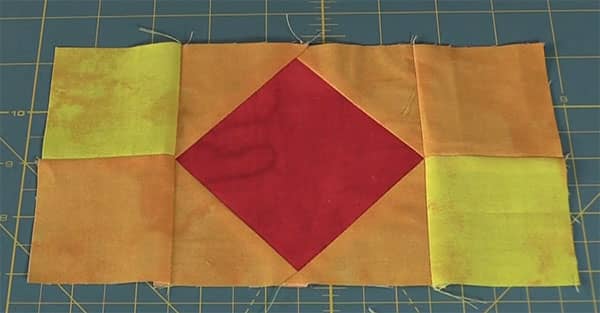
Sew these side pieces to the center piece ensuring that you line up the seam lines.
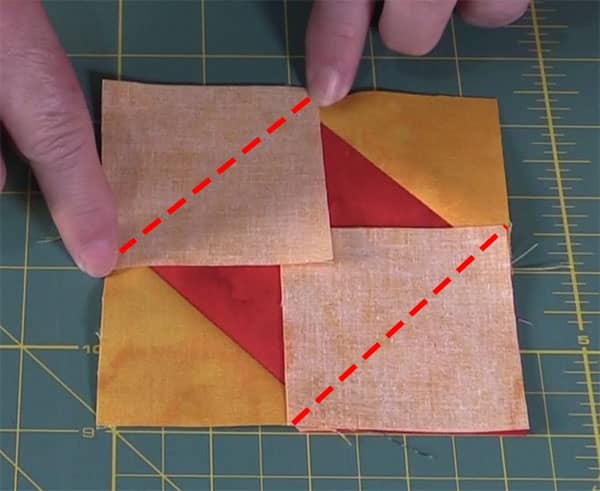
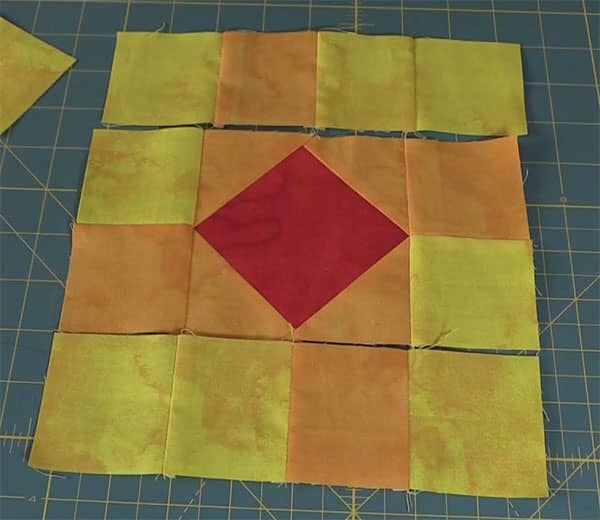
Now we are ready to add the remaining squares. Arrange them as per the image below.

Sew each row together.
Sew each row to the main piece and your quilt block is now complete.
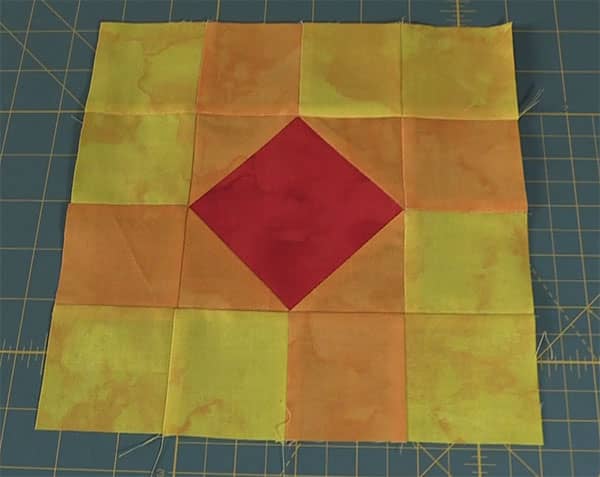
Table Topper Instructions
As I mentioned previously, we made a table topper using this quilt block. If you would like to make it, we have included basic instructions for you. Just click here to download the pdf.
Alternative Sizes
6″ Finished Block
- Fabric 1: Cut 1 piece at 3½” x 3½”
- Fabric 2: Cut 8 pieces at 2″ x 2″
- Fabric 3: Cut 8 pieces at 2″ x 2″
10″ Finished Block
- Fabric 1: Cut 1 piece at 5½” x 5½”
- Fabric 2: Cut 8 pieces at 3″ x 3″
- Fabric 3: Cut 8 pieces at 3″ x 3″
12″ Finished Block
- Fabric 1: Cut 1 piece at 6½” x 6½”
- Fabric 2: Cut 8 pieces at 3½” x 3½”
- Fabric 3: Cut 8 pieces at 3½” x 3½”


Pat says
I have tried twice to subscribe. I get no confirmation resposne to acknowledge. HELP???
Alanda Craft says
Hi Pat, you subscribed to our newsletter on the 5 Sep 2019, so you should be receiving our newsletters.
Rosanne McKinney says
Perfect color and pattern for me. Can you tell me the name and or source of each fabric?
Alanda Craft says
The fabric was purchased from our local Spotlight store here in OZ. They are fat quarters and there is no branding on the pieces. Sorry I can’t help you further Rosanne.
Beverly Villarreal says
I’m always interested in table toppers. Easy Christmas gifts for friends.
Alanda Craft says
Here is link to the tutorials for the different table runners we have at the moment Beverly. /?s=table+runner
Mary K. Doyle says
Your demonstration is clear and the pattern looks fun to make! Thank you.
Alanda Craft says
Thank you Mary 😊. It’s such an easy block to make and it looks lovely in a quilt or any other project.
pat says
can these blocks and instructions be shared in a block swap group?
Alanda Craft says
Oh my goodness, I completely missed your question Pat. Yes you can share the instructions with your block swap group. It would nice if you could mention our website and/or YouYube channel to the ladies. Thank you for asking.
Diane says
I have lots of 5 inch squares from charm packs, what size should the small squares be cut to make a block using a 5 in. center block? Or is that too difficult to figure out? Please advise. THAN KYOU, I love this block.
Diane Cecilia Snyder says
I love your video tutorials. I really appreciate that you don’t spend a lot camera time on sewing a straight stitch and pressing. You instructions are so clear. Thank you
Alanda Craft says
Thank you for your lovely comment Diane 😊