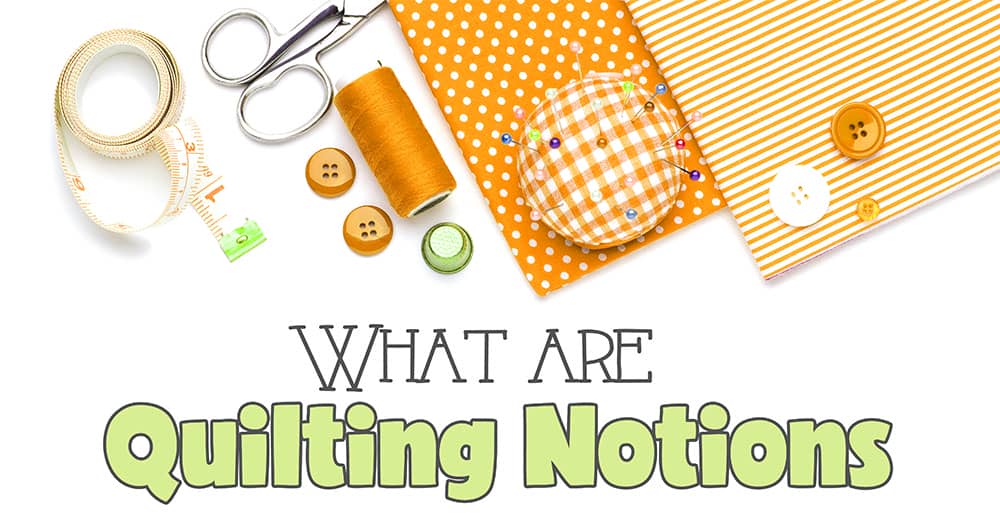
What are Quilting Notions?
If you are fairly new to quilting you may have only just come across the term ‘quilting notions’ and wondering exactly what that means.
Fortunately, this is a simple one to answer.
Quilting notions are all of those tools and accessories that are used when making a quilt.
Some examples of quilting notions include:
- Scissors
- Thimble
- Seam ripper
- Fabric pens
- Rotary cutter
- Cutting mat
- Safety pins
- Quilting gloves
- Wonder clips
- Seam guide
- Quilting rulers
- Needles and pins
- Pressing mats
It can also include accessories that are incorporated into the quilt itself like zippers, threads and quilt labels.
There are literally hundreds if not thousands of different notions you could potentially buy but when starting out, here are a few suggestions.
Let’s start with the absolute must-have quilting notions…
If you really want to get serious about quilting then you need to start with a few basic things. Now, of course, you could get away with using a pair of scissors and a basic measuring tape, pins and some thread – that’s what they did back in them olden days. But seriously, if you want to make your life easier and your quilting better then get these basics quilting supplies. Everything will change when you do.
1. Rotary cutter
Using a rotary cutter is so much better than a pair of scissors when it comes to cutting quilting fabric. For starters, you will get way more accurate cuts plus you will be able to cut through multiple layers at the one time. This is really going to be a time-saver for you.
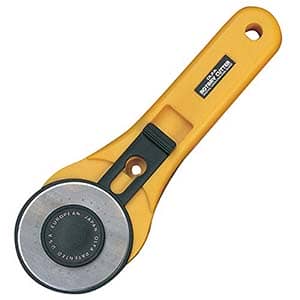
Rotary cutters come in a variety of sizes but the most common is 45mm. We also use a 60mm and every now and then a 28mm.
Our favorite brands are Olfa and Clover.
Click on the links below to view on Amazon.
- Olfa 45mm Rotary Cutter – best size to get if you are just starting out.
- Olfa 60mm Rotary Cutter – not absolutely necessary but helps with cutting layers of fabric or thicker fabrics.
- Olfa 28mm Rotary Cutter – nice to have but not essential – great for cutting curves and intricate shapes
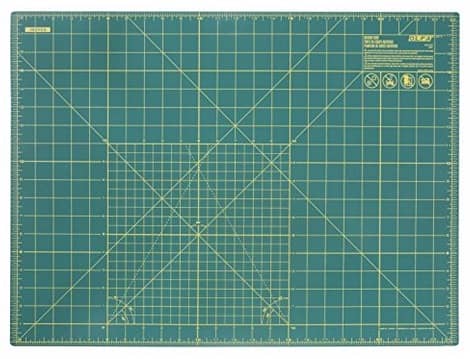
2. Cutting mat
If you are going to be using a rotary cutter, then you are going to have to get yourself a self-healing cutting mat. If you use a rotary cutter on any other surface then it is not only going to ruin the surface, it’s also going to dull the blade pretty fast.
Click on the link below to view on Amazon.
- Olfa Cutting Mat (24″ x 36″) – We like using a large mat but you can get them in smaller sizes. Ensure that you measure the surface you place it on to ensure that it will fit.
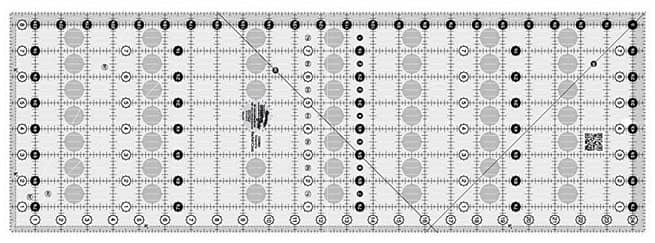
3. Quilting Ruler
This is another must-have. The quilting ruler ensures that your rotary cutter has a perfectly straight edge to cut along. And who would have thought that it would also provide you with measurements that will come in handy when you are wanting to uh…measure things.
Click on the link below to view on Amazon.
- Creative Grids Quilting Ruler – We use this ruler constantly. We like Creative Grid rulers for two reasons – they are non-slip and the lines and numbers are clear.
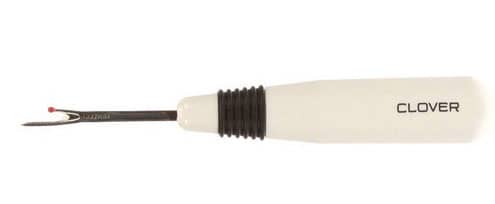
4. Seam ripper
If you are perfect then you can skip this one, but if you are like me and make lots of mistakes with your sewing, then you are going to need a seam ripper. Think of it as an undo tool for those happy little accidents.
Click on the link below to view on Amazon.
- Clover Seam Ripper – We’ve used a ton of seam rippers over the years but we both agree that the Clover Seam Ripper is our favorite.
Scissors
We already have a rotary cutter so why would we need a pair of scissors you ask? Well, you still need to cut stuff that a rotary cutter just isn’t really suited for. And in fact, I’m going to recommend two pairs of scissors – one large pair for cutting things like batting and a small pair for cutting threads.
Click on the links below to view on Amazon.
We have a multitude of scissors between the two of us but they are all generic brands. However, I know if I were to buy a new pair of scissors today, I would go with the following:
- Fiskars Razor Edge Soft Grip Scissors – I like the shape of these scissors as they allow you to leave the fabric flat on the table in order to cut. They also have excellent reviews.
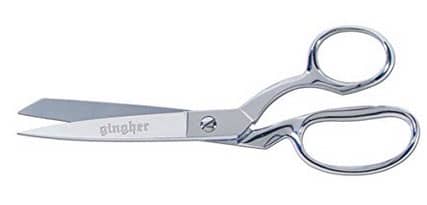
- Gingher 8″ Shears – Gingher is well known for their high-quality scissors. You only have to read the amazing reviews on Amazon to see how well received they are. I want a pair!
- Embroidery Scissors – I know we aren’t doing embroidery here but these are a must for quilters. We have a number of them in different spots so we can access them easily. They are great for cutting threads and trimming frayed edges of fabric.
Pins and needles
For quilting I suggest two different types of pins – thin and thick. The thin type are for pinning the pieces of a quilt block together and the thick type are for pinning the layers of the quilt together. You will also need some needles for the odd bit of hand sewing you might need to do or if you want to hand bind your quilt.
Click on the links below to view on Amazon.
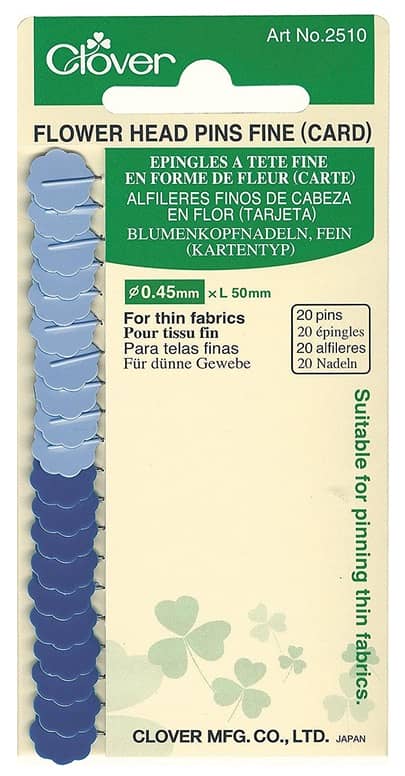
- Clover Flower Head Pins – These pins are really fine which means that they glide easily into fabric and don’t leave holes. However, they are quite delicate so only use them when sewing your quilt blocks. Don’t use them for anything thicker than that.
- Dritz Quilter’s Pins – These are the thicker style pins that are used when you are pinning your quilt layers.
- Quilter’s Betweens Hand Needles – There are a variety of different sizes you can use but for a beginner size 8 is usually recommended. The link is to a mixed pack so you can always experiment with different sizes to see what suits you.
Thread
Obviously you are going to need some thread, otherwise, your quilt just isn’t going to happen. You can read about our recommended threads here.
Now let’s move on to a few notions that aren’t absolutely necessary, but after you have them you will never go back…
These quilting supplies are ones that we use constantly.
- Wonder clips – These are sort of like a bulldog clip. They act as a clamp to hold the layers of your quilt together. They are usually used at the binding stage in place of pins. I personally love them.
- Fabric pens – I debated about perhaps putting these in the ‘must-have’ list above but I figured you can still build a quilt without using these. However, they come in mighty handy for drawing a quarter-inch mark on fabric or creating quilting lines. There are a number of different fabric markers including chalk markers, fading marker pens, and water-soluble pens. We use Frixion pens quite a bit but a lot of quilters don’t like them because the line can show up in very cold temperatures. If you do use them, then only draw on parts of the fabric that won’t be seen.
- Fabric glue stick – I love these little suckers. They are amazing for temporarily holding fabric together when you don’t want to use pins. You can see an example of this in action on our zippered purse tutorial here. The brand that we use is called Lapel Stick but you Dritz is another popular brand.
- Quilting safety pins (aka basting pins) – When we first started quilting we used regular pins to hold the layers of fabric and batting together but it wasn’t long before we transitioned to quilting safety pins. These are not like your regular pins in that they have a curve to make it easier to glide the pin into the layers of fabric.
- 505 Basting Spray – We use basting spray in conjunction with the curved quilting pins mentioned above to ensure that everything stays in place before we get ready to quilt.
Quilting notions that are totally not necessary but we just love to have…
Between the two of us, we have a ton of different notions so narrowing it down to just a handful was difficult but this is what we came up with after much deliberation. These are a few of those nifty little gadgets that we don’t really need but we use constantly.
- June Taylor Shape Cut Pro – If you find yourself cutting a lot of jelly roll strips then you are going to want to get yourself one of these. We have used this constantly over the years. It allows us to cut multiple 2 1/2” strips extremely fast and accurately. There are also other versions of this ruler allowing you to cut in 1/4” and 1/2” increments.
- Quilters Slidelock – When using quilting rulers, you can often have the problem of the ruler slipping as you cut. This can be both annoying and dangerous. The Quilters Slidelock ensures this doesn’t happen. You just press down on the ruler and it holds it in place. We’ve been using this ruler for years now and have three different sizes in our collection. You can read our review for this ruler here.
- Rotating mat – This mat does exactly what you would expect it to, it rotates. This comes in mighty handy for things like trimming back half-square triangles or squaring off blocks or even for cutting appliqué. We have an Olfa version but there are other brands that sell them.
- Bobbin Savers – We’ve tried all sorts of bobbin keepers over the years and most did what I would call an adequate job. Then we found the Bobbin Saver. These work really well at keeping the bobbin secure and reducing the problem of the thread from unraveling. We bought one for each sewing machine.
- Wool pressing mat – This is simply a piece of thick dense wool that you can use to press your quilt blocks on. I prefer this to an ironing board as it is much firmer and makes nice flat crisp quilt blocks. Bear in mind that the heat from the iron does go right through the mat so you will still need to place it onto an ironing board or other surfaces that are heatproof.


Pam O'Brien says
I agree with your Choices. BUT I have just discovered the FONS & PORTERER 45 Mil rotary Cutter It has a 45 blade but you can adjust for thicker fab cuts like when you stack and then cut at once and a Lite for Normal cuts of 1 or 2 pieces of Fab. The Blade stays inside till you Hold it upright and then cut what you have. Then when you put it down the blades hides away and no cut ot knocked fingers or hands. I found it recently at Wal-Mart here in the States. I also have found a way to keep my Rullers still as I am only 4’9″ and when I would try and cut along my Templets, It would slip. So when in Wal-Mart in the sports section I found 2 and 5 lbs Hand Weights, which I use to hold my ruler in place 2 on Top of Ruller and one on non-cutting side with the others and then when I get ready Use for my EXERCISE with the Weights. I’ll be truthful they get more usage on the RULERS . Just what I have been finding that helps me out, I now have uncut fingers and STRAIGHT CUTS due to my ruler being anchored. GThanks for your hints
Pam
Tennessee, USA
Alanda Craft says
I’m not sure they are making that rotary cutter any more. I had a look around for it and it seems to be sold out in most places, assuming I am looking for the right one. Is it the red one that you are referring to?
Lois McCirmack says
Just made your kids placemats for my grandson. They were fast, easy and I also made a round coaster for his drinking cup!
Thanks for a great quick and easy project!
Alanda Craft says
Excellent, Lois 😊. I’m happy to hear you like the tutorial.