In this tutorial we are going to make a Jack in the Box quilt block. The instructions below are for a 10″ finished block” ( 10½” unfinished). However, we have included the fabric requirements for other sized blocks below. There are also some examples at the end of the blog post for using 3 or 4 colors to help give you some inspiration on making your own blocks.
Updated Video Version
(If you would like to watch the original Jack -in-the-box video from our Quilting Blocks and Patterns channel CLICK HERE. This video is longer than our new video, and we have decided to add it here as some of you may prefer the longer version.)
Cutting Instructions for Different Sized Blocks
| Finished Size | Fabric 1 (White) | Fabric 2 (Purple) | Fabric 3 (Black) |
|---|---|---|---|
| 6″ | 8 @ 2 1/4″ x 2 1/4″ 1 @ 1 11/16″ x 1 11/16″ | 4 @ 2 1/4″ x 2 1/4″ 4 @ 2 7/8″ x 1 11/16″ | 4 @ 2 1/4″ x 2 1/4″ |
| 8″ | 8 @ 2 3/4″ x 2 3/4″ 1 @ 2 1/8″ x 2 1/8″ | 4 @ 2 3/4″ x 2 3/4″ 4 @ 3 11/16″ x 2 1/8″ | 4 @ 2 3/4″ x 2 3/4″ |
| 10″ | 8 @ 3″ x 3″ 1 @ 2 1/2″ x 2 1/2″ | 4 @ 3″ x 3″ 4 @ 4 1/2″ x 2 1/2″ | 4 @ 3″ x 3″ |
| 12″ | 8 @ 3 1/2″ x 3 1/2″ 1@ 2 7/8″ x 2 7/8″ | 4 @ 3 1/2″ x 3 1/2″ 4 @ 5 5/16″ x 2 7/8″ | 4 @ 3 1/2″ x 3 1/2″ |
What you need for a 10″ finished block
Main Fabric (white)
- 8 pcs main fabric @ 3″ x 3″
- 1 pc main fabric @ 2½” x 2½”
Contrast Fabric 1 (purple)
- 4 pcs @ 3″ x 3″
- 4 pcs @ 4½” x 2½”
Contrast Fabric 2 (black)
- 4pcs of contrast 2 @ 3″ x 3″
Tools Used in this Tutorial
You can check the latest prices at Amazon by clicking on the links below:
- Creative Grids Ruler 8½” x 24½”
- Olfa Non-slip Ruler 6 ½” x 6½”
- Olfa 60mm rotary cutter
- Olfa 24″ x 36″ double sided healing mat
Method
We will start by making 8 half square triangles (HST).
- Take one main piece of the main fabric and place it right sides together on one of the contrasting squares.
- Do this for all 8 pieces of the main fabric.
- Draw a line diagonally across each of the squares.
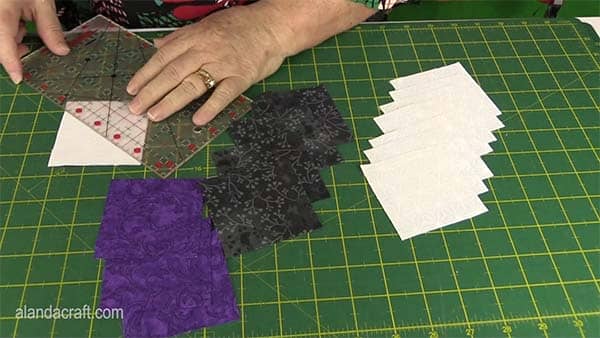
- Sew a ¼” seam on either side of the drawn line.
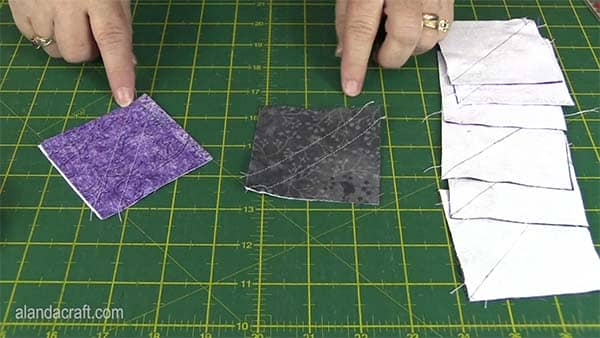
- Cut on the drawn line.
- This will give you 2 half square triangles (hst) from each 3″ square.
- Press the seam to the dark side on each of hst.
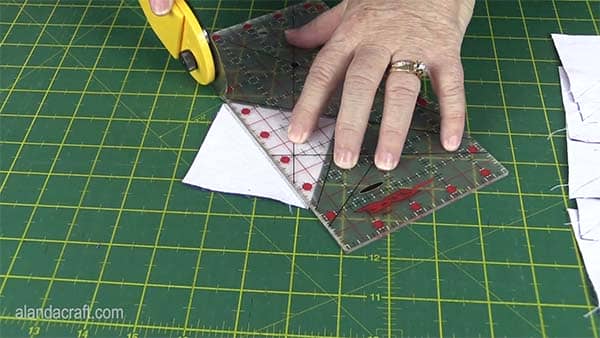
- Trim the hst’s to 2½”. If you are unsure on how to do this, here is a link to our tutorial.
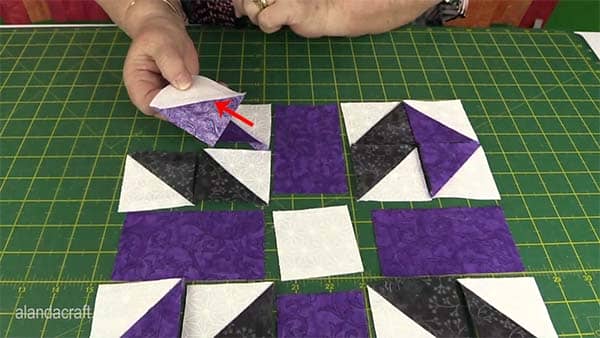
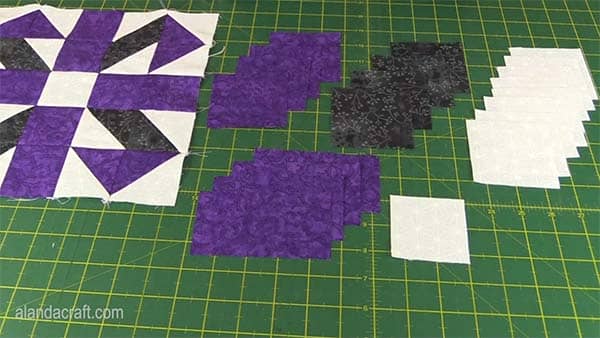
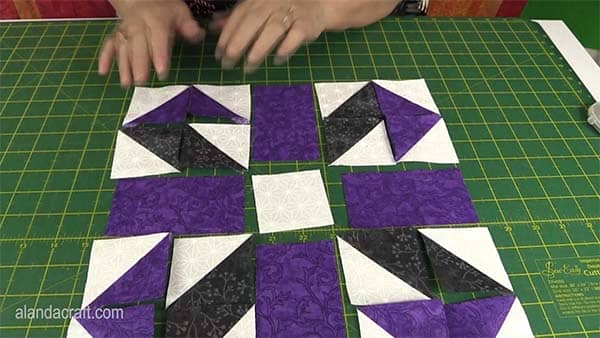
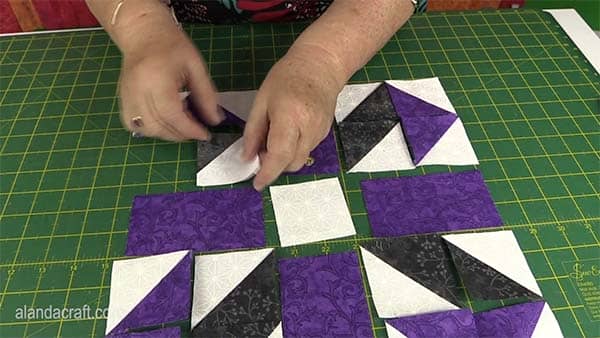
- Lay the square out on the mat as shown in the photo below.
- Place the rectangular pieces and the centre square in place.
- We are going to work with the 4 squares in each corner.
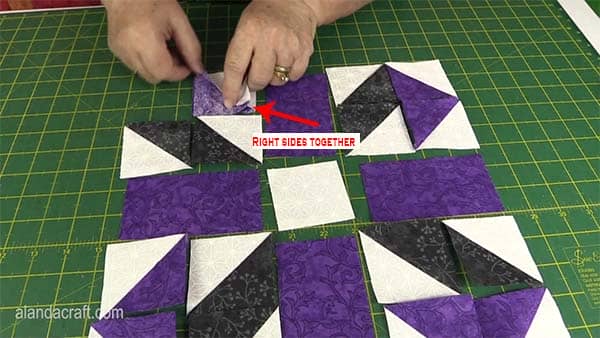
- Place one square on top of the other, right sides together and pin.
- Sew the squares together with a ¼” seam
- Press the seam to one side
- Place the two squares in the second row one on top of the other, right sides together and pin.
- Sew the squares together with a ¼” seam.
- Press the seam in the opposite direction to the squares in the previous row.
- Pressing the squares in opposite directions means the blocks will nest nicely when you come to sew them together.
- Do the same for all four corner blocks.
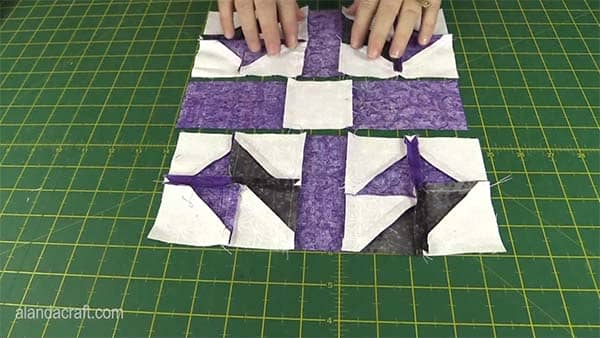
Now we need to join the blocks together into rows.
- Place the first set of blocks on top of the rectangle, right sides together.
- Sew together with a ¼” seam.
- Place the last set of blocks in the row, on top of the rectangle, right sides together.
- Sew together with a ¼” seam.
- Do the same for the other two rows.
- Press the seams open.

- Press the seams on the top and bottom rows in towards the rectangle.
- Press the seams in the middle row out towards the edges.
Now it’s time to join the rows.
- Place the first row on top of the middle row, right sides together.
- Make sure the rectangle pieces line up nicely with the centre square. As we have pressed the seams in opposite directions this will help you line these piece up.
- Sew together with a ¼” seam.
- And repeat for the last row.
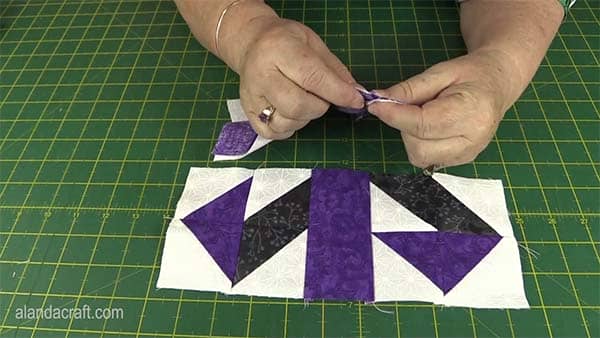
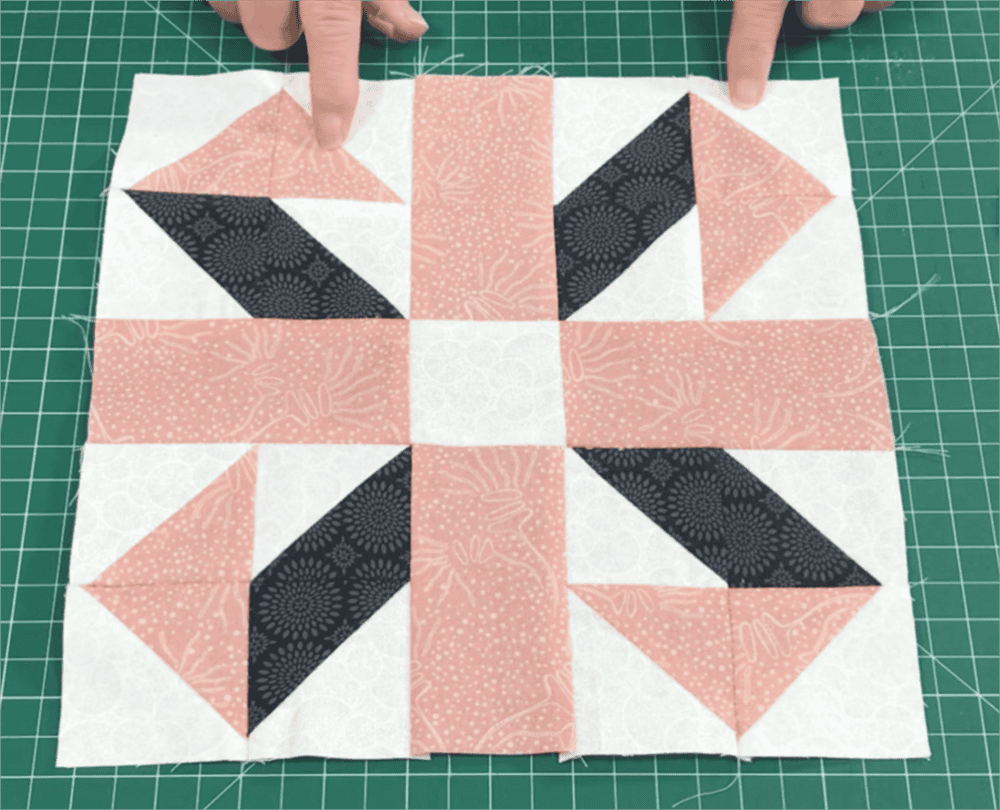
Your Jack in the Box quilt block is now finished.
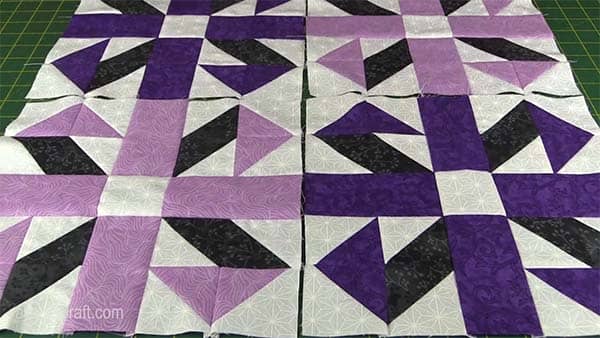
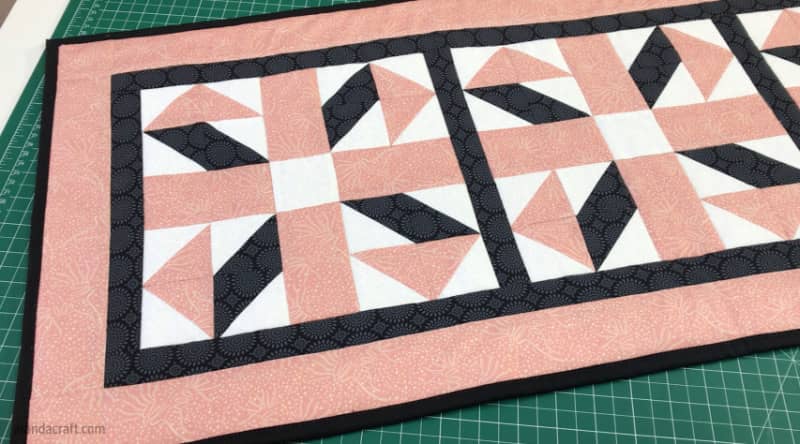
I have made 4 of these blocks in contrasting colours and will probably add sashing and turn them into either a table runner or cushion cover.
Pattern for Table runner – 16″ x 38″
Download the Table Runner PDF

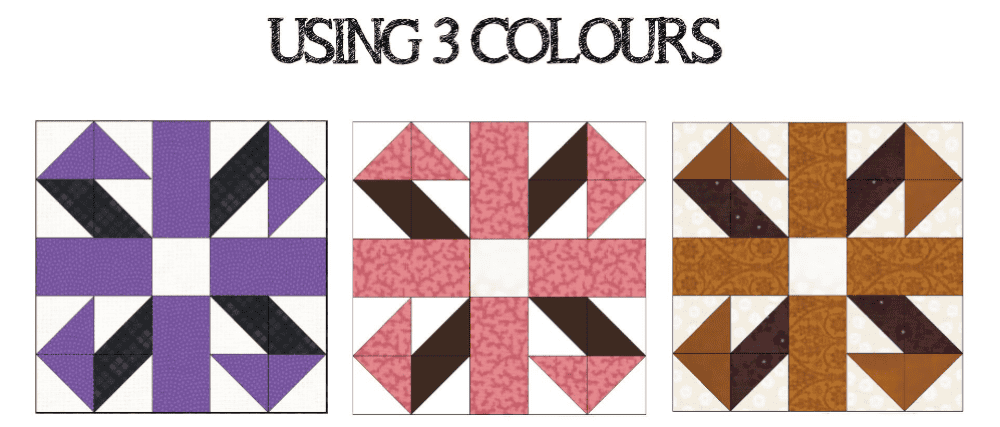
Examples of Jack in the box quilt blocks using three colors
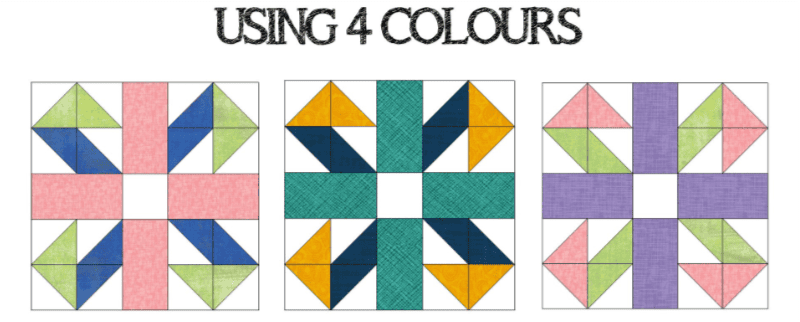
Examples of Jack in the Box quilt blocks in 4 colors
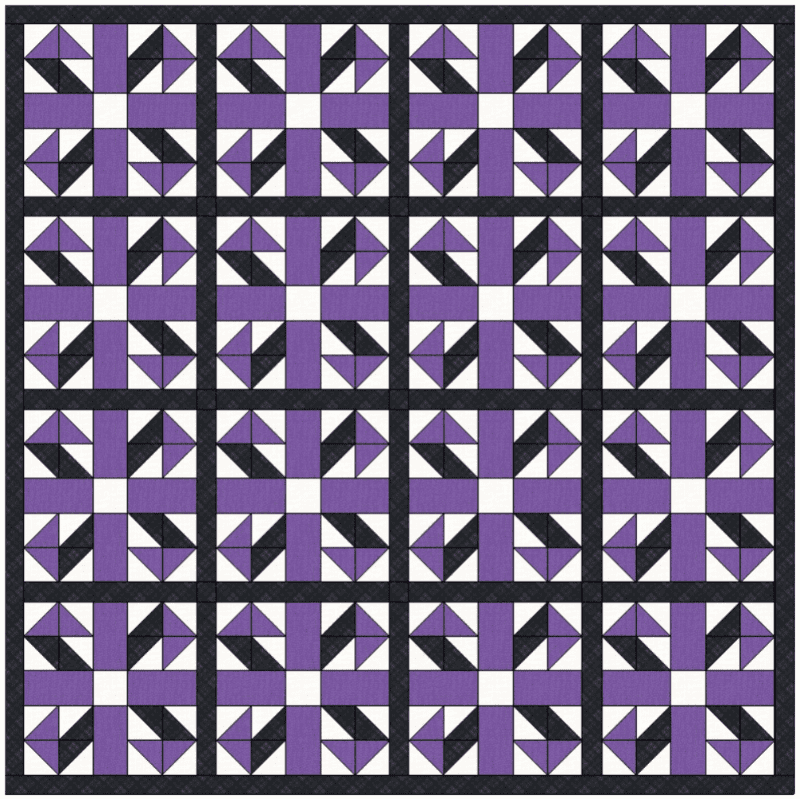
Example of a quilt using 3 colors.


Francine Shea says
Need pdf of this!
Alanda says
Sorry Francine we don’t have pdf’s available. We provide the videos and the written instructions with photos.
Amanda says
Great block, but there is no measurement for the rectangles. If you could post that would be great.
Alanda says
Thank you for letting me know Amanda. I have corrected the measurement in the post.
Sandy says
Very good tutorial! Thank you. However, it won’t let me subscribe! It keeps telling me that me email is invalid!
Alanda says
Hi Sandy, Glad you like the tutorial. Our records show that you successfully subscribed to our newsletter on the May 17. So you should receive our newsletters in the future.
Gretchen Norris says
I just made the 12″ quilt block. I cut the rectangles at 5 5/16″ as indicated on the pattern, but they were too short. I cut more at 5 3/4″ and they were just right. Thank you for the tutorial. This was a fun block to make.
Caren says
We just finished a 102″X102″ quilt using this block. When finished it was stunning. Thank you so much for the pattern
Alanda Craft says
Wow, that’s a big quilt. If you’d like to share the results with everyone on this blog, you can do so here: /submit-your-project/
Carol says
Thank you for your great tutorials
Alanda Craft says
Thank you Carol 😊. I am so happy to hear that you like them.