We’ve been having a lot of fun with cushion covers recently and this jelly roll cushion cover tutorial is one of our favorites.
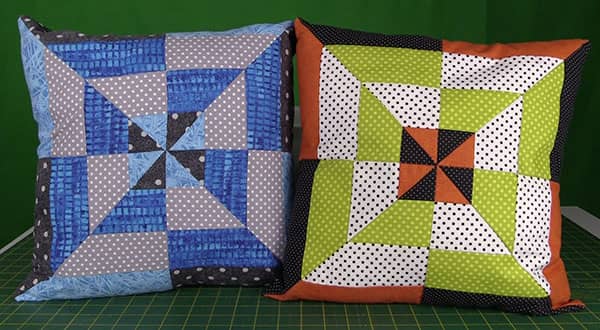
It looks like it might be difficult but it is actually quite easy since it involves sewing jelly roll strips together. Jelly roll strips for those that don’t know are 2 ½” strips of fabric. You can buy them pre-cut from Moda (and other companies) or you can cut them yourself.
It’s an easy cushion cover to make, but I do recommend that you follow the instructions as it is easy to mix things up if you don’t keep your bits organized.
Watch the video below or scroll down for the step-by-step written instructions
What You Will Need
Note that you will need jelly roll strips for this. You can buy a pack of Jelly Roll strips or you can cut your own 2 ½” strips of fabric by the width of the fabric.
- Colour 1 – 2 jelly roll strips
- Colour 2 – 2 jelly roll strips
- Colour 3 – 2 jelly roll strips
- Colour 4 – 2 jelly roll strips
- Backing Fabric – 2 pcs @ 16¾ x 15¾
- Zippers – 2pcs @ 14″
- Cushion Inserts -2 x 16″ cushion inserts OR 2 x 14″ cushion inserts for a less puffy look
TOOLS USED IN THIS TUTORIAL
You can check the latest prices at Amazon by clicking on the links below:
- Creative Grids Ruler 8½” x 24½”
- Olfa 24″ x 36″ double-sided healing mat
- Olfa 60mm rotary cutter
- Oliso Iron
- Gutermann Sew-All thread
Step-by-Step Instructions
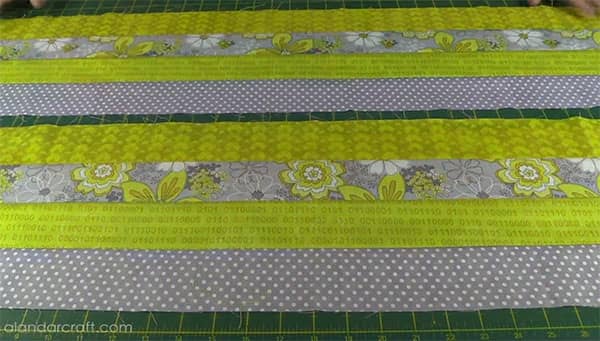
- Start by laying out the strips in lots of four.
- It’s important to note that you need to place the fabrics in the exact same order for both lots of four as you can see in the image below.
This will make more sense if you watch the video.
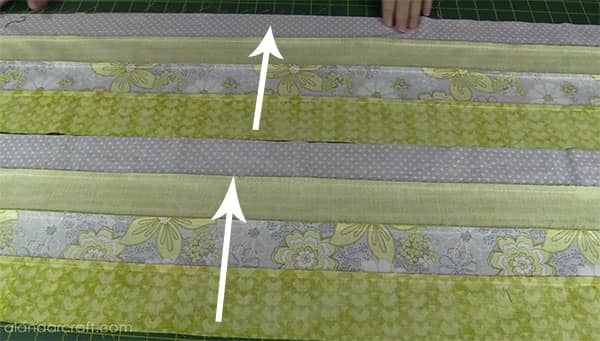
- Sew each lot of the four strips together.
- Press the seams in the same direction for both of the strip sets.
- Your strip sets should measure 8 ½” across. It’s okay if it’s a little out but if it’s a lot, you need to check your seams and resew.
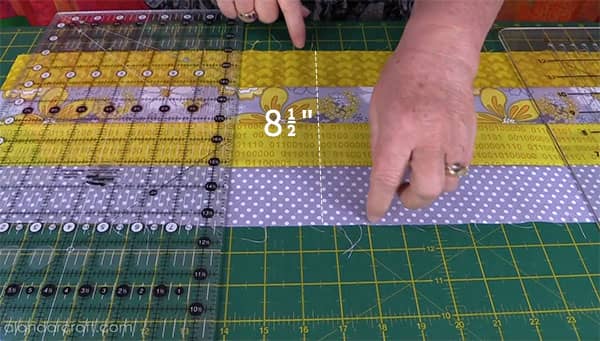
- Now we need to slice through each strip at 8 ½” increments to form 8 ½” x 8 ½” squares.
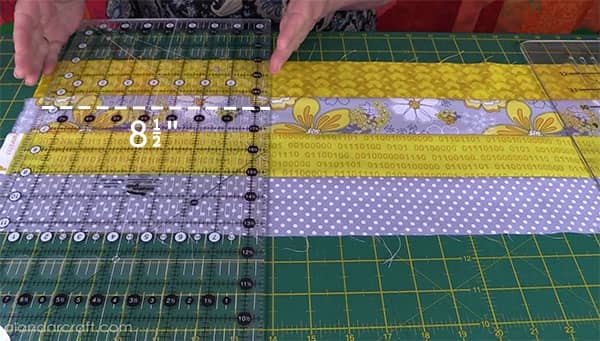
- You should end up with 4 of these squares for each strip set.
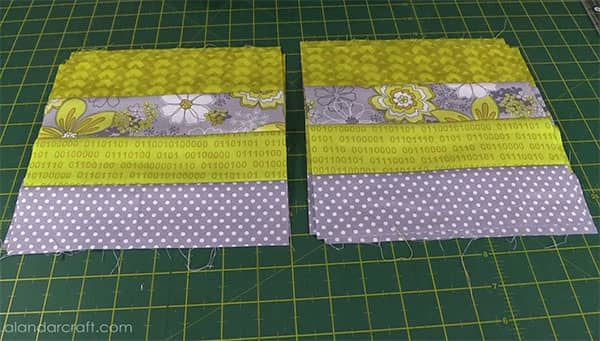
- Lay them out in two piles of 4 with the strips facing in all the same direction.
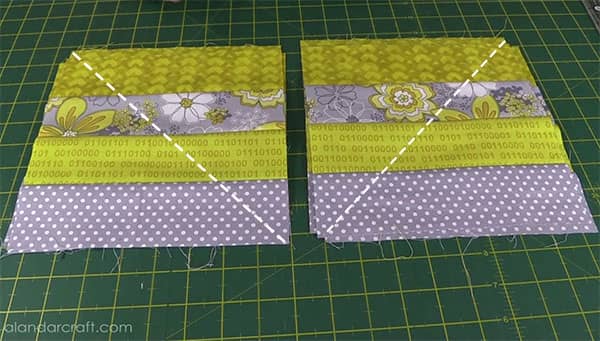
- Now we are going to slice along the diagonal for each of the squares.
- For the first pile, you will be cutting one way and for the second pile, you will be cutting in a different direction.
- It’s important that you get this bit right as it won’t work otherwise.
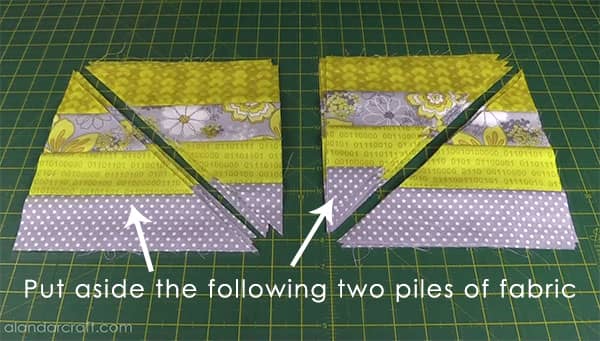
- This is the result.

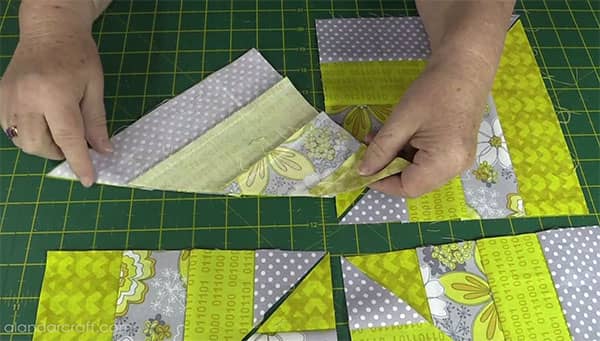
- Take two of the piles as shown in the image below and place them aside. They will be used for the second cushion.
- For now, we are going to be focusing on completing just one of the cushions.
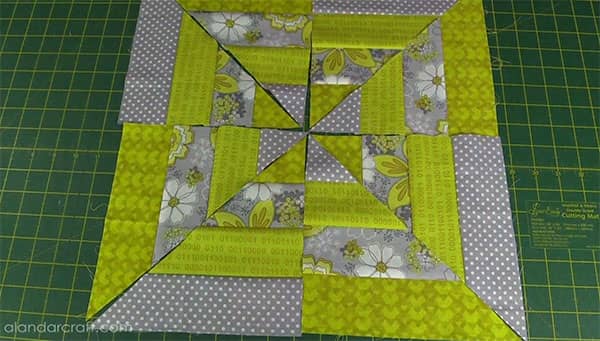
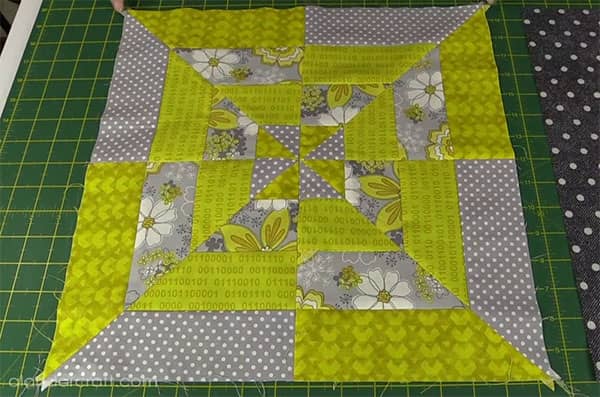
- Layout the cushion cover as shown below.
- To do this, take one piece from each pile to form a square. Watch the video below to see this in action.
- You should end up with a pinwheel in the center.
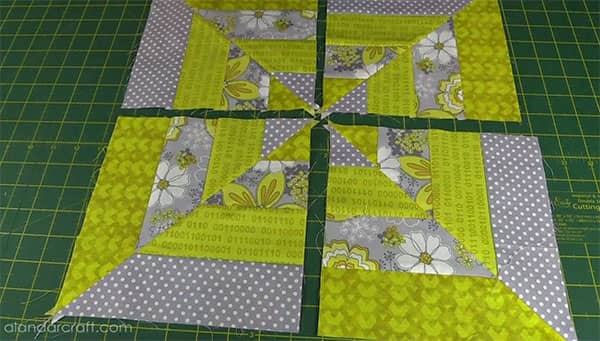
- Sew each of the blocks together using a quarter inch seam.
- If you have pressed the seams correctly as we stated previously, they should nest together beautifully and you will have accurate seams.
- This is the result.
- Now sew the two squares together and the other two squares together.
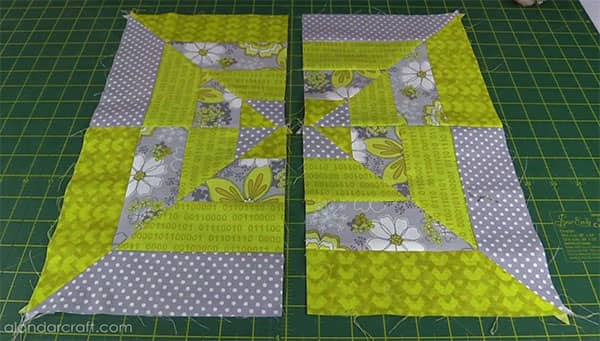
- The front of your cushion is now complete.
- You can now complete a second cushion front with your remaining fabric piles.
- Now you are ready to add your backing fabric and insert the zip.
- Watch the video below for step-by-step instructions on how to do this.


Jo Walters says
I love this. Does this block design have a name please?
Alanda Craft says
I’m not sure if it has a particular name, maybe one of our readers with know. I just call it a jelly roll pinwheel block. I did a bit of a search to see if anyone else had a name for it but didn’t have much luck.