
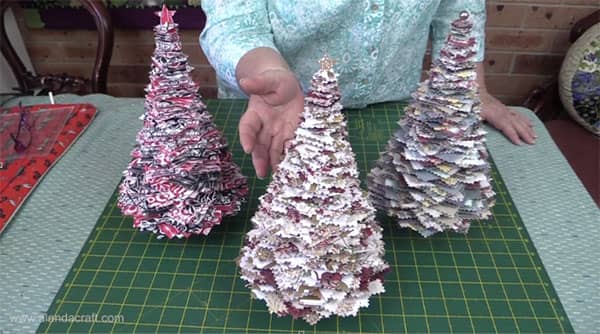
Paula and I were recently in one of the local craft stores and we saw some Xmas trees made out of paper. They were $90 so we decided we should make our own.
Neither of us likes to cut up books so we decided to use scrapbooking paper, and we are delighted with the result.
This is a great project for a Christmas centerpiece. And it’s something you can get older kids involved in. So here is our Paper Christmas Tree Tutorial for you.
Watch the video tutorial below or scroll down for the written instructions
So What Do You Need?
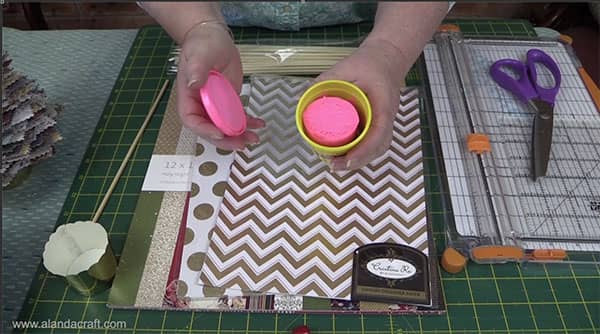
- 10-12 different sheets of scrapbooking paper
- 1 tub of playdoh or some plasticine
- 1 firm cardboard cupcake holder
- 1 wooden skewer – ours measured 11½”
NOTE:
Martha, one of our lovely readers suggests using old Christmas Cards instead of Scrapbooking paper and we thought this was a really good idea.
Method:
- Start cutting your paper.
For an 11½” skewer – 180 Squares:
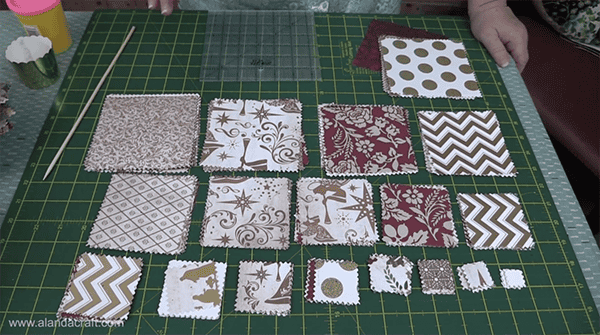
- You need 10 squares in an assortment of sizes starting with 5″.
- Always start with the largest size first to maximize the use of your scrap paper.
- You only cut one size from each piece of paper – if that’s the look you want.
- Really you can cut your squares from whatever scraps you have.
- With the red and black tree we doubled up a couple of times and it still looks great
NOTE:
After you have cut 10 x 5″, you cut 10 x 4¾” etc. keep cutting in this way until you are down to ¾”. So each size will be ¼” smaller than the previous square.
If you are using a smaller skewer, use ½” increments instead of ¼”.
You can use pinking shears to trim the outside of the squares or you can simply leave them straight cut.
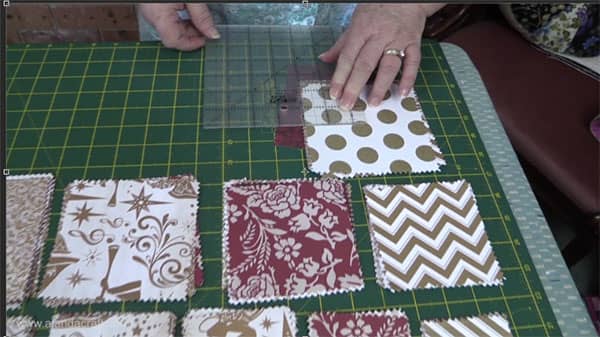
- Place a dot in the center of each square. The table below has been provided so that you don’t have to work it all out.
- Lay the squares out on your workspace in their sizes so that you can just pick up the next size down as you finish putting the squares on the skewer.
NOTE:
- Fill the cupcake holder with Playdoh
- Insert the skewer into the center of the Playdoh – flat side down.
- You need the point facing upwards to pierce the paper.
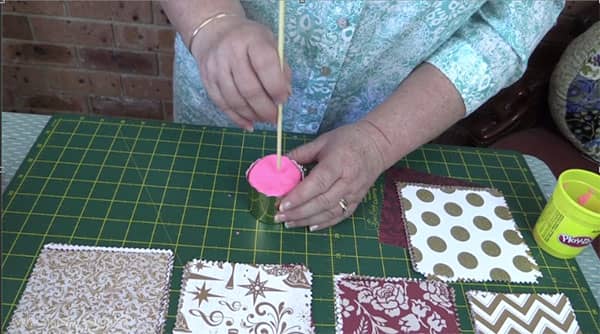
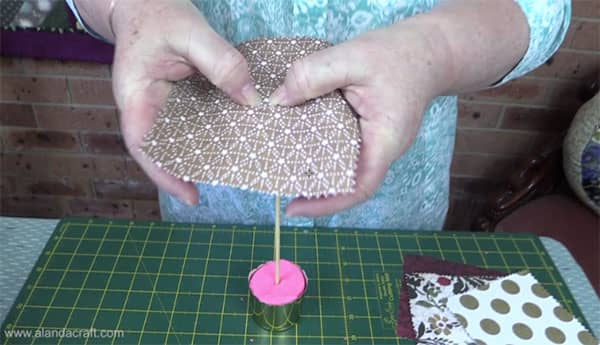
- Starting with the 5″ squares push the skewer through the center dot or as close to it as you can. We don’t want our tree to be lopsided.
- Next, add the 4¾” squares, then the 4½” squares and so on until you have added the ¾”.
NOTE:
- Don’t press down too hard at the start.
- As you move up the skewer you may need to gently make adjustments and feather the squares down so that all the squares fit on the skewer.
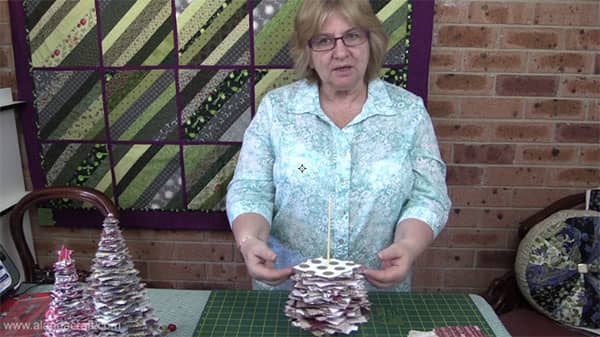
- Once all the paper squares have been added, you can top off the tree with a bead or make a star out of two pieces of scrapbooking paper, glue them together and leave an opening to put the skewer into so that the star sits nicely on top of the tree.
| Size of Square | Center Point of Square |
|---|---|
| 5" | 2 !/2" |
| 4 3/4" | 2 3/8" |
| 4 1/2" | 2 1/4" |
| 4 1/4" | 2 1/8" |
| 4" | 2" |
| 3 3/4" | 1 7/8" |
| 3 1/2" | 1 3/4" |
| 3 1/4" | 1 5/8" |
| 3" | 1 1/2" |
| 2 3/4" | 1 3/8" |
| 2 1/2" | 1 1/4" |
| 2 1/4" | 1 1/8" |
| 2" | 1" |
| 1 3/4" | 7/8" |
| 1 1/2" | 3/4" |
| 1 1/4" | 5/8" |
| 1" | 1/2" |
| 3/4" | eyeball center |


Carmela says
Two thumbs up. You should sell this as kit in your store for those of us that don’t want to do all those cuts, but would love to do the project.
Thank you
SultonC
Alanda says
Ahhh Carmela, if only we had the time. There are just the two of us and we are kept flat out with the YouTube Channels, the website and the Training Academy. We just don’t have the time to put these kits together. And it probably wouldn’t be cost effective as the postage to the US or anywhere from Australia is pretty darn pricey. Sorry 🙂 Cheers, Wanda
Suzy J says
I have a suggestion for making these trees that I hope will help others like it has me. Rather than individually marking all the centers of the squares with a pencil, I used a push pin or thumb tack to mark each size stack. It creates a starter hole, and I could mark all the pieces of one size at once, saving a lot of time.
Alanda Craft says
What a great idea Suzy 😊. Thank you for that tip, I’m sure others will find it very helpful as well.