Here is another great scrap busting project to help reduce your fabric stash.This project takes little fabric and it’s a practical item to dress up your table for any occasion. You can also make a set to pop in your picnic basket. Just because you are eating on the ground outdoors doesn’t mean you can’t add a touch of class to the occasion.

These cutlery pouches are super easy to make so they are a perfect beginner sewing project. they are also quick to make – you should be able to make these in under 10 minutes so no excuses for getting some of these on the table for Thanksgiving or Christmas.
Materials Required

Main Pieces
- 2 pieces of fabric measuring 10″ x 5″
Now you can cut these two pieces from the same fabric or you can cut one color for the front and another color for the back. It’s entirely up to you and the look you are wanting to achieve. It may be that you have some odd leftovers and you don’t have enough of just one color for both the front and the back, so why not be bold and use contrasting fabric.
Front Pocket
1 piece of contrasting fabric measuring 12″ x5″
This is for the front pocket and will be folded in half.
Batting
1 piece measuring 10″ x 5″. You can use any scrap of batting you have on hand. We generally use Warm and Natural batting but for this project we just picked some scrap pieces of batting and to be honest, I have no idea what the brand is. We just went with a thinner batting…too thick and it will create extra bulk for the cutlery pouch.
Watch the video below or scroll down for written instructions
Method
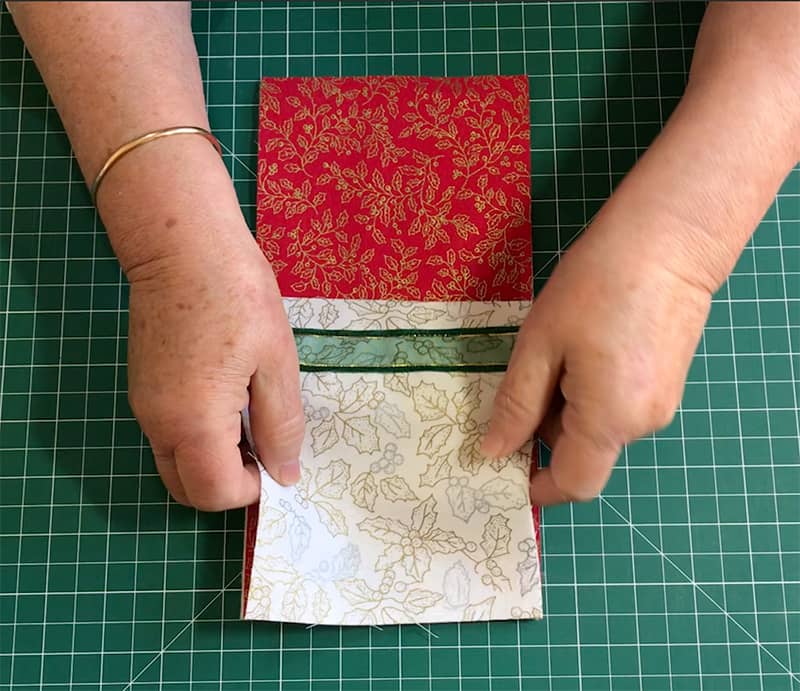
Take the piece for the front pocket that measures 12″ x 5″ and fold it in half.
- Press to get a nice crisp fold.
- Place a piece of ribbon across the pocket and pin it in place.
- Sew on either edge of the ribbon to secure it in place.
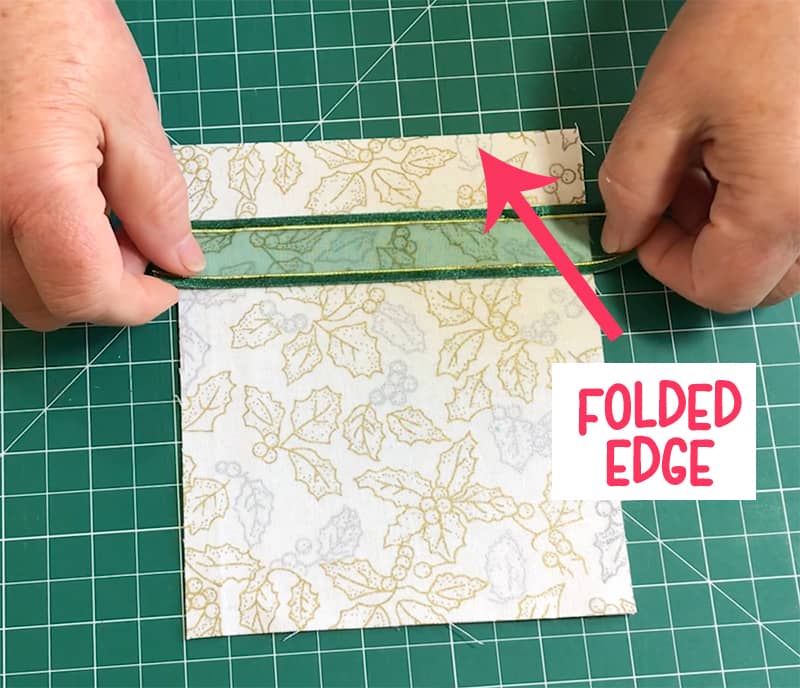
Trim back the ribbon or lace.
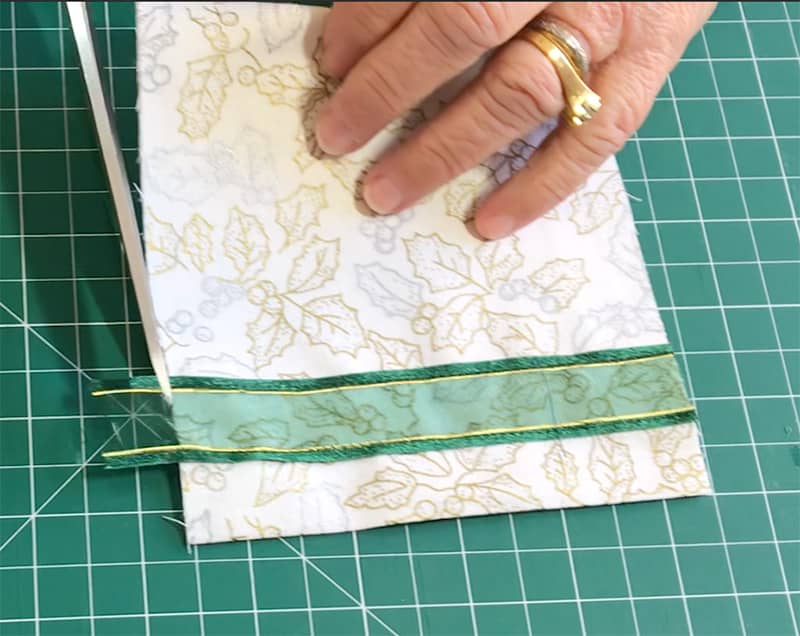
It should now look like this.
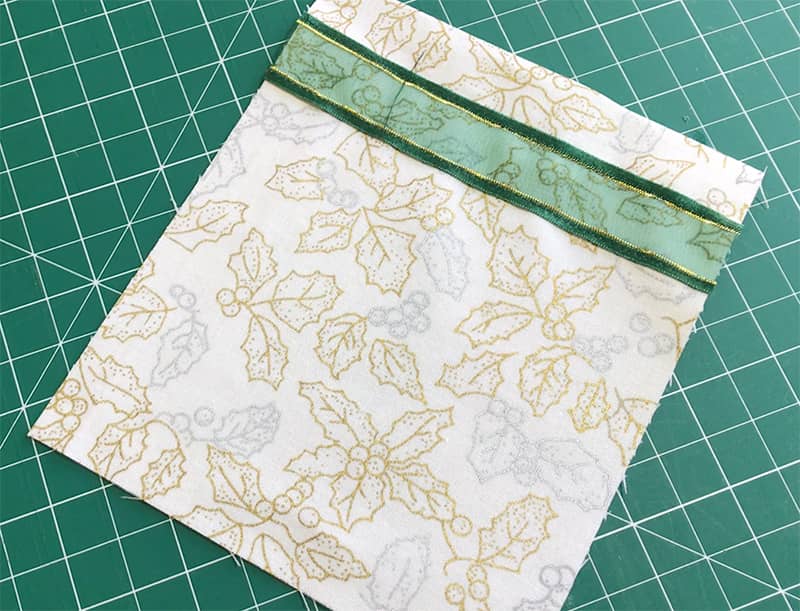
Let’s put it all together!
- Place the batting on the workspace.
- Place one piece of the main fabric on top of the batting, right side facing up towards you.
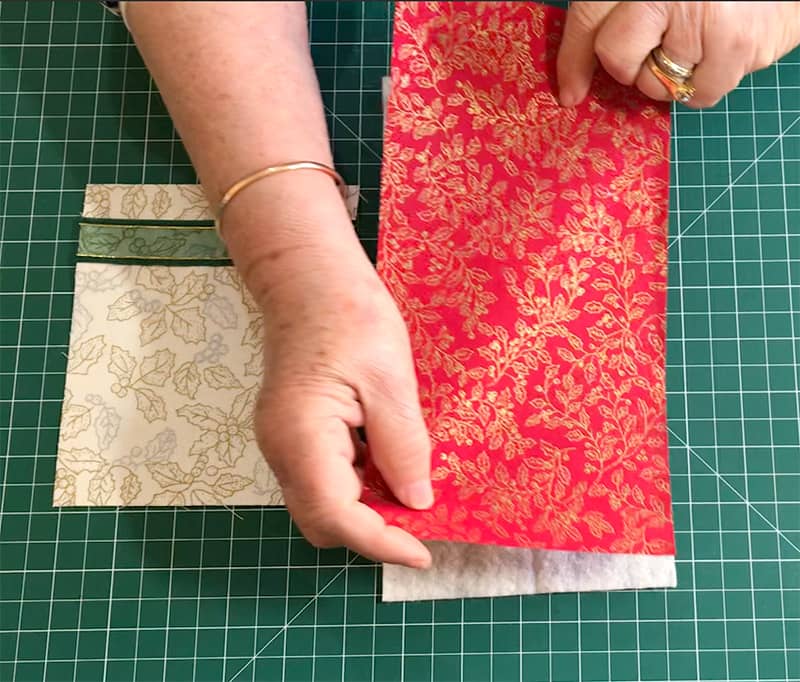
- Place the pocket piece with the folded edge facing towards the top of your project and the raw edges lining up with the raw edges of the batting and the main piece.
- Place the other main piece of fabric on top of the pocket, right side facing down. So have the wrong side facing up towards you.
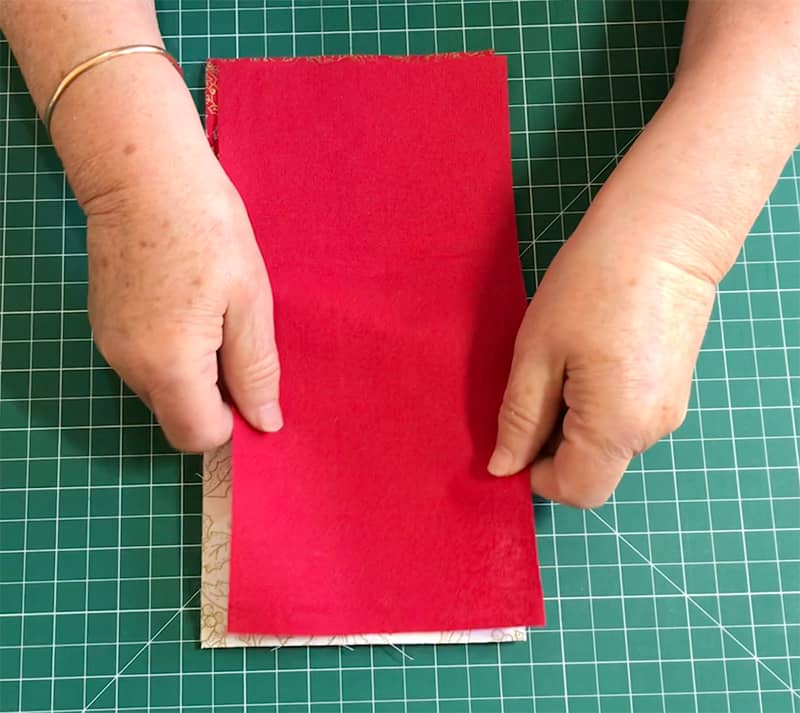
- Pin or clip all the layers together. We are going to leave an opening to turn the piece through. So pick a starting point and do a couple of back stitches and then sew around the edge with a quarter inch seam going off at the edges. So we are not going to pivot at the corners but sew straight off the edge. Then begin at the edge of the next side.
- When you com to the last side, don’t forget to leave an opening of about 2 1/2″ – 3″ so that you have space to turn the project through.
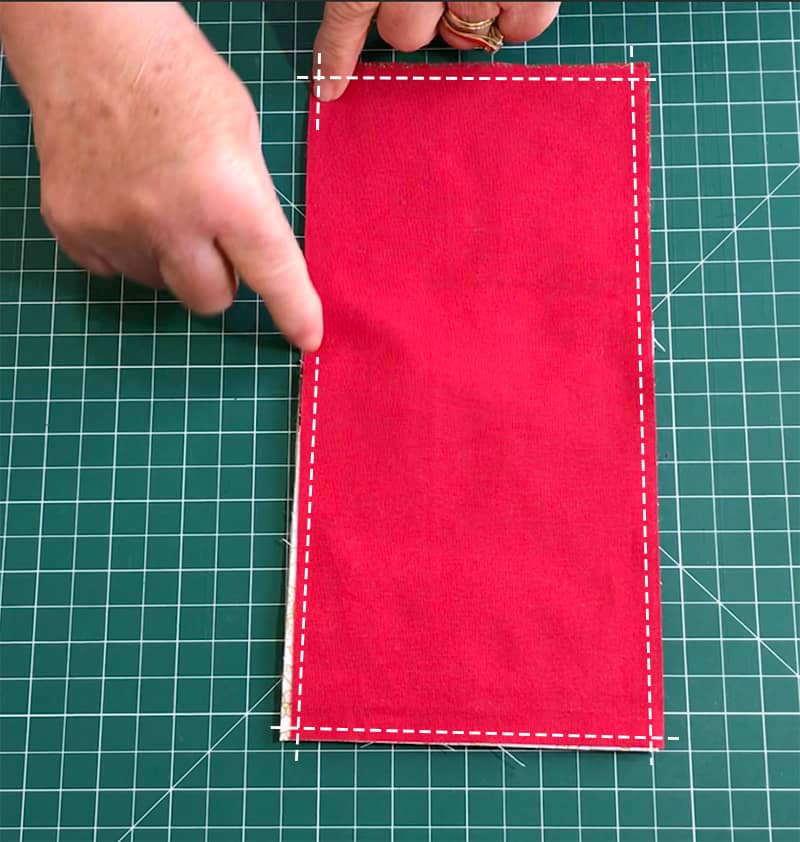
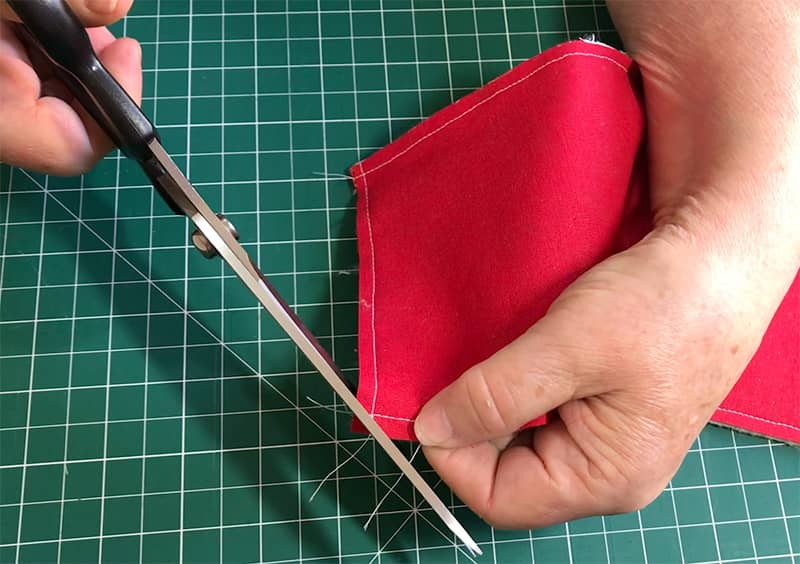
Check that all the layers are sewn nicely together and then clip the corners to remove some of the bulk, making sure that you don’t clip too close to the stitch lines that are holding your layers together.
Now you are ready to turn the pouch through. Take your time with this. You don’t want to rip the stitches.
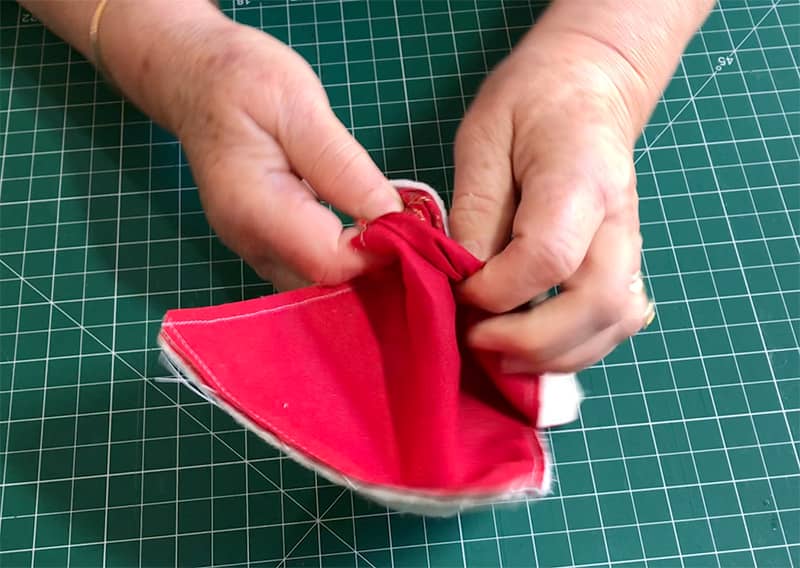
Now if you have used a directional print for the pocket you many freak out if you see the pattern is up the wrong way. Take a deep breath, and just push the pocket to the other side and you will see that all is good. Aske me how I know. I was making one of these when I was tired and instead of hesitating and checking out the situation, I immediately unpicked everything only to realise that I didn’t need to do that at all.
Now once you have everything turned through and your corners are pushed out then press the piece taking your time with the seams at the opening. Once you have them nicely turned in and lined up, give them a press.
I use an apple corer to push out the corners but the end of a wooden skewer also works well. If you are using your scissors, take care that you don’t push too hard as you may tear the stitches and/or poke a hole in your fabric.
It’s time to finish of the piece. To do this we sew a seam around close to the edge. This time we pivot at the corners. So make sure your needle is in the down position and lift the presser foot when you get to the corner, turn the piece around and sew down the next side, until all 4 sides have been stitched around.
I use about an eight of an inch to do this. You don’t want to come in too far, this stitch line is just to close the opening and give a nice finish to the piece.
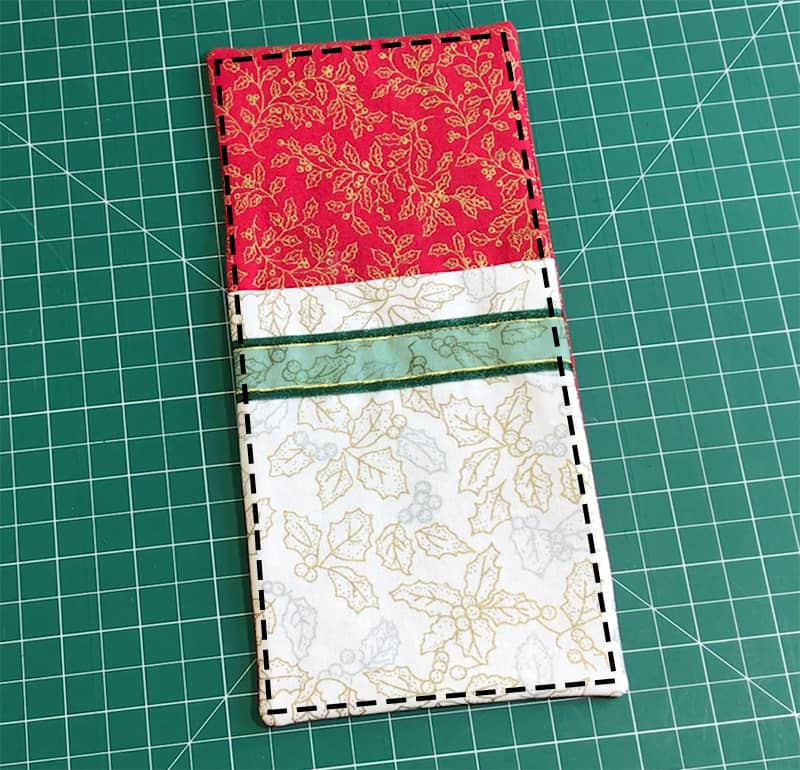
And there you have we have a nice easy cutlery pouch. Now these cutlery pouches can be made for sorts of occasions – we did ours in Christmas and Thanksgiving themes but you could make some for weddings, birthdays, anniversaries, Valentines day, Halloween even for your picnic basket and any other occasion you can think of.


Christine F Nelson says
So cute, and so easy. I am going to make a set for my daughter to take to their cottage in northern Wisconsin. Will make them in an outdoor themed fabric.
Alanda Craft says
What a great idea, Christine 😊. That’s the beauty of these cutlery pouches, they can be made in any themed fabric.