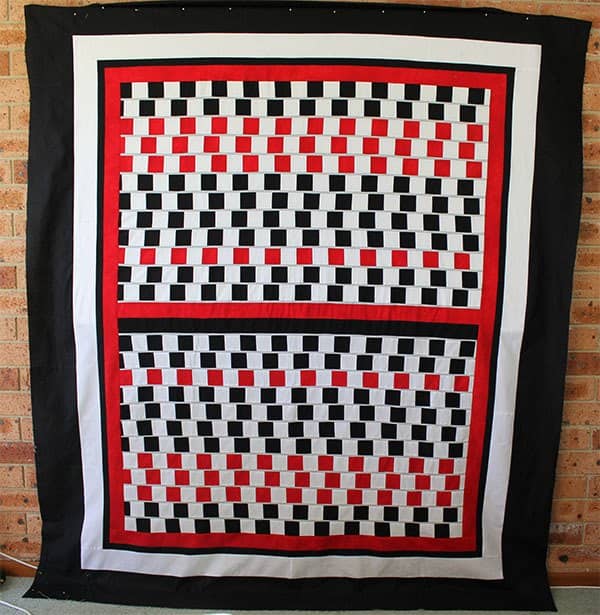
The Cafe Wall Illusion is pretty neat and works really well for a quilt because although the lines look like they are bending, they are actually perfectly straight. So it’s easier to put together than it looks. Even so, it took us a bit of time to nut out because the illusion only appears if you meet certain criteria.
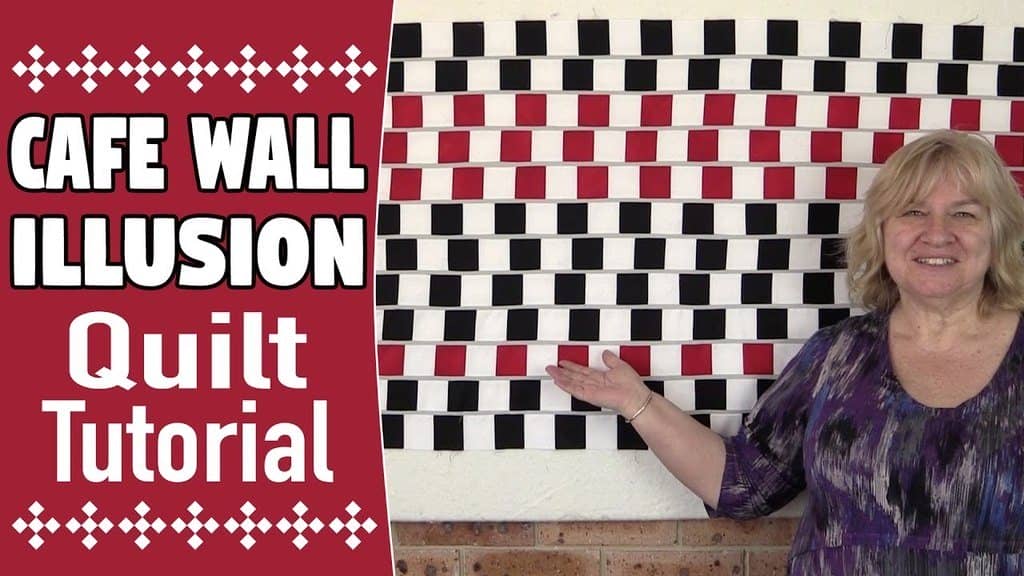
But not only that, the sashing has to be the right color for it to work. We found the perfect color was a light grey or blue-grey. We tried both black and white sashing and the effect didn’t work. Grey seemed to work the best.
Also, you need to ensure that you use a light and a dark fabric for the squares. Black and white will always work but you can use any dark color shade as long as it isn’t too fussy. So it’s best to choose a dark color and then use white as the contrasting color.
In this tutorial, we are going to show you how to piece together a quilt top measuring approximately 27″ x 47″. If you want to make a larger quilt, you can double the number of fabric strips and you should be getting close to a full-sized quilt by the time you had your borders.
Watch the video tutorial below or scroll down for the written instructions
Tools Used in This Tutorial
You can check the latest prices at Amazon by clicking on the links below:
- Creative Grids Ruler 8½” x 24½”
- Olfa 24″ x 36″ double-sided healing mat
- Olfa 60mm rotary cutter
- Oliso Iron
- Gutermann Sew-All thread
What You Will Need
(This will be enough for a 27″ x 47″ quilt top…approximately)
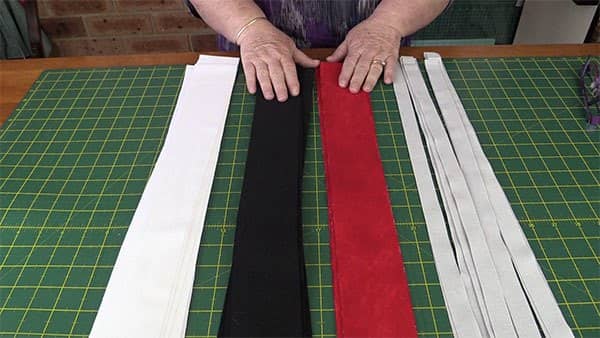
- 6 strips of dark fabric measuring 2 ½” x width of fabric – we used black
- 3 strips of dark fabric measuring 2 ½” x width of fabric – we used red
- 9 strips of light fabric measuring 2 ½” x width of fabric – we recommend using white
- 12-13 strips of fabric measuring ¾” x width of fabric – we recommend using grey
Method
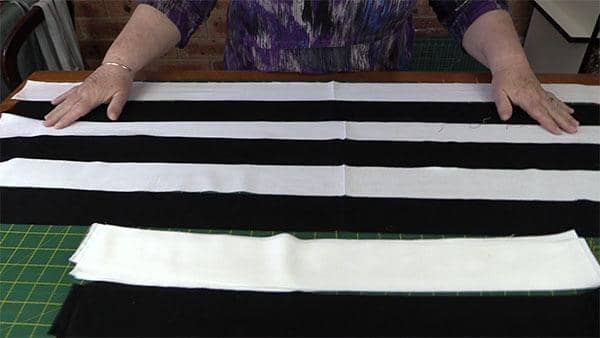
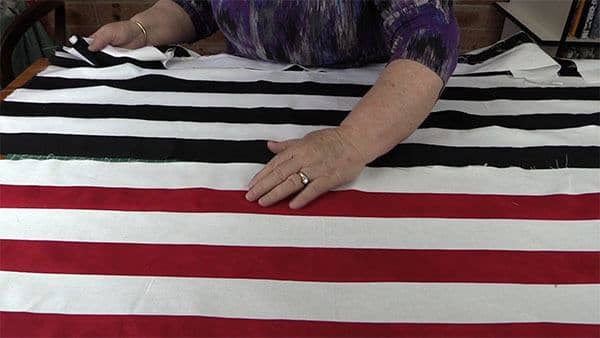
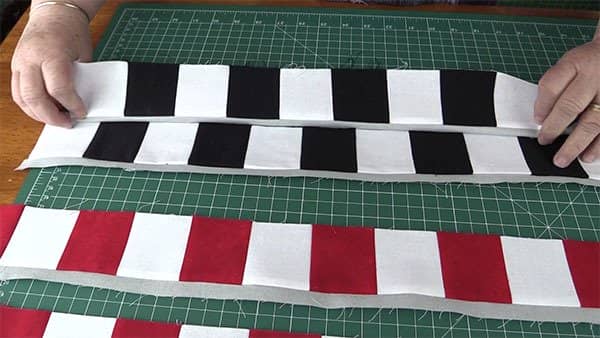
- Place 3 strips of the white fabric and 3 strips of the black fabric as shown in the image below.
- You will want to start with the white and finish with the black.
- Now you need to sew these rows together.
- We do this in lots of two, sewing together one row of white to one row of black.
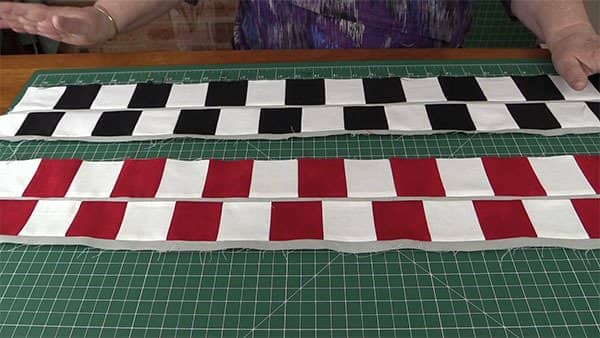
- You should now have three rows of strips as seen in the image below.
- Ensure that you iron your seams to the dark side of the fabric.
- Now you need to sew those strips together.

- You should now have one piece with 3 rows of white and 3 rows of black.

- Repeat the process with another 3 black and 3 white strips.
- Once you have that completed, sew it to the first lot.
- You should end up with a piece that has 6 white strips and 6 black strips all sewn together.

- Sew up the remaining red and white strips in the same way.
- You should end up with a piece that has 3 red strips and 3 white strips.
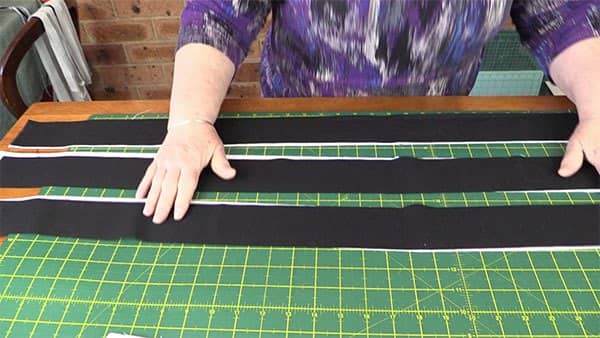
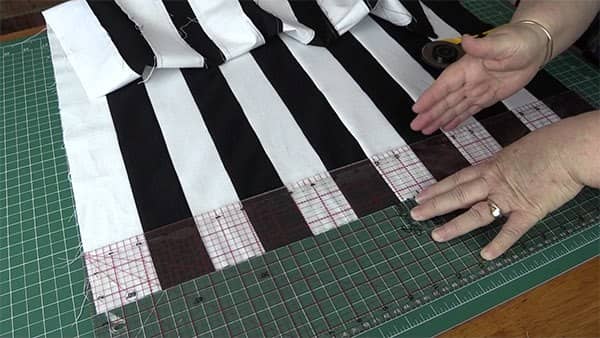
- Trim up one side of the black and white piece to remove the selvages.
- Now cut the piece into 2 ½” strips all the way along the fabric.
- Repeat the process with your red and white piece.

You should now have:
- 16 black and white strips
- 8 red and white strips

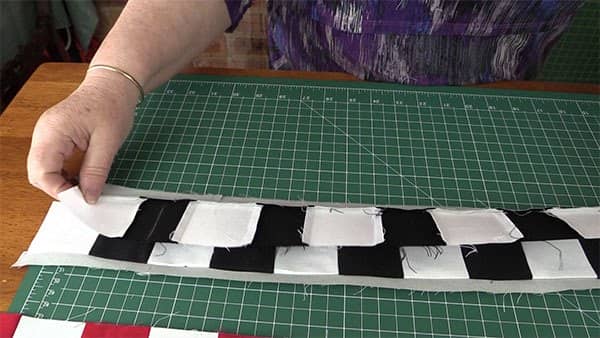
- Our strips aren’t long enough so we need to sew them together.
- Take two of the black and white strips and sew them together ensuring that you have placed a black and a white block together when doing so.
- Do this for all the black and white strips.

- Repeat the process for the red and white strips, however instead of sewing 2 strips together, sew 4 strips together.

You should now have:
- 8 long black and white strips
- 4 long red and white strips

We now need to sew our sashing to these strips.
- You may find that your sashing is too short to fit the length of the strips. If this is the case, simply sew two pieces together to extend it using the method of your choice.
- We simply sewed across the two pieces and did that twice to ensure they didn’t come apart.

- Line up your strips on your workspace with the same color at each end. In other words, all white ends at one end and all black ends at the other.
- Lay your sashing down on one end of each of the strips.

- Pin the sashing in place.
- Do this for all your strips, including the red and white ones. However, leave one strip free as it will end up on the bottom of the quilt and won’t need sashing (unless of course, you want it to).

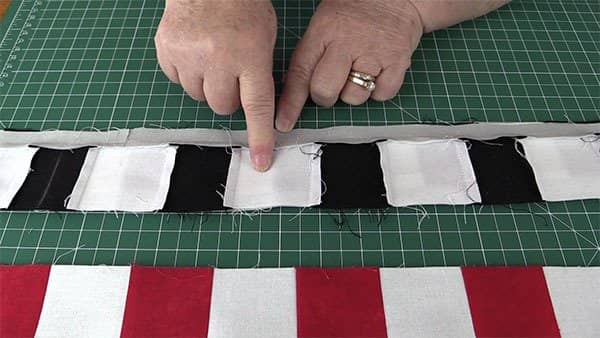
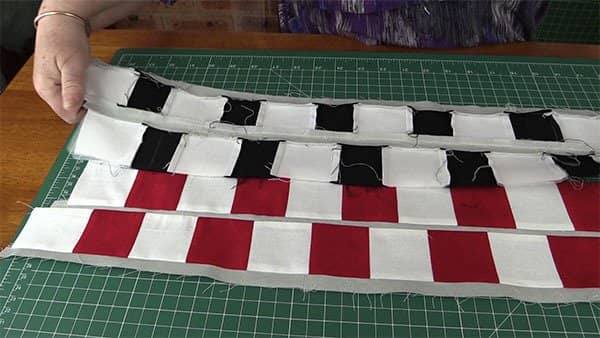
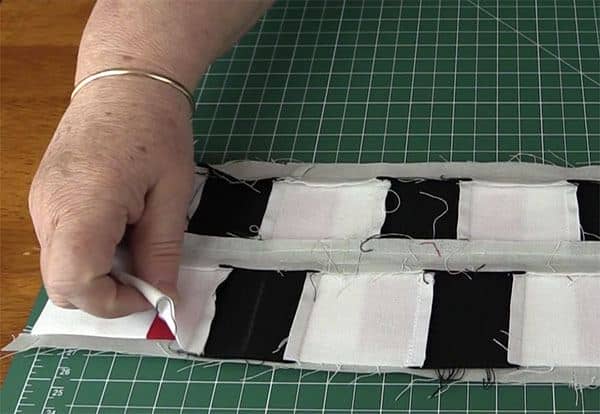
- Once you have sewn on your sashing to each strip, iron the sashing open as per the image below. This will make it easier for you to sew the next strip on.

- Now we need to sew the strips together.
- Start by lining up two strips on your workspace with the sashing facing away from you.

- Flip the strip closest to you over so that the sashing is facing towards you.
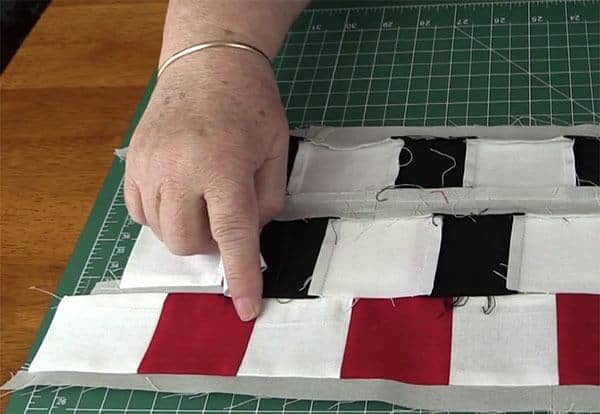
- Since we need to stagger the strips, we need to ensure we are lining it all up correctly.
- Draw a line down the middle of the second block.

- You need to line up that line you just drew with the second block on the other strip.

- Lift up the strip closest to you (the one that you drew the mark on) and place it on top of the other strip so that they line up.
- Bear in mind, that you only need to draw that line once as the rest of the strip should line up assuming you have sewn a nice quarter inch.
- If you have used white fabric, you may even be able to see through the fabric to check if it is all lining up.
- If you can’t see through your fabric, then simply lift the strip to ensure that everything is lined up okay.
- You don’t have to be absolutely perfect with lining up the squares halfway but you want to be as close as possible.
- Once you are happy with the placement, pin and sew down with a quarter inch seam.
- Repeat the process with the remaining strips.
- Once sewn, place two lots of the strips on your workspace with the sashing facing away from you.
- Flip over the fabric closest to you.
- You should still see the line you drew on the black square.
- This needs to line up with the edge of the second square on the other piece of fabric.
- Lift the fabric closest to you up and on top of the other piece so that they line up.
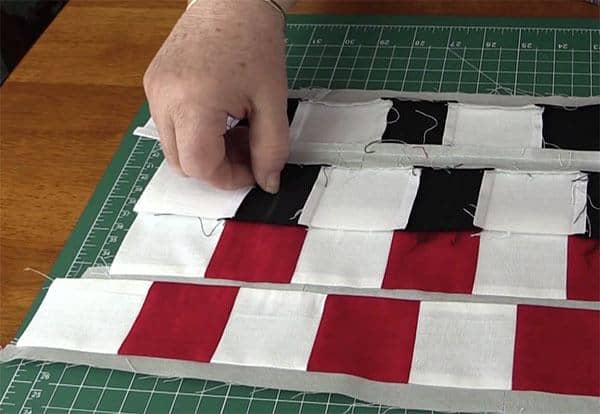
- Now sew the two pieces together along the sashing with a quarter inch seam (as shown by the red line in the image below).
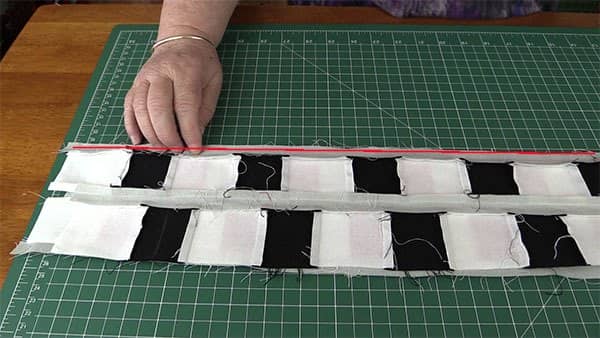
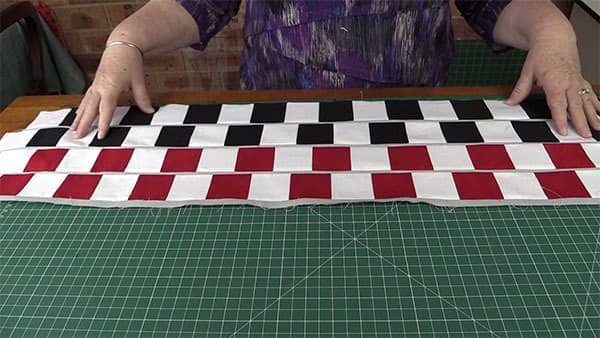
- Once sewn, you should now have a piece of fabric with four rows.
- Now all you need to do is complete the process with your remaining rows and then sew them all together at the end.
- I have started adding the borders. Will probably add another red border to finish off the top.
- Then it’s just a matter of adding the backing and batting.
- I will probably just quilt it by ditch stitching on either side of the grey lines. I don’t want too much quilting as I don’t want to lose the Illusion effect.


Ja kie says
Great illusuon
Alanda says
Thank you Ja