 We love making tote bags and we also love the Bargello method of creating quilts so we decided to combine the two and design a bag. I just love this technique. It is sooooo easy to do and makes a great checkerboard effect.
Watch the video tutorial below or scroll down for the written instructions
- How to box the corners
- How to make and add the handles
- How to make the trim
- How to finish the bag
TOOLS USED IN THIS TUTORIAL
You can check the latest prices at Amazon by clicking on the links below:
- Creative Grids Ruler 8½” x 24½”
- Olfa 24″ x 36″ double-sided healing mat
- Olfa 60mm rotary cutter
- Oliso Iron
- Gutermann Sew-All thread
- Quilters slidelock
What you Need:
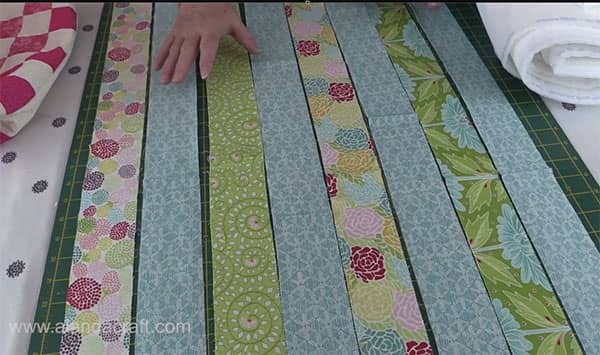
- 8 Jelly Roll strips or alternatively cut your own at 8 x 2½” strips measuring around 40″- 42″ in length (width of fabric).
For our Pink Bag: we used alternating strips using white as the main and 2 contrasting pink strips
For our Blue Bag: we used alternating strips using blue as the main and 4 different colour co-ordinated strips. This bag was made using a jelly roll called ‘Chantilly’ by Lauren and Jessi Jung for Moda.
Batting or fusible fleece.
- Backing
Method :
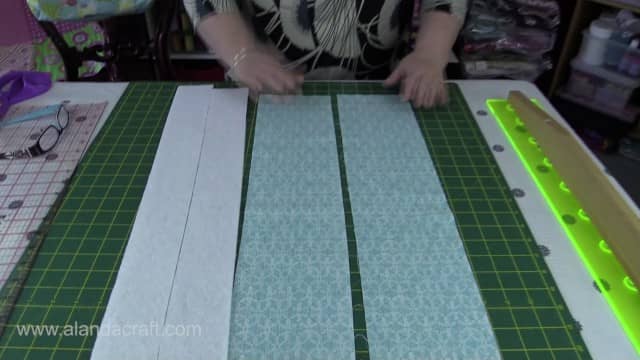
- Cut off the selvages from each end of the strips.
- Lay the strips on your table side by side, starting with the main colour.

- Place the first two strips on top of each other with right sides together.
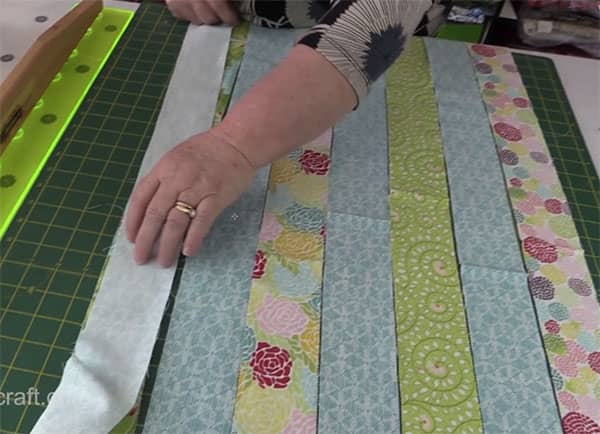
- Sew the long edges together with a ¼” seam.
- Pick up the 3rd strip and place on top of the second strip, right sides together and sew with a ¼” seam. Continue in this manner until the strips are all sewn together.
- Press the seams flat.
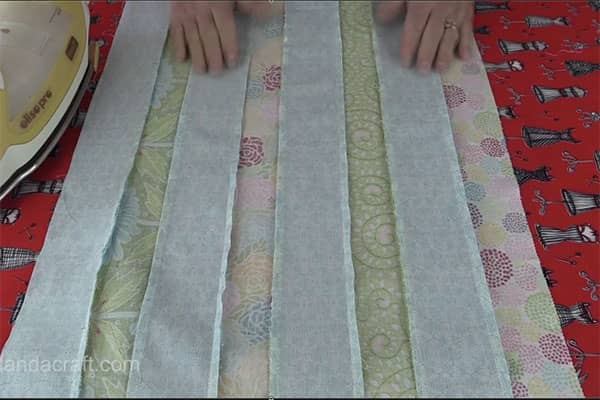
- Trim across the short ends to straighten up.
- Join the first and last strip together lengthwise and sew with a ¼” seam to form a tube.

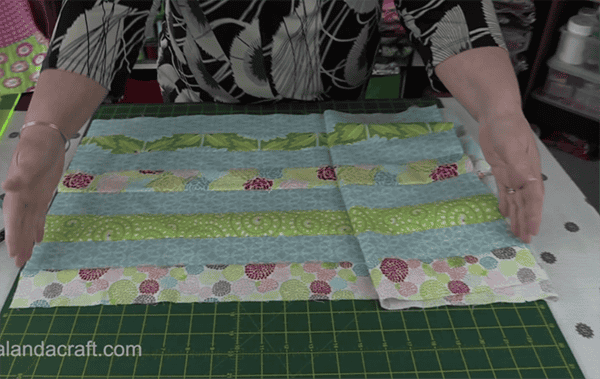
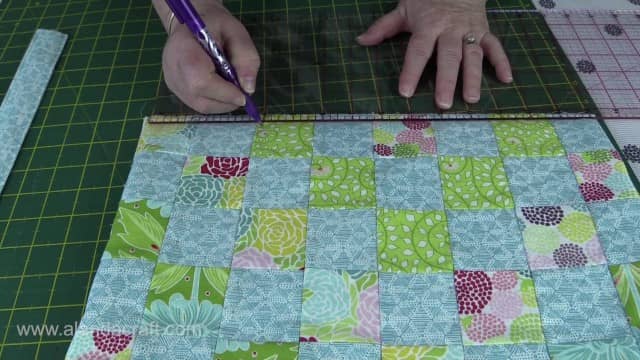
- Lay the tube on your table and cut 8 x 2½” strips from the tube. (You will still have some of the tube leftover to use for the back of the tote bag.)
- Lay the tubes next to each other making sure the co-ordinating squares line up.
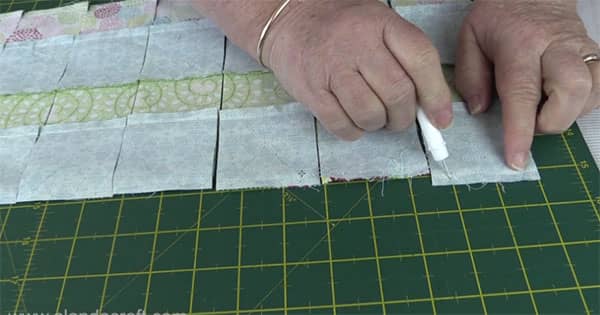
- Unpick the top row of stitching on the first tube
- Unpick the second row of stitching on the second tube
- Unpick the third row of stitching on the third tube
- Unpick the fourth row of stitching on the fourth tube
- Unpick the bottom row of stitching on the fifth tube
- Unpick the top row of stitching on the sixth tube
- Unpick the second row of stitching on the seventh tube
- Unpick the third row of stitching on the eighth tube.
Open the tubes and you will find that they alternate in design – 1 main, 1 contrast, until you get to the sixth tube, simply turn this one and the next three around so that the design is consistent.
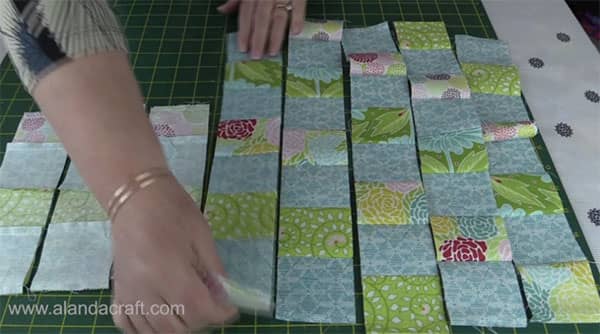
- Sew the strips together with a ¼” seam.
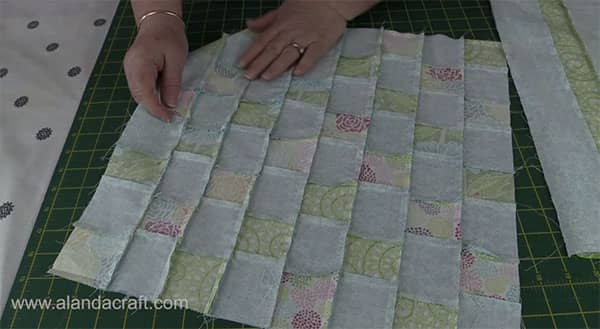
- Press your piece and put it aside.
We are now going to work on the back.
Decide whether you want to have the main strip on the bottom of the bag or a contrasting strip. I went with the main color.
- Open one seam line so that you have a flat piece of striped fabric.
You also need to decide if you want the stripes on your bag to run horizontally or vertically across the back of your bag.
- Trim your bag pieces to the size you want, my bag is 16¼” x 16¼”.
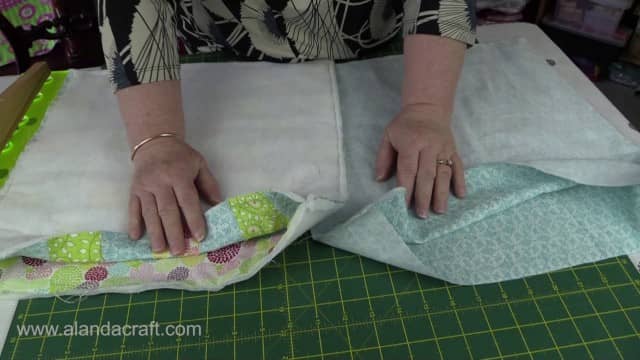
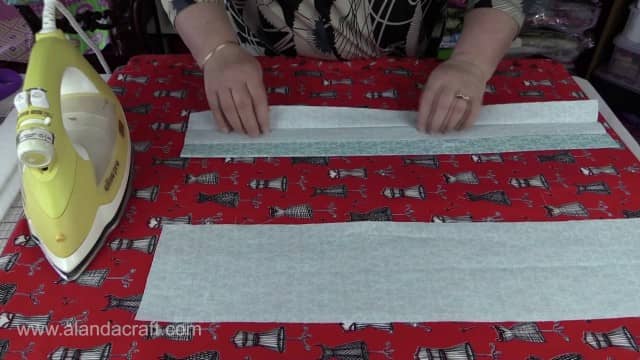
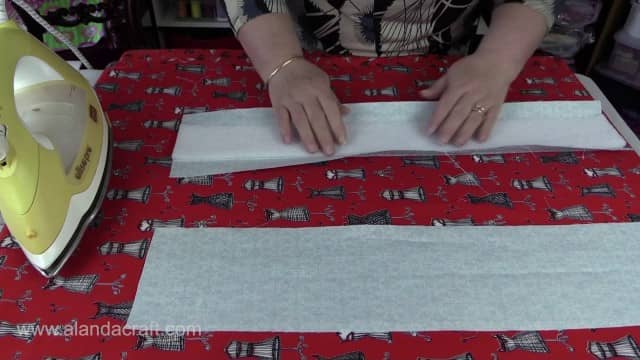
- Cut your fusible fleece to the size of your bag.
- Make sure that you iron the rough side of the fleece, this is the side that has the glue on, to the wrong side of your bag pieces.
- Do Not Use Steam.

- Once you have added your fusible fleece to both the front and the back bag pieces, its time to sew the bag together.

- Place the two pieces right sides together and sew around 3 sides only with a ¼” seam.
- I start and end with a backstitch.
- As you sew around the edges, stop a ¼” from the corners and pivot.

Lining
With Top Trim
- Cut 2 pieces of lining 16¼” wide to match your bag BUT cut the height 16¾”. This is to create the trim at the top.
Without Top Trim
- If you don’t want to have the trim then cut your lining pieces to match your bag pieces, in my case 16¼” x 16¼”.
- Sew around three sides as you did on the front piece, leaving the top end open end open.
Box the Corners
Now is the time to decide if you want to box the corners or not. If you do decide to box the corners you need to do it on both the main piece and the lining.
You can see how this is done in the video, and we also have a tutorial on boxing corners here.
Make the Handles
- Cut 2 strips of fabric 5″ x 22½”.
- Cut 2 strips of fusible fleece or batting – 2½” x 22½”.
- Fold the fabric in half. Press.
- Open it up and fold each side into the middle. Press.
- Place the batting/fusible fleece down the centre of the handle strip.
- Fold the outside edges to the middle, over the fusible fleece and press.
- Fold the handle in half. Press
- Top stitch down the each edge

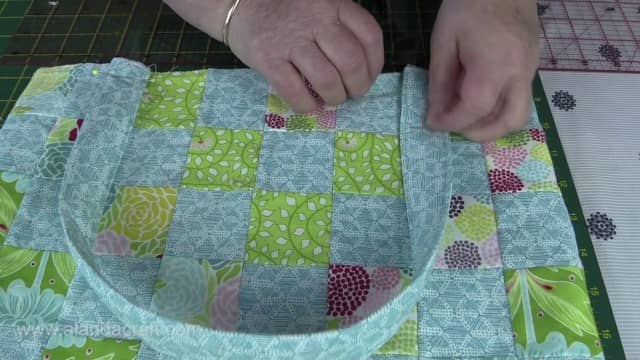
Adding the Handles to the Bag
- Measure in 4″ from the side seam on both sides of the bag.
- Make a mark with chalk or a frixion pen. Make your marks on both the front and the back of the bag.
- On the front of the bag, place the handle with one side next to the outside of the mark..
- Pin in place.
- Place other side of the handle to the outside of the mark on the other side of the bag.
- Repeat on the reverse side of the bag.
- I left my handles pinned in place before doing the next step but you can sew a line of stitching across the handles to secure them in place.
Finishing the Bag
- Insert the bag into the lining with right sides facing. So have your bag facing fight side out and the lining facing wrong side out.
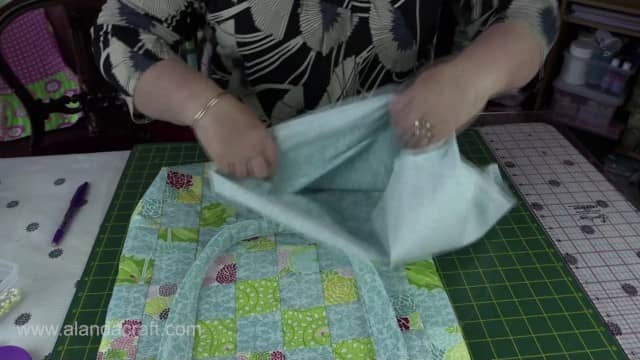
- Make sure the handles are pushed into the bag and are laying nice and flat .
- Match up the side seams of the bag and the lining and pin.
- Once the side seams are lined up nicely and pinned in place, continue pinning around the top edges of the bag.
- Leave an opening of around 5 to 6″ on one side of the bag. This is so that we can turn the bag through. I find it helps to place a pin on either side of the opening so that I remember not to stitch across it.
- Sew around the top edge of the bag with a ¼” seam.
I start with on one side of the opening and back stitch. I also back stitch when I reach the other side of the opening. This secures the stitching for when I am turning the bag through. I also backstitch over the handles as I come to them.
- Turn the bag through the opening.
- Push the lining into the bag.
Do a final check to make sure the handles aren’t twisted. and that everything is sitting nicely.
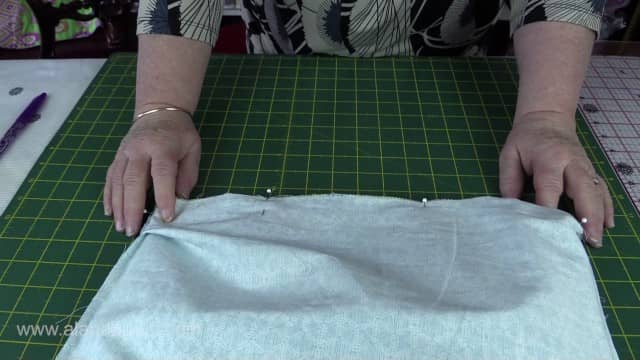
Finishing the bag without the the trim
- Turn in the edges of the opening and topstitch around the bag to close the opening and finish the it.
If you are finishing the bag with the trim
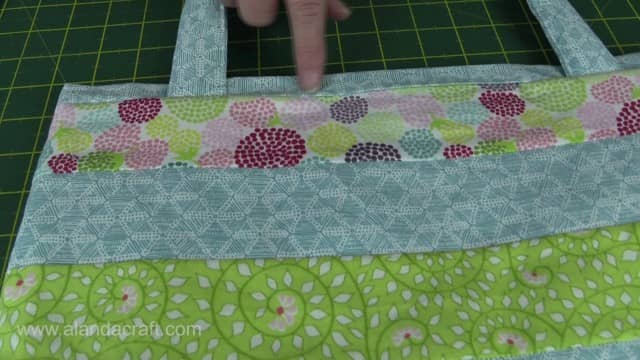
- Fold in the raw edges of the opening and give it a press.
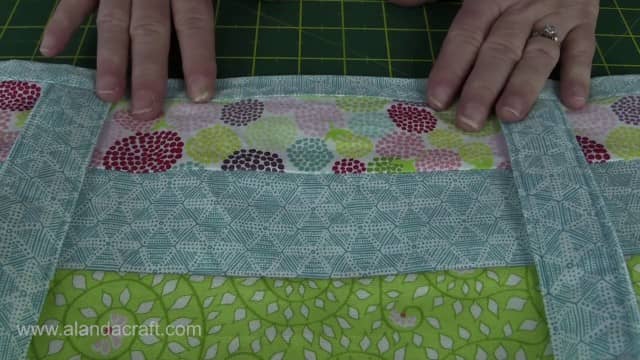
- Make sure to bring the handles up as shown in the image.
- Topstitch about 1/16″ from the seam line to close the opening secure the handles.
- Topstitch about 1/16″ from the top edge to finish the trim and further secure the handles in place.
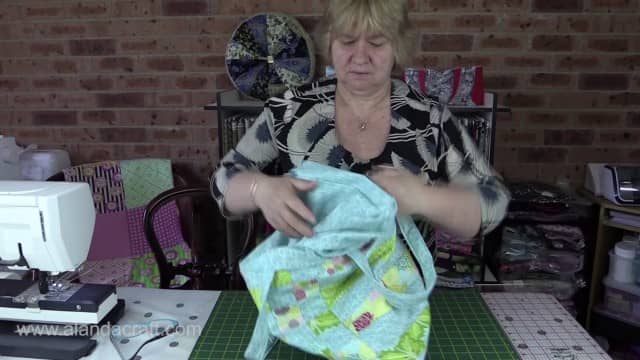
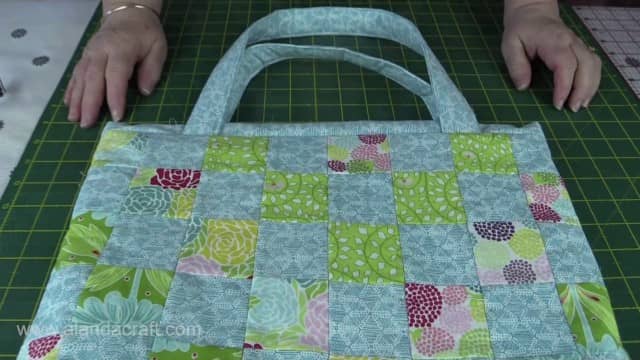
And there you have it. Your checkerboard tote bag is complete.
I


Michelle says
Why DID THE PATTERN END UNFINISHED. LINING AND HANDles are missing
Alanda Craft says
I have no idea what has happened to the rest of the instructions, Michelle. I will work on getting them up again shortly. In the meantime you can watch the video which shows how to add the handles and finish the bag. Thank you for letting me know as I had no idea that this had happened.
sandra says
Hi this pattern in not finished, could I possible get a copy of the pattern itself. I can pay for it. please let me know, i am handicapped and cannot leave my home at all, so i would like to get the full pdf pattern for this bag please
Alanda Craft says
Hi Sandra, I have added more information to the post for you. The instructions in the post are the pattern. There is a PDF button at the bottom of the post where you can print out the instructions. Thank you for letting me know some of the instructions were missing. I’m not sure what happened there.
Jan says
Great tutoria, thank you!
Alanda Craft says
Thank you Jan, I’m glad you like it 😊.