If you are looking for a big bag then you are definitely going to love this one. This big craft bag is ideal for those occasions when you need a really BIG bag for market or for taking accessories to craft class. It has lots of handy pockets and plenty of room for your supplies.
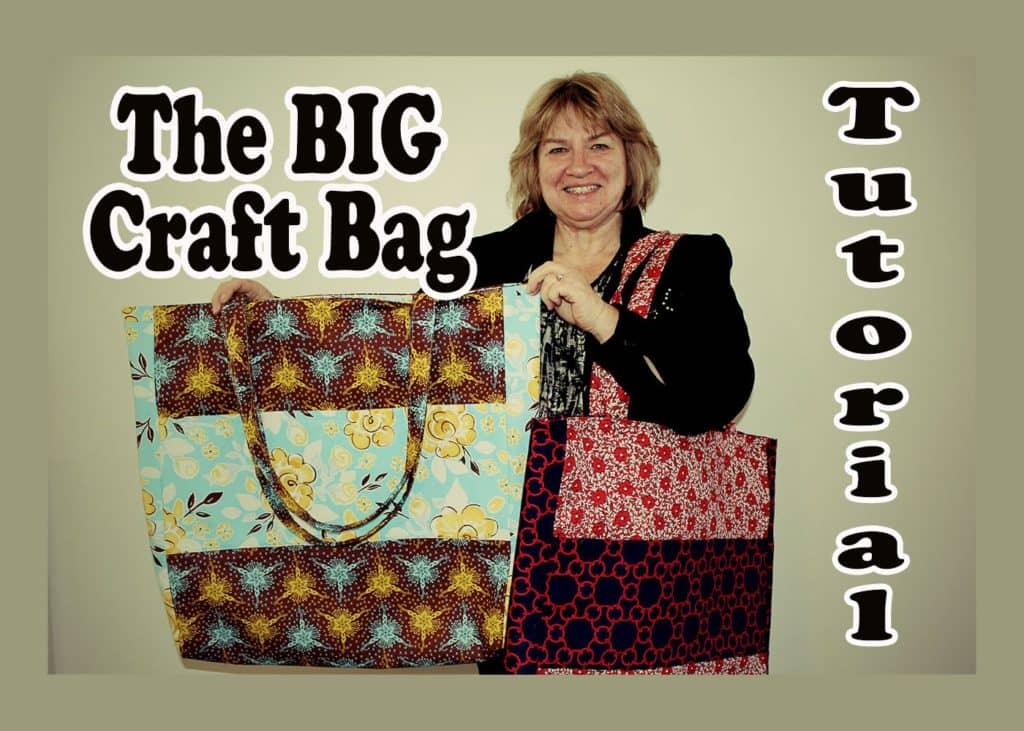
Not all craft rooms are large and we found this when we took our rolling craft trolly to one venue. It took up way too much room. So we decided we needed a new option for taking our sewing accessories with us and this is what we came up with – it’s a very large craft bag. It holds a cutting mat, rulers, and all the other bits and pieces that you need to take with you.
It’s roomy, it’s reversible and it looks great and it will also make a great market bag.
The finished bag measure approx. 19½” wide x 22″ and the side gussets measure 4″.
Watch the video tutorial below
WHAT YOU NEED:
You need 2 pieces of contrasting fabric.
- Main fabric – 2 yards
- Lining fabric – 1½ yards
Cut your fabric as follows:
Main:
- 1 piece of fabric – 46″ x 20½”
Lining:
- 1 piece of fabric – 46″ x 20½”
Handles:
- 2 pieces from main fabric – 30″ x 5″
Pockets:
- Outside pocket – 2 pieces from lining fabric each piece measuring 8″ x 20½”
- Inside pockets – 4 pieces from main fabric each piece measuring 8″ x 20½”
Gussets:
- 2 pieces from the main fabric – 5″ x 21″
- 2 pieces from lining fabric – 5″ x 21″
INTERFACING:
I cant provide the yardage for the interfacing as fusible fleece comes in a variety of widths and sizes.
Main:
- 1 piece of Fusible Fleece – 46″ x 20½ can be slightly smaller
Handles:
- 2 pieces Fusible Fleece or batting – 2″ x 30″
Lining:
- 1 piece medium weight iron-on interfacing – 46″ x 20½”
Pockets:
- 3 pieces medium weight iron on interfacing – 8″ x 20½”
Gussets:
- 4 pieces 5″ x 21″
Watch the video above on how to construct this great looking craft bag
TOOLS USED IN THIS TUTORIAL
You can check the latest prices at Amazon by clicking on the links below:
- Creative Grids Ruler 8½” x 24½”
- Olfa 24″ x 36″ double-sided healing mat
- Olfa 60mm rotary cutter
- Oliso Iron
- Gutermann Sew-All thread
- Quilters slidelock


Barbara Eady says
I finished my bag tonight. I used Nate Burkas home decor fabric, batting and quilted the outside. I put Velcro on the top edge. love it. I can use it as a weekender too!
Thank You for sharing.
Barbara
Alanda says
Fantastic Barbara. We love the size of these bags as well.
We would love to see your finished bag, so if you would like to share some photos with us please add them to our ‘Submit Your Project’ page – /submit-your-project/. Its always a thrill to see our readers finished bags because each one is so individual.
Margaret Wraith says
Just watched your Big Craft Bag being made. “what a whopper!” It’s just wonderful. I’m here in the UK wondering where to begin. In the meantime I must ask about your Iron, just love the squeak! I’m assuming the squeak and the lift that followed is to make sure you don’t scorch your ironing board. Is it a well known brand? I’ve never seen one like it before.
Thank you for sharing. I get the feeling you’ve sewn a few metres of material, you make it look so easy.
Thanks again. Every Blessing.
Margaret
Alanda says
Thank you Margaret. These irons are available from Amazon.uk here is the link Oliso Smart Iron Pro. You can also read our review of this fantastic iron here /oliso-pro-smart-iron-review-and-demonstration
isabella says
hello from Scotland I love this bag, I have never made anything before but would love to try this. I am into crochet and have been looking for a bag big enough for blankets and shawls, this would be ideal. My Mum has a sewing machine so hopefully I can give this a go, thank you for great tutorial . best wishes isabella
Alanda says
Nice to hear from you in Scotland, Isabella. This bag is an awesome size and you will find it useful for so many things. Happy sewing.
Dana Fucella says
Hello from Tennessee! I watch your video and was wondering if I could use a heavyweight sew-in stabilizer? It is Ultra Firm by HTC Retail Division. It seems flexible enough but stiff enough to give the bag some structure. I figured I could stick it to my fabric with 505 spray adhesive. Any advice is appreciated. This bag looks so nice with all the pockets!
Alanda says
Hi Dana from Tennessee. As I mentioned when I answered your comment on youTube I do tend to feel that this stabiliser may be a tad too firm for this bag. As you know we used a medium weight interfacing. My only problem with a heavyweight interfacing is that you might find it difficult to turn the bag through, plus it may be too stiff to work with when sewing the rounded part of the gusset to the bag. You have mentioned that it seems flexible so you may be okay using it. I am reluctant to say go for it and then you have you find it is too stiff to work with. However, if you do use it then please let us know how it goes. And the beauty of using a temporary adhesive spray is that if you find the interfacing is too stiff you can remove it fairly easily before you get too far into the bag.
I am a tactile person so I would be bending it into shape and getting a feel for if it is flexible enough before starting to sew.
I love lots of pockets and this bag is a delight when it comes to holding all your bits an pieces.
Sharon says
Hello from Imperial Missouri USA, I made your bag and I love it. It’s a neat pattern and the bag is roomy with great pockets. I’m making another for my sister. Is there a way to print the pattern so I can log off and sew?
Best Wishes,
Sharon
Alanda says
There is no real pattern to this, Sharon, as it is all straight pieces. You can just print the page for the basic cutting details so is it the method of construction that you are wanting.
Bernie says
hello.. i really love this bag. However i wish to make a slightly smaller one first to try out. i was thinking to reduce the length from 46″ to around 30.5″. i will keep the width at 20.5″. how do i gauge the sizes for the gussets? i hope my final product will look as good as yours! Thanks!!
Alanda says
Much as we love to help we don’t really have the resources to do individual calculations, but I had a few moments spare so here goes.
Our original calculation was:
Overall length 46″, subtract 4″ for the bottom gusset = 42″. Divide 42 x 2 = 21″.
So you would need to do the following.
Overall length 30.5″, subtract 4″ for bottom gusset = 26.5″. Divide 26.5 x 2 = 13.25″. So the side gussets would be 5″ x 13.25″. This will give you a more squat, rectangular looking bag. These are just my assumptions working on what we did. It might be worthwhile to draw the bag measurements out on plain paper first to be sure that this is the look you want before cutting out your material.
Colleen McPhee says
I think this was a great tutorial. I plan on making one. Thanks
Alanda says
Excellent Colleen, and we would love to see your finished bag when its done. Here is a link to the ‘Submit Your Project’ page /submit-your-project/
Rhonda Head says
I made this to take to Quilting and love it. I have now decided to make one for my Great grandson that’s 6 mos old to carry his toys in when he visits.
Alanda says
What a great idea making one for your little grandson. His mum will definitely love being able to keep everything together in the one bag. I’m really glad you are finding your bag so useful. We love ours for the same reason, everything fits in one bag. We would love to see your bags so you might like to share them on our readers project page /submit-your-project/
Tricia Neelley says
Just purchased all the fabric to make this great looking bag. I am going for a sew-in with my sewing guild in a week, so I will get busy tomorrow so I can take everything that I currently wrestle with in one big tote. Thanks so much for this video and your easy to follow instructions.
Alanda says
I am sure you are going to love it when its finished Tricia. We find ours so handy as everything just fits in perfectly. Thank you for your feedback. And please share photos of your finished bag on our readers project page. /submit-your-project/ We love seeing how unique these projects look as everyone chooses such different materials and they all look great.
Vicky Lin says
You mentioned only 1 piece for main fabric. Is that right? Or should be 2?
Alanda says
Yes Vicky, it is only one piece for the main.
Diane says
I signed up for Beginning Quilting and wondered how I’d get all my supplies there, including a cutting mat. The solution was to make your very big tote bag and it came out beautifully! I’m not a very experienced sewer so I was thrilled. I left one inside pocket with just the sides sewn in so it’s more of a band to hold my cutting mat and long rulers against the side. Thanks for sharing your pattern!
Alanda says
Excellent Diane. I am so happy that you like your big craft bag. It certainly is great for taking all your items to craft class. Good luck with your quilting course. We love to see our readers finished projects so if you would like to share some photos here is the link. /submit-your-project/
Wendy newman says
I would love to make this bag and I am new to sewing . I’m curious how much fabric all together I would need to buy of each print ?
Alanda says
I have done some calculations using the measurements on the site and from what I worked out you would need 1 and one third yards for the main and the same for the lining. This is based on the width of fabric being 42″ wide. However, I urge you to check the measurements just to be sure.
Daisy Copeland says
I just have fell for this big craft bag. l made one for church and i am making another one.
Alanda says
That’s brilliant Daisy. Perhaps you would like to share some photos of you bags on our Readers Projects. We would certainly love to see your bags. Here is a link to the page /submit-your-project/
Daisy Copeland says
I followed your direction to the t. And took my time. I cut one nite and sewed the next morning.
Alanda says
Excellent Daisy. These bags are so handy, I love how big they are.
Daisy Copeland says
I LOVE ALL YOUR VIDEO ON MAKING A LOT OF PROJECTS. THEY ARE SO EXPLANABLE .
THANK YOU ALANDA FOR YOUR HELP, IN EVERY PROJECT I HAVE MADE , I LOVE TO SEW.
I SEW ALMOST EVERY DAY MAKING SOMETHING. THANK YOU AGAIN FOR YOUR INSPIRATION.
Alanda says
Thank you for your lovely feedback Daisy. I am so happy we have inspired you. Perhaps you would like to share some photos of your projects on our Readers Projects page – here is the link /submit-your-project/. We love seeing our readers projects. 🙂
Becc says
Instructions including the measurements in centimetres would be helpful. I generally try to use Australian sites for this reason.