I think most of us are familiar with half square triangles and know just how versatile they are in quilt making. Half square triangle blocks can be arranged in so many different ways to create different looks and they can even be incorporated nicely into quilts with other types of blocks. However, for this quilt tutorial we are only going to keep it simple and only use half square triangle quilt blocks.
We initially got our inspiration for this quilt from Electric Quilt 8 (EQ8) software and we decided on a pattern that we both liked. However, the pattern required cutting some odd shapes and we wanted something simple. Those of you who follow our blog and YouTube channel know that we are all about simplicity and beginner friendly projects.
So we played around with the design and came up with a Herringbone quilt made from half square triangles. It’s a super easy quilt to make and the idea behind the quilt is to use light and dark colors that compliment each other and I think we have managed to do that with the lovely fabrics that we purchased.
I am going to say that this herringbone design wasn’t our first choice but once we had the blocks laid out on the floor, and played around with them we felt this was the one we wanted to go with. And I’m really happy with how it turned out.

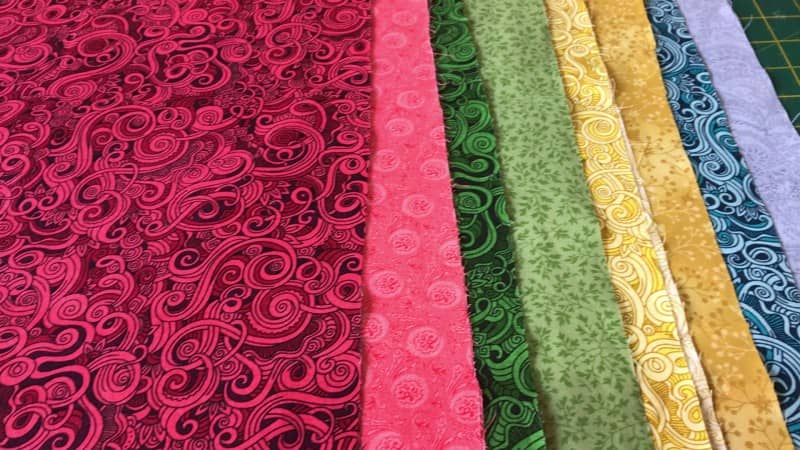
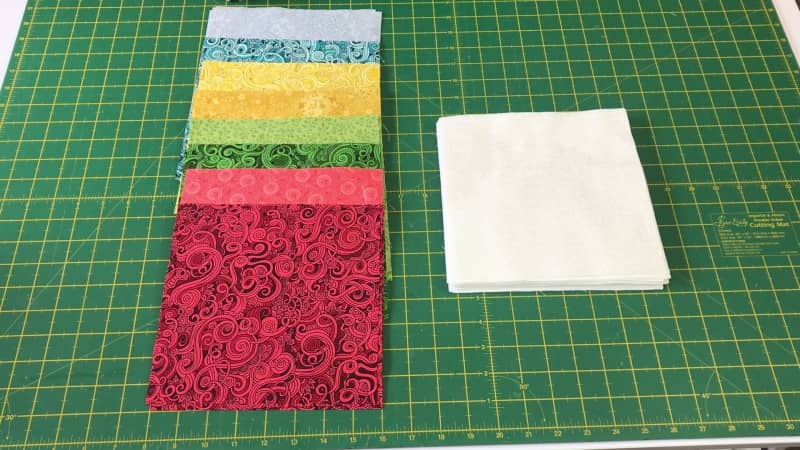
At the time, our local Spotlight store was having a great sale on quilting fabric, so off we went and were lucky enough to find 8 fabrics that complimented each other with both light and dark hues.
Before we get into the tutorial on what you need and how to assemble our half square herringbone quilt, let’s talk a little about what a herringbone quilt is and some of the background into how this pattern came into being.
What is a Herringbone Quilt?
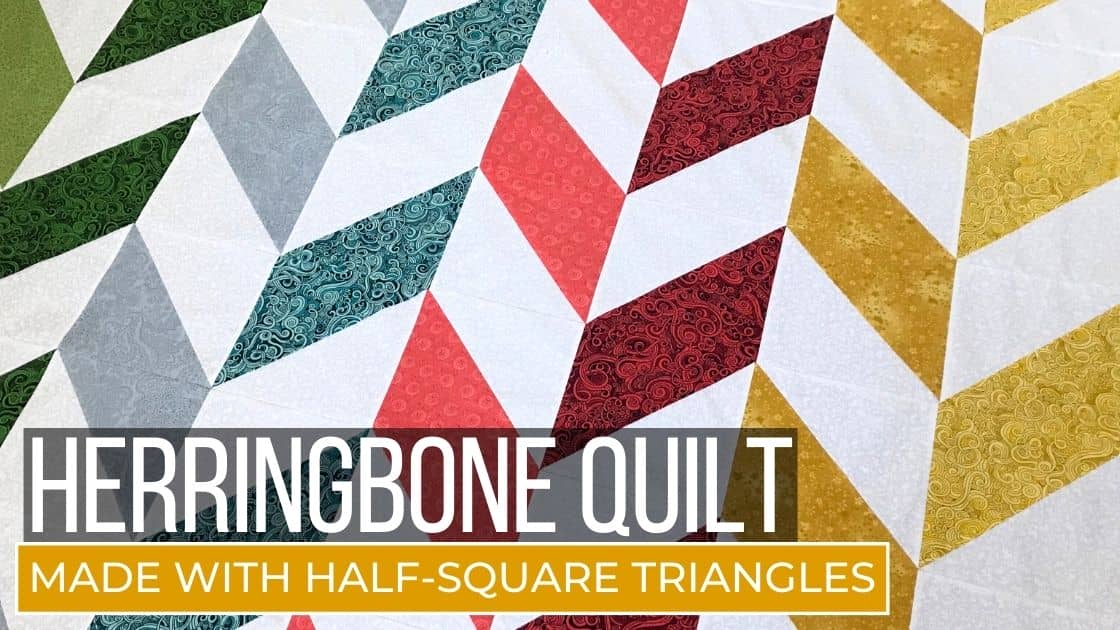
This is a quilt that has a distinct V- shaped pattern that resembles the bones of fish – hence the name ‘herringbone’. We create this design by arranging the rectangles or strips of fabric in a staggered manner. You can see from the picture above just how striking this effect looks. And you can be as bold or as subtle as you like with your color choices.
One of the great things about a herringbone quilt pattern is it’s versatility. After all you can make it entirely of solid colors or mix and match with prints, each will create a different look and feel. So it doesn’t matter if you are going for a bold, modern look with bright, bold colors or if you prefer a more subtle, traditional look using muted tones, your herringbone quilt will look amazing. It’s also a great way to use up fabric scraps. Why not make a total mix up using what you have in your stash. Now that would serve two purposes, reduce your scrap stash and create a mind blowing herringbone quilt of many colors, You would just need to temper the design with a contrasting fabric so that the mish mash of colors stand out and pop.
Did you know??
The herringbone pattern was originally used by the Romans when they laid out their roads, and we all know how long they have lasted. This design created a stable and durable surface that was able to withstand heavy traffic and shifting ground if the base layer wasn’t entirely stable. So as you can see this pattern has been around for centuries and it has been used by many different cultures and had many different uses.
It stands to reason that the herringbone design would find it’s way into the world of textiles. It’s a popular choice in tweed and wool fabrics and is often used in making suits and coats creating a classy and timeless look.
Quilters tend to like the herringbone pattern because of its geometric look and the way it adds movement to your quilt. And, even though it looks complex and a bit sophisticated it’s really easy to piece together, especially when made using half square triangles.
So lets get on make our half square triangle, herringbone quilt.
Watch the Video below or Scroll down for the written instructions
(Can’t see the video? You may have an ad blocker installed. You can turn it off or you can watch the video on our YouTube channel here.
Finished Quilt Size
Approx: 58″ x 72″
What You Need
- ¼ yard of 8 different colored fabrics
- 1¾ yards of white (or a contrasting color of your choice)
- Thread – we use Gutermann Sew All Thread
- Ruler – Creative Grids 8½” x 24½”
- Cutting Mat
IMPORTANT: Choosing fabrics for this quilt
If you want to achieve the same effect that we have with our quilt then you will need to have a light and dark of each fabric.
So for example, with our quilt we went with 4 main colours – red, green, yellow and blue.
Now for each of those colours you are going to need a light and a dark.
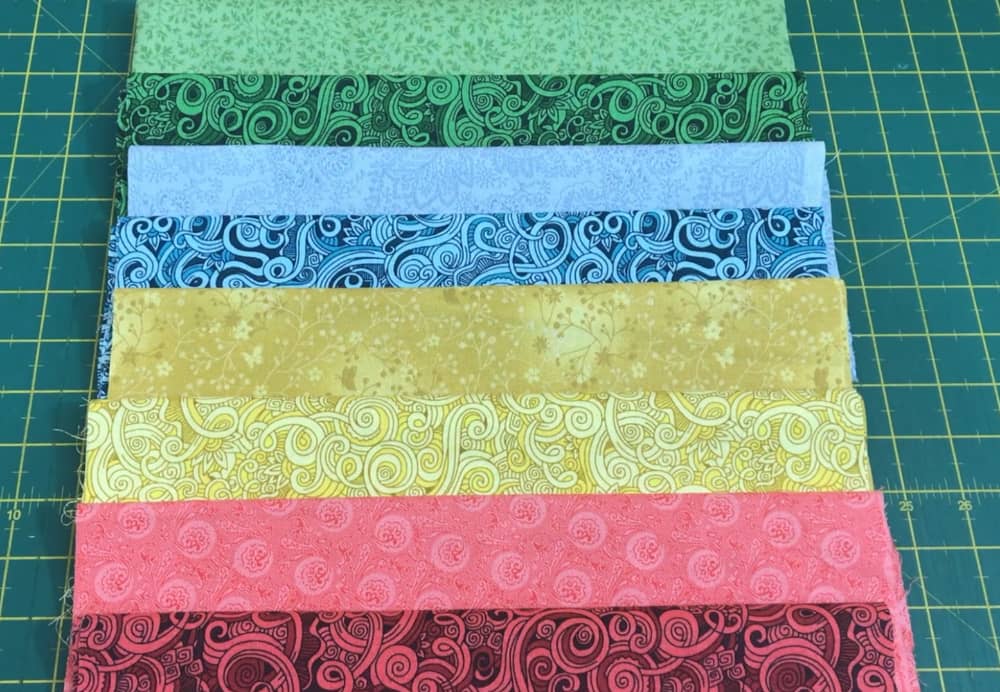
So as you can see here we have a:
- light and dark green
- a light and dark blue
- a light and dark yellow
- and a light and dark red
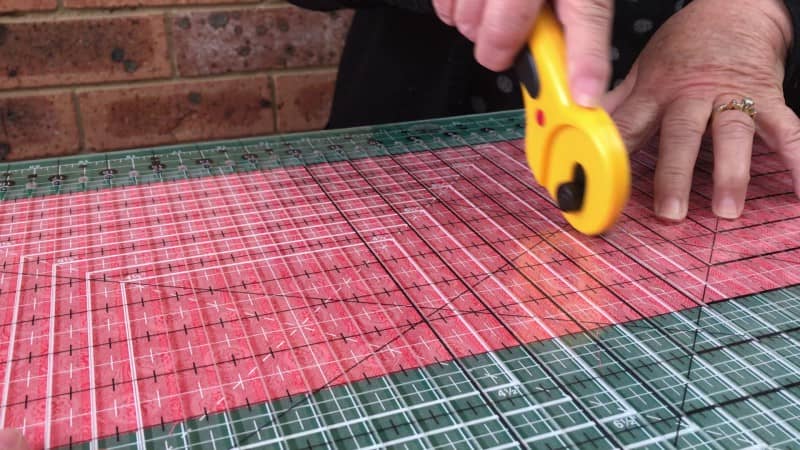
Cutting Instructions
The first thing we need to do is cut one strip from each of the colored fabric and 8 strips from the white.
- Cut 1 strips @ 8″ x width of fabric of each color
- Cut 8 strips @ 8″ x width of fabric from the white fabric

So we now have one long 8″ strip of each fabric (plus the 8 white strips) and we are going to cut those strips into 8″ squares. I used my Stripology XL ruler to do this but you can just use your quilting ruler which works just as well.
I like to have the colors in separate piles, it just makes it easier to work with if everything is neatly stacked.
So this is what you will end up with:
- 5 (8″ x 8″ ) squares of each colour – 40 squares in total
- 40 (8″ x 8″) squares of the white
How to Make the Half Square Triangle Blocks
The first thing we need to do is make our half square triangles. (Watch the video to see this in action.)
To do this:
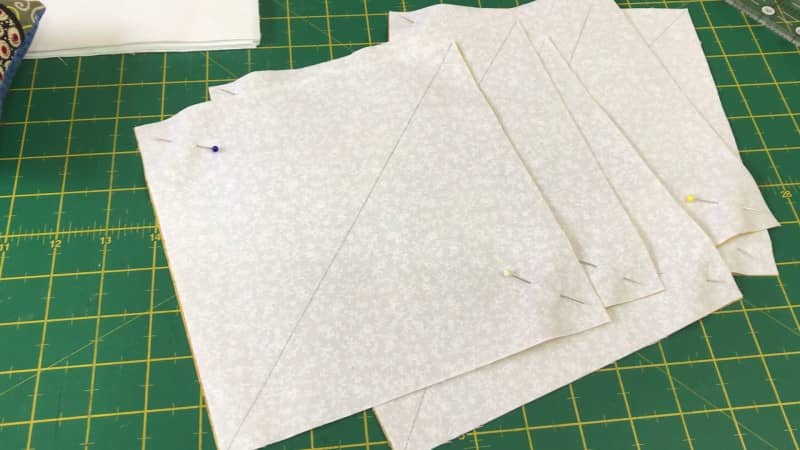
- Place one 8″x8″ colored square on top of an 8 ‘x8 ‘ white square with the right sides facing.
- Make sure that the two pieces line up nicely around the edges
- Pin the pieces together
Now, if you wish, you can take the time to match up each of the colored squares with a white square and stack them on top of each other in a pile and set them to one side. Once that is done it’s time to make our half square triangles.
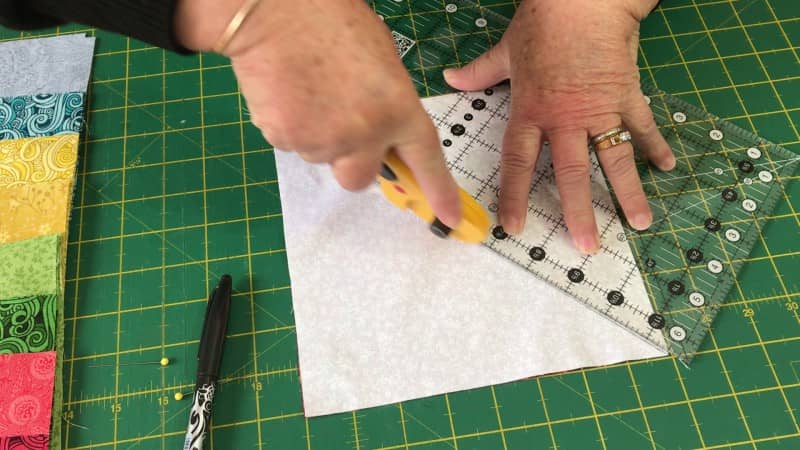
Take one pair of your matched squares and draw a line across the diagonal of the block. I tend to do this on the white square as the mark is easier to see, but if you are using chalk you may prefer to draw the line on the colored square. There is no right or wrong way to do this it’s entirely up to you how you want to do it.
I used a FriXion pen, as I find they are excellent for marking lines on my fabric and the mark easily irons out. They do have a drawback in that if you live in a cold climate the ghosting of the mark may show. So I wouldn’t use a FriXion pen on a show quilt, not that I make those, but just a tip for those talented ladies who do.
- Now we are going to sew a seam 1/4″ away from the drawn line, and we will do this on either side of the line you just drew.
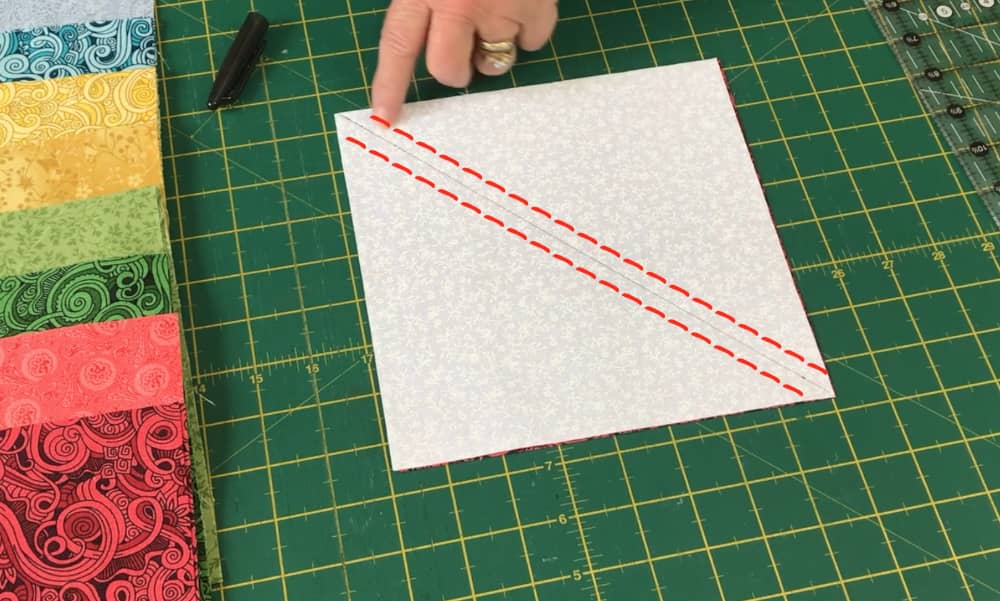
I have turned the square over so that you can better see the stitching. It doesn’t show up on the white square.
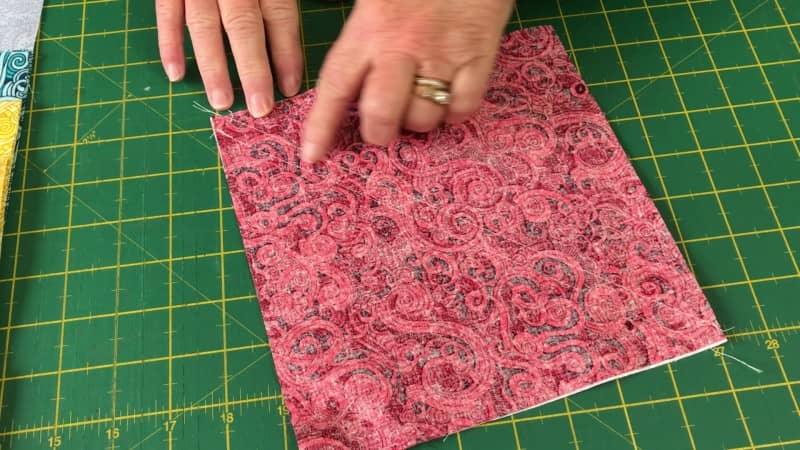
- Take your rotary cutter, or scissors and cut along the line that you drew, and now you have created 2 half square triangle quilt blocks.
Press the seams on each block towards the dark side of the fabric. We prefer not to have the seams showing through on the white side if we can help it.
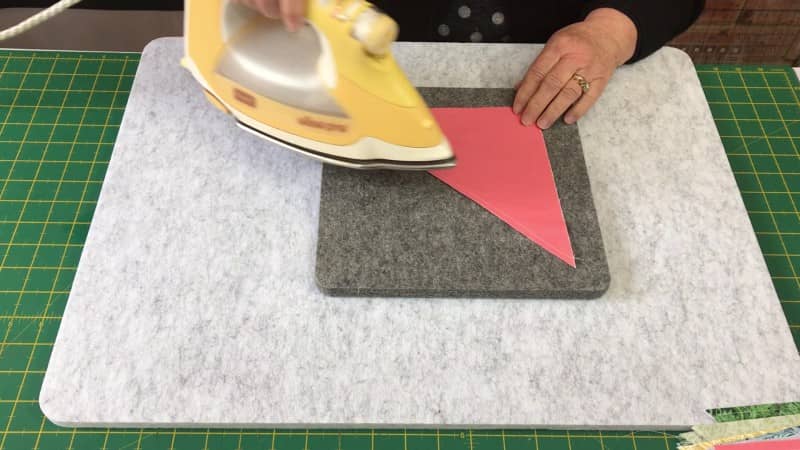
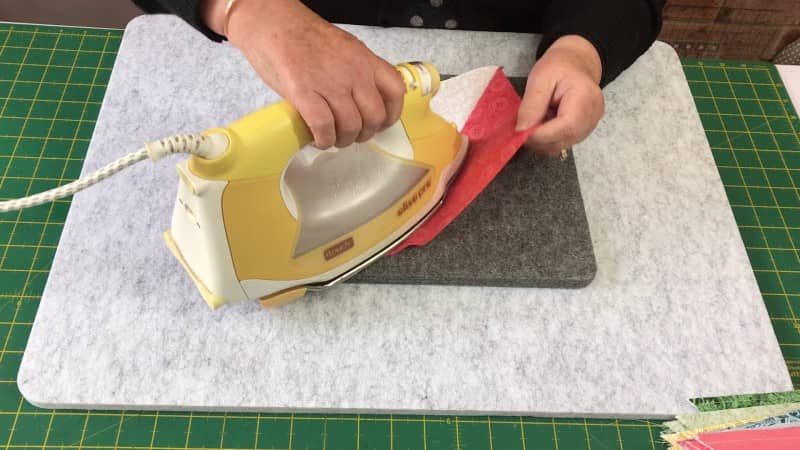
Here you can see how the seam is pressed towards the dark fabric.

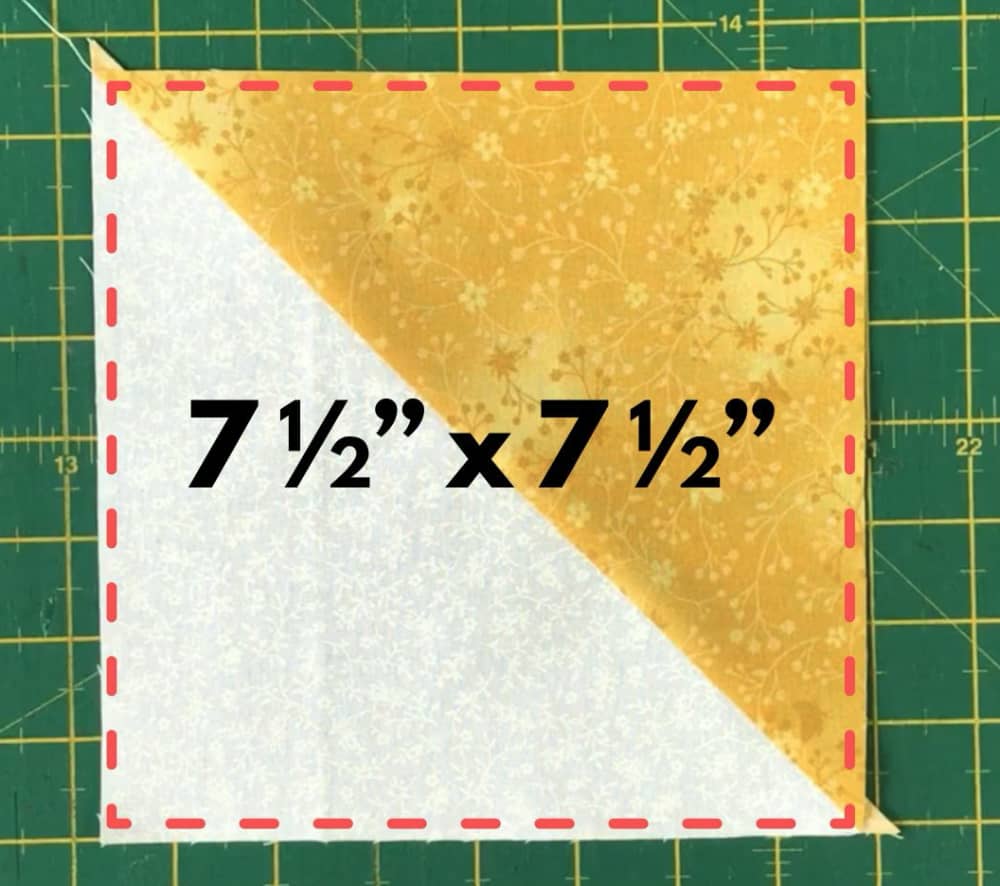
Now that we have all our seams pressed it’s time to trim the blocks.
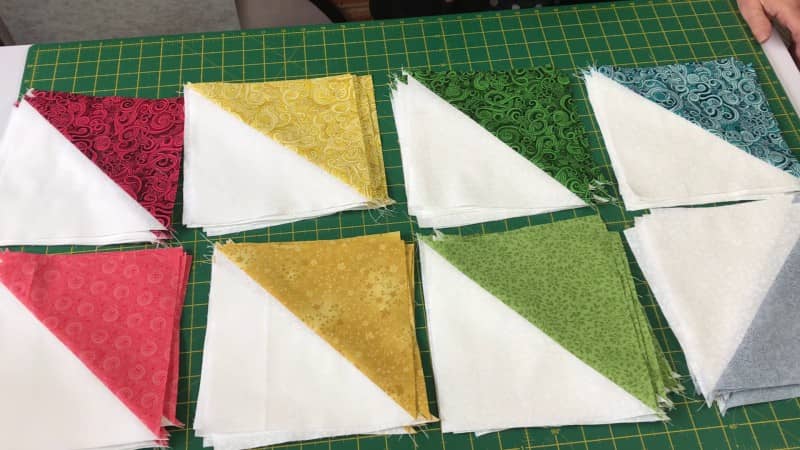
We need to trim the half square triangle blocks back to 7½“. If you’re not sure how to do this we have a tutorial that shows you what you need to do.
How to Assemble the Quilt
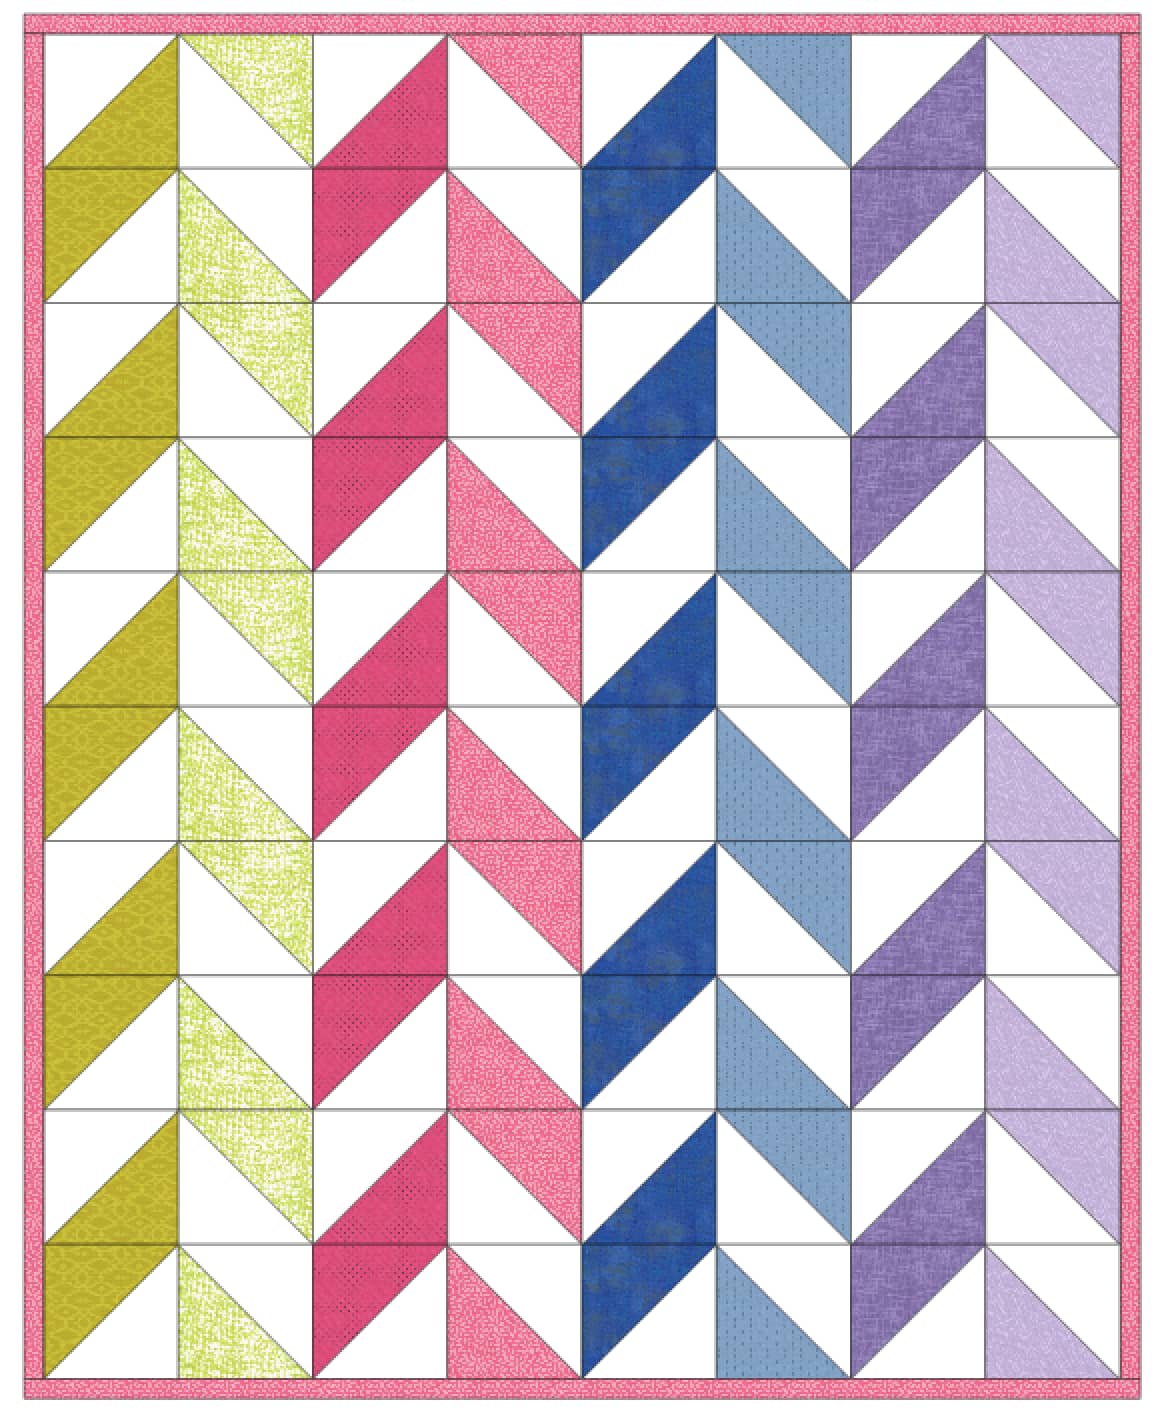
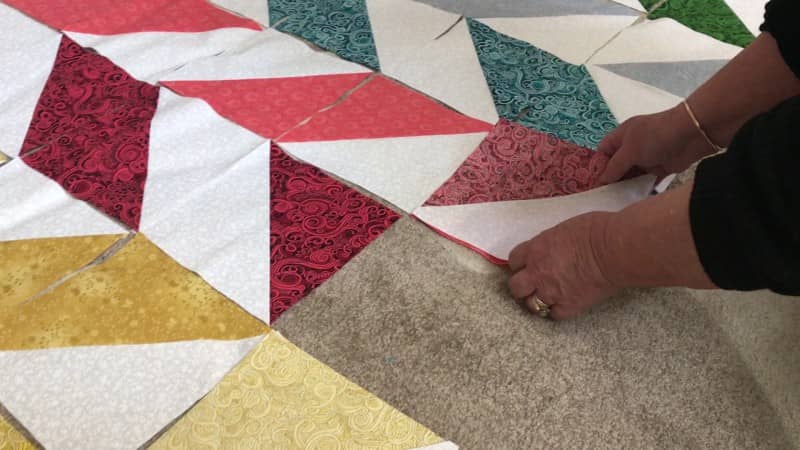
Now comes the fun part. Lay out the squares on your work surface and arrange them as you see in the picture below. I tend to lay out my quilts on the floor as I don’t have a lovely big workspace. But it works well and it’s good exercise.
Sewing the Quilt Together
Once you have all your blocks set out it’s time to start sewing them together. All the seams in this quilt are sewn together with 1/4″ seam.
Take the first block in the row nearest to you and place it on top of the second block in the row. Have the right sides of the blocks facing and make sure to line up the edges. And now we sew them together.
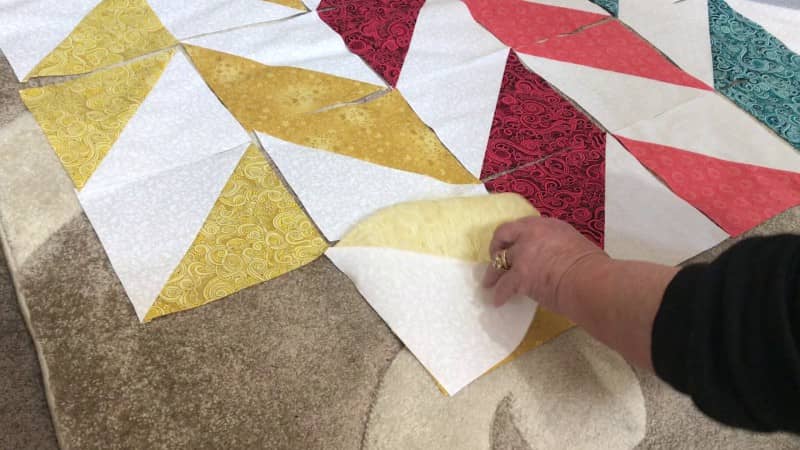
I tend work along the row and sew my blocks together in lots of 2 and then I sew the whole row together, but you do what suits you. You may prefer to pin each of the blocks in one row together and sew them all in one go.
After you have sewn all the blocks in one row together, press the joining seams all in one direction. I have turned over the first three rows of the quilt to show you how I have pressed the seams. (Watch the video above to see this in action)
When you have sewn all the blocks in the second row together, press all the joining seams in that row, in the opposite direction to the first row. Continue to press the rows in an alternating direction until you have all the rows joined.
By pressing the seams in alternating directions you are ensuring the seams are going to nest together nicely giving you nice crisp joins when we come to sew the rows together.

Once your squares are sewn into rows it’s time to join the rows together. Remember we are sewing the rows together with a 1/4″ seam.
And there you have it, the centre of our quilt is finished and doesn’t it look lovely. I think that the use of light and dark contrasting fabrics really makes this herringbone quilt pop. Such an easy quilt to make. I hope you will give it a go and if you do why not share some photos on our Readers Project page. We would all love to see your creation.

You can make this quilt larger by adding more squares to the sides and the bottom
Now you can add borders to the quilt if you like. I’m not going to add borders to this quilt, I will simply add my batting and backing, do some line quilting and finish the quilt with a binding. And if you aren’t sure on how to binds a quilt we have a video on ‘how to bind a quilt ‘on your sewing machine.


Leave a Reply