We recently received our second bundle of fabric from Cotton Cuts. It’s always a lovely surprise to see what is in the box and this time the fabric came from the Murano collection by Odile Bailloeul for Free Spirit. And I would just like to mention that Cotton Cuts have a number of different membership types available so that you can receive fabric when you want, which makes it easy for you to get the type of fabric you like on a regular basis or even just as a one off purchase.
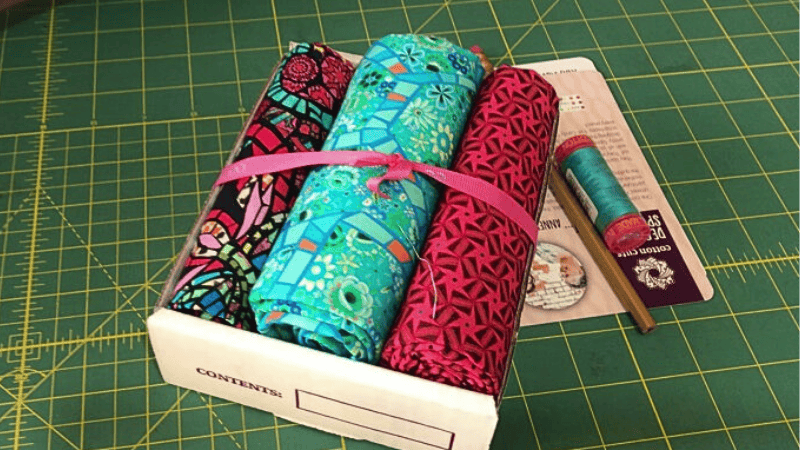
We received 1 yard each of three different fabrics. So with 3 yards in total, we decided to make a quilt and we thought that since the fabric is so vibrant it would work well as a stained glass style quilt. These types of quilts generally use black sashing between the shapes to highlight the deep colors of the fabric.
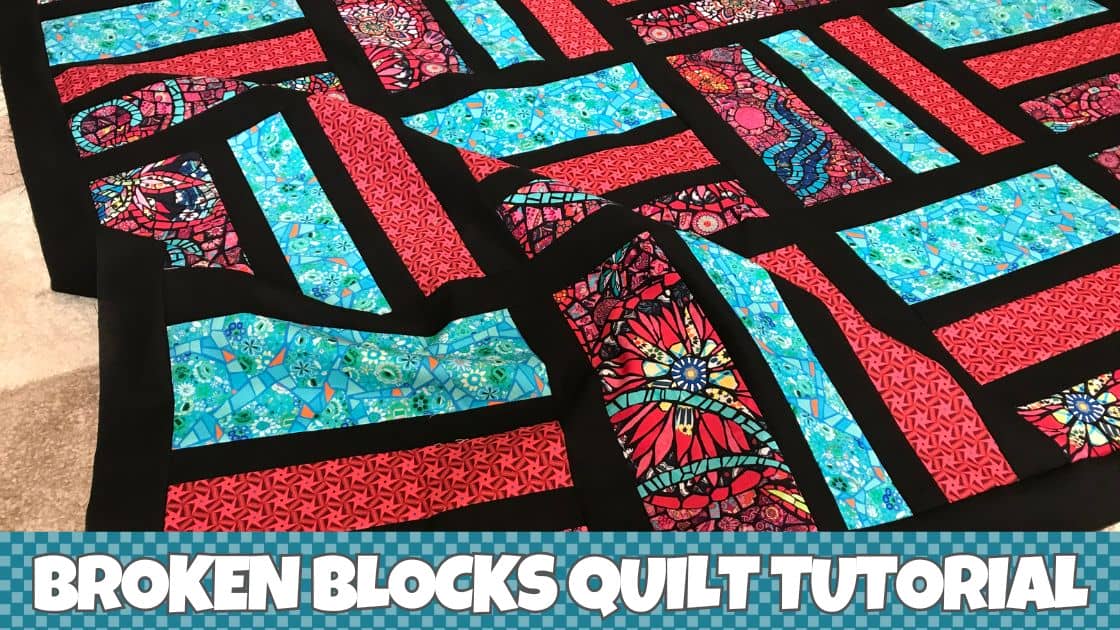
So we opened up our EQ8 software and started designing a quilt and ended up with what you see here.
Now, if you have been following along with us for a while you will probably have come to the conclusion that we like to make quick quilts. For me personally, I am not one to spend weeks on making a quilt. I like to get them done fast so that I can move onto the next one…but that’s just me.
So with this in mind, we designed the Broken Blocks quilt in such a way that you don’t have to cut hundreds of rectangles up and then sew them all together. Instead you only need to sew strips together and then cut them up into the block size needed for this quilt. This makes it so much faster to put together.
So let’s get started!
Tools Used
(These are affiliate links so if you purchase using these links, we receive a small commission, at no extra cost to you. Thank you for your support.)
- Rotary Cutter – We use a 60mm rotary cutter for most of our quilting projects. I know a lot of people use a 45mm and that works just as well, but we have both been using a 60mm for so long now that it’s just the one we automatically pick up.
- Quilting Ruler – We have a number of different sized quilting rulers. The one we used in this tutorial comes from the Creative Grids Basic Range collection and we both love it. I must admit I find some of their quilting rulers fussy to read but this one is super simple. It’s my new favourite.
- Cutting Mat – We have a few different brands of cutting mat and the one that we used in this tutorial is a generic brand. I can’t even tell you where we bought it now but it’s not one I would recommend because it runs in inches at the bottom and then metric at the top. It just doesn’t work for me. I personally like the Olfa brand of cutting mats and that is the one we like to use in most situations.
- Juki 2010Q Sewing Machine – This is our new favourite sewing machine. It is a work horse but bear in mind that it only has one stitch – the straight stitch – but it does it extremely well.
Materials Used
IMPORTANT: As mentioned previously, we received 3 different yards of fabric from Cotton Cuts. This will be enough to make the center of the quilt that you see in this tutorial, with the addition of the black sashing. It will also be enough to make a 3″ or 4″ border but you will need to use a mix of the 3 different fabrics to do that so keep that in mind.
- Fabric 1 – Blue – 1 yard
- Fabric 2 – Multicoloured – 1 yard
- Fabric 3 – Pink/Red – 1 yard
- Fabric 4 – Black (for sashing) – 2 yards
Finished Size
The quilt finished size is 56½” x 67½”
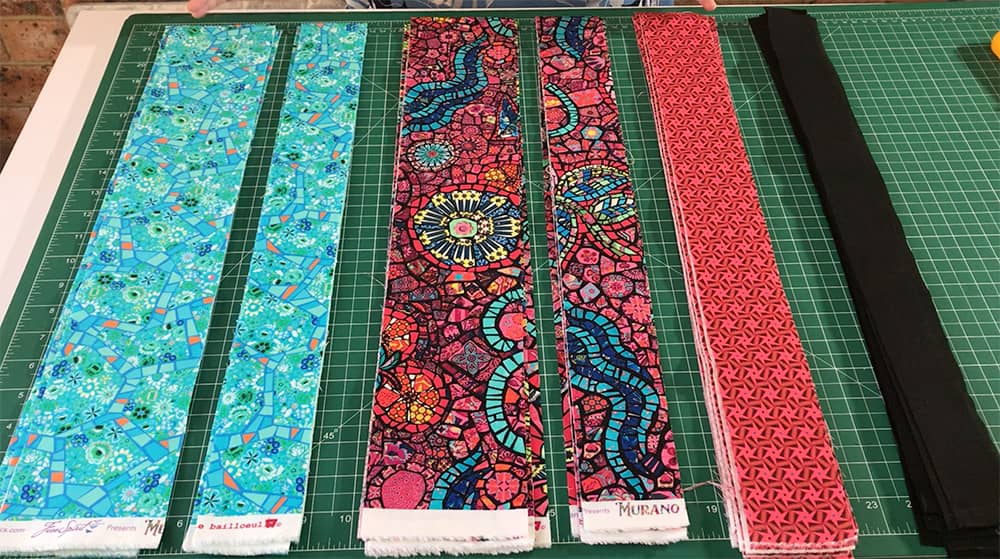
Step 1: Cut Your Fabric into Strips
The first step is to cut your fabric into strips. (Note that WOF means ‘width of fabric’.)
Fabric 1: Blue
- Cut 4 strips @ 4″ x WOF
- Cut 4 strips @ 2½” x WOF
Fabric 2: Multicoloured
- Cut 4 strips @ 4″ x WOF
- Cut 4 strips @ 2½” x WOF
Fabric 3: Red/Pink
- Cut 8 strips @ 2½” x WOF
Fabric 4: Black
The black fabric is used for the sashing. Note that you may require more or less strips based on your width of fabric. We have based the requirements on the fact that you can get a good 40″ of fabric out of each strip.
- Cut 16 strips @ 1½” x WOF (for blocks)
- Cut 20 strips @ 2″ x WOF (for sashing)
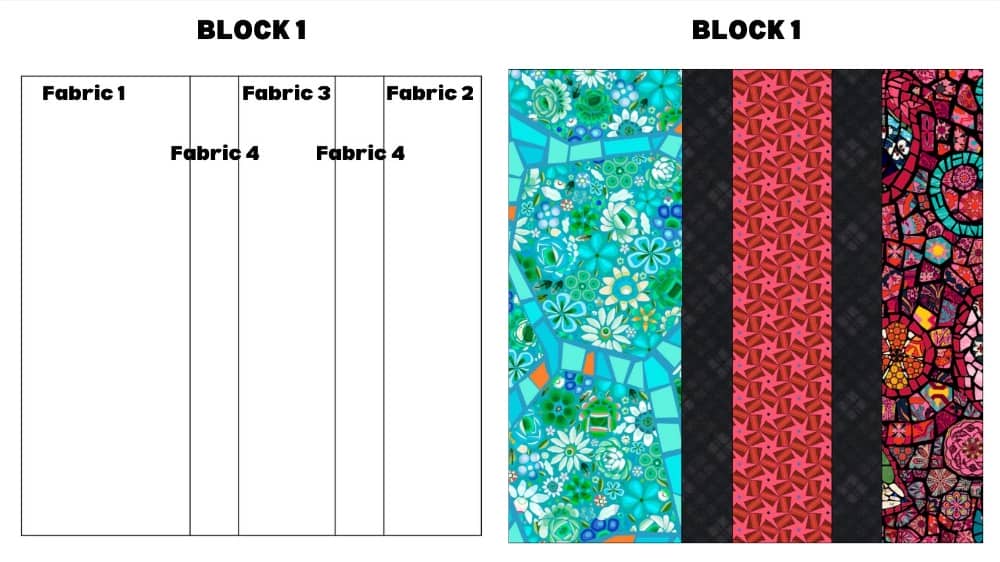
Step 2: Sew Your Blocks
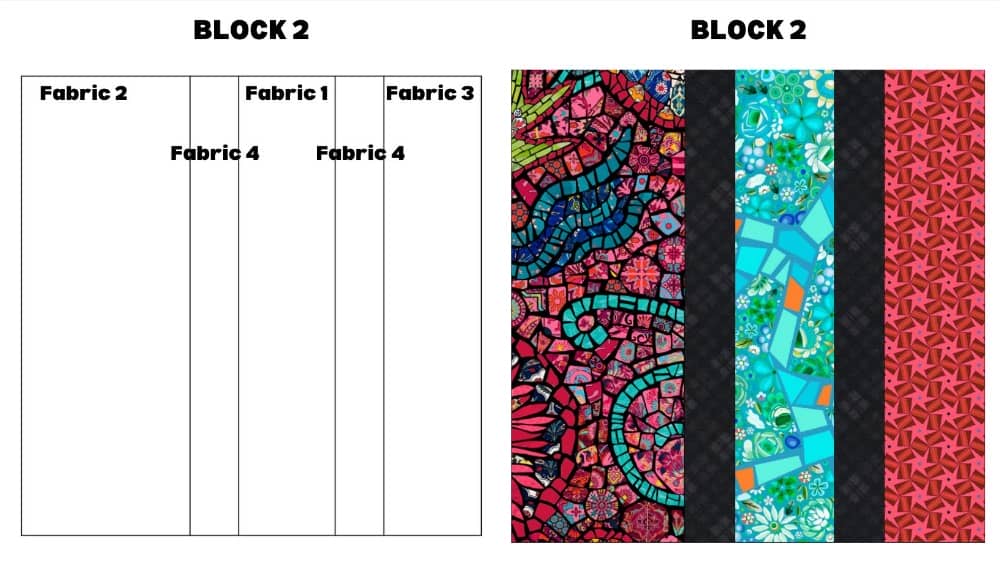
There are two blocks that make up this quilt and in order to make those blocks you start by sewing your strips together in the configuration shown below.
You will be using the 16 strips that you cut of the black fabric that measures 1½” x WOF for these blocks.
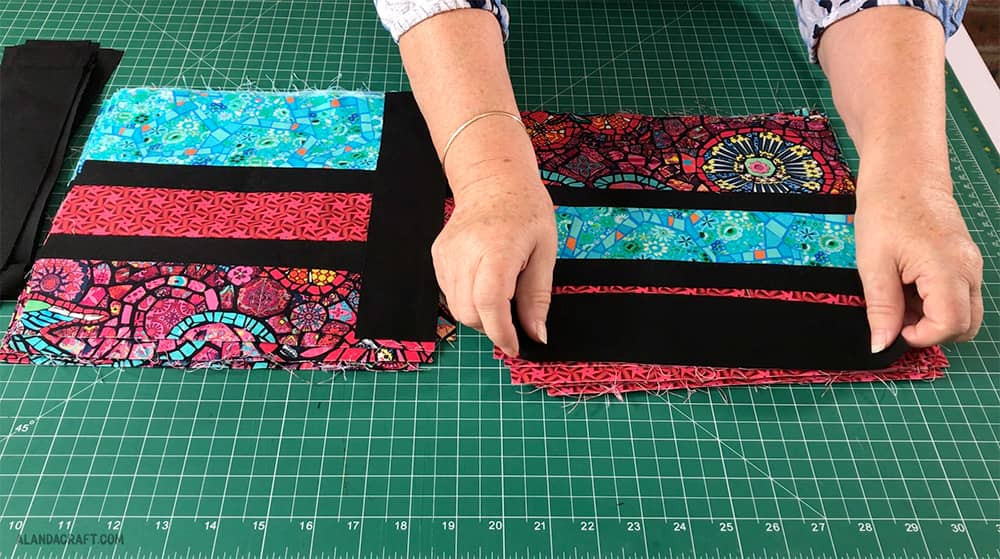
You can see two different strip sets shown in the image below. The one on the left is for Block 1 and the one on the right is for Block 2.

And here is a different visual so you can see how the blocks will look and how the fabric is sewn together. Remember that you are sewing the strips together first and then in the next step we will be cutting those strip sets into blocks.
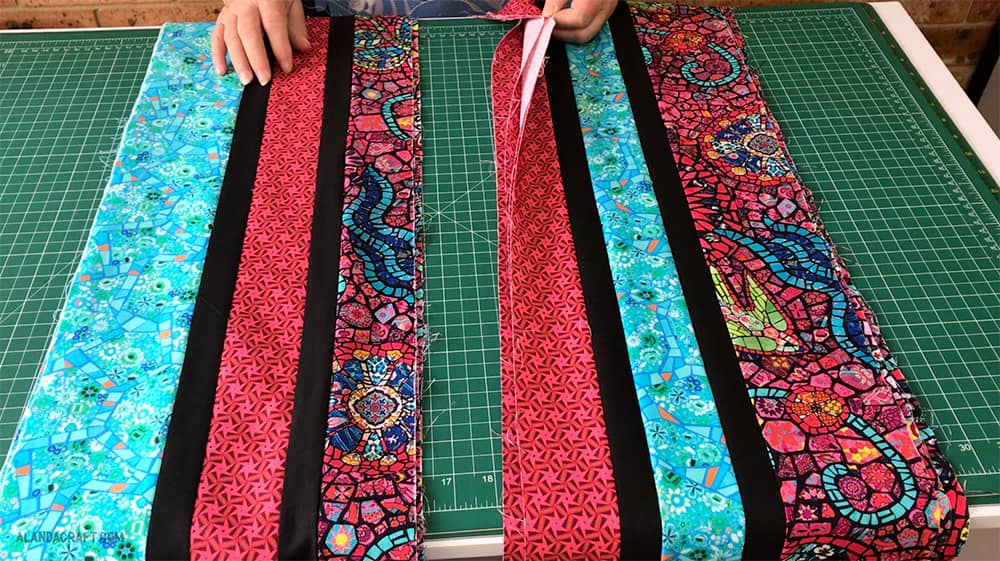
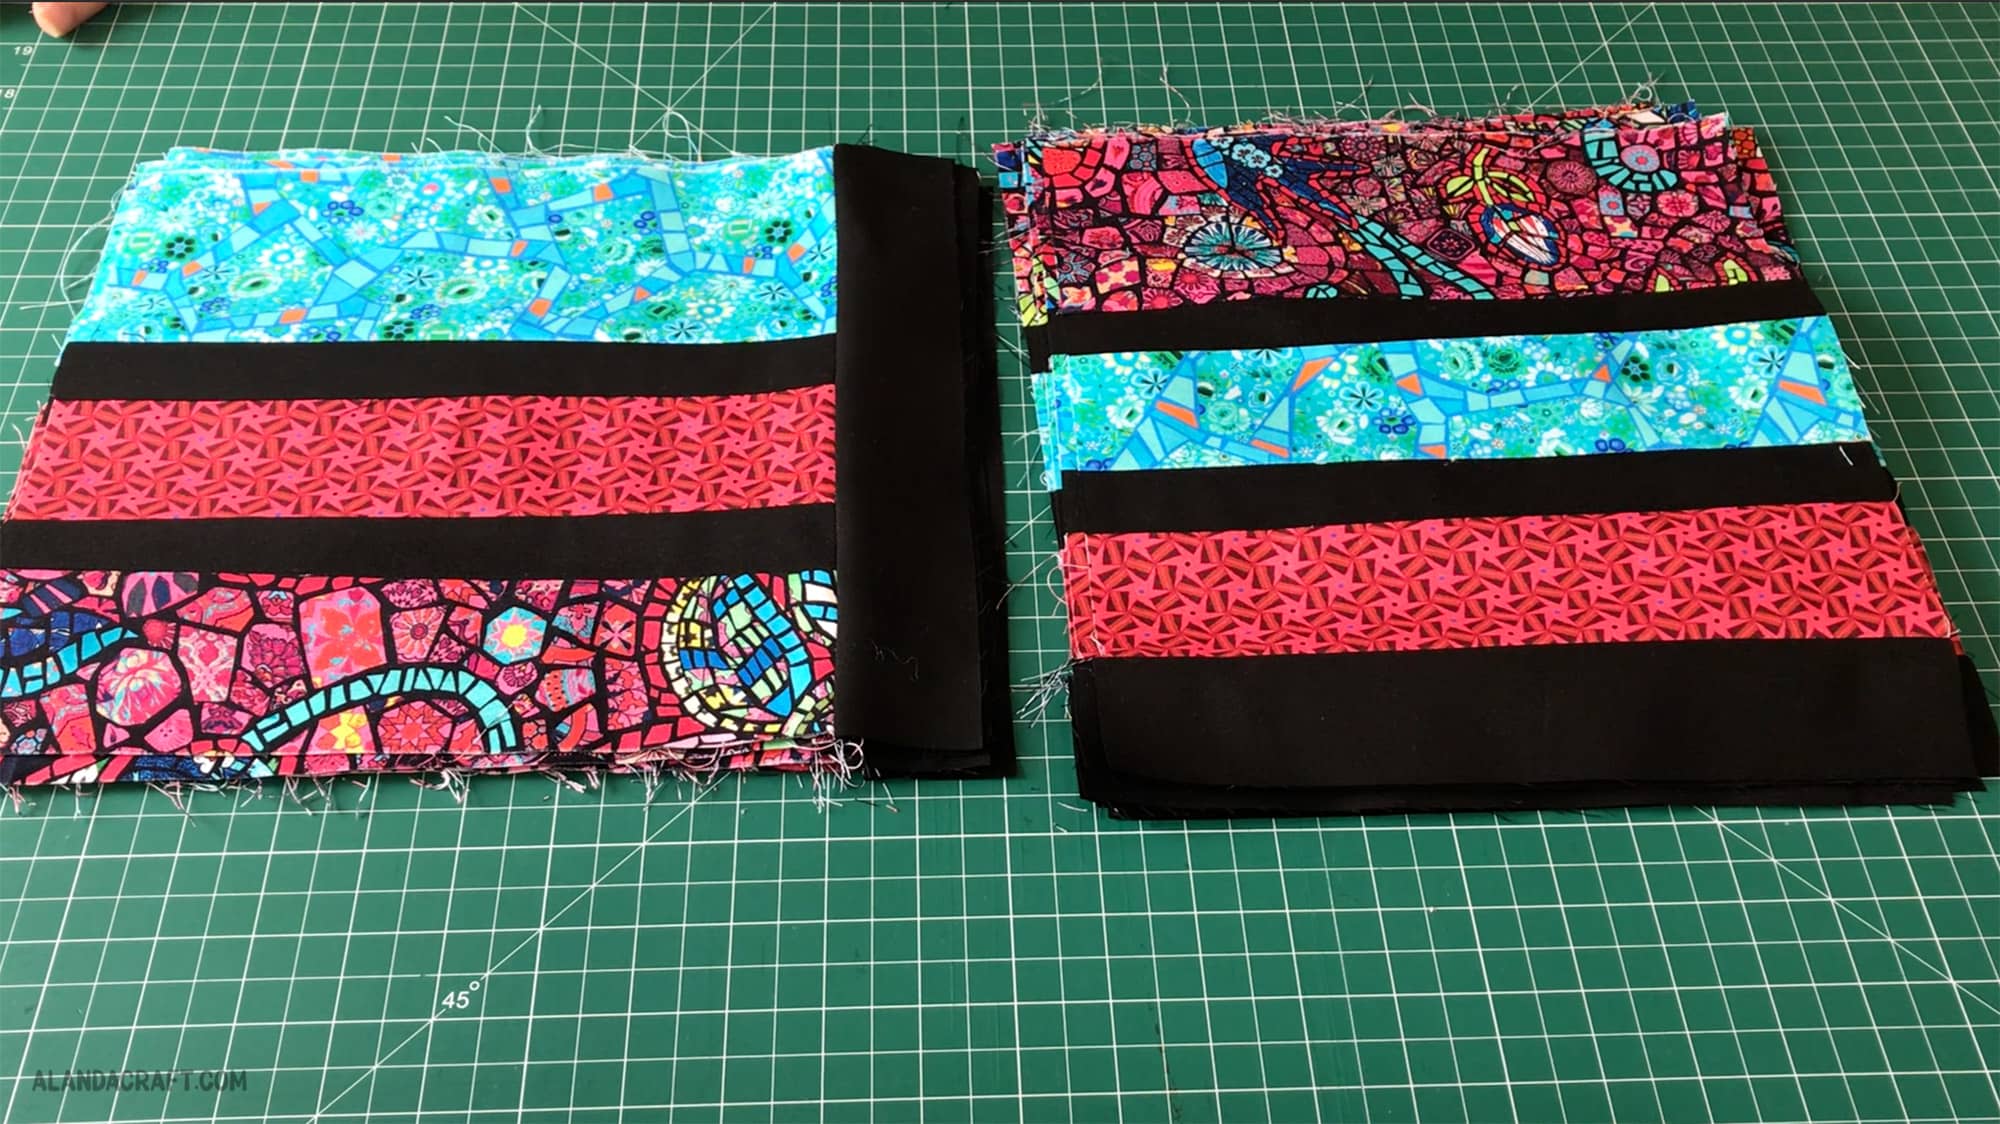
This is what those strip sets will look like once they are sewn together. You will end up with 4 strips sets for Block 1 and 4 strip sets for Block 2.
Step 3: Cut Your Strips into Blocks
Once you have sewn your strips together you will need to cut them into blocks. Each block will measure 10″ x 10″ so you should get 4 blocks out of each strip set.
Start by trimming the selvedge from one edge.
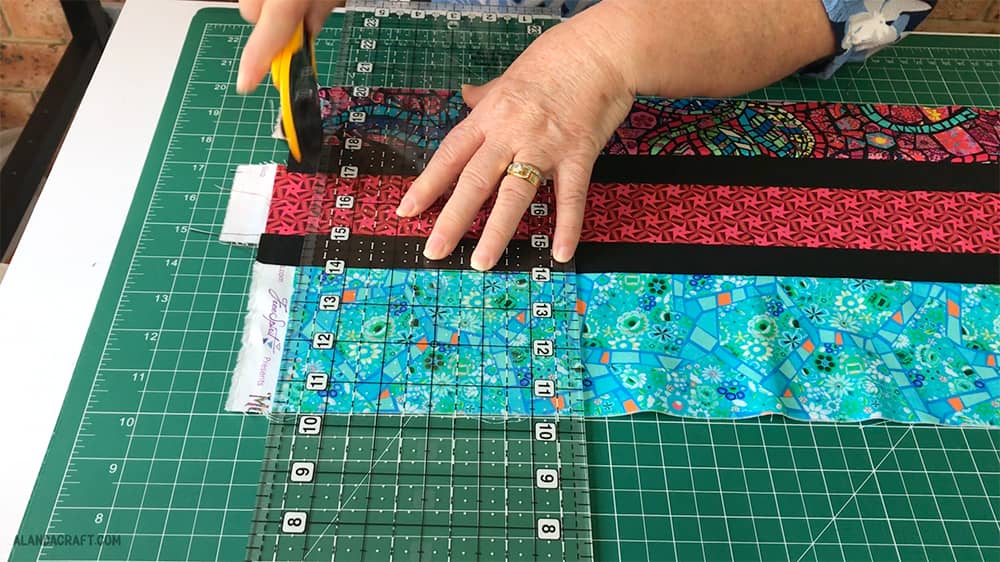
Then line up the fabric on your mat so that you can cut the strip into 10″ pieces.
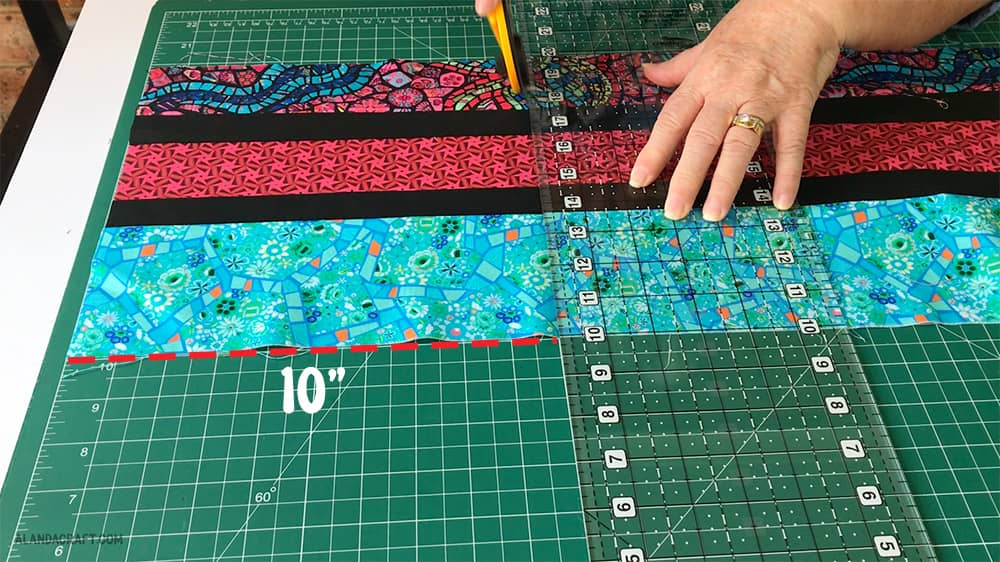
You should end up with 4 blocks from each strip set and a little leftover that you could use for crumb quilting.
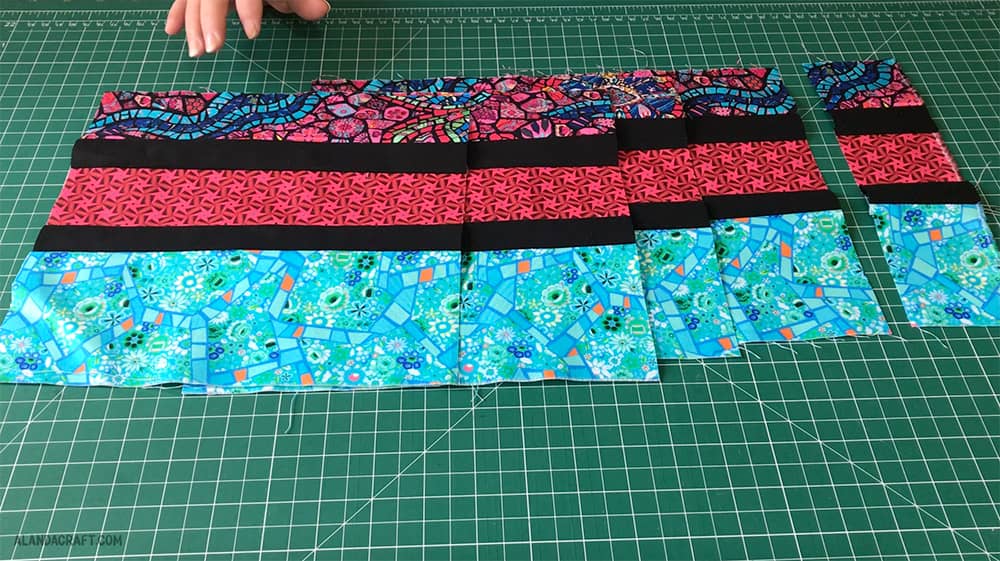
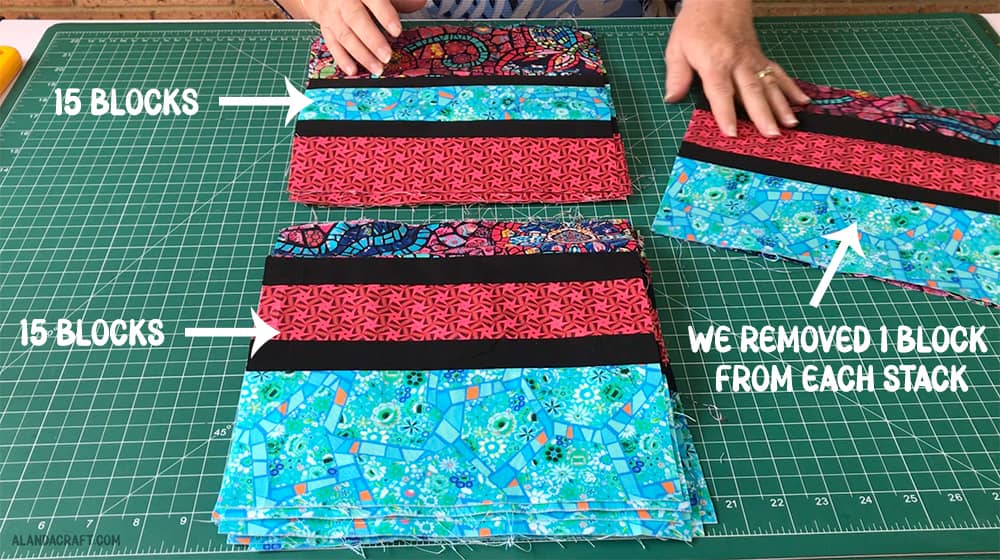
Now you need to repeat the process with the rest of the strip sets. You should end up with a total of 32 blocks – (16 of BLOCK 1 and 16 of BLOCK 2).
Now, we don’t actually need 16 blocks – we only need 15 so we removed 1 block from each stack. We are thinking of making a zippered pouch with these 2 pieces.
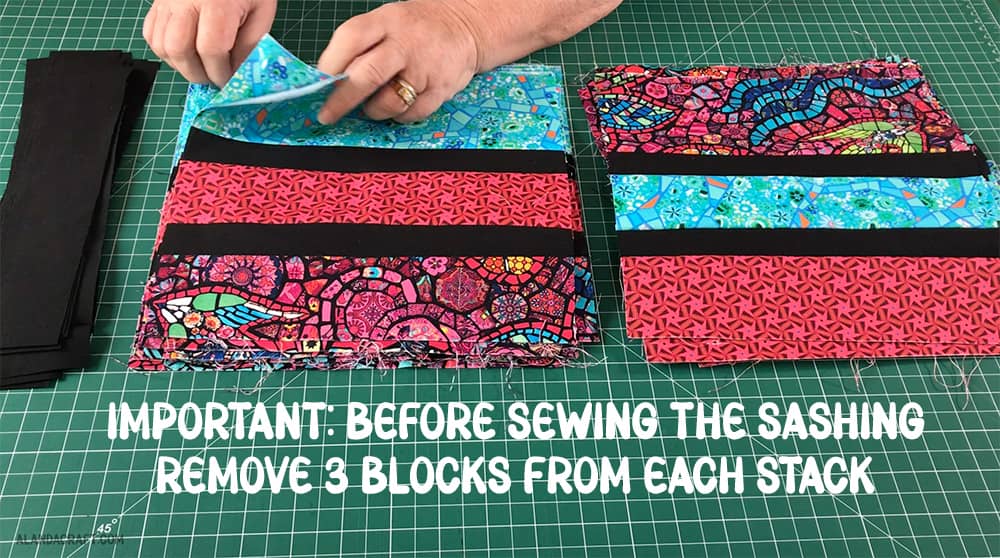
Step 4: Adding the Block Sashing
Now we just need to add the sashing to our blocks. You will be using the 20 strips that you cut that measure 2″ x WOF for this step.
Take 6 of those black strips and cut them down to 10″ in length. You should get 4 pieces from each strip. So in total, you should have 24 pieces of black fabric measuring 2″ x 10″.
Before we start sewing this sashing, we need to make sure we sew them onto the right sides of the block.
For block 1, we need to sew the sashing to the side of each of the blocks as shown in the image below.
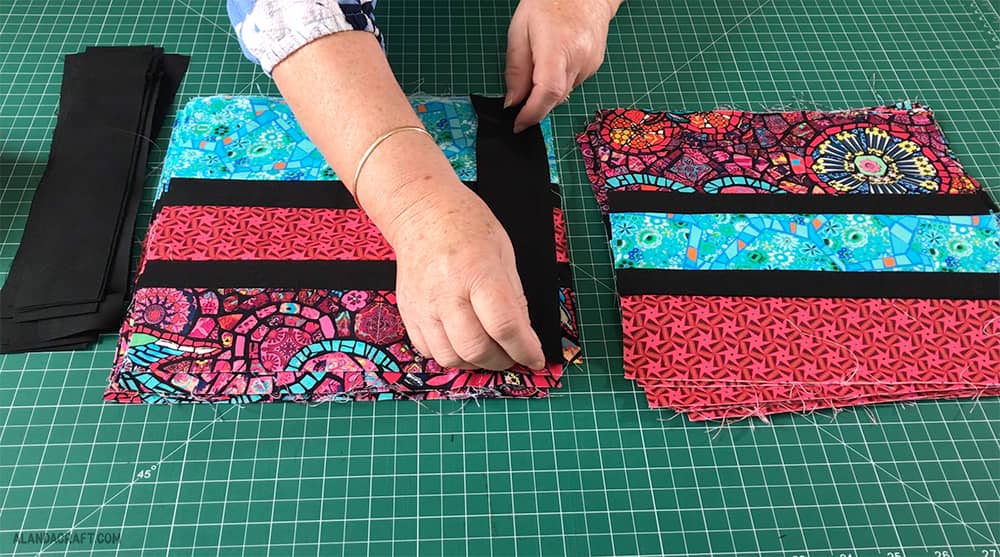
For block 2, we need to sew the sashing onto the bottom of the block as shown.
This is what they will look like once they are all sewn on. Remember that we also have 6 blocks leftover that we didn’t sew any sashing onto.
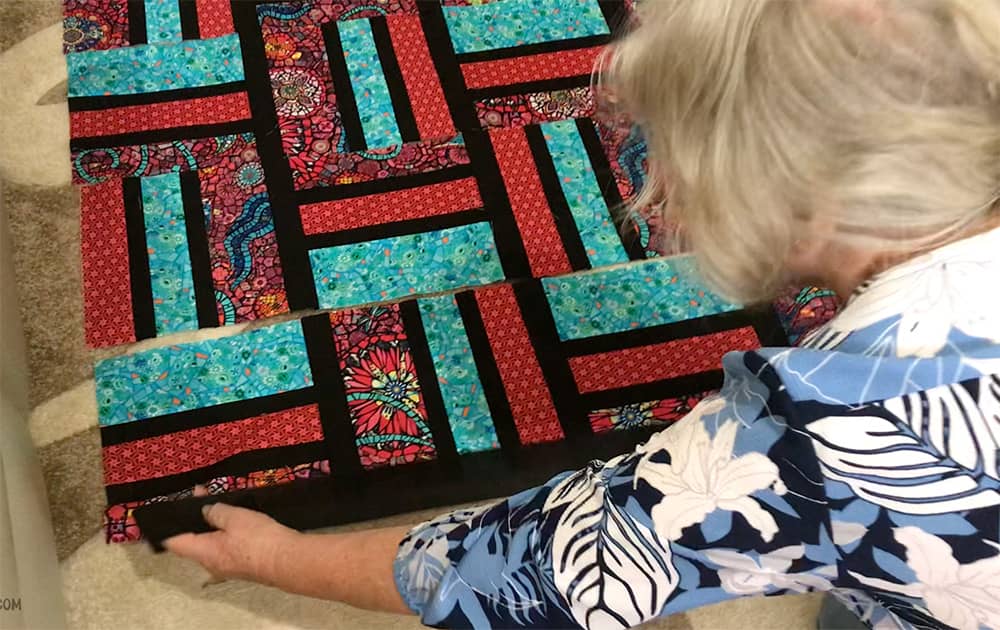
Step 5: Sew the Rows Together.
Lay out all of your blocks in the configuration shown below.
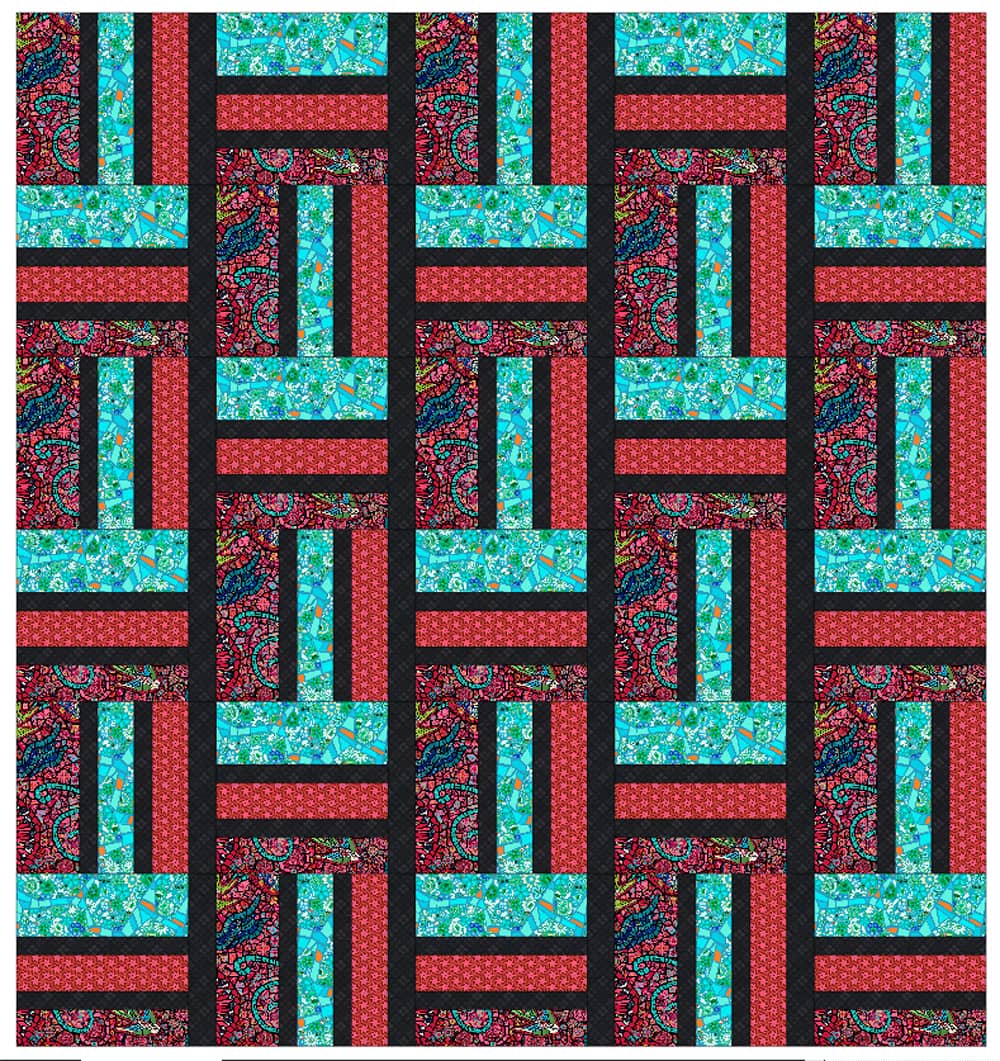
The 6 blocks that had no sashing will be added to the end of each row.

Remember that we have only sewn on the vertical sashing at this point, so we still have to add the horizontal sashing. But first, you will need to sew the blocks into rows.
And you can see how that looks here.
Step 6: Sew on the Remaining Sashing
Now we are ready to sew the horizontal sashing strips. Take 10 of the black sashing strips that measure 2″ x WOF.
Since these strips will not be long enough to reach across the width of your quilt, you will have to sew strips together and then cut them back to the right size to make them fit.
These rows should measure 53½” wide at this point so create your strips to this size. (It’s worth measuring the width and if you end up with something that is significantly different than that, then create the strips to fit the size of your quilt.
Once you have sewn your strips into the right width, sew them onto each row, starting with the bottom row and finishing with the top row.
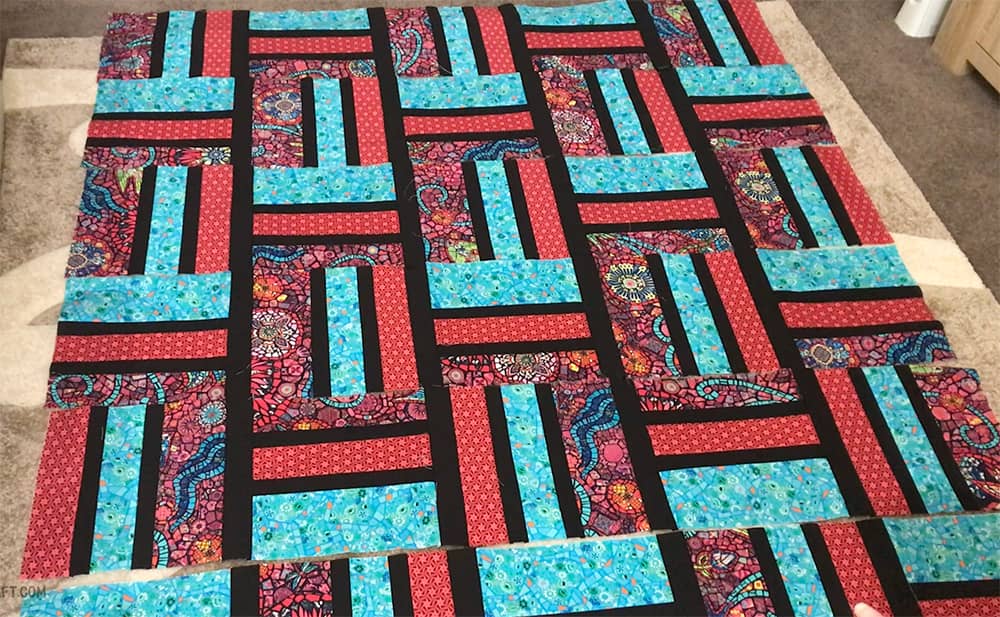
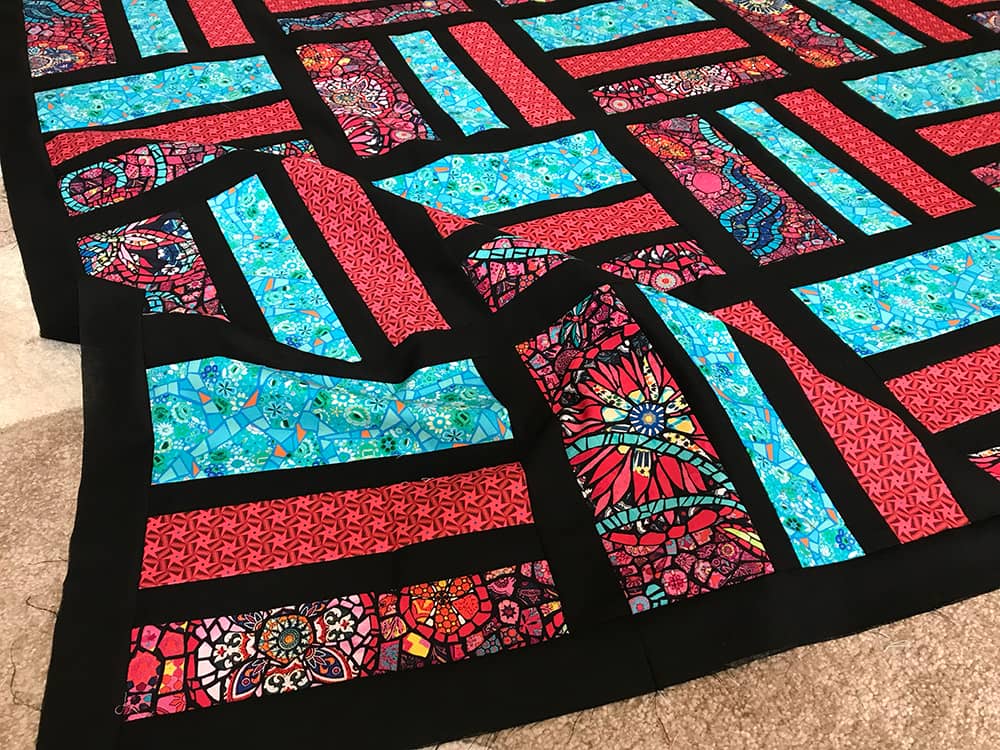
Now you can sew the rows together to form the quilt top.
You can see how that looks in the image below. You will also notice that we have placed the side sashing along each side ready to sew on.
For the side sashing you will need 4 of the black strips that measure 2″ x WOF and again, you will need to piece the strips together to get the length that you will need.
You quilt should measure 68″ high at this point but again, measure the quilt first before working out the length you will need for the sashing. We measured ours and it came to 67½” so we went with that.
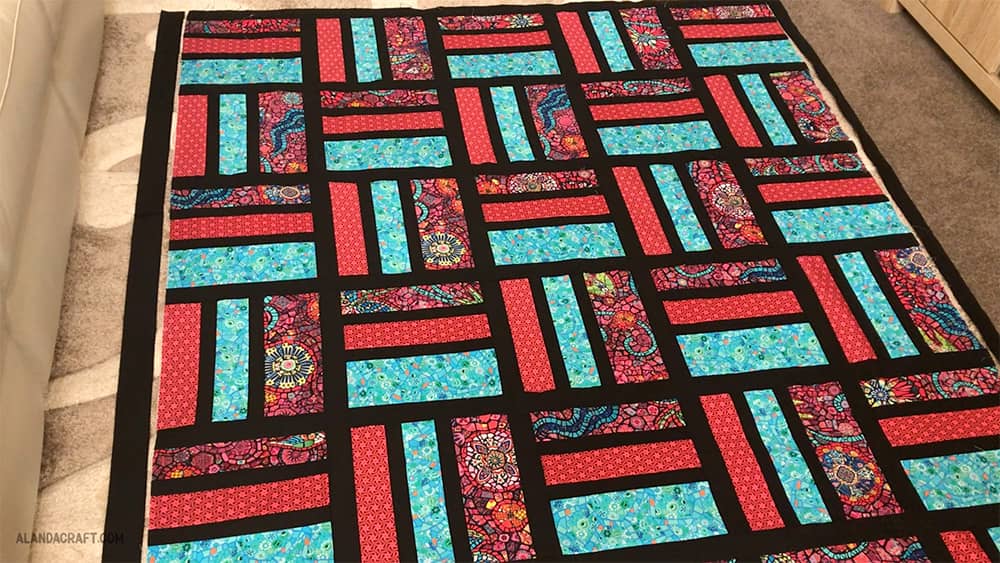
Once you have sewn on your sashing, your quilt top is complete. At this point, you could add a border but we decided to leave it as is….as least for the moment.
Here’s the final result.
We really love the vibrant colours and I think the black sashing really makes the colors pop.
We would just like to say thank you to Cotton Cuts for providing us with this lovely fabric. Don’t forget to check out their membership deals for great fabric.


Janette Patrick says
Hi Alanda I am a self taught amateur quilter, I have cut pattern to your instructions using 1/4″ seam but for some reason my blocks have come out at 10″ x 10 3/4″ when matching Vertical to Horizontal, is there something I’ve missed ?
Regards
Janette P.
Alanda Craft says
Dear Janette, Thank you for contacting us about this quilt pattern. We owe you a huge apology for the fact that your quilt blocks are not the right size.
Somehow we messed up and completely missed out the step for cutting some of the black strips at 1 and a half inches for each block in the instructions. We have now fixed the post so that it reflects this step.
Although it’s not ideal, the quilt is not irretrievable, you can still trim the blocks back to 10″ so that they fit together. The finished look will be a little different but you will still have a lovely quilt once it’s finished.
This is the first time we have made a mistake like this and we are feeling really devastated about it.