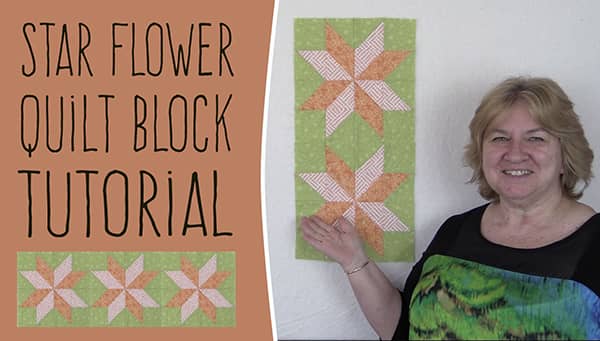
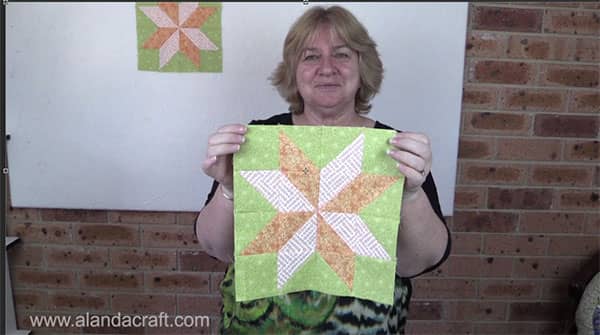
The Star Flower quilt block is a fairly easy block to make using half square triangles.
Some people refer to this as a Lemoyne Star but that’s not really correct as this one is constructed differently and as stated above, is made with HST’s.
The unfinished size of this block is 10½”, finished size 10″.
What You Need:
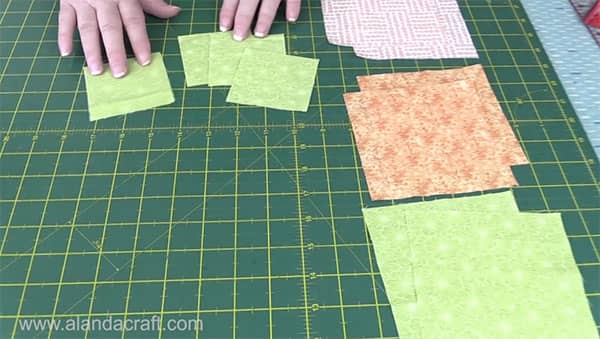
- 4 x 3″ squares of the main fabric
- 2 x 5″ squares of the main fabric
- 2 x 5″ squares of contrasting fabric – no 1
- 2 x 5″ squares of contrasting fabric – no 2
Tools We Used in this Tutorial
You can check the latest prices at Amazon by clicking on the links below:
- Creative Grids Ruler 8½” x 24½”
- Olfa Non-slip Ruler 6 1/2″ x 61/2″
- Add a Quarter Plus
- Olfa 24″ x 36″ double sided healing mat
- Olfa 60mm rotary cutter
- Oliso Iron
- Gutermann Sew All thread
Watch the video tutorial below or scroll down for the written instructions
Method
Construct the half square triangles as follows:
- Lay one piece of main fabric on top of one contrasting piece of fabric – no 1. Right sides facing.
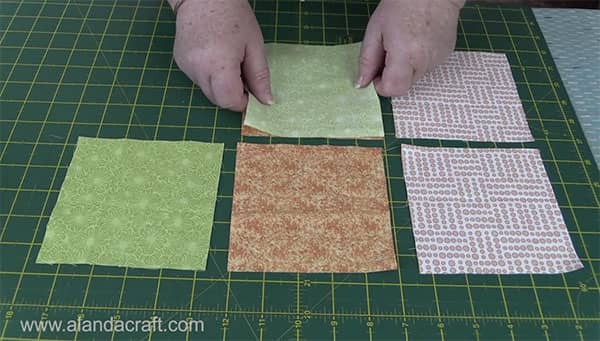
- Lay one piece of main fabric on top of one contrasting piece of fabric – no 2. Right sides facing.
- Lay one piece of contrasting fabric no 1 on top of one contrasting piece of fabric no 2. Right sides facing.
You now have 3 sets of squares
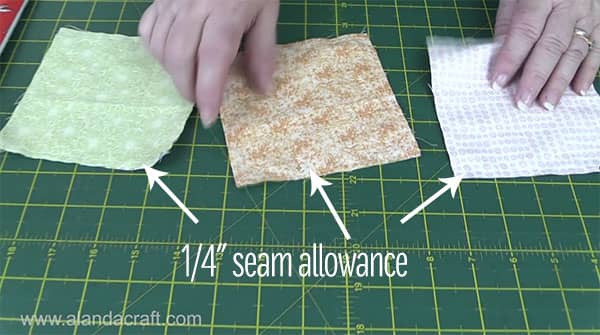
Sew around the edge of each set of squares with a ¼” seam.
Make the triangles
- Place your ruler from point to point diagonally across one of the 5″ squares and cut. Do not move the fabric. Turn your ruler and again place it diagonally from point to point on the uncut side, and cut.
You can draw a diagonal line across the square, with a Frixion pen.
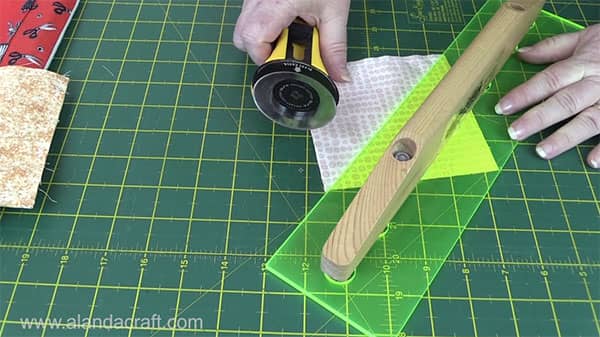
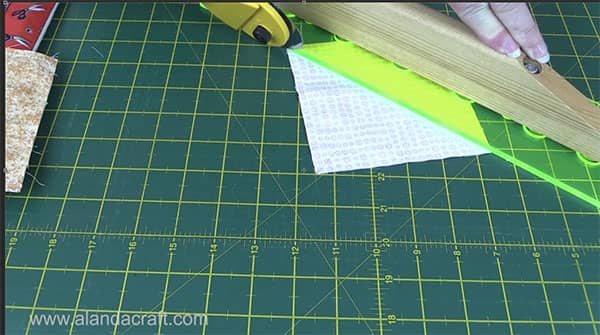
You now have 4 triangles. Do this with each of the sets of 5″ squares.
This gives you a total of 12 triangles.
- Press the seams open. This will help to reduce the bulk when sewing the rows together. Often seams are pressed to the dark side, but for this block, we prefer to press them open, to reduce the bulk in the center, however, the choice is yours.
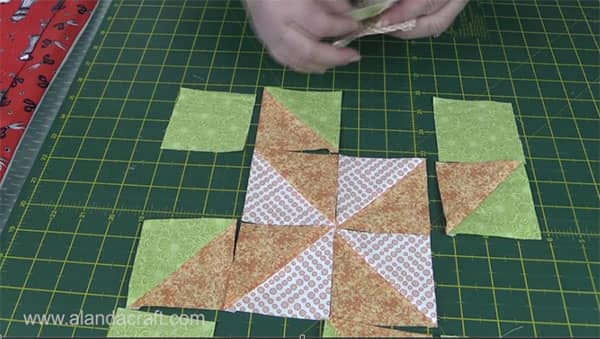
- Trim the squares into 3″ x 3″ squares. If you are not sure how to do this we have a video tutorial here.
Once your squares are nicely pressed and squared off, lay them out on the workspace so that they form the pattern.
I find that by laying out the 4 corner squares and then adding the middle squares so that they form a pinwheel, and lastly, the outside squares are the best way to tackle this. Take your time with this to get it right.
Sew the squares together to form a row.
- By this I mean sew the first two squares in row 1 together, then sew the last 2 squares in row 1 together. Now sew those two lots of 2 squares together so that you have one row of 4 squares.
- Do the same with each row.
Now sew rows 1 and 2 together and rows 3 and 4 together. Take care to match up the seams as you want them to be nice and straight, and your star won’t look as nice if the seams aren’t matching. Press all seams open.
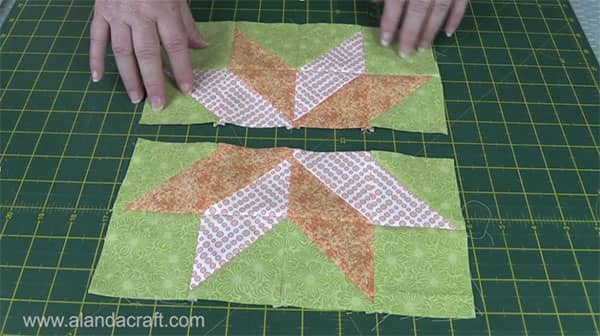
Now sew the top row to the bottom row. Press seams open. And your Star Flower quilt block is finished.
It looks lovely when it’s completed.


Peter Murphy says
Please – can you tell me about that ruler? Where is it from?
THANK YOU
Alanda says
Hi Peter, this is the Quilters Slidelock – here is a link to our review /quilters-slidelock-demonstration/. We have both sizes and find they are just awesome to work with. And here is a link to their website http://www.quiltersslidelock.com
gailia says
beautiful. north carolina
del says
i want to make a lemoyne star quilt i need to know how to piece them together
Alanda says
The Star Flower block looks the same as the Lemoyne Star Block when it is finished. However, it is easier to construct as it is made with half square triangles. We haven’t done a tutorial for the lemoyne star as yet. Will put it on the list of things to do.
Lisa J. says
Thank you for the easy tutorial!!! If I wanted to make 12″ and 6″ finished size blocks, how would I figure out what size squares I need to start with?
Alanda Craft says
I am happy to hear that you like the tutorial, Lisa. I am sorry, but unfortunately, although we would love to help out, there are just the two of us working on this site, and we have videos to plan, shoot and edit, blog posts to write for each video and a myriad of other tasks; so we just don’t have the resources to work out specific measurements for individual requests. One day we may be able to get a helper but in the meantime, we just can’t manage it.
Arlene Terborg says
Can you please email the star flower pattern
Alanda Craft says
I am sorry Arlene I don’t have a printable pattern. We have provided all the information, a video and step by step instructions on the website.
Jesusa says
Hi, gracias por el magnifico tutorial, lo entendí muy bien a pesar de que no domino el inglés.. Este será mi próximo proyecto.
Bendiciones
Alanda Craft says
Gracias. Me alegra que te guste. No olvides compartir tu edredón con nosotros cuando esté terminado. Aquí está el enlace /submit-your-project/ (Thank you. I’m glad you like it. Don’t forget to share your quilt with us when it’s finished. Here is the link /submit-your-project/ 🙂
Lois Sandberg says
I cut the 3 inch squares and used 1/4 in seams…found they just don’t fit. I cut 3 1/4 inch squares and they fit perfectly..wasted a lot of fabric and tie trying to get the 3inch squares to work.. I love the pattern.Just hope I can replace the wasted fabric..It would be helpful to give the fabric requirements needed to do each size quilt…twin..double…queen…king…
Alanda Craft says
What you might have missed is the part where you trim back the squares that form the star (ie. the centre squares and the half square triangle squares) to 3″ x 3″. They need to be trimmed back otherwise the corner squares won’t fit.
Mary Santos says
I used your tutorial for a blue and white quilt and I LOVE how it came out. Your directions and the video were very clear. Thank you so much!!! Would love to send you a picture of the top (haven’t quilted it yet).
Alanda Craft says
That’s great to hear Mary 😊, I would love to see your quilt. Here is a link to where you can send through some photos /submit-your-project/
Bonnie says
Great tutorial! Needed a quick easy pattern and this was perfect. Looking forward to watch your other projects.
quiltmusic says
What size is the unfinished block?
Alanda Craft says
The unfinished size of this block is 10½”, finished size 10″.