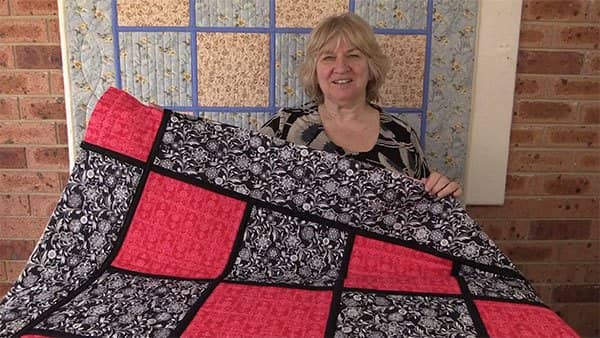
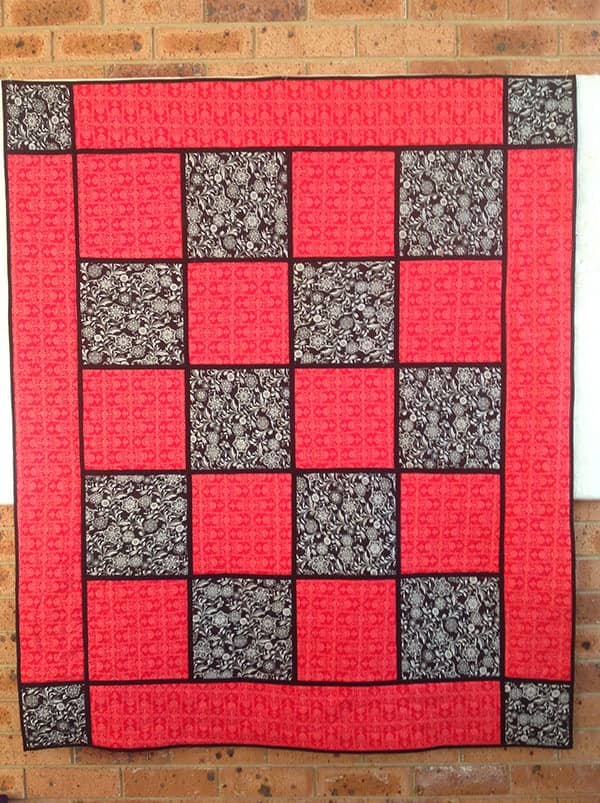
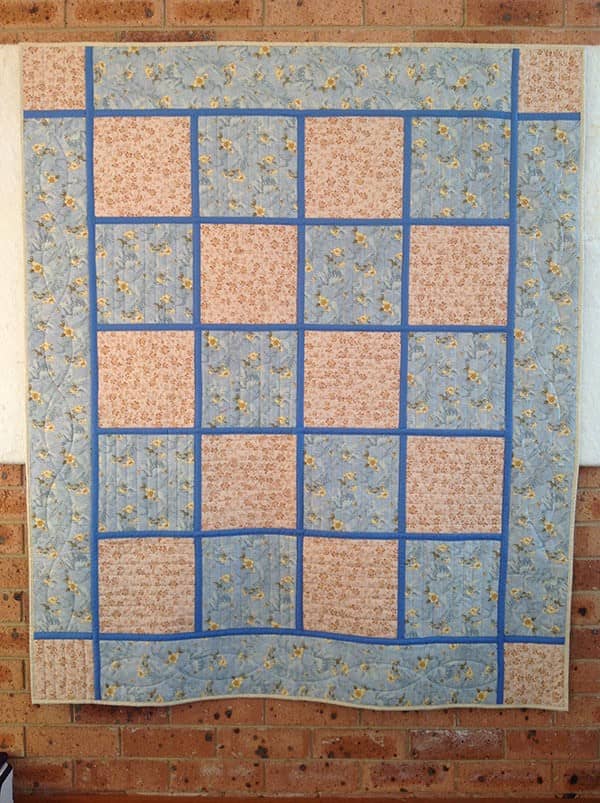
This is a ‘quilt as you go with sashing‘ quilt. The sashing is added as you piece it together. It is fully reversible and looks great in either soft vintage materials or bright moderns colors.
We have just done line quilting on the main quilt with curved quilting on the borders. After quilting the finished quilt measures approx. 62″ x 52″
Watch the video below or scroll down for the step-by-step written instructions
TOOLS USED IN THIS TUTORIAL
You can check the latest prices at Amazon by clicking on the links below:
- Creative Grids Ruler 8½” x 24½”
- Olfa 24″ x 36″ double-sided healing mat
- Olfa 60mm rotary cutter
- Oliso Iron
- Quilters Slidelock
- June Taylor Shape Cut Pro ruler
- Gutermann Sew All thread
- Warm Warm Company Batting
—FABRIC CUTTING REQUIREMENTS—
CENTER SQUARES
- Colour 1: approx 1¾ yards (this is based on a 42″ or greater WOF – see note below)
- Colour 2: approx 1¾ yards (this is based on a 42″ or greater WOF – see note below)
NOTE: If you have fabric that is less than 42″ WOF you are going to need more fabric so instead of what is stated above you will need approx 2¼ yards for colour 1 and 2¼ yards for colour 2.
Cut the squares as follows:
- Colour 1: – cut 20 squares measuring 10½” x 10½”
- Colour 2:- cut 20 squares measuring 10½” x 10½”
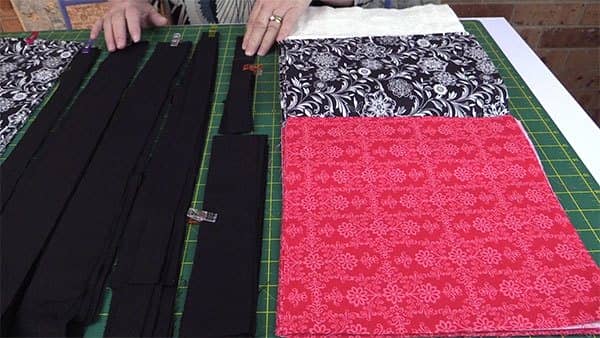
SASHING
- Black: Approx. 1½ yards
Cut the short sashing for the center squares as follows:
- Cut 15 strips at (10″ x 1″)
- Cut 15 strips (10″ x 2″)
- Fold the 2″ strips in half and press to get a nice crisp fold.
Cut the long sashing for the center of the quilt as follows:
- Cut 6 strips at (1″ x 40″)
- Cut 6 strips (2″ x 40″)
- Fold the 2″ strips in half and press to get a nice crisp fold.
Cut the long sashing for the sides of the quilt as follows:
- You need 2 strips @ (63″ x 1″). – To get strips long enough to measure 63″ you will need to cut 3 x 1″ strips across the width of the fabric.
- You need 2 strips @ (63″ x 2″) – To get strips long enough to measure 63″ you will need to cut 3 x 1″ strips across the width of the fabric.
Cut the sashing for the cornerstones as follows:
- Sashing – cut 4 strips @ (1″ x 6½”)
- Sashing – cut 4 strips @ (2″ x 6½”)
BORDERS & CORNERSTONES
- Colour 1: approx ¾ yard
- Colour 2: approx ¾ yard
Cut the top and bottom borders as follows:
- Colour 1: cut 2 strips @ (40″ x 6½”)
- Colour 2: cut 2 strips @ (40″ x 6½”)
Cut the side borders as follows:
- Colour 1 – cut 2 strips @ (50″ x 6½”)
- Colour 2 – cut 2 strips @ (50″ x 6½”)
Cut the cornerstones as follows:
- Colour 1 – cut 4 squares @ (6½” x 6½”)
- Colour 2 – cut 4 squares @ (6½” x 6½”)
BATTING REQUIREMENTS
- Cut 20 squares @ 10½” x 10½” – for center squares
- Cut 2 strips @ (40″ x 6½”) – for top and bottom borders
- Cut 2 strips @ (50″ x 6½”) – for side boarders
How to Assemble the ‘Quilt As You Go With Sashing’ Quilt
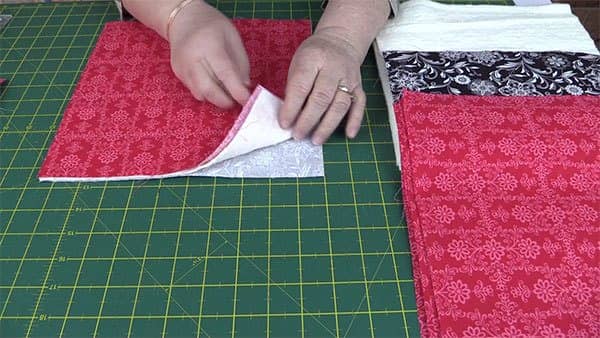
- Create a quilt sandwich with 1 square of each colour and 1 square of batting.
Make a quilt sandwich as follows:
- Colour 1 – right side facing down
- Batting
- Colour 2 – right side facing up.
- Line up the edges of the fabric and the batting.
Quilt as you wish or do some line quilting as we have done. Also watch the video below for more info.
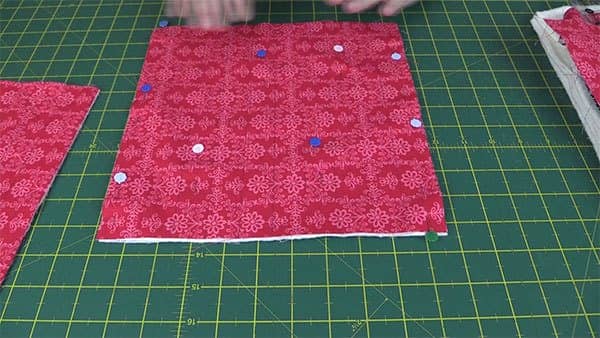
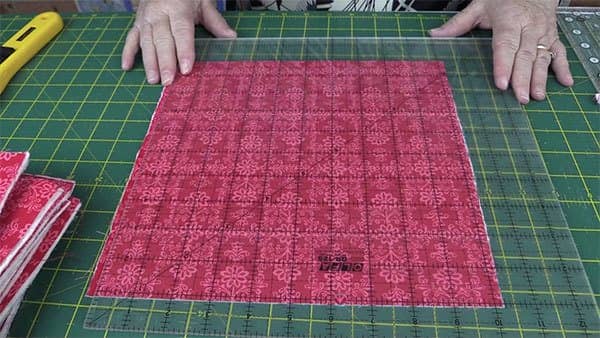
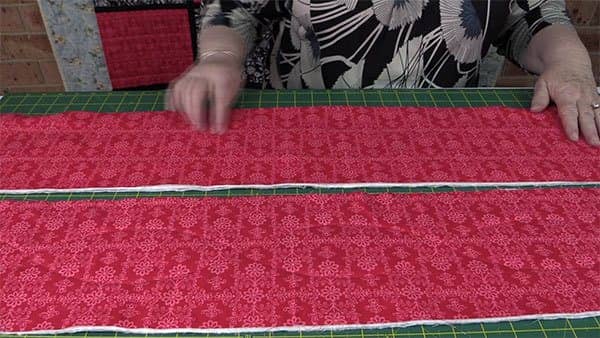
- Draw lines 1″ apart on the lighter coloured fabric. Line the square up on the mat so that you have approx ¼” on either side. This will give you a centre line at 5″.
- Pin the three layers together to keep everything in place while you sew.
- Sew along the drawn lines.
- Use a walking foot if you have one.
- Repeat for all the squares.
- Trim the squares to 10″. Check the video for 2 different methods on how to do this.
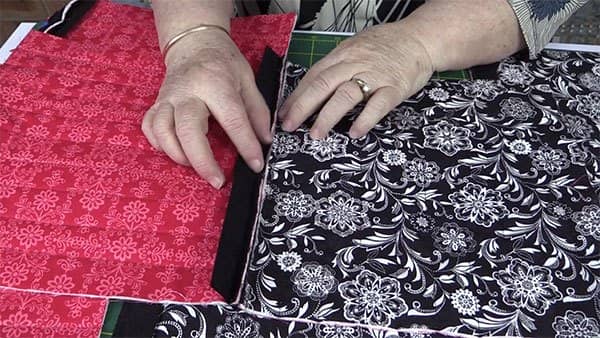
Adding Short Sashing to Center Squares
- Place a 1″ sashing strip to the back of the quilt square and the folded strip to the front of the quilt square. Make sure the raw edges are all lined up. The folded edge of the 2″ strips should be facing away from the edge.
- Sew the quilt sandwich with the sashing in place with a ¼” seam.
Do this with all 20 squares.
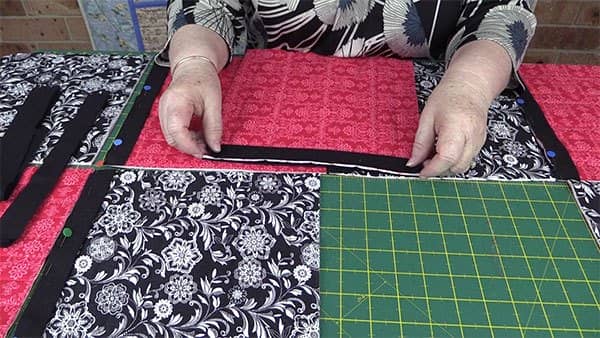
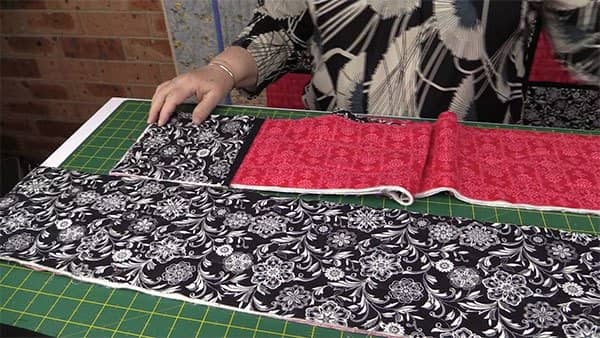
- Lay out the squares how you want them to look.
- Now we need to join the squares into rows.
- This step is a little tricky so I suggest you watch the video below to see exactly how this is done.
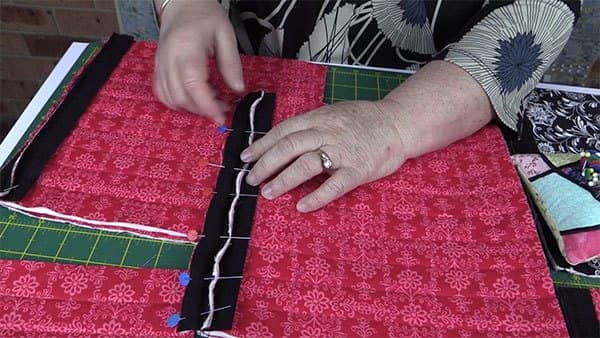
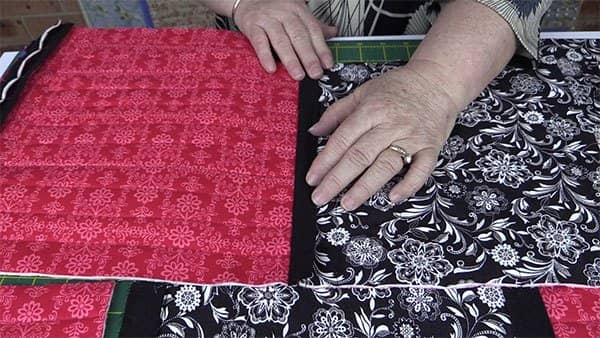
- Line up the 1″ strip from the 1st block along the edge of the next block.
- Pin in place along the edge.
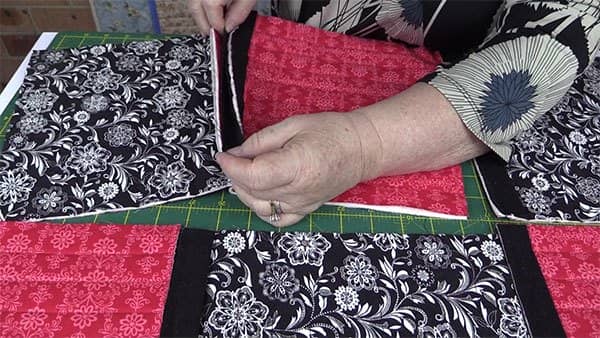
- Sew with a ¼” seam.
- Place the loose sashing piece over the seam lines. You will notice that the seams will fill the space.
- Topstitch the sashing in place, close to the folded edge.
- Join all the blocks into rows in the same way.
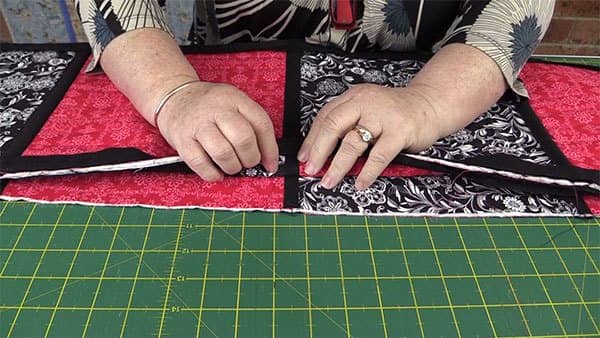
Adding the Long Sashing to Join the Rows
- Once all the blocks have been sewn into rows add the long sashing pieces to join the rows together in the same way as you joined the blocks together.
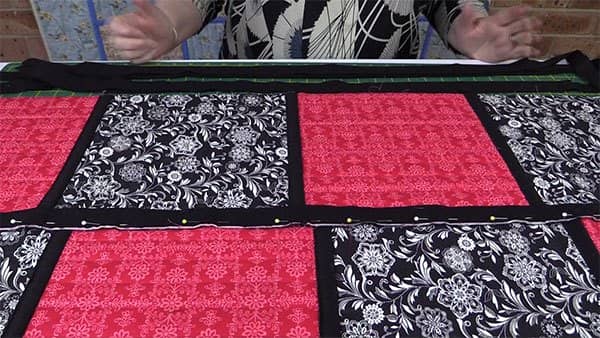
- When joining the rows together make sure you line up the sashing strips.
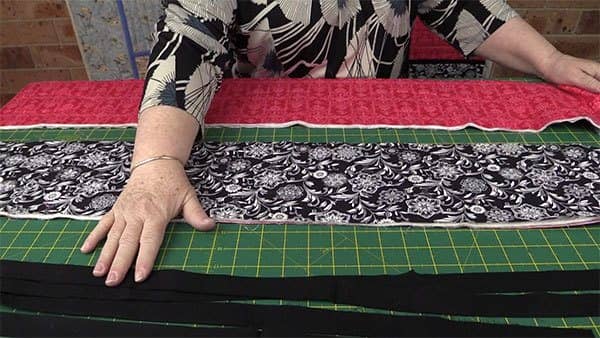
Adding the Top and Bottom Borders
Sandwich the pieces together the same way you did when you created the blocks.
- These layers need to be quilted. You can do this in any way you wish but keep it light. I have chosen to create curved lines.
- Attach the borders to the centrepiece in the same way as you joined the blocks together.

Adding the Side Borders and Cornerstones
- Sandwich the batting between one border fabric in colour 1 and one border fabric in colour 2.
- Quilt as before. Again I am using my Leaves Galore Ruler to create some curved lines.
- I have used line quilting on the cornerstones, 1″ apart, the same as on the blocks.
- Attach the sashing to the cornerstones in the same manner as we added the sashing to the squares.
- Sew the cornerstone pieces to the border piece.
- Attach the 63″ sashing pieces to the long borders along the side edges of the quilt using the same method that we used previously.
- Sew the borders to the quilt.
- Add the binding and you’re done.
If you need help with adding the binding, here is a link to our tutorial on How to bind a quilt using your sewing machine.
- Leaves Galore Ruler (aff link)
- Binding Tutorial


Heartland Honey says
Thank you for this FANTASTIC tutorial!
Alanda says
This is one of my favourite quilts. I loved how well the black and red fabrics came together. So happy that you liked the tutorial. 🙂
Cindy says
I stink at math…how much fabric for a king size quilt?
Alanda says
Wish we could help Cindy, but we get asked quite often for different measurements for our projects and unfortunately we just don’t have the time to sit down and calculate them all. It can take a bit of work as we aren’t that great at maths ourselves.
Andrea Van Delden says
I make a king quilt 100×100. So to make this quilt you could make it with 9 squares and a 5 1/2” (cut, 5” finished) border. Follow along in the same way. If you want a larger border make 8 squares and your border anything up to 10 1/2”. I hope this helps. I learned a quilt as you go method with so much more sewing and lots of hand sewing. Maybe that’s why it’s still in my unfinished box! I’m going to finish it with this method!
Lisa M Johnson says
I recently made a king size quilt, and after quilting it the traditional machine way, I vowed never to do it again. I think I did permanent wrist damage stuffing that thing through my small arm machine! But, I really loved every other aspect of making the quilt. After watching your video and following your link to this tutorial, I have decided to make this one. And I am REALLY looking forward to it! Thank you so much for this tutorial, as well as the simple/beautiful color scheme idea! I can sew just about anything you throw my way, but I cannot for the life of me color coordinate. red/black is just up my alley though!!
Alanda says
That’s nasty Lisa, but I’m glad it hasn’t put you off quilting. The biggest challenge, as you have experienced, is quilting on a small home machine. I work on a table so that I have some flat space for the quilt to lay on, and then I roll the quilt up to feed it into the throat of the machine. King sized quilts are a real challenge. A colour wheel helps with colour co-ordinating and they are relatively inexpensive.
Darlene says
Just wanted to say this is the best step by step of showing how to make a quilt that I have seen. I have been looking everywhere on line how to do a photo quilt. I’m sure this would be done the same way. Except I want the sash to be two and half inch wide not sure if I can do this and also don’t know if I would need to add batting to the sash and how could I do this . I would greatly appreciate if you could please help me, I can’t find the answer anywhere. This is only my second quilt. Thank you again for such a great tutorial.
Alanda says
It’s not something we have done as yet but I found a video that might help: https://www.youtube.com/watch?time_continue=159&v=BC6Bf8VEOCo
And thank you for your lovely comment. Glad we could help.
Norma says
Going to try this scrappy as a trial run…..best tutorial for quilt as you go that I have found…others are confusing to a old lady.
Alanda says
lol, the trick is to keep those seams a consistent size. Just take your time putting it together. Let us know how it goes. 🙂
Ann Crane says
I am new to quilting and love this, and would love to try it as it will be my first. What is the measurement of the finished quilt . Thanks
Alanda says
Hi Ann, the finished quilt measures 62″ x 52″. Just check the post for the materials and the size. The main thing with this one is to make sure the seams are a consistent 1/4″. It looks lovely when it’s finished. Cheers, Wanda
Katie says
Thx soooo much!!! The best QAYG tutorial & vid I’ve found!! Now, maybe I can progress from mug rug to baby sized projects.
Also . . many thx for no annoying music to distract from vid. Wonderful vid w/ clear backup direction. ?
Alanda says
Thank you Katie. I’m also not a fan of the music that many sites have, sometimes it is so loud you can’t hear what the person is saying. Just remember we are always available to help if you get stuck with something. It won’t always be an immediate reply as we are in Australia and may be asleep. However, I think you will be fine with the written instructions and video. Happy quilting. 🙂
Cheryl A. Daubs says
Thank you so much for this tutorial! I am going to try it but I have cornerstones in my sashing and am not sure about that. I guess I will learn as I go! Thank you again.
Alanda says
Cornerstones would look great but with this method I’m not sure how you would do that easily.
Mindy Quinn says
I have a question on the fabric requirements. Is the yardage for the side borders and cornerstones included in what you have listed for the center of quilt fabric amounts and the same for the side border sashing pieces, is that included in the fabric requirements you have posted for the sashing material? I have a different layout planned so I needed to verify this before I purchased my fabric. I love this tutorial and I can’t wait to get started on my quilt!!
Alanda says
We’ve updated the post so all of the fabric requirements are listed at the top now. That should help but let me know if you need further clarification.
Lyndell says
Hi, were you have said cut your side sashing 50” have you joined your fabric?
Alanda says
Yes that’s right Lyndell. The sashing strips were sewn together to make the long strips.
Lyndell James says
Thank you so much for your response. I’m currently looking for suitable black and silver fabric to make this quilt Love it and really enjoyed your tutorial.
carol says
All my cuts are precise, the squares all exactly the same size. When I am pinning the 2nd square to the 1 inch back strip, it’s all square and lined up. I sew using the equivalent of a walking foot, and when finished, the two squares are misaligned by 1/4 inch. I have picked it out 4 or 5 times, always the same results. So frustrating! Any suggestions?
Alanda says
Hi Carol, I’m really not sure what could be going wrong. It could be your sashing material is a bit stretchy. A Quarter of an inch is quite a bit to be out. I can only suggest pinning at both ends and in the middle to start with and then add more pins as you are having a problem. When you are sewing, leave the pins in until the last moment before removing them. Make sure you do remove them and don’t sew over them or you may break a needle. Keep a watchful eye on the fabric to make sure it isn’t moving and warping as you sew. Other than that I really have no solution. Maybe one of our other readers may be able to throw some light on your problem. I hope it works out for you because this usually comes together nicely.
carol says
Thanks for responding so quickly! It’s 100% cotton, doesn’t seem too stretchy. I pin the heck out of everything and, as you suggested, wait until the last possible stitch before removing the pins. Three only thing I can think to try is to ro a strip rather than cut, to make sure it’s on the straight of grain.
Alanda says
Without standing over your shoulder, it’s going to be a bit difficult to see what is going on. Have you checked the length of the sashing strips? The squares themselves should be trimmed back to 10″ once you have quilted them and therefore the sashing strips should be cut to 10″.
Deb says
I had the same problem. The math doesn’t work out. Instead of 1 inch strips for the back I cut 1 and 1/4 inch strips. This comes out correctly .
Alanda Craft says
Thank you Deb, I’m glad that worked out for you. I have done a number of these quilts and table runners and always use a 1″ strip and haven’t had any problems. The strips are sewn onto the blocks with a quarter inch seam leaving a half inch to covered the raw seams. However, I just show how I do things, it’s not written in stone. Everyone needs to do what works for them.
Dana Nickerson says
Hi,Alanda:
Great tutorial! I’ve been wanting to start quilting and you have inspired me with your easy explanations. Wow, I can’t wait to get started.
Thank you so much,
Dana
Alanda Craft says
So good to hear Dana. This is a great one to get started with.
Kathy says
Thanks for your QAYG tutorial with sashing. Looks so easy. I’ve appliqué’d butterflies on 20 blocks & wanted to use my regular sewing machine to quilt around them. Looking forward to trying your technique. Kathy
Alanda Craft says
Oh wow that is going to look awesome when it’s finished Kathy. We would love to see some photos when you have finished it. Here is a link if you are interested. /submit-your-project/
Kathy says
I’m still workin on it but when I finish it, I will surely send you a picture.
Alanda Craft says
Lovely Kathy. I look forward to it 🙂
Teresa says
I bought 2 1/4 yards of color 1 & color 2. I cut 20 – 10 ¹/2″ squares, cutting in the order listed, then saw that 3/4 yard of fabric is needed for the sashing, but that isn’t long enough to make the 63″ sashing pieces. The fabric requirements are confusing. I am guessing the cutting list is not listed in the order the cuts should be made. I will have to go buy more fabric to make those 63″ pieces. Disappointed but will figure it out.
Alanda Craft says
Hi Teresa, the material requirement as stated in the pattern is 1 and a half yards for the sashing. The 3/4 yard is for the cornerstones and borders. Hope this helps.
Gin Jones says
I’m not finding the video. I have quilted for many years, and never understood the part using the sashing to join two blocks. They are hard to see in the photos and written directions, so I need a video to fully make my brain ‘get it’. Thanks!
Alanda Craft says
The video is just under the first two paragraphs. It might take a few seconds to load.
Angie Hockenberry says
Thank you for the easy tutorial! This is just what I was looking for when searching for an easy quilt for my grandson. My question is about the batting requirement, we need a total of 3 yards?
Alanda Craft says
For starters, we have just adjusted the fabric requirements based on width of fabric (WOF) so ensure that you reread those first as you may need less fabric.
In regards to the batting, it will depend on how you are going to be buying it as it can come in small pre-cut packs or on the roll and the rolls can measure 60″, 90″ or 120″ and variants in between. So it’s difficult to give you exact yardage. You are going to need a piece that measures at least 62″ x 52″ as that is the finished size of the quilt. However, I would probably buy a little more than that just to be safe. So if you let the store know the sizing they will be able to cut accordingly based on the width of the batting they have in stock.
Dianne Fore says
Could you direct me to the place to print pattern……without all the ads and pictures. thank you and very good direction.
Dianne Fore
Alanda Craft says
At this point, we don’t have a download option for our free posts, but it’s on my list of things to research.
Kristi says
What is the pen you are using to mark your lines for quilting?
Alanda Craft says
I used a frixion pen Kristi. Here is a link to our review on these pens /2014/11/07/frixion-pen-review-fabric-pens-for-quilters/.
Kristi says
Thank you so much! I’ve used another brand for 25 years, but never heard of one removed by heat. Guess I need to get back in the loop of things! Thank you so much for responding so quickly, for the link, and this awesome tutorial! I found it very helpful!
Cheryl says
Hi Alanda:
I love this quilt and your video! I am just a little confused about the cutting of the long sashing.
The material I am using is 44” x 81”. The instructions say your sashing needs to be 2 one inch strips @ 63” long
and 2 two inch strips @ 63” and in order to do this you need to cut 3 pieces the width of your material. Why if the length of my material is at least 63” long can I not cut 4 strips 63” long instead of cutting 6 strips the width of my material? As you have probably guessed I am a beginner and I am sure there is a very good reason for this but
Just can’t quite figure it out! LOL
Cheryl
Alanda Craft says
If you have enough fabric then you can cut the strips along the length of the fabric.
Elisabete Meira says
Hi Alanda, Just looking at your tutorial and I have to say it is fantastic! But i still have a question. The finished width of the sashes front and back are the same?
Thank you .
Elisabete
Alanda Craft says
Yes the finished width of the sashes are the same on the front and the back, Elisabete.
rosita says
I have been quilting for a while (in the dich/shadow) never saw anything this easy it encourage me to try .Thanks a bunch. love the easy way you explain also again thanks.
Alanda Craft says
Thank you for your lovely comment Rosita. I am so happy to hear that you are going to give this one a go. 🙂
Roz Dealy says
I find if I starch the sashing and binding fabric before I cut them that it *helps* with matching up. *Doesn’t stretch.
Barbara says
Love this. But one Question. Do we trim the borders and cornerstones back some? If so I missed that in the video.
Alanda Craft says
Hi Barbara,the quilting is just basic lines so the quilt doesn’t distort, so there isn’t a need to trim the cornerstones or the borders. The borders are made to fit so no trimming should be required.
Camille Knowles says
I loved this tutorial! I just finished making 12 blocks for a quilt for my granddaughter and do not know anyone who can do the quilting for me. This is a perfect method and I know I’m on my own as far as amounts of material but you have been a god-send. I feel confident following your tutorial so I can finish this quilt and I can’t thank you and the friend who sent me to you enough.
Alanda Craft says
Glad we could help Camille. I do love this method myself.
Sue Woods says
I made a quilt-as-you-go- with you years ago & sent you the photos of it. You put it on your website but I cant find it any more. I would like copies of those photos because my old computer crashed & I lost all those photos. Can you help me get the photos of it back? Your website doesn’t seem the same either.
Alanda Craft says
I have sent copies of the photos to your email address Sue. Here is a link to the post as well /2017/02/20/readers-project-sues-gorgeous-string-quilt/. Your quilt is really gorgeous. Cheers Wanda
Cheryl says
I plan to use the QAYG method for a quilt that will not have uniform blocks. My “fabric” is pieces of soccer sports scarves that have been stabilized. Some blocks will be various sized squares, others will be long rectangles and some will be short rectangles. I’ll be using cotton fabric on the back.
I am currently in the process of layout. My challenge, I think, is going to be the sashing. I envision putting the various blocks together in sections and then putting the sections together. Have you done a QAYG quilt without uniform blocks? Any insight or suggestions for me?
Alanda Craft says
I haven’t made a quilt like that yet Cheryl But it sounds like you are on the right track. Joining the blocks into sections and then joining the sections should work perfectly. Just build up each section with sashing so that they end up in a way that they can be joined nicely together. I would love to see it when you finish it.
Nancy Williams says
I really enjoy your video tutorials. I so enjoy this one in particular.
Thank you so much.
Alanda Craft says
Thank you Nancy 😊. I’m so happy to hear that you like our tutorials.