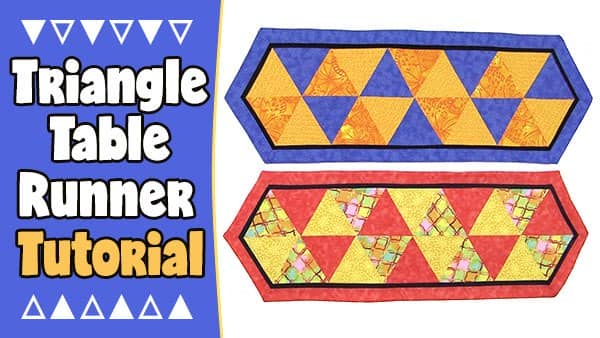
I love these table runners, they are relatively easy to make as long as you follow the instructions. And you can make them in a variety of great styles by making the triangles larger or smaller and using different fabrics to suit your decor.
Finished Table Runner Size: 14″ x 40″
Watch the video tutorial below or scroll down for the written instructions
What You Need
Triangles:
(Check out our Cutting Triangles tutorial here)
- Fabric 1: Cut 8 x 6″ – 60º triangles (multicolour)
- Fabric 2: Cut 7 x 6″- 60º triangles (tangerine)
- Fabric 3: Cut 7 x 6″ – 60º triangles (yellow)
Sashing:
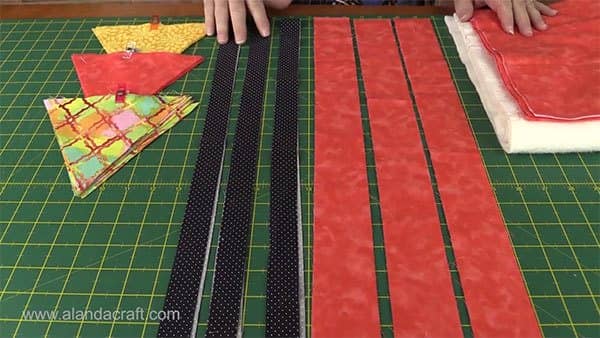
- Fabric 4: 3 x 1″ strips cut across the width of fabric (WOF)
Borders:
- Fabric 2 (tangerine): 3 x 2″ strips cut across the width of the fabric (WOF)
Batting:
- Approx 16″ x 42″ – We’re overestimating a bit here but you probably won’t need that much.
- You will be using your finished table runner top as a template to cut the batting.
Backing:
- Approx 16″ x 42″ – We’re overestimating a bit here just to be safe but you probably won’t need that much.
- You will be using your finished table runner top as a template to cut the batting.
TOOLS USED IN THIS TUTORIAL
You can check the latest prices at Amazon by clicking on the links below:
- Creative Grids Ruler 8½” x 24½”
- Olfa 24″ x 36″ double-sided healing mat
- Olfa 60mm rotary cutter
- Oliso Iron
- Gutermann Sew-All thread
Method:
NOTE:
I am not going into detail on cutting the triangles in this tutorial. If you need help making triangles please see our tutorial on making triangles.
TIP:
I clip my triangles together with the non-stretchy side in the clip. The non-stretch side goes towards the outside edge, and you sew the triangles together along the stretchy or bias edge.
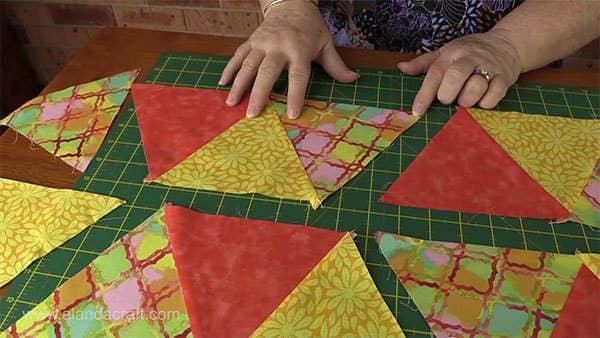
- Lay the triangles in two rows on the mat and arrange them in the order you like.
- Take two triangles from each end and put them aside for now.
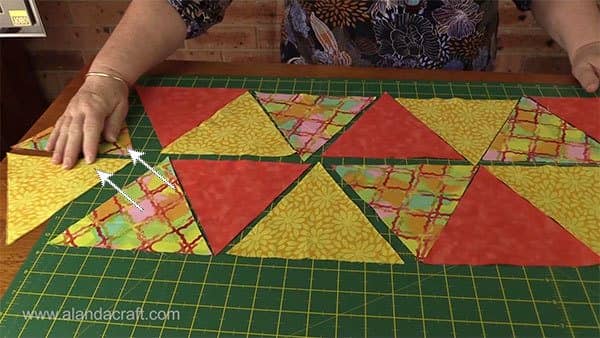
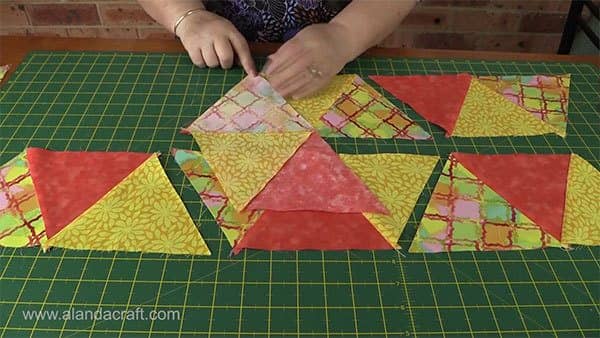
- Sew the other 18 triangles together, in blocks of three.
- Take the first triangle in row one and place it face down on triangle 2 and sew them together with a ¼” seam.
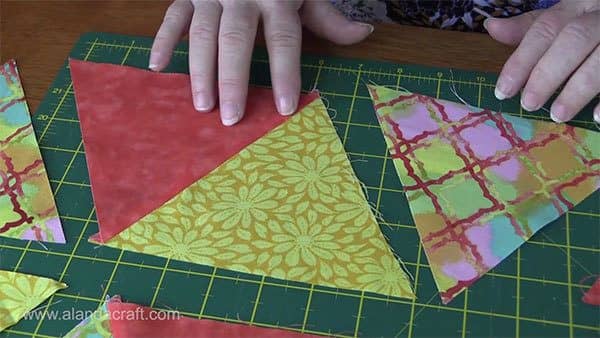
- Sew the third triangle to the second one and this will give you a block of three.
- Repeat this process with the triangles in bottom row.
- Now sew the blocks of three together so that there are nine triangles in each row.
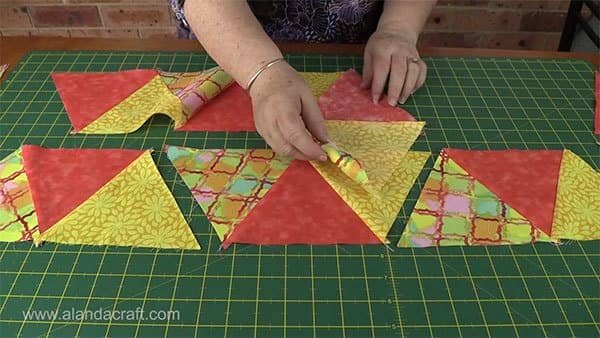

- Press all the seams in the top row in one directions.
- Press all the seams in the bottom row in the opposite direction.
- This will make it easier to match the seams when we come to join the two strips together later on.
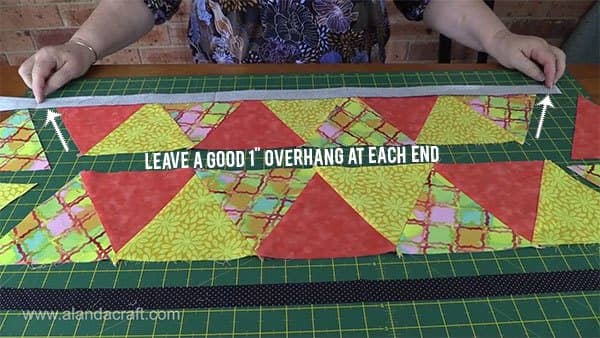
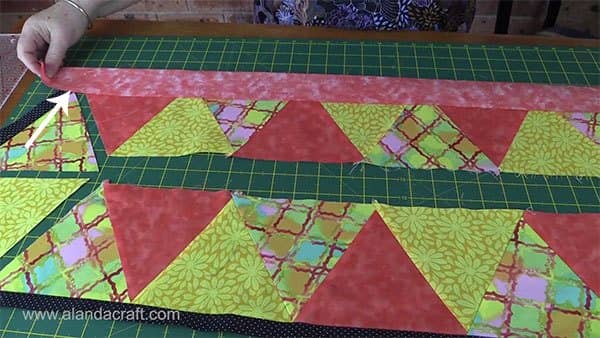
- Take one of the sashing strips and lay it face down along the outer edge of the top row.
- Make sure there is a good 1″ overhang at each end. We need this overhang because we will be cutting the sashing strip on an angle to match the triangle.
- Sew with ¼” seam along the edge.
- Repeat for the bottom row.
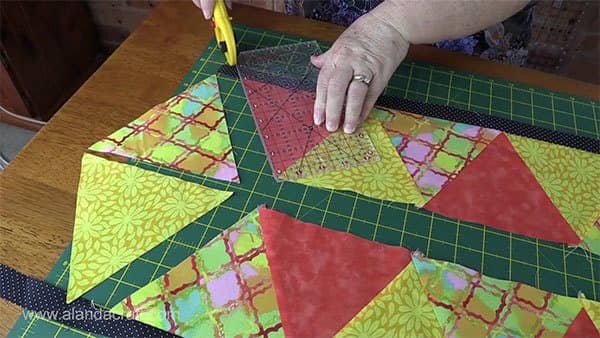
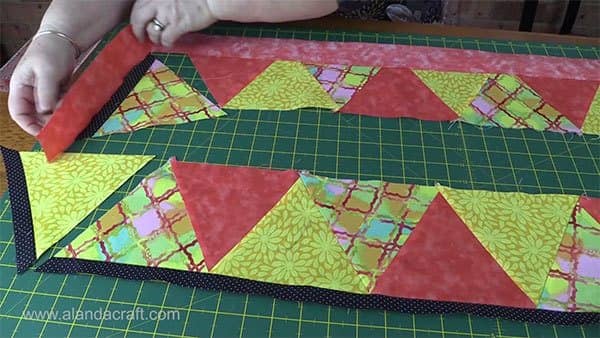
- Make sure the sashing strip is open.
- Take your ruler and line it up along the edge of the triangle
- Cut the sashing strip on an angle to match the triangle.
- Do this on each end of the triangle strips.
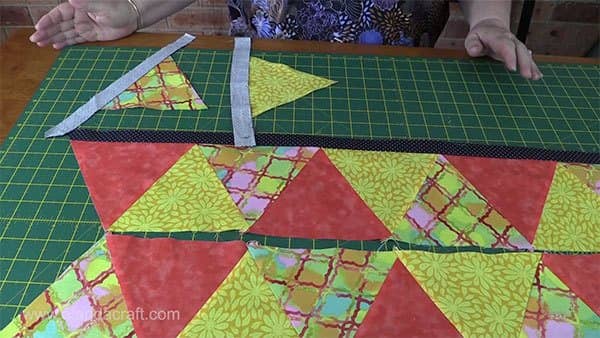
- Take a small section of sashing and attach it to one of the individual triangles that we put aside previously,
- As before make sure there is a good 1″ overlap at each end. We need this overlap because we will be cutting the strip on an angle to match the triangle.
- Place the strip face down on the triangle strip and sew with ¼” seam.
- Do this with all four individual triangles.
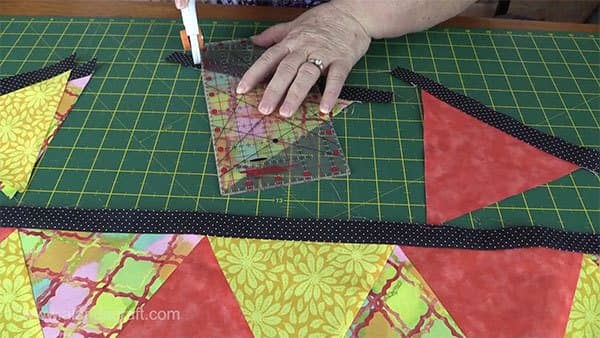
- Lay your ruler along the edge of the outer triangles on one strips and cut to match the line of the triangle. Repeat for the other strip and all four individual triangles.
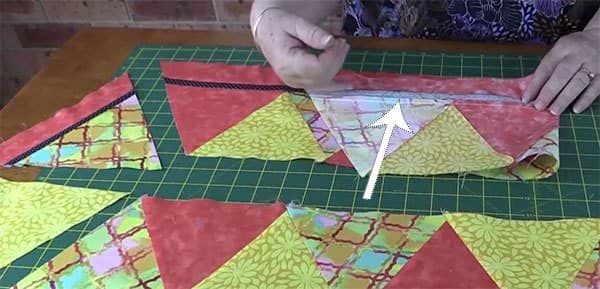
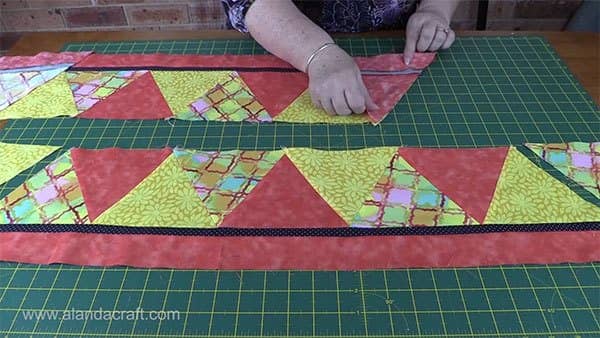
- Now lay the border strips on top of the sashing strip, right sides together.
- Make sure the border strip overhangs the edge of the sashing strip by a good 1½” overlap at each end.
- Sew down the edge with a ¼” seam.
- Lay your ruler along the edge of the triangle and the sashing strip and trim the border strips an angle.
- Do this for all four border strips.

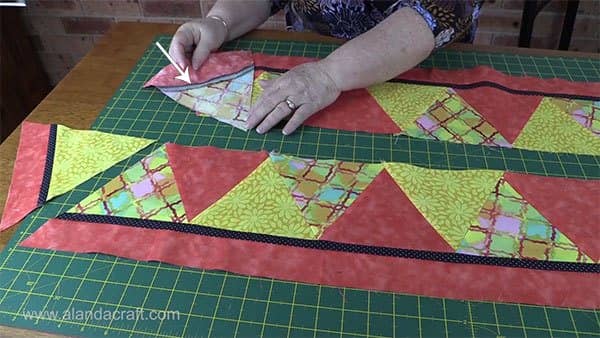
- Attach the borders to the individual triangles.
- Lay the border strips on top of the sashing strip, right sides together.
- Make sure the border strip overhangs the edge of the sashing strip by a good 1½” overlap at each end.
- Sew down the edge with a ¼” seam.
- Press the seams of the sashing strip and the border strip towards the outer edge.
- Press the sashing strip and the border strip on the individual triangles, towards the triangle point.
- Lay the single triangle on top of the end triangle in the strip, right sides together and sew with a ¼” seam.
- Sew one of the individual triangles to each end of the strips. So that’s one triangle to each end of the top strip and one triangle to each end of the bottom strip.
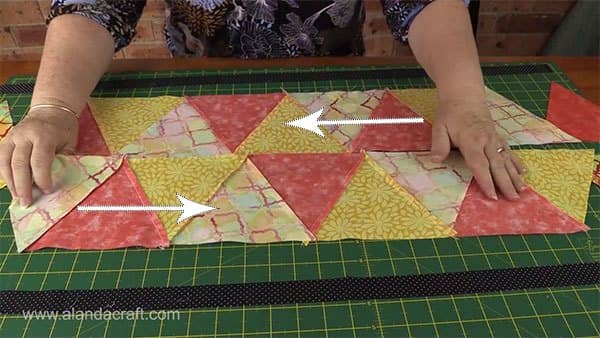
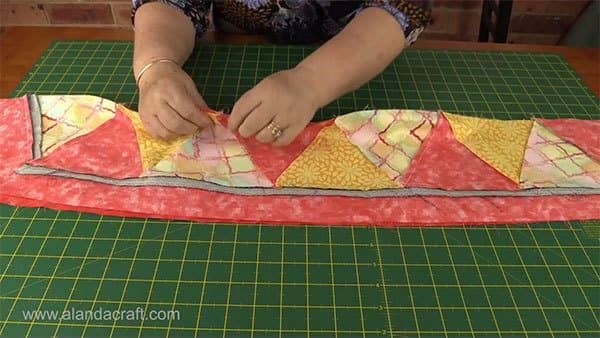
- Lay the top row on top of the bottom row, right sides together.
- Match all seams to create nice points.
- Sew with a ¼” seam.
- If you are going to quilt this runner then cut your backing and batting approx 3-4″ larger than your runner.
- Quilt as desired and bind.
- If you are going to use the turn through method, use the runner top as a template and cut the batting and backing to the same shape.
- Place the batting on the workbench
- Lay the top on top of the batting.
- Lay the backing on top of the runner top.
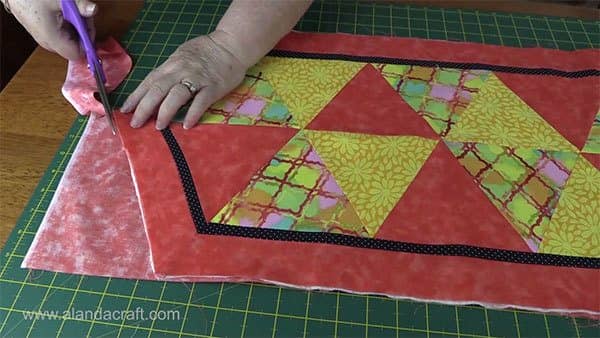
- Smooth all three pieces out.
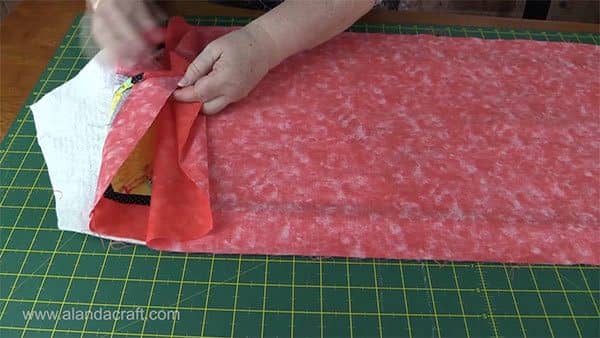
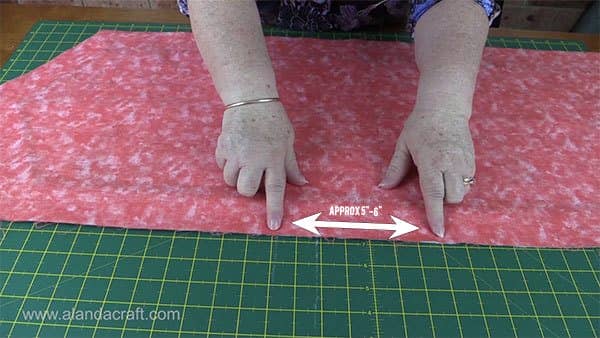
- Pin around the edge leaving an approx 5-6″ gap to turn the runner through.
- Start and stop on either side of the gap with a backstitch
- Sew around the edge with a ¼” seam.
- You can run off at the corners and restart sewing or you can pivot at the corners. I prefer to run off but it is entirely up to you how you sew this together.
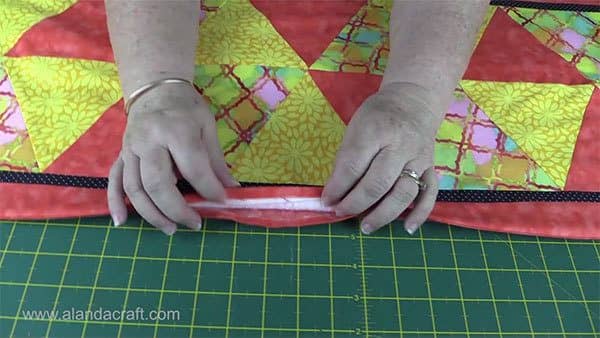
- Carefully clip the corners and remove some of the build from the corners. Be really careful not to cut your stitching.

- Turn the runner through to the right side through the gap you left when you sewed the runner together.
- Press the runner well making sure you press the turned in the edge of the gap opening.
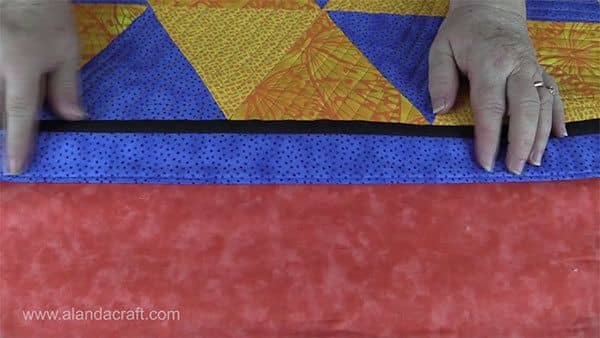
- Topstitch the runner about an 1/8″ from the edger all the way around. This will catch in the gap opening and close it.
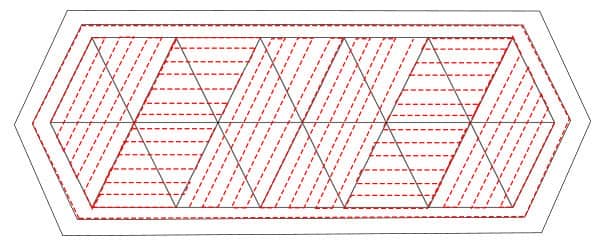
- Now you are ready to quilt it. You can stitch in the ditch or you can follow the quilting lines in the image below. (We just used our walking foot, so no free motion quilting here.)
- You can either backstitch at the start of each sewing line or use your machines tie-off function if available.


Frances Andrews says
Great table runner with very easy to follow instructions. Please keep them coming. Regards Frances.
Alanda says
Thank you Frances.
Kathleen says
Would really like to know is it possible to bind a table runner that has traingles at each end,,,thank you…
Alanda says
Yes you can Kathleen. It’s a little different to doing a regular binding. We are putting up a tutorial for a Halloween Table Topper in the near future. This is a triangle type topper and will show the technique you need.
Alanda says
Just to let you know Kathleen that we have now added the Halloween Table Topper that will help you with binding triangles. /easy-halloween-table-topper-tutorial/
Helen says
I really did enjoy this tutorial. It was straight forward and easy to follow. Love your fabric choices too. Thank you for sharing it.
Pat says
Enjoyed watching your video
can’t wait to make several. easy to follow directions too
Alanda Craft says
Thank you Pat 😊, I’m glad to hear you like the tutorial
Norma HENNEBURY says
You give excellent easy to follow directions. This afternoon I cut, sewed and put all the layers together following your quick and easy table runner tutorial. I can’t wait to finish supper and give this one a try.
Thank you so much.
Sincerely
Norma
Alanda Craft says
That’s great to hear Norma 😊. Thank you. I would love to see your table runner when you finish it. Perhaps you would like to share some photos on the website. Here is the link if you are interested. /submit-your-project/