This is the easiest cushion cover you will ever make, trust me. I ran these three up in no time at all.
These cushion covers are made from just one piece of fabric. So you can showcase off those pretty pieces of fabric you have on hand.
Watch the video tutorial below or scroll down for the written instructions
(Can’t see the video? You may have an ad blocker installed.)
What You Need
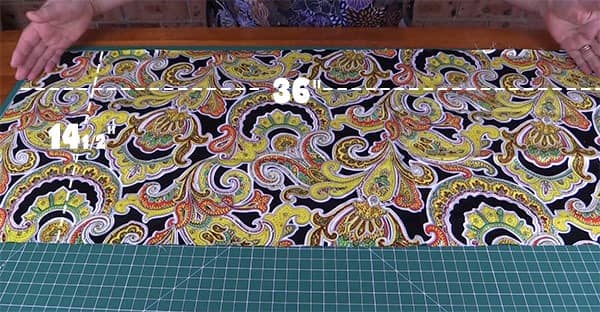
This will fit a 14″ cushion insert
- 1 piece of fabric measuring 14½” x 36″
Formula to Make Other Sized Cushion Covers
I have tested this formula with cushion inserts measuring 14″,16″ and 26″ and this formula should work equally well for other sized inserts.
- For the width of the fabric, you need the size of the cushion insert plus ½”.
- For the length of the fabric, you need (the size of the cushion insert x2) + 8″.
| Size of Cushion Insert | Width of Fabric Calculation | Length of Fabric Calculation |
|---|---|---|
| 12" | 12" + 1/2" = 12 1/2" | (size of cushion x 2) + 8" = 32" |
| 14" | 14" + 1/2" = 14 1/2" | (size of cushion x 2) + 8" = 36" |
| 16" | 16" + 1/2" = 16 1/2" | (size of cushion x 2) + 8" = 40" |
| 18" | 18" + 1/2" = 18 1/2" | (size of cushion x 2) + 8 = 44" |
| 20" | 20" + 1/2" = 20 1/2" | (size of cushion x 2) + 8" = 48" |
| 26" | 26" + 1/2" = 26 1/2" | (size of cushion x 2) + 8" = 60" |
TOOLS USED IN THIS TUTORIAL
You can check the latest prices at Amazon by clicking on the links below:
- Creative Grids Ruler 8½” x 24½”
- Olfa 24″ x 36″ double-sided healing mat
- Olfa 60mm rotary cutter
- Oliso Iron
- Gutermann Sew-All thread
Method
- Lay the fabric down and draw a ¼” line from the edge of each of the short edges. Use a Frixion pen or water erasable pen. (DO NOT USE a BallPoint Pen) . You can eyeball the ¼” if you wish, I personally prefer to draw a line so I know it’s straight.
- Add a 1″ line from the ¼” line.
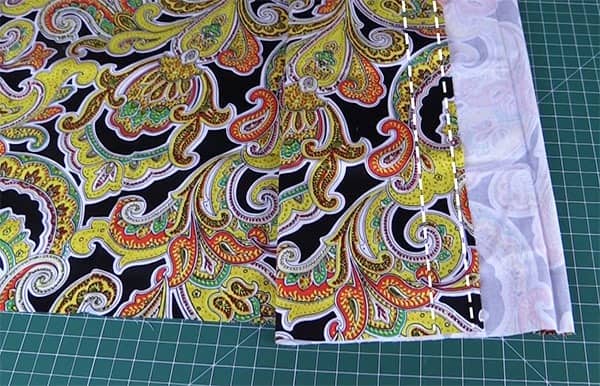
- Fold the fabric along the ¼” line that you have drawn and press.

- Then fold over the 1″ line and press.
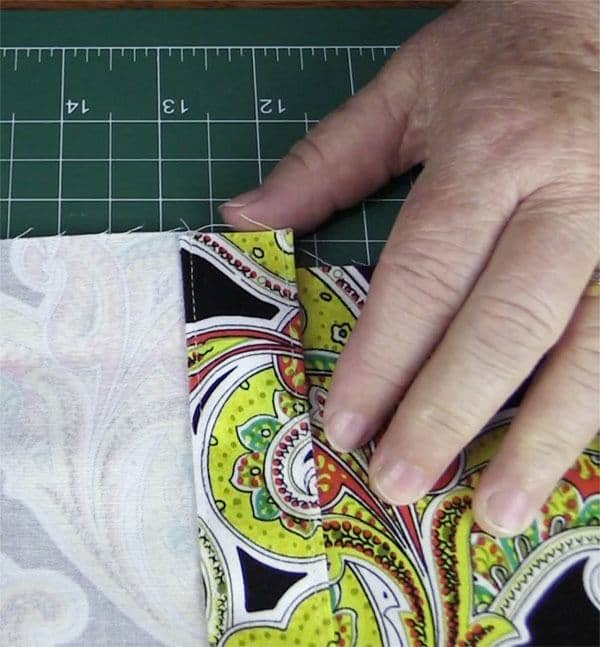
- Sew about an1/8th of an inch along the top edge and also along the edge of the 1″ fold.
- Do this for both ends.
- This gives a nice neat finish to our turn-ups on the cushion back
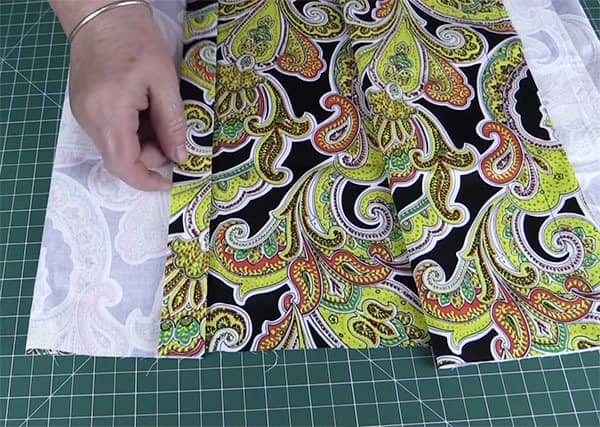
- Fold the material in half.
- Finger press or give the folded material a quick press just to give you a centerline crease to work with.
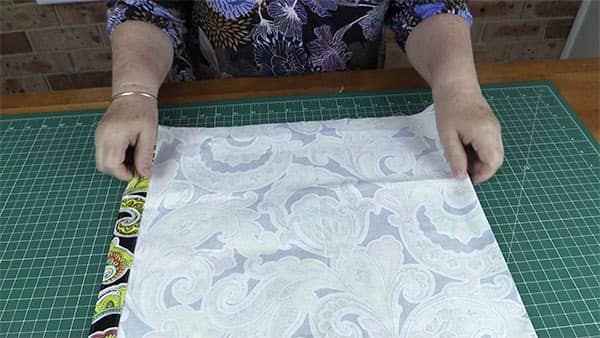
- The fabric should be facing right side up.
- Lay the center crease line along a line on your mat, any line will do. I used the 16″ mark.
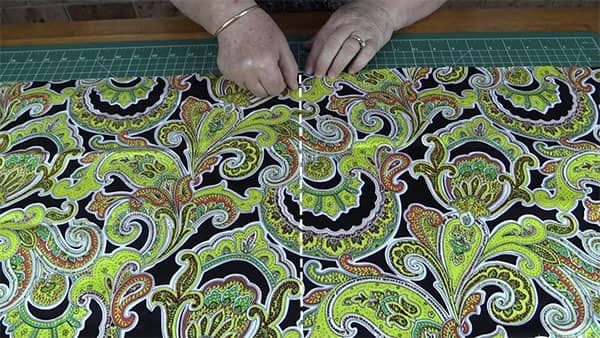
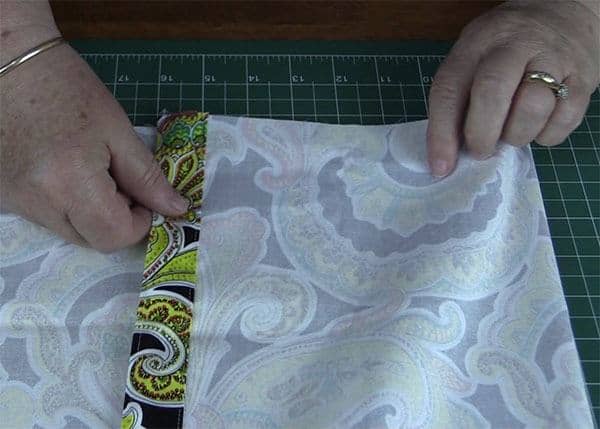
- Bring up one of the ends and lay it, right side facing down, so that the folded edge overlaps the creased center line by 4″.

- Since mine is lined up on the 16″ mark, I will bring my fabric edge over to the 12″ mark.
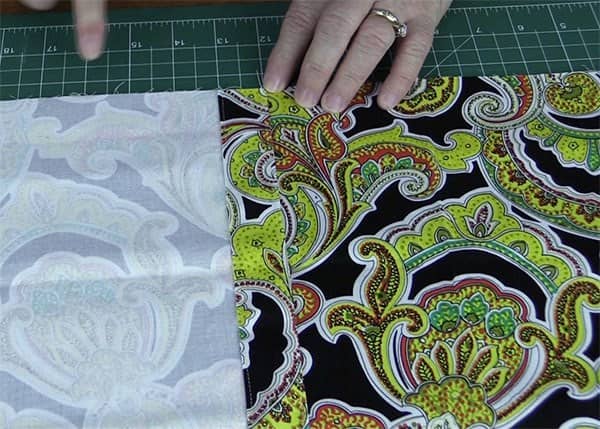
- Bring up the other end and lay it so that it overlaps the other end and the middle line by 4″ .
- Watch the video above if this part seems a little confusing.
- Sew both sides together with a ¼” seam. Backstitch at the beginning and the end of each row.
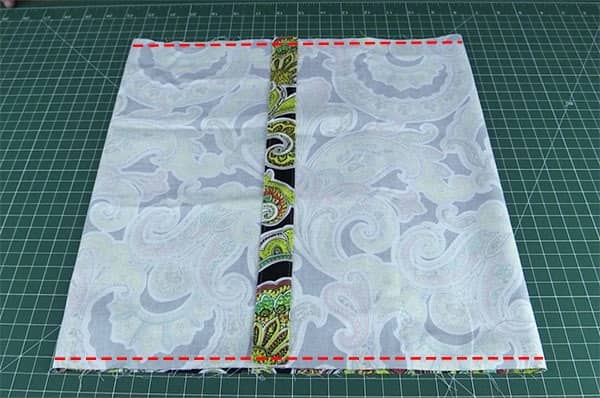
- You are now ready to turn the cushion cover through.
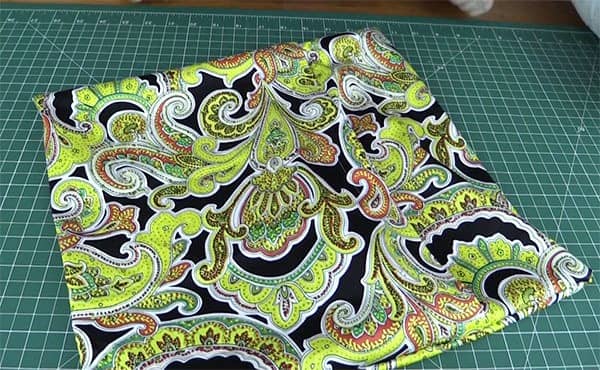
- Just insert your 14″ cushion and you are done.

See I told you it was the easiest cushion cover you were ever going to make.


Jackie Ward says
How fabulous
I shall certainly be giving this a go
Alanda says
Awesome Jackie. We would love to see your cushion covers up on the website when you have made them. Here is a link where you can add some photos. /submit-your-project/. It’s always interesting to see our readers finished projects. 🙂
Carol F says
Love this idea and tutorial! Would you provide measurements for other pillow ( cushion) sizes? (12″, 16″, 20″…)
Many thanks!
Carol F
Wanda says
Sorry for not getting back sooner Carol. I had hoped to work these out for you but I just haven’t had the time. We have been really busy with getting everything ready for Black Friday and our upcoming Christmas projects. It will go on my to do list.
Melissa says
Thank you I’m interested in the measurements for larger inserts as well ?
Alanda says
It’s definitely on the list of things to do Melissa. 🙂
Alanda says
The formula for making this cushion cover in larger sizes is now on the website Melissa. /envelope-cushion-cover-from-one-piece-of-fabric/
Alanda says
The formula for making this cushion cover in larger sizes is now on the website, Carol. /envelope-cushion-cover-from-one-piece-of-fabric/
Marcia in TX says
Thank you for this and the video. Like Carol, I was wondering how to figure out for other sizes. This time of year is so busy for everyone so whenever you get to it. Thank you for adding it to your list. Hugs and have a great Christmas time as well as a safe one.
Marcia in Texas
Alanda says
Hi Marcia, just to let you know that the formula for making this cushion cover in larger sizes is now on the website /envelope-cushion-cover-from-one-piece-of-fabric//wp-admin/edit-comments.php#comments-form
Debbie Willicombe says
Thank you Wanda. You are amazing! Everything you demonstrate is so easy to understand.
Like the other ladies I can’t wait for more sizes to become available.
I love big cushions and my inserts are 18″ waiting to be transformed into something beautiful.
Debbie
Alanda says
I will do this as soon as I get some spare time Debbie. Things are a bit hectic here with Christmas looming in the background. Busy but exciting times. I have a couple of 20″ cushions myself that need new covers and I want to test that the formula works before committing to it. I would hate to give you ladies the wrong information. So hang in there girls it won’t be too long. 🙂
Alanda says
Okay Debbie, the formula for making this cushion cover in larger sizes is now on the website /envelope-cushion-cover-from-one-piece-of-fabric/
Diane Spring Herzog says
Love it!
Diane Spring Herzog says
Great tutorial!
Shelley StClair says
Hello, I just tired your tutorial envelope pillow covers and just love them I am doing right now the Grinch Who Stole Christmas fabric for a ladies daughter for Christmas.. The are so much easier and faster.. Thank you
Shelley.. 🙂
Alanda says
That’s great to hear Shelley. Perhaps you would like to share some photo with us on our Readers Projects page. We would love see your Grinch cushion covers. Here is a link if you are interested. /submit-your-project/
Lisa says
Hi I am trying to make one of your cushion covers that I have a rectangular cushion which is at 12.5 inches times 20.5 inches and just went wondered if you could give me a heads up How I would do this? I’ve just watch your YouTube and your calming voice seems to be talking quite a lot of sense. I am trying to use a piece of fabric from some cuts off curtains with us I’m using a rectangular cushion as opposed to a normal Square which for me would be easier for me hopefully you’ll get this msg.
Alanda says
Sorry for not getting back sooner Lisa. I had to work this out as I haven’t made a rectangle cushion cover as yet. It’s on the list to do. I looked at the measurements we had used for the square cushion as a base and did some calculations from that.
Length- The cushion length would be 49″. The size of your cushion insert of 20.5″ x 2 = 41″ plus 8″ for overlap.
Width – 12.5″ plus 1/2″ = 13″.
This allows for 1/4″ seams.
Please note – These are just calculations I have worked out, I haven’t tried it. So maybe cut it out on paper first to see if it fits.
Ashlie says
Hi, I have just made my first cushion cover following your instructions. It’s not perfect but that’s my sewing skills! so practice, practice. Thank you.
Alanda Craft says
Excellent Ashlie. There will be no stopping you now. 🙂
Sarah Dowling says
I can’t find ‘link’ for video.
Also it would be useful to have metric measurements for sizes..
Alanda Craft says
If you have an adblocker on that could be blocking the video.
Linda Jeffries says
Thank you so much for the easy to understand and to follow instructions. Pillows will be a Christmas gift to the grandkids . Keep safe and look forward to completing more of your projects. (Love your accent)
Alanda Craft says
You are most welcome Linda and thank you for your lovely comment. Another pillow cover that you might like to try and is popular with kids is the pocket pillow. Here is the link /2020/05/23/pocket-book-pillow-tutorial/